

- 4,281 views, 2 today

189
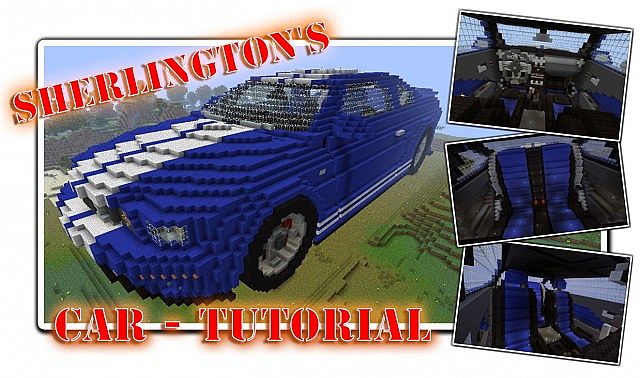
Hello PMC community,
many people, not only here, on youtube, too, ask me frequently: "How did you built that part of the car?", "Could you built a *insert any car model here*, please ?" or even, "I want to build a car, too. Would you help me?". So I decided to make a tutorial on "How to built a car".
I use my Mustang as reference, 'cause I have a whole bunch of pictures, of the building process, 'cause it took so damn long. But I will give you some details of the Mercedes, too.
1. The Beginning:
I really beg you to NEVER build a car which you do not like. If you don't like what you're doing, no one else will, 'cause everyone will see that you didn't enjoy building it.
I love Mustangs, the Shelby 500gt in "shelbyblue" with white strips from 2005 is my dreamcar and I'm saving all my money to buy one, some day, if not the Shelby than it will be a "normal" V8 Stang. I know every detail of the car, but the first thing I did was:
1.1. Finding good reference pictures
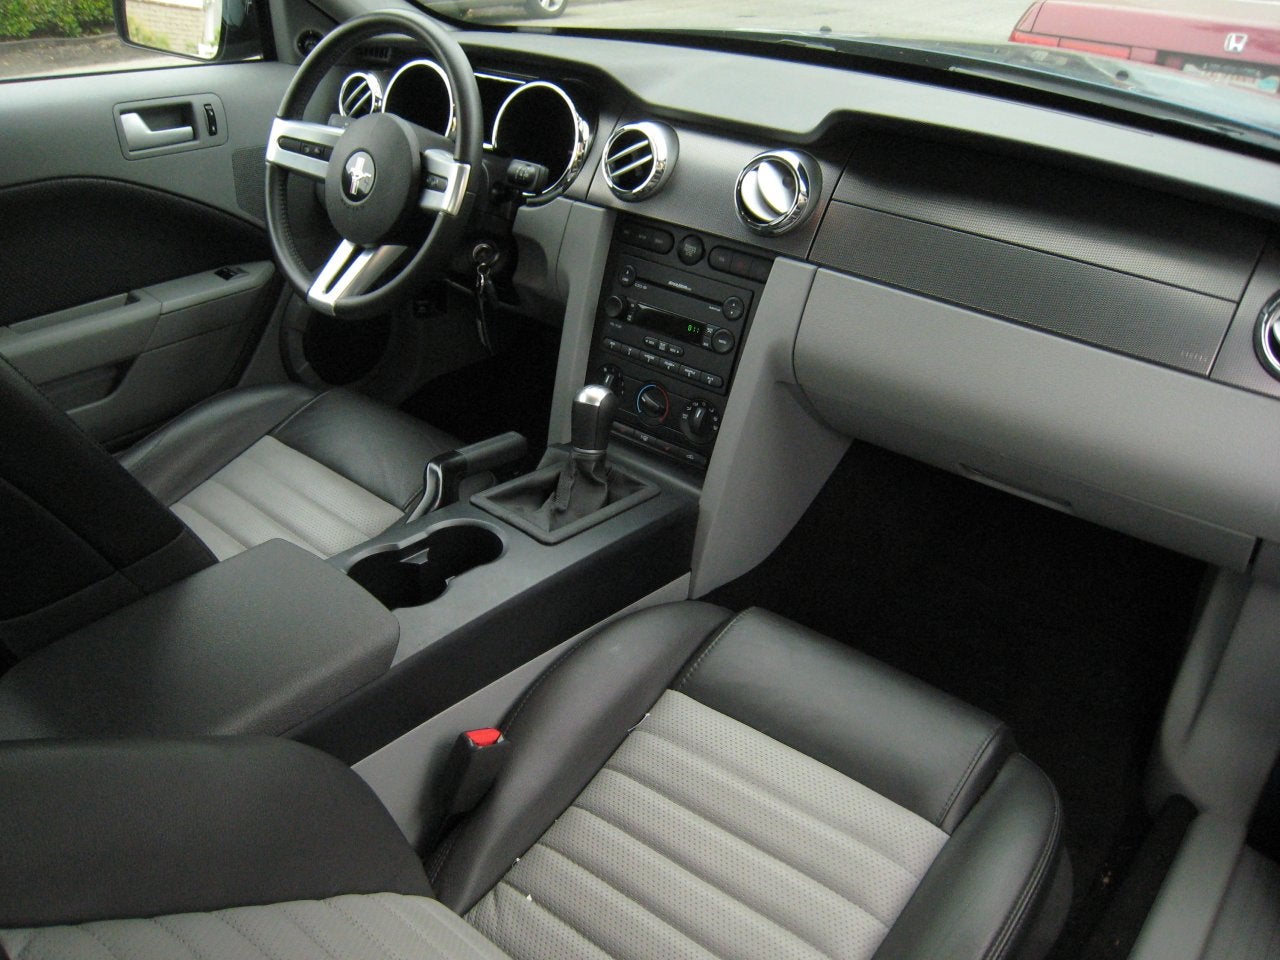
The Internet is full of pictures from the Stang, you just need to find them. You need pictures not only from the outside, from the inside too! If you find good blueprints, they will help you, too!
So here is, what I came up with (just a view, I have had arround 50 pictures)
The Backpart:

Sideview:


Inside:
Frontpart:

1.2. 3D model and a real model
I looked arround the Internet to find a good 3D Model of a Stang, that was the hardest part of all, 'cause most of the free downloadable 3D Models are very shitty I found my model here: link
A real model is a good thing, too. Sometimes you will look at your Minecraft model, asking your self why a certain part of your car, doesn't seem to fit and it's very nice to see the real thing next to your MC model.
Building the Mercedes was a great fun for me, too. I drive a 190e myselfe so, each time I had problems with the MC model I went outside and checked it out on my real car.
1.3. What to do with the 3D model
There is a program called "Binvox" (further information can be found here). This program makes it posible to voxelize 3D Models so you actually can get something like a plan on how to build the outline of the car. I used this program while building the Mustang and the Mercedes, but be aware of the fact, that binvox isn't always right. Many things are messed up and do not look good, but it's a good way to build the rough outlines of the car.
You can find a good tutorial on how to use binvox here.
2. Getting started aka the body
You can start, wherever you want to. I show you my way to start now:
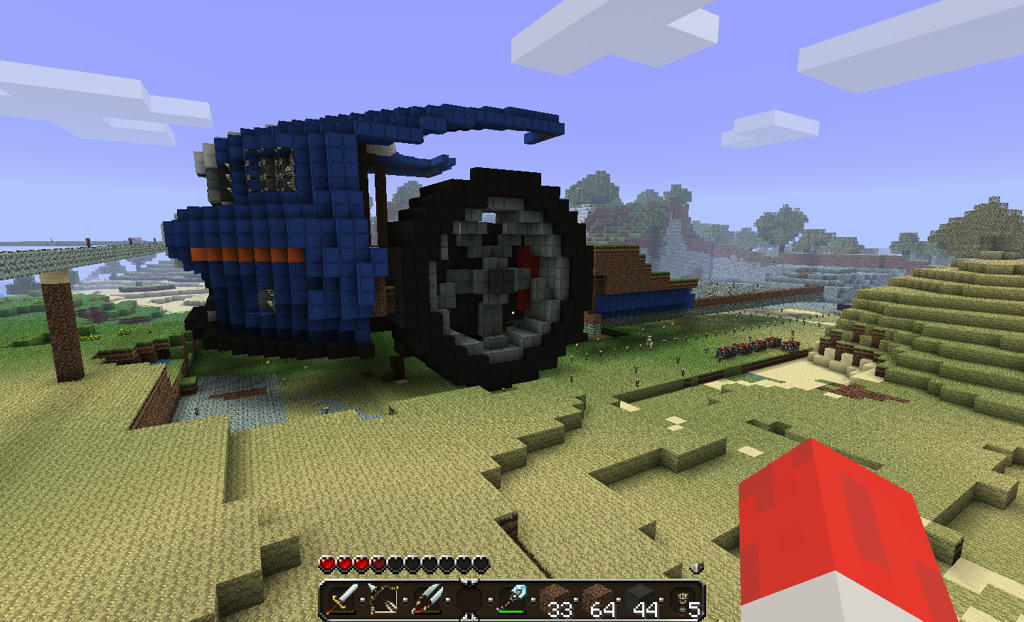
2.1. The wheels
It's not easy to find the right size for your car. Binvox gives you a certain size, but most of the time it won't fit and not to mention that the models are rarely symmetrical. All four wheels of the Stang where shown in different sizes in bin vox. One was 6 blocks wide, the next only 4... and so on...
So I started with the wheels first. I built several raw models, to find the right scale but a 9 block radius fitted best and it fitted into the binvox model, too.
The same scale was used to built the tires of the Mercedes, but those aren't as thick as the ones of the Stang.
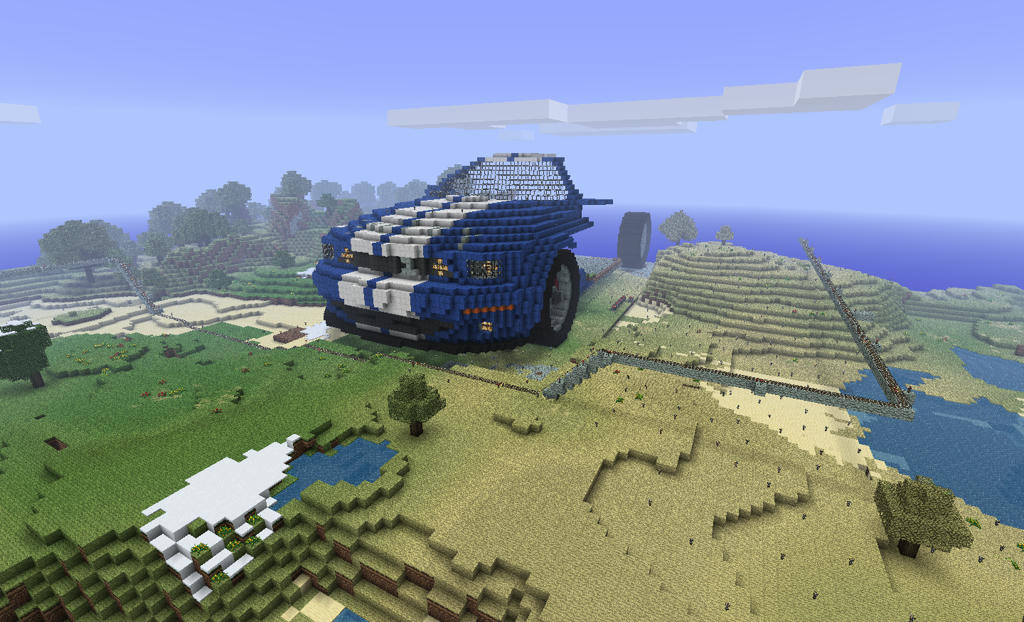
2.2. The "Face of the car"
Some people are maybe building row after row, but I do not like that way of building. I need a motivation first and my main motivation is the "Face of the car" - the front part. I built it the way binvow told me, but had to change a loot of things, to make it look like the Stang in the pictures.
And there is the problem with binvox. Binvox will not tell you, where your lights are going to be, or where the windshield is and stuff like that, these are all things, you have to figure out alone.
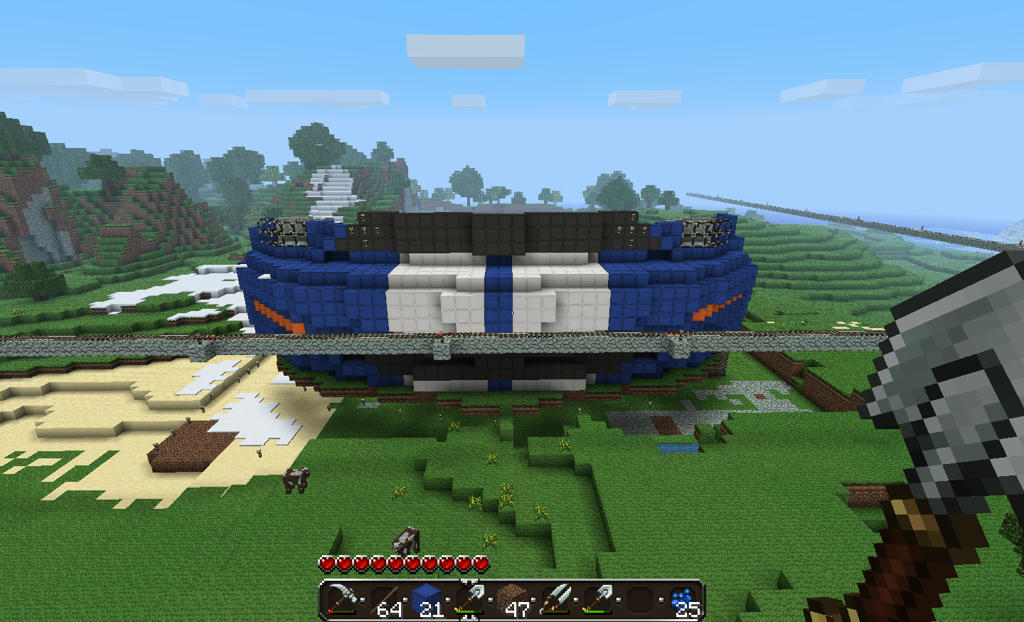

You can see in the pictures, that I didn't built the lights, but replaced them with torches. That was simply, because I did the Stang on a survival Server and didn't came back from the nether alive -.-. If you look closely you will see, that I made a mistake, placing the blinkers.

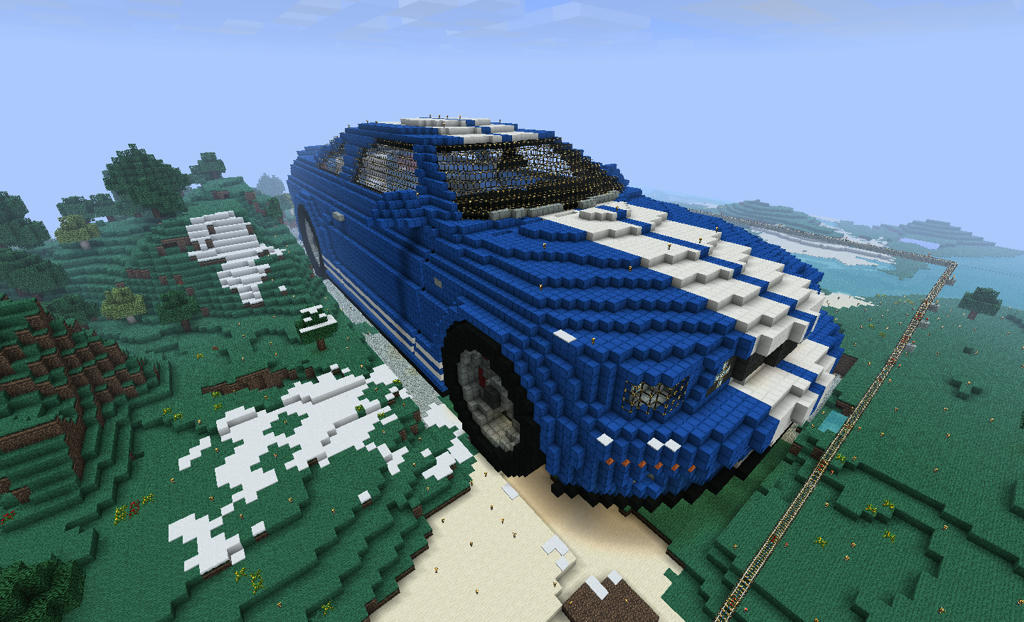
If you stick to your binvox model all the time, your MC model will look totally nuts. Use your own imagination to make it look more like the real thing. And do not forget: This is YOUR model, no one on earth can tell you what is right or what is wrong.
For example: if you look at the photograph of the two Mustangs standing next to each other. The one on the left is a Shelby, the one on the right is a "Stock" Mustang. To built the face, I mixed them both up, 'cause I do prefer the version with the four lights but wanted the two at the bottom, too!
The black outline at the bottom of the car, wasn't in binvox. I built it 'cause it made the model look better.
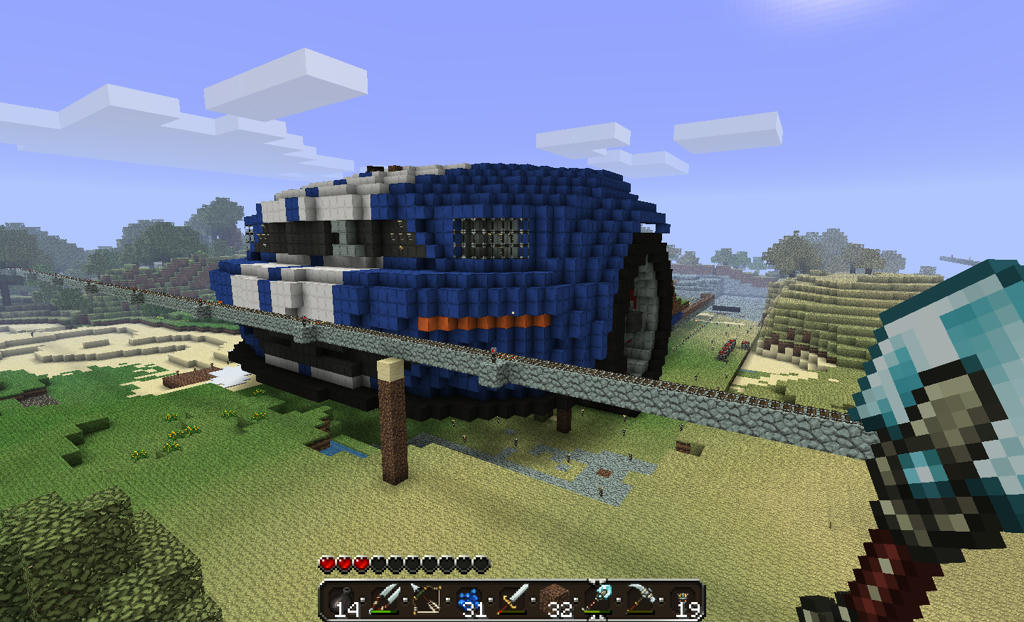
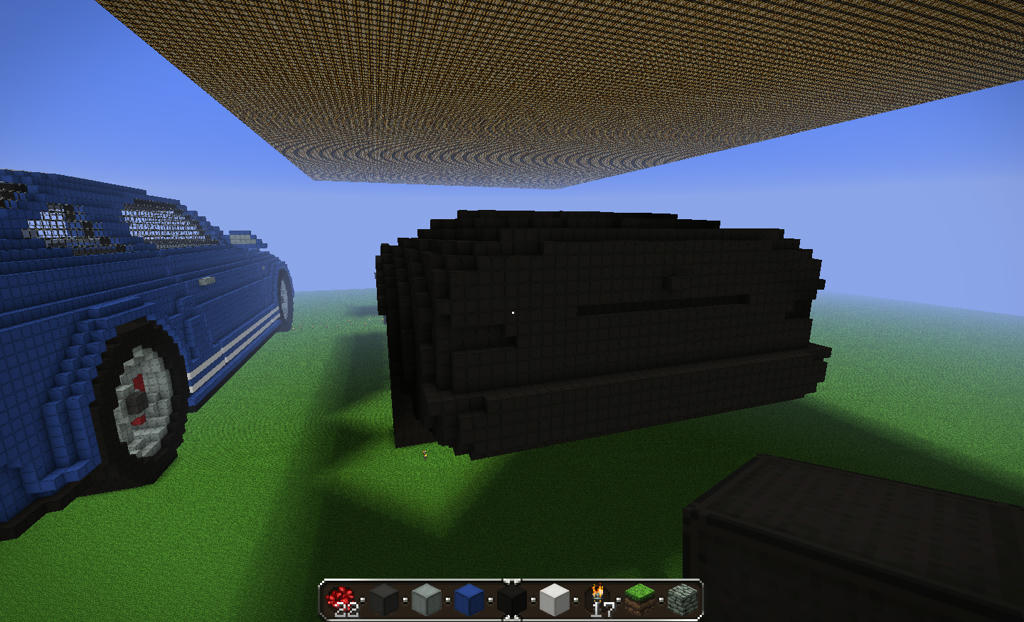
2.3. The body of the car
The next thing I built was the windshield of the stang. I'm not going to do this first again! I had to rebuilt it for three times to make it fit in the actual body of the car. While building the Mercedes I did the body first, without any details. Later I spent a lot of time, adding all the details.
Back of my 190e without any details... looks not that pretty, does it?
If you finished building the whole body of the car, you can close binvox. It's not going to help you any further.
Now you actually modeled the raw form of your car, so let's make the next step.
3. Details
There are many details and it's impossible to built them all. I coudn't do a good looking pony at the radiator grill of the Stang, nor could I built the star of the Mercedes, but there are so many other things you are able to show.
3.1. Windows
Windows are not clinging to the body, there is a space, between the outside and the window. This space is filled with a tight rubber.
In this picture, there are no details to the windshield, and it actually doesn't look very fitting, and it looks like it isn't a part of the car.
In this picture I added a black line to the edges of all the windows, to simulate the rubber and they are looking MUCH better with the black lines.
Always compare real pictures to your model, you will find a ton of details you'll be able to show. Find the right size for the windows, play a little arround. It doesn't matter if they are 100% in scale, as long as they look good!
If you want to add a spoiler, do so! Find reference pictures and start building, no one will stop you. Every detail you add, will make the car more alive. Sometimes, details will look stupid, maybe they will look better, if you use a different block or scale? I always build most of the details a dozend times and I change them later on, twice that much and I only stop, when I think they fit perfectly.
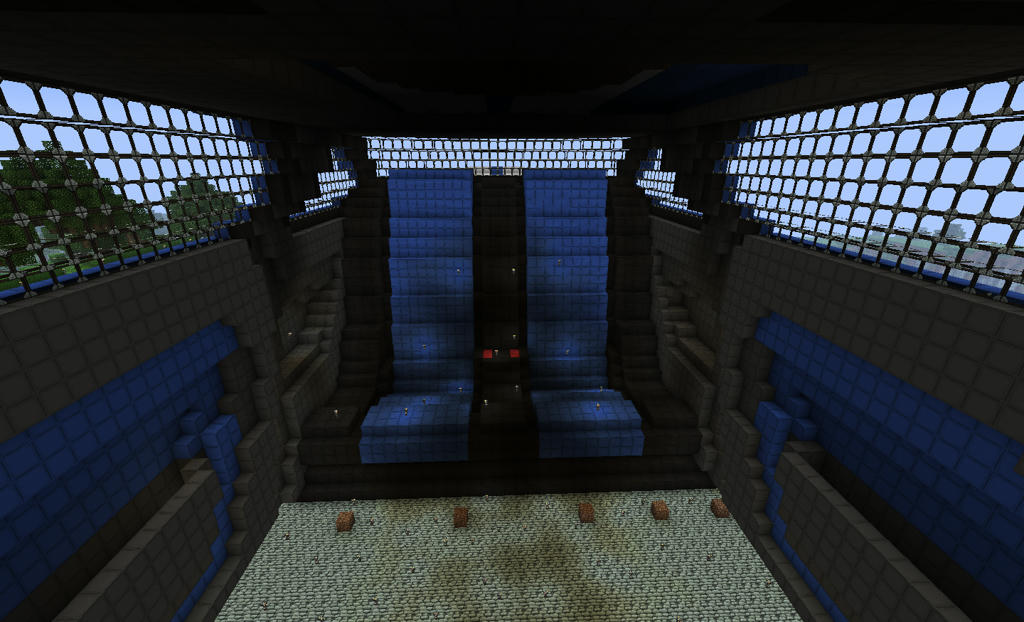
4. The Interior
Now you got a fine and good looking model of your beloved car... but hey, your are not going to leav it like that and run away? C'mon! There are seats inside and all that stuff!
4.1 The interior lining
There is carpet on the foor of your car. The headlining usually isn't the same colour as the outside of your car, there are window lifters and many storage spaces. Usually my cars are two rows thick at the top and up to six or seven rows at the bottom and finished with a two row thickness on the floor. That's because on the outside the cars don't go straight up, but the interior does.
4.2. The rearseats
I always start with the rearseats. Please... the seats inside a car are NOT only two spaces which had been connected with a 90 degree angle! You can always start with a block raw form, but they do have a shape that will make a driver relax and feel good inside his/her car. Try to rebuild the shape.
Seatbelts are part of the buildable details and should be built.
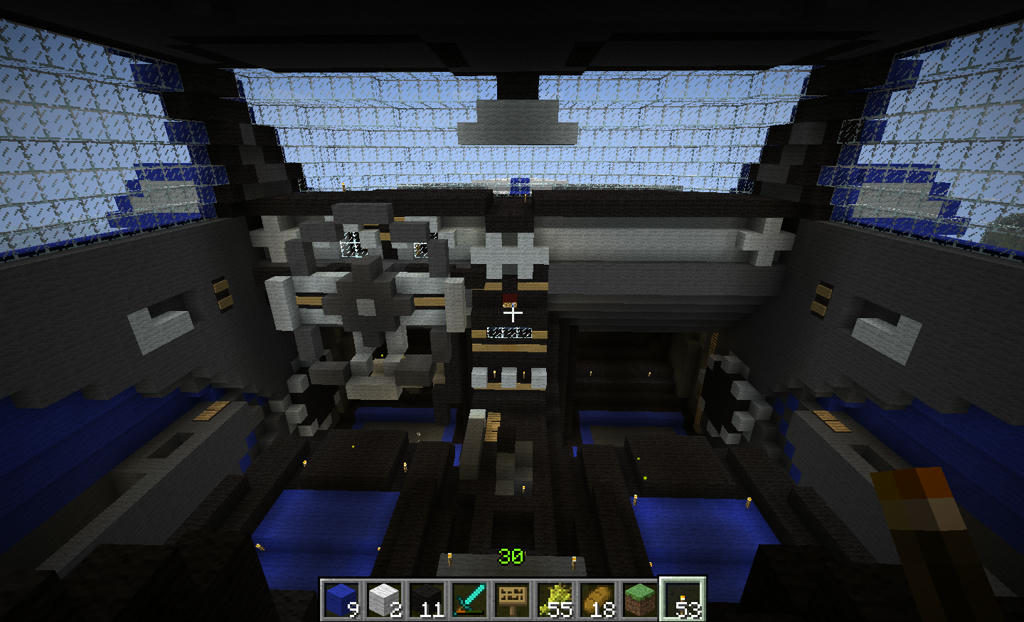
4.3. The Dashboard
This is the most tricky part of your car. Let me say this first: it's not possible to show every switch, lamp and instrument, so you have to concentrate on the important stuff.
First, find the outline of the board. Check some pictures how deep it actually is and what kind of shape it has, try to modle that first, before you start with anything in spezific.
The stearing wheel again isn't connected in a 90 degree angle, it's more like 75-80 gedree and you should built it that way. Add as many details as you want, the more you do, the better it will look.
4.4. Front seats
the Front seats are built the same way as the rearseats. You can always start with a raw model but you need to bring a nice fitting shape to them.
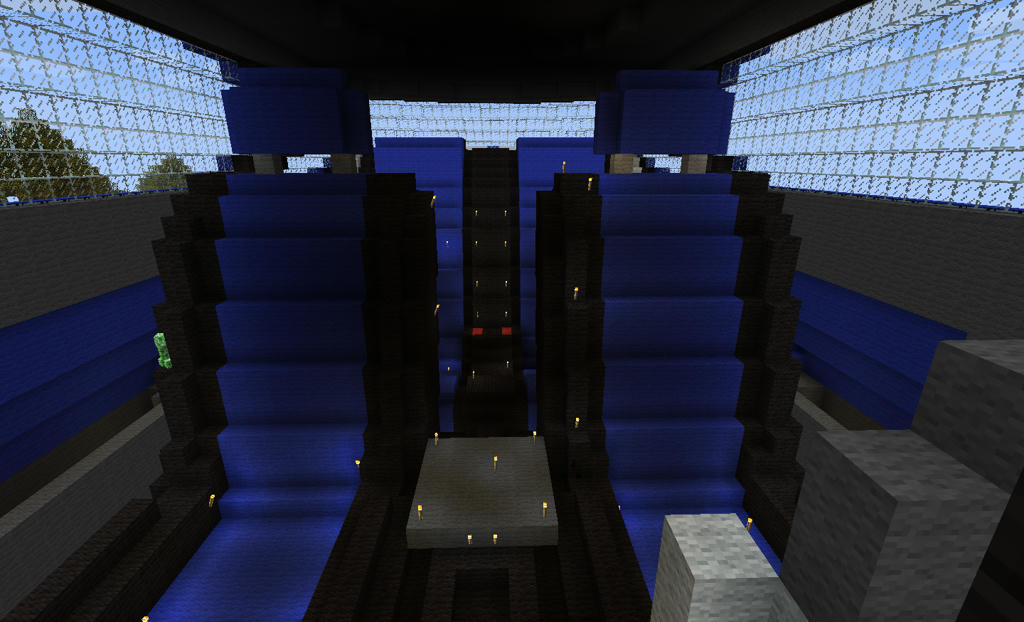
5. Redstone
If you want to, you can connect all the lamps to the dashboard, so they will be controlable. It's a nice gimmic but not a "have to".
Cars do have several different lights, wich are makeable in minecraft
- Blinkers (left, right and the warning lights)
- Headlights (dimmed and driving lights)
- Foglamps (front AND back)
- Break lights (back)
- Interior lights
- Dashboard lights
- Reversing lights
- License plate light
I usually mark all the lights with coloured wool and leave spaces for redstone lamps, so the lamps actually bring the wool to shine and aren't seen that much, like this:
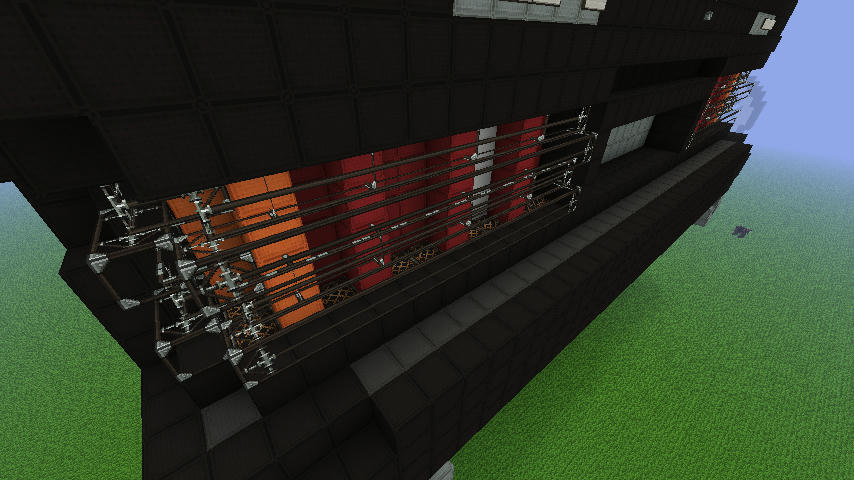
There is much space inside your car, to connect all the lamps with the dashboard, but as much lamps you wanna connect, as much switches will be at the dashboard. like:
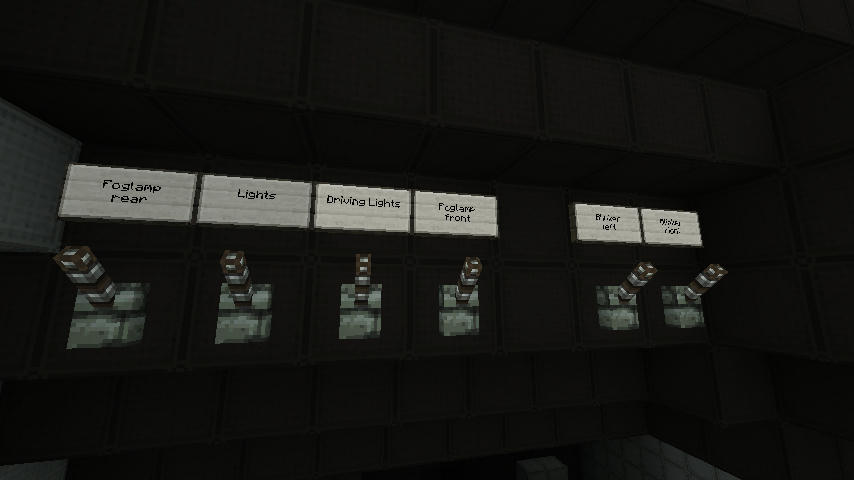
There are more switches at different places inside the Stang and the Mercedes. The Switch for the warning lamp, is where they are in reality. The break lights are activated with a switch at actual brake and so on.
there are many ways of making blinking redstone circles like and like..... and so on and on. Just find your prefered way.
Have a lot of fun, while building your car, and I would love to check out your projects!
Greetings,
Sherlington.
I would love to get Feedback on this. This is the first tutorial I ever did and I would love to get constructive comments on this one. Please, be aware, that english isn't my mother tongue and I bet that there are a lot of mistakes inside the text. Feel free to tell me, so I can correct them.
many people, not only here, on youtube, too, ask me frequently: "How did you built that part of the car?", "Could you built a *insert any car model here*, please ?" or even, "I want to build a car, too. Would you help me?". So I decided to make a tutorial on "How to built a car".
I use my Mustang as reference, 'cause I have a whole bunch of pictures, of the building process, 'cause it took so damn long. But I will give you some details of the Mercedes, too.
1. The Beginning:
I really beg you to NEVER build a car which you do not like. If you don't like what you're doing, no one else will, 'cause everyone will see that you didn't enjoy building it.
I love Mustangs, the Shelby 500gt in "shelbyblue" with white strips from 2005 is my dreamcar and I'm saving all my money to buy one, some day, if not the Shelby than it will be a "normal" V8 Stang. I know every detail of the car, but the first thing I did was:
1.1. Finding good reference pictures
The Internet is full of pictures from the Stang, you just need to find them. You need pictures not only from the outside, from the inside too! If you find good blueprints, they will help you, too!
So here is, what I came up with (just a view, I have had arround 50 pictures)
The Backpart:
Sideview:
Inside:
Frontpart:
1.2. 3D model and a real model
I looked arround the Internet to find a good 3D Model of a Stang, that was the hardest part of all, 'cause most of the free downloadable 3D Models are very shitty I found my model here: link
A real model is a good thing, too. Sometimes you will look at your Minecraft model, asking your self why a certain part of your car, doesn't seem to fit and it's very nice to see the real thing next to your MC model.
Building the Mercedes was a great fun for me, too. I drive a 190e myselfe so, each time I had problems with the MC model I went outside and checked it out on my real car.
1.3. What to do with the 3D model
There is a program called "Binvox" (further information can be found here). This program makes it posible to voxelize 3D Models so you actually can get something like a plan on how to build the outline of the car. I used this program while building the Mustang and the Mercedes, but be aware of the fact, that binvox isn't always right. Many things are messed up and do not look good, but it's a good way to build the rough outlines of the car.
You can find a good tutorial on how to use binvox here.
2. Getting started aka the body
You can start, wherever you want to. I show you my way to start now:
2.1. The wheels
It's not easy to find the right size for your car. Binvox gives you a certain size, but most of the time it won't fit and not to mention that the models are rarely symmetrical. All four wheels of the Stang where shown in different sizes in bin vox. One was 6 blocks wide, the next only 4... and so on...
So I started with the wheels first. I built several raw models, to find the right scale but a 9 block radius fitted best and it fitted into the binvox model, too.
The same scale was used to built the tires of the Mercedes, but those aren't as thick as the ones of the Stang.
2.2. The "Face of the car"
Some people are maybe building row after row, but I do not like that way of building. I need a motivation first and my main motivation is the "Face of the car" - the front part. I built it the way binvow told me, but had to change a loot of things, to make it look like the Stang in the pictures.
And there is the problem with binvox. Binvox will not tell you, where your lights are going to be, or where the windshield is and stuff like that, these are all things, you have to figure out alone.
You can see in the pictures, that I didn't built the lights, but replaced them with torches. That was simply, because I did the Stang on a survival Server and didn't came back from the nether alive -.-. If you look closely you will see, that I made a mistake, placing the blinkers.
If you stick to your binvox model all the time, your MC model will look totally nuts. Use your own imagination to make it look more like the real thing. And do not forget: This is YOUR model, no one on earth can tell you what is right or what is wrong.
For example: if you look at the photograph of the two Mustangs standing next to each other. The one on the left is a Shelby, the one on the right is a "Stock" Mustang. To built the face, I mixed them both up, 'cause I do prefer the version with the four lights but wanted the two at the bottom, too!
The black outline at the bottom of the car, wasn't in binvox. I built it 'cause it made the model look better.
2.3. The body of the car
The next thing I built was the windshield of the stang. I'm not going to do this first again! I had to rebuilt it for three times to make it fit in the actual body of the car. While building the Mercedes I did the body first, without any details. Later I spent a lot of time, adding all the details.
Back of my 190e without any details... looks not that pretty, does it?
If you finished building the whole body of the car, you can close binvox. It's not going to help you any further.
Now you actually modeled the raw form of your car, so let's make the next step.
3. Details
There are many details and it's impossible to built them all. I coudn't do a good looking pony at the radiator grill of the Stang, nor could I built the star of the Mercedes, but there are so many other things you are able to show.
3.1. Windows
Windows are not clinging to the body, there is a space, between the outside and the window. This space is filled with a tight rubber.
In this picture, there are no details to the windshield, and it actually doesn't look very fitting, and it looks like it isn't a part of the car.
In this picture I added a black line to the edges of all the windows, to simulate the rubber and they are looking MUCH better with the black lines.
Always compare real pictures to your model, you will find a ton of details you'll be able to show. Find the right size for the windows, play a little arround. It doesn't matter if they are 100% in scale, as long as they look good!
If you want to add a spoiler, do so! Find reference pictures and start building, no one will stop you. Every detail you add, will make the car more alive. Sometimes, details will look stupid, maybe they will look better, if you use a different block or scale? I always build most of the details a dozend times and I change them later on, twice that much and I only stop, when I think they fit perfectly.
4. The Interior
Now you got a fine and good looking model of your beloved car... but hey, your are not going to leav it like that and run away? C'mon! There are seats inside and all that stuff!
4.1 The interior lining
There is carpet on the foor of your car. The headlining usually isn't the same colour as the outside of your car, there are window lifters and many storage spaces. Usually my cars are two rows thick at the top and up to six or seven rows at the bottom and finished with a two row thickness on the floor. That's because on the outside the cars don't go straight up, but the interior does.
4.2. The rearseats
I always start with the rearseats. Please... the seats inside a car are NOT only two spaces which had been connected with a 90 degree angle! You can always start with a block raw form, but they do have a shape that will make a driver relax and feel good inside his/her car. Try to rebuild the shape.
Seatbelts are part of the buildable details and should be built.
4.3. The Dashboard
This is the most tricky part of your car. Let me say this first: it's not possible to show every switch, lamp and instrument, so you have to concentrate on the important stuff.
First, find the outline of the board. Check some pictures how deep it actually is and what kind of shape it has, try to modle that first, before you start with anything in spezific.
The stearing wheel again isn't connected in a 90 degree angle, it's more like 75-80 gedree and you should built it that way. Add as many details as you want, the more you do, the better it will look.
4.4. Front seats
the Front seats are built the same way as the rearseats. You can always start with a raw model but you need to bring a nice fitting shape to them.
5. Redstone
If you want to, you can connect all the lamps to the dashboard, so they will be controlable. It's a nice gimmic but not a "have to".
Cars do have several different lights, wich are makeable in minecraft
- Blinkers (left, right and the warning lights)
- Headlights (dimmed and driving lights)
- Foglamps (front AND back)
- Break lights (back)
- Interior lights
- Dashboard lights
- Reversing lights
- License plate light
I usually mark all the lights with coloured wool and leave spaces for redstone lamps, so the lamps actually bring the wool to shine and aren't seen that much, like this:
There is much space inside your car, to connect all the lamps with the dashboard, but as much lamps you wanna connect, as much switches will be at the dashboard. like:
There are more switches at different places inside the Stang and the Mercedes. The Switch for the warning lamp, is where they are in reality. The break lights are activated with a switch at actual brake and so on.
there are many ways of making blinking redstone circles like and like..... and so on and on. Just find your prefered way.
Have a lot of fun, while building your car, and I would love to check out your projects!
Greetings,
Sherlington.
I would love to get Feedback on this. This is the first tutorial I ever did and I would love to get constructive comments on this one. Please, be aware, that english isn't my mother tongue and I bet that there are a lot of mistakes inside the text. Feel free to tell me, so I can correct them.
| Tags |
2 Update Logs
Update #2 : by Sherlington 04/03/2013 10:45:31 amApr 3rd, 2013
edited some images cause they got lost in the world wide web adventures...
LOAD MORE LOGS
tools/tracking
1561079
6
sherlingtons---car-tutorial


 20w14infinite
 CrystalRuby
 Arianwyn
 FBreakDance30
 AutumnAura49797
 Apro87
 SpainOnMinecraft
 Ryderlb09

 WYHA-Storm
Create an account or sign in to comment.