


- 4,297 views, 3 today

1,596
Old Pictorials
Hello there everyone! I've been asked from a few people how I make my skins and if I can help explain how I shade or use color. Well today's the day I make a blog about it! :D
This is going to be a pictorial in some parts and some (terrible) explaining in others.
There will be diffrent categories and how I do them, etc. I will start off with one category and will update the blog with the other sections when they are done :D
Lets begin~
ALSO IM SO SORRY IM REALLY BAD AT EXPLANATIONS IVE TOLD PEOPLE DAT TOO BUT ANYWAYS I TRIED TO MAKE IT MORE DETAILED SO I DONT CONFUSE YOU ALL BUT I MIGHT HAVE FAILED ANYWAY SO SORRY! DX ALSO HERES A COOL WEBSITE FOR COLORS!: Adobe Color Wheel
How I shade:
This section will be filled with how I shade diffrent part's of the body, And maybe a few diffrent style on them and how it affect's the shading. Now lets begin~
First off is Hair.
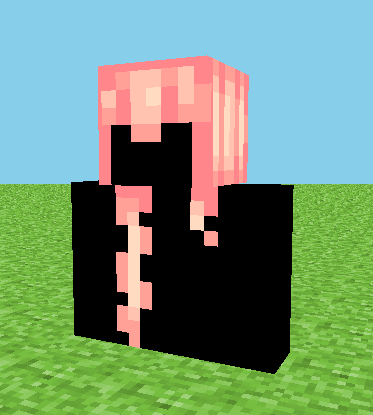
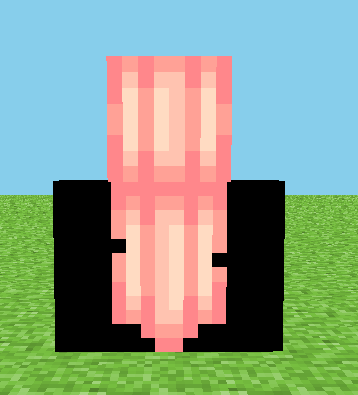
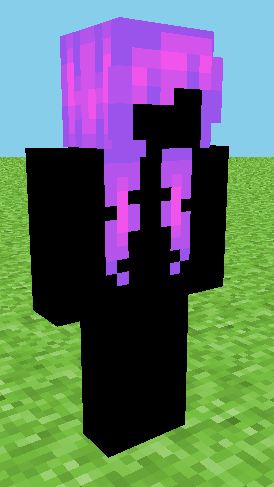
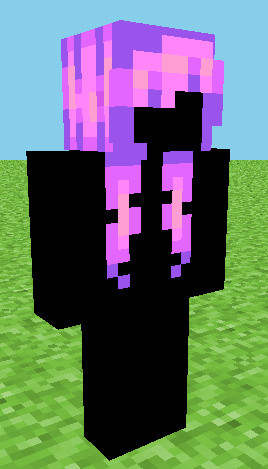
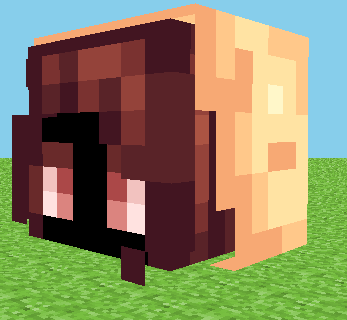
The hair shading I do is fairly simple. For the purpose of this tutorial I will be using a pink haired skin.
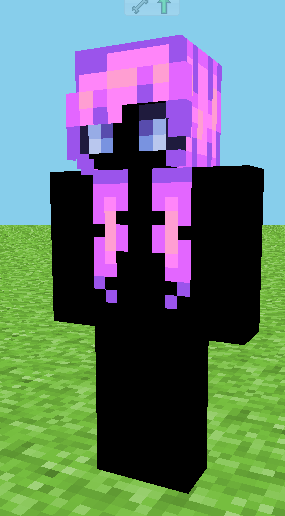
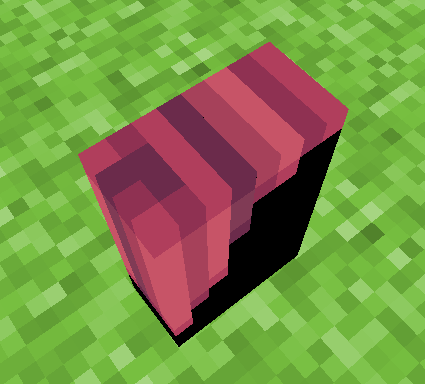
When finished the results will look something like this for this tutorial:
Lets start!
1) When I make my skins I first decide on a pallette, Now I will either set the pallette aside for use or I will make it off the top of my head as I go along, For this we are going to use one I set aside to help with organization. I personally use MCSkin3D for my skins as I find it very useful and comftorable to use.
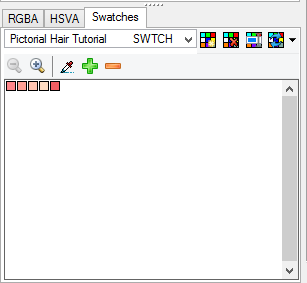 In MCSkin3D by the color wheel if you go to swatches you are able to see a few premade pallettes and even make your own, Here I have placed my Hair pallette for future use.
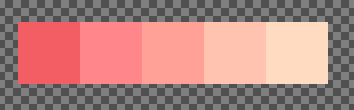 This is the pallette closeup as you can see there is some obvious hue shifting going on. I will explain the hueshifting process in a diffrent category, For this I will just show you what I do for pink.
Now my flat color I used is the pink 2nd from the left, The redish pink is the darker color I used for the top of my head. Here we go with the tutorial process.
I usually do the skinning process on the model itself, But if your more comftorable with the skin file MCSkin3D has a option built in that allows you to see it in skin file format located here
 The first one is the model, the center one is the skin file, and the third is both the model and skin file.
Moving along Here's how I do the colors for pink:
2)
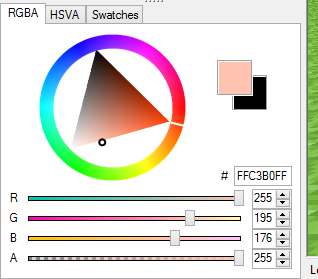
First I go to the RGBA section as it is the section I feel is easier for the hueshifting process. Once there I choose my flat pink color, For this one I wanted to make it fairly dark so I went with this color.

Next I choose my second lightest color, To do so I move the G up a bit and just a tad bit on the B, Which I raised to 150.
When choosing the third brightest color I tend to brighten it up a little more then I did to get the second.
 As you can see I raised the brightness up drastically on the G as well as the B making it a more peach color rather then pink. To get the brightest I then move it up just a tad bit towards the yellow, The color started of pink but gradually makes its way towards a yellowish orange whenever I do pink. I very rarely only mess with saturation and value.
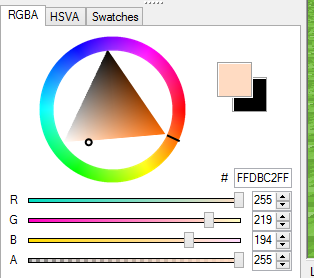
Now for the shading process.
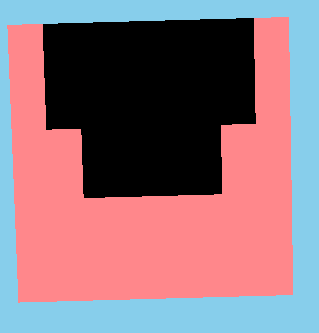
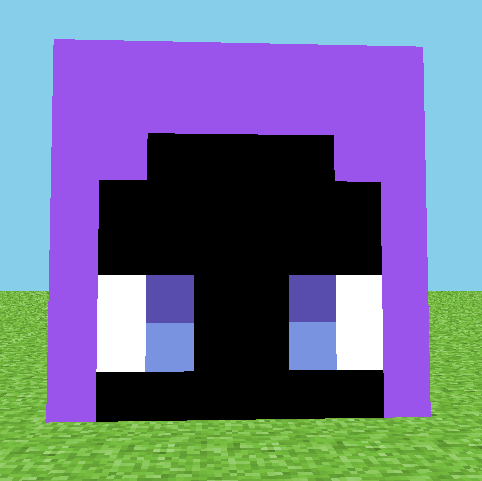
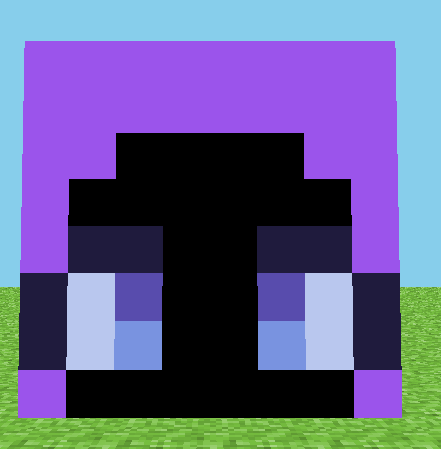
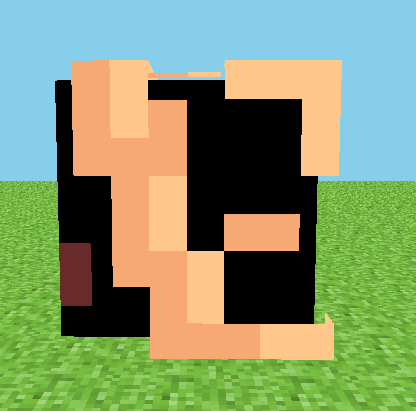
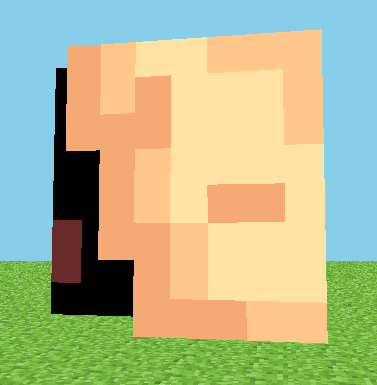
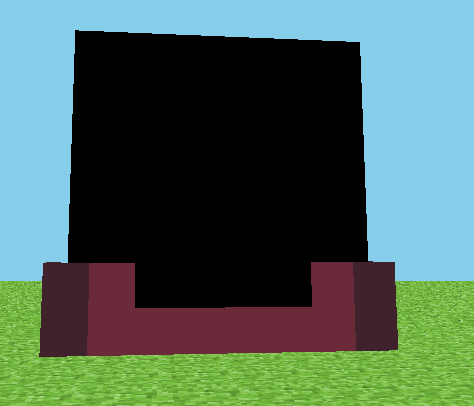
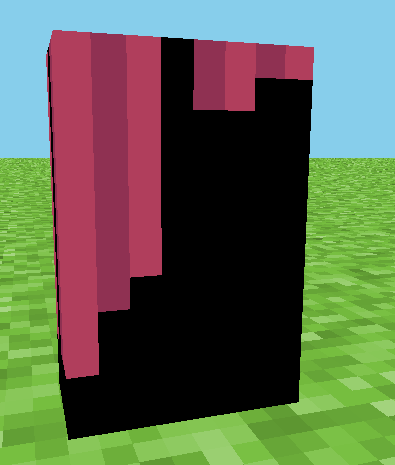
3) Lets start with the front of the head. I make a very simple boxed outline leaving the bottom of the head with no color besides the corners.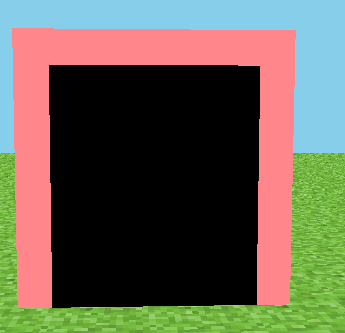 From there I make a boxed U on the inside, From the top I usually only do 2 thick, and then corners on the 3rd.
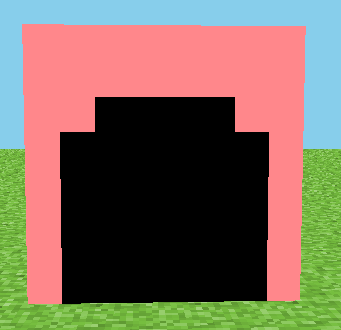
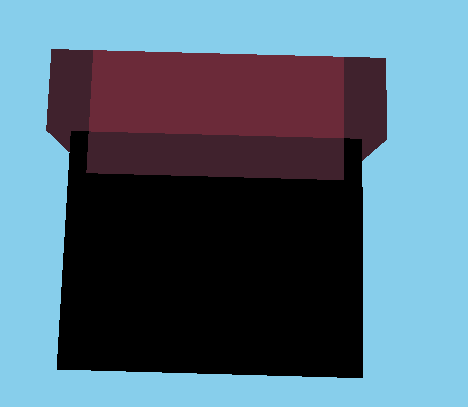
4) Sides
With the darkest color, On the far left I make a straight line and 2 pixels over I make a 2 pixel high line, then space by 2 and on the third make 2. The final result with the darker color should look something like this.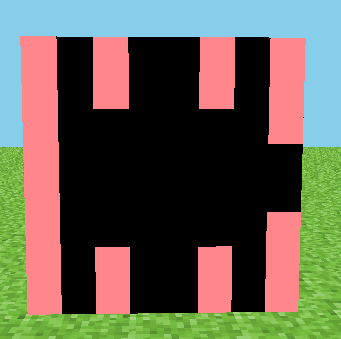
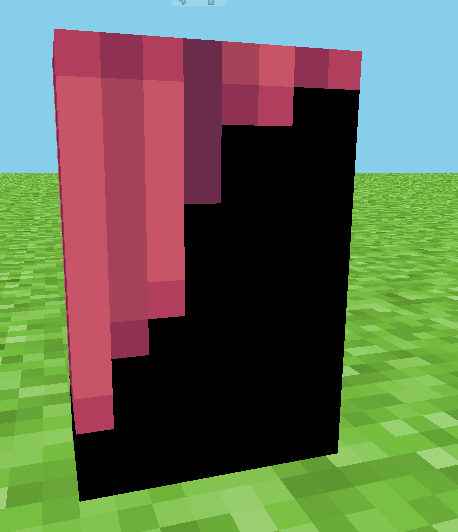
With the second color I simply mark the rest of the edges that havent been filled in and add a line between the two center ones going straight down.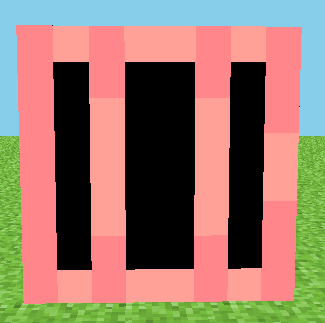
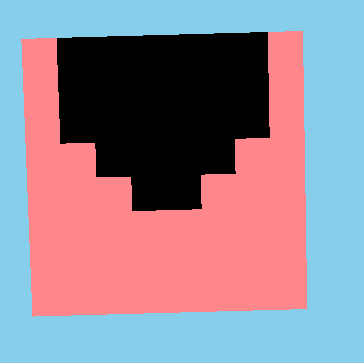
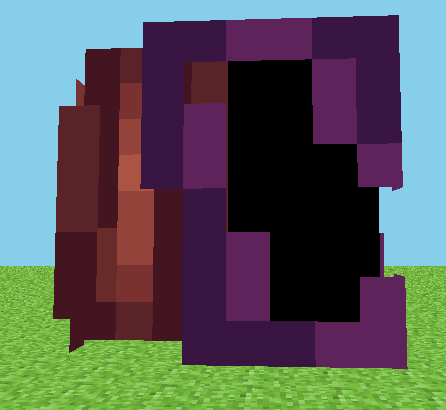
now for the 3rd color I put two pixels in every section besides the center, In the center I make a boxed U. Seeing as this is the right side of the head, I face the boxed U towards the left. Then I fill in the empty sections with the brightest color.
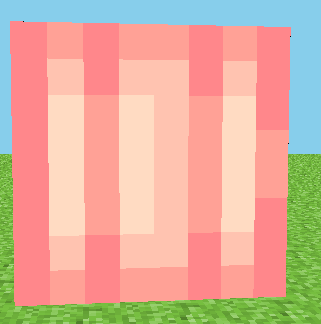
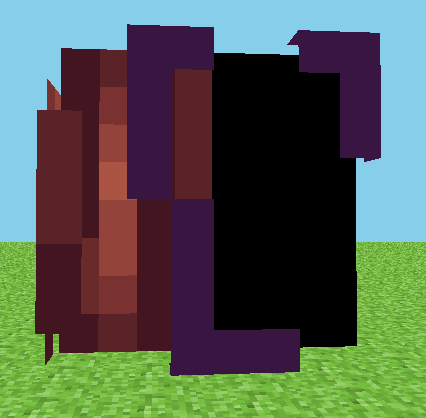
For the left side I repeat the same process and for the Boxed U instead of facing it to the left, I face it towards the right.
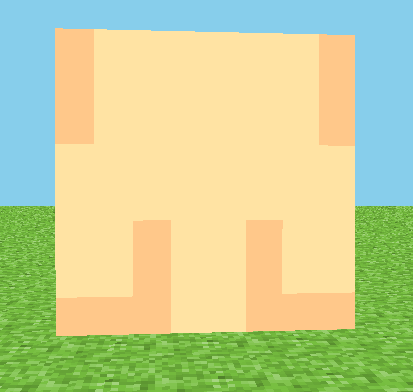
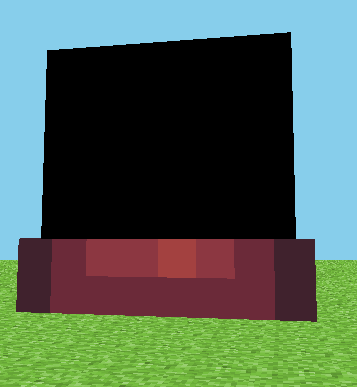
5) Back
The back is fairly simple keeping the same style in mind, The only diffrence is that the outline is like this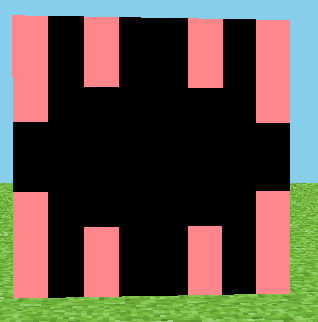 Reason being If I turn the head over it matches up with the sides of the head
 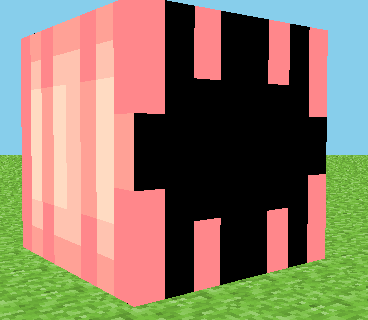 then you follow the same process as the sides with the colors, You should then end up with something like this, For the Boxed U you can either face it left or right, That is up to you.
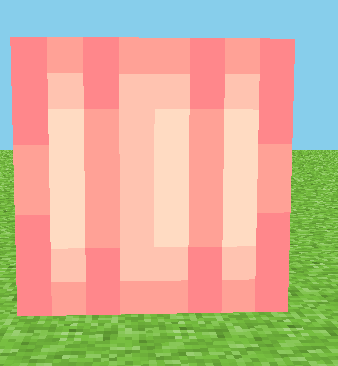
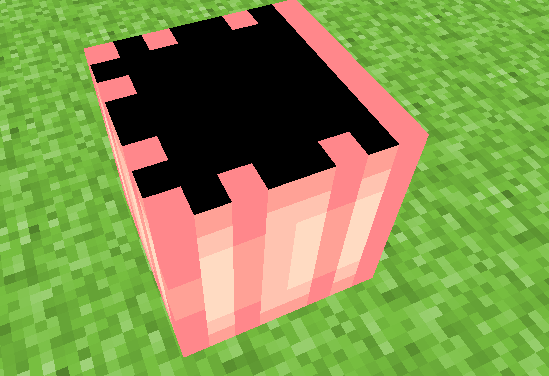
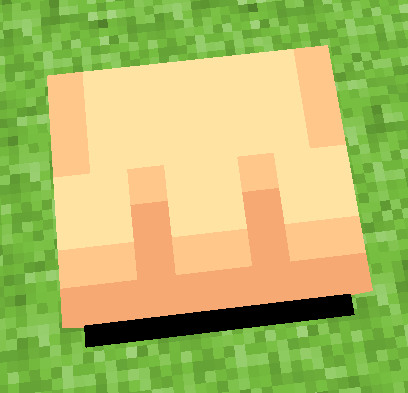
6) Bottom and Top
The bottom design is fairly simple, Seeing as I didn't decide to add ears in this one, You can do it many diffrent styles such as these.
 These are just three simple examples however, Go wild and find what you think would work best for your skin :D
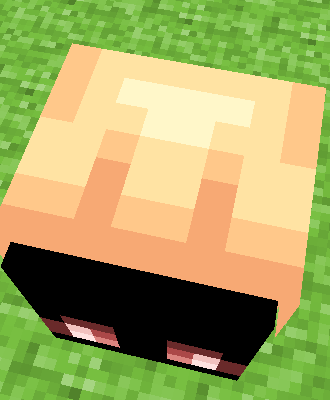
Now the top, I follow a rather simple design for pretty much all of them.
 first make sure the base color you used is lined up with the other sides, Kind of like this. Then I make a line across from the two dark ones on the sides and a boxed you from the center ones like this.
 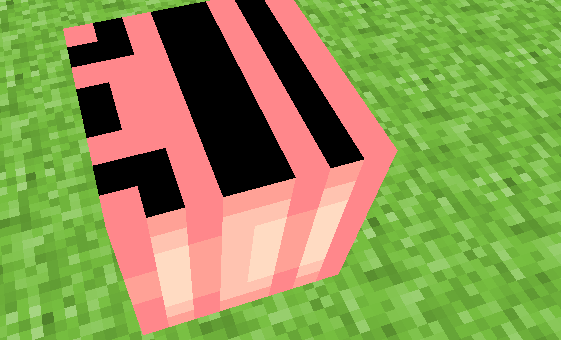 from the boxed U thats thick I drag on the darkness towards the front. Then I take my second darkest color and line it up with the sides. With the 3rd darkest color I fill in the blank spaces and take the darkest darkest color (which i made a redish pink) and place 3 lines. Starting from the front edge leaving one space in between, ending up with this.
7) BANGSSSS
Bangs are the more simple part in my opinion, But their are many diffrent styles, For this I just used some black to white colors to show some designs.
There are so many diffrent bang styles so just mess around with them!
Same goes for the hair on the body, Their are many diffrent styles that you can make so just mess around with that, If you want you can use the outline I made in the beggining, As it's also fairly common too :3
How I shade the body:
11/13/15
Hello there! I bet many of you have been waiting for this. Well it's here! How I shade my body!
Lets start~
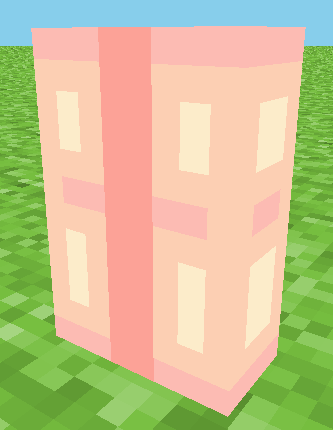
 here I have my blank canvas, I am going to start of with the arms.
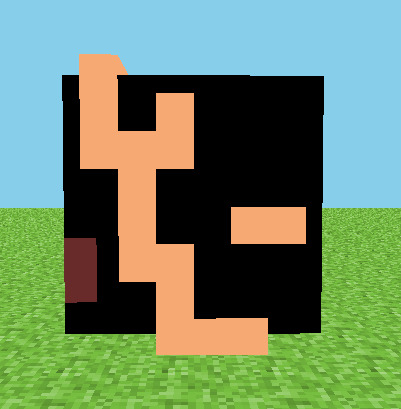
 First I take the darkest color of my skin pallette and make lines like this, Wraping from the front to the back, top, and bottom.
[img=undefined] i.gyazo.com/689f210d48c15d4450442cb78cb70499.png[/img] 2nd, I take my second darkest skin color from my skin pallete and make lines like this, Wrapping all around the arm, top, and bottom.
 3rd I take my 2nd brightest skin color from my skin pallette and make little hollow boxes like this, On the side it will look like this when done correctly.
4th, I take my absolute brightest color and fill in the empty spaces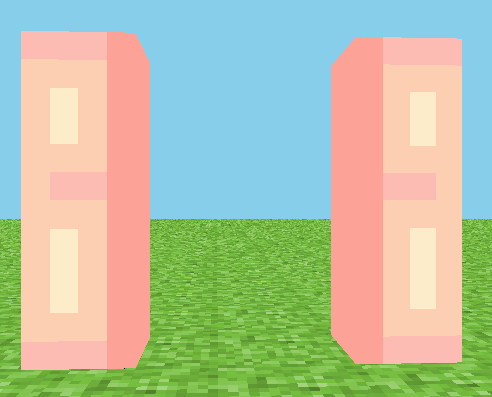
once done it should look like above, and like these from the top and from the bottom (top)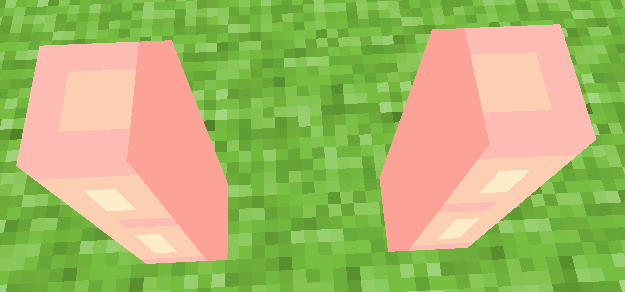 (bottom)
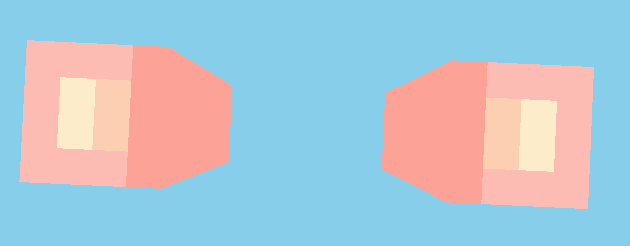
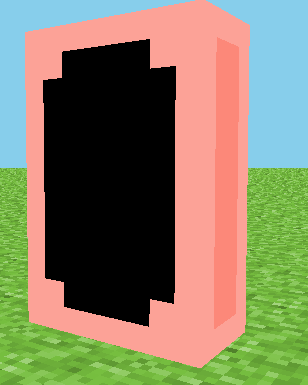
Next we go to the body!
I take my darkest skin color and outline the edges like so, Then adding one more pixel to the corners, On the inside, top and bottom of the body, I outline with the darkest, And create an even darker color from that, Filling in the hollow spaces.
2nd, I take my second darkest color from my pallette and make a pattern like so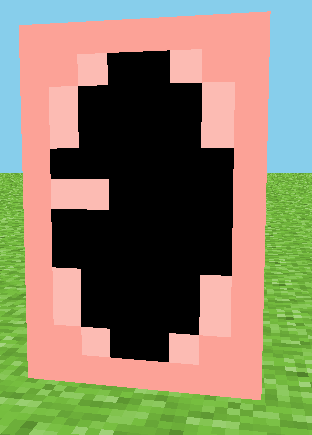
3rd i take my 2nd brightest color and fill in the empty space completely.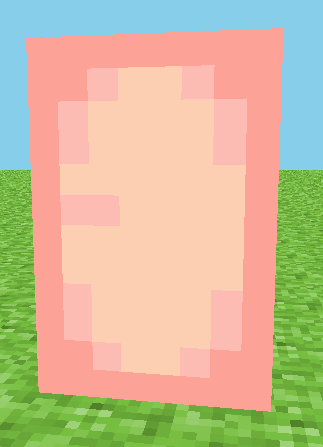
Lastly, I take my brightest skin color, And go to the opposite of the line in the center made by the second brightest color, And make the brightness like so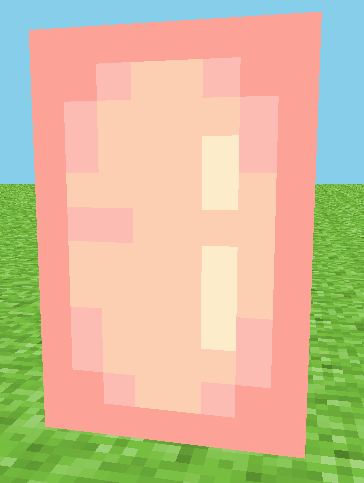
of course this varies depending on the clothes being worn.
And the legs are done the same as the arms but a little diffrent, In th end it should look like this,
 (top)
(top) 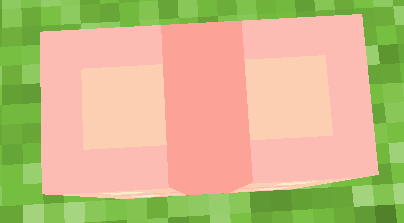 (bottom)
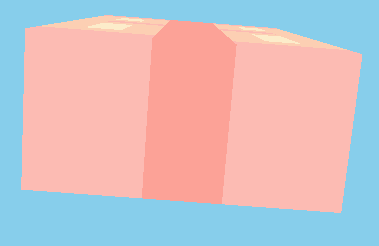
And that is how I shade my body!
This shading style was originally by Oblivion, So full credit goes to her, I made little changes to it, But uh yeah thats the end of this section!
How to Style:
COMING SOON...
This is going to be a pictorial in some parts and some (terrible) explaining in others.
There will be diffrent categories and how I do them, etc. I will start off with one category and will update the blog with the other sections when they are done :D
Lets begin~
ALSO IM SO SORRY IM REALLY BAD AT EXPLANATIONS IVE TOLD PEOPLE DAT TOO BUT ANYWAYS I TRIED TO MAKE IT MORE DETAILED SO I DONT CONFUSE YOU ALL BUT I MIGHT HAVE FAILED ANYWAY SO SORRY! DX ALSO HERES A COOL WEBSITE FOR COLORS!: Adobe Color Wheel
How I shade:
This section will be filled with how I shade diffrent part's of the body, And maybe a few diffrent style on them and how it affect's the shading. Now lets begin~
First off is Hair.
The hair shading I do is fairly simple. For the purpose of this tutorial I will be using a pink haired skin.
When finished the results will look something like this for this tutorial:
Lets start!
1) When I make my skins I first decide on a pallette, Now I will either set the pallette aside for use or I will make it off the top of my head as I go along, For this we are going to use one I set aside to help with organization. I personally use MCSkin3D for my skins as I find it very useful and comftorable to use.
In MCSkin3D by the color wheel if you go to swatches you are able to see a few premade pallettes and even make your own, Here I have placed my Hair pallette for future use. This is the pallette closeup as you can see there is some obvious hue shifting going on. I will explain the hueshifting process in a diffrent category, For this I will just show you what I do for pink.Now my flat color I used is the pink 2nd from the left, The redish pink is the darker color I used for the top of my head. Here we go with the tutorial process.
I usually do the skinning process on the model itself, But if your more comftorable with the skin file MCSkin3D has a option built in that allows you to see it in skin file format located here
The first one is the model, the center one is the skin file, and the third is both the model and skin file.Moving along Here's how I do the colors for pink:
2)
First I go to the RGBA section as it is the section I feel is easier for the hueshifting process. Once there I choose my flat pink color, For this one I wanted to make it fairly dark so I went with this color.
Next I choose my second lightest color, To do so I move the G up a bit and just a tad bit on the B, Which I raised to 150.
When choosing the third brightest color I tend to brighten it up a little more then I did to get the second.
As you can see I raised the brightness up drastically on the G as well as the B making it a more peach color rather then pink. To get the brightest I then move it up just a tad bit towards the yellow, The color started of pink but gradually makes its way towards a yellowish orange whenever I do pink. I very rarely only mess with saturation and value. Now for the shading process.
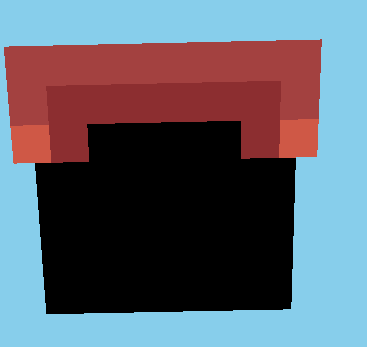
3) Lets start with the front of the head. I make a very simple boxed outline leaving the bottom of the head with no color besides the corners.
From there I make a boxed U on the inside, From the top I usually only do 2 thick, and then corners on the 3rd. 4) Sides
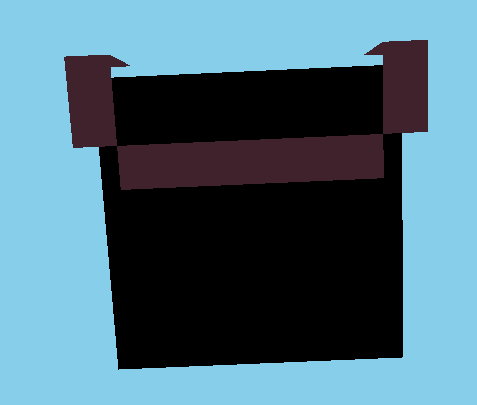
With the darkest color, On the far left I make a straight line and 2 pixels over I make a 2 pixel high line, then space by 2 and on the third make 2. The final result with the darker color should look something like this.
With the second color I simply mark the rest of the edges that havent been filled in and add a line between the two center ones going straight down.
now for the 3rd color I put two pixels in every section besides the center, In the center I make a boxed U. Seeing as this is the right side of the head, I face the boxed U towards the left.
Then I fill in the empty sections with the brightest color. For the left side I repeat the same process and for the Boxed U instead of facing it to the left, I face it towards the right.
5) Back
The back is fairly simple keeping the same style in mind, The only diffrence is that the outline is like this
Reason being If I turn the head over it matches up with the sides of the head then you follow the same process as the sides with the colors, You should then end up with something like this, For the Boxed U you can either face it left or right, That is up to you. 6) Bottom and Top
The bottom design is fairly simple, Seeing as I didn't decide to add ears in this one, You can do it many diffrent styles such as these.
These are just three simple examples however, Go wild and find what you think would work best for your skin :DNow the top, I follow a rather simple design for pretty much all of them.
first make sure the base color you used is lined up with the other sides, Kind of like this. Then I make a line across from the two dark ones on the sides and a boxed you from the center ones like this. from the boxed U thats thick I drag on the darkness towards the front. Then I take my second darkest color and line it up with the sides. With the 3rd darkest color I fill in the blank spaces and take the darkest darkest color (which i made a redish pink) and place 3 lines. Starting from the front edge leaving one space in between, ending up with this. 7) BANGSSSS
Bangs are the more simple part in my opinion, But their are many diffrent styles, For this I just used some black to white colors to show some designs.
There are so many diffrent bang styles so just mess around with them!
Same goes for the hair on the body, Their are many diffrent styles that you can make so just mess around with that, If you want you can use the outline I made in the beggining, As it's also fairly common too :3
How I shade the body:
11/13/15
Hello there! I bet many of you have been waiting for this. Well it's here! How I shade my body!
Lets start~
here I have my blank canvas, I am going to start of with the arms. First I take the darkest color of my skin pallette and make lines like this, Wraping from the front to the back, top, and bottom.[img=undefined] i.gyazo.com/689f210d48c15d4450442cb78cb70499.png[/img] 2nd, I take my second darkest skin color from my skin pallete and make lines like this, Wrapping all around the arm, top, and bottom.
3rd I take my 2nd brightest skin color from my skin pallette and make little hollow boxes like this, On the side it will look like this when done correctly. 4th, I take my absolute brightest color and fill in the empty spaces
once done it should look like above, and like these from the top and from the bottom (top)
(bottom) Next we go to the body!
I take my darkest skin color and outline the edges like so, Then adding one more pixel to the corners, On the inside, top and bottom of the body, I outline with the darkest, And create an even darker color from that, Filling in the hollow spaces.
2nd, I take my second darkest color from my pallette and make a pattern like so
3rd i take my 2nd brightest color and fill in the empty space completely.
Lastly, I take my brightest skin color, And go to the opposite of the line in the center made by the second brightest color, And make the brightness like so
of course this varies depending on the clothes being worn.
And the legs are done the same as the arms but a little diffrent, In th end it should look like this,
(top) (bottom) And that is how I shade my body!
This shading style was originally by Oblivion, So full credit goes to her, I made little changes to it, But uh yeah thats the end of this section!
How to Style:
COMING SOON...
New Stuff
Hello there everyone, It's been awhile since I updated this blog so I thought'd I'd start fresh, If you'd like to see the old pictorials from before they are in the spoiler from above.
For now I'm basically going to update my explanations and such for some things but for now I thought'd I'd talk a bit about hueshifting, Not too much though.
-----------------------------------------------------------------------------------------------------------------------------------------------------------
HUE SHIFTING
Before I start please go read these 2 amazing blogs on Hueshifting first to help you get an understanding on hueshifting, I'm just going to show how I do a bit of it in my way, As most of you know by now I mostly deal with bright,Vibrant skins. And I hueshift alot as well to help me achieve that.
~The Two Blogs~
The_Soups Hueshifting guide full credit to them, Please read it before I continue to help you understand better.
KnobleKnives hueshifting blog & color theory. Please read this before to help you understand hueshifting better before I do simple tips on it.
(Its okay if I link these blogs in here right? I take no credit for it at all, If Im not allowed to then please tell me and I'll remove them ASAP)
Okay lets get into this, I'm going to talk about how I make my hueshifts look bright, Alot of people tend to hueshift when making skins on PMC, But most keep their jumps close for me its a little diffrent.
Lets begin.
When I make skins I try to set out pallettes for certain parts before on the empty sections of my skins, So like outside the head layer is where I normally do it. To show you how to make the hueshift vibrant I'll just start off with a simple color.
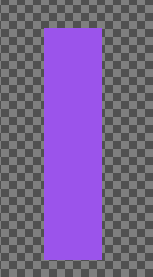
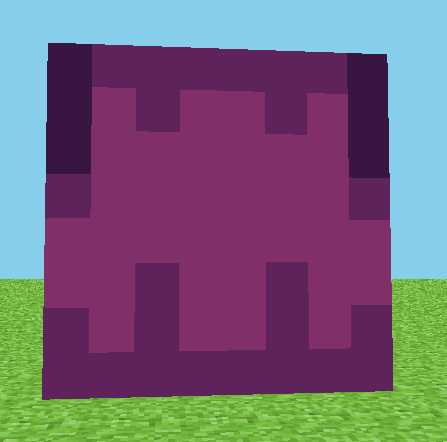
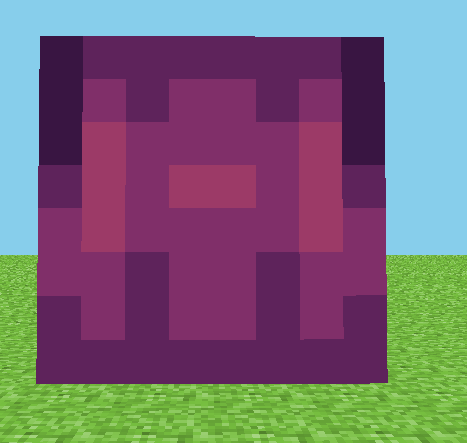
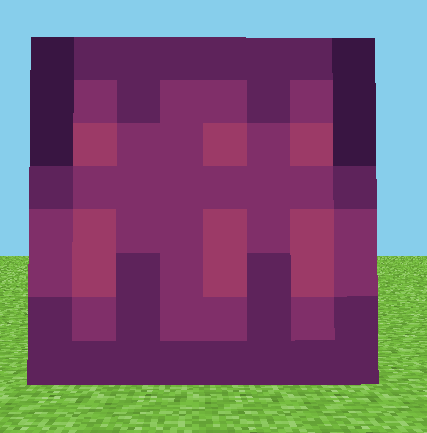
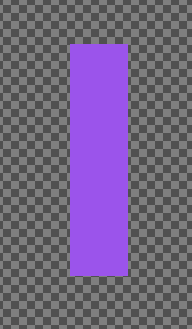 This will be a 4 pallette for this one I am doing purple.
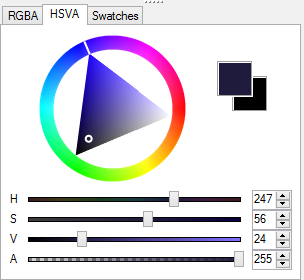
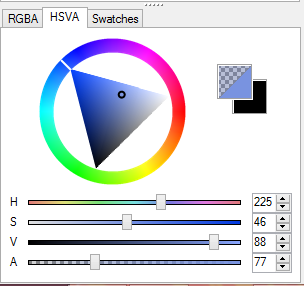
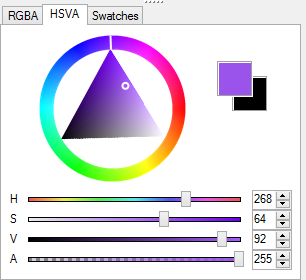 I use MCSkin3D for my programs so I get 3 sections like this. HSVA will help with saturation and value if you want a little more control over your hueshifting.
 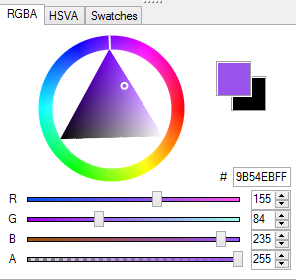 In the RGBA section it is a little easier to do hueshifting but in my opinion you dont have too much control over saturation and value unless you know how this section specifically works. This is why I wanted you to look at the above tutorials as I will show you a bit on this section.
When using this section you need basic knowledge on how hueshifting works. If you had purple here, You would move the bar with the R (Means red) towards the right, Like in the color whell above it, It heads towards red.
 Seeing as I have four colors and im usually very vibrant and bright with my skins I tend to make the jumps very big, The RGBA section is basically a cheat for hueshifting to help you. So if I do hueshifting with only the RGBA section it'd be like this.
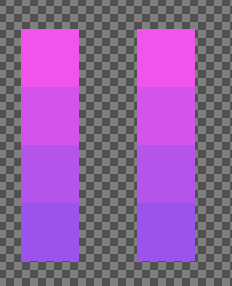
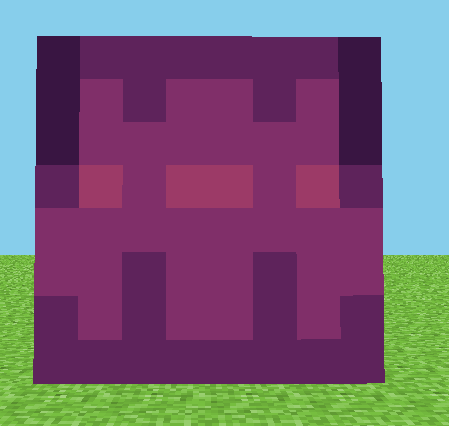
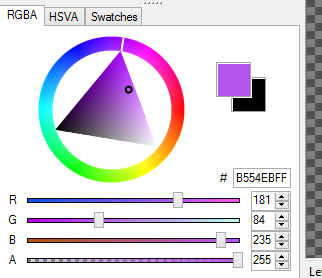 This is around how big i make my jumps from the base color.
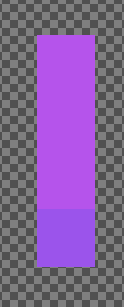 Once I am done with this pallette you can see that it doesnt look too bright.
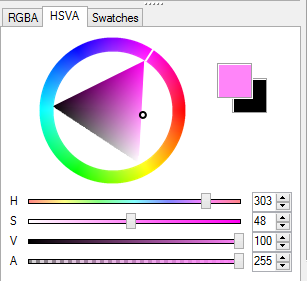
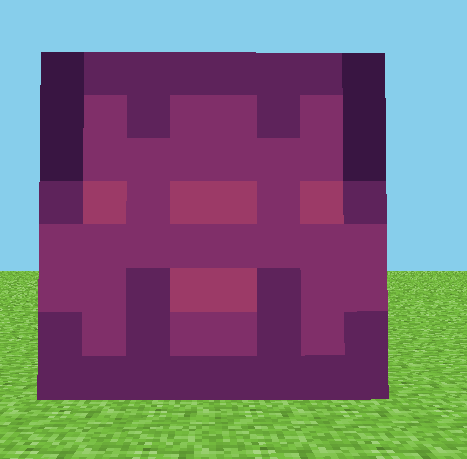
 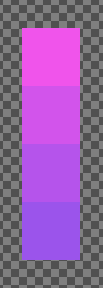 Sure its bright but not too much. This was just with a few little jumps in the RGBA section. In the HSVA section you'll recognize I said you have a little more control, When making my pallettes I first start off with a base RGBA pallette like the one above. Then I copy the pallette beside it like so.
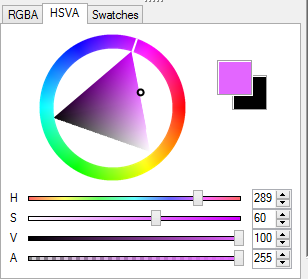
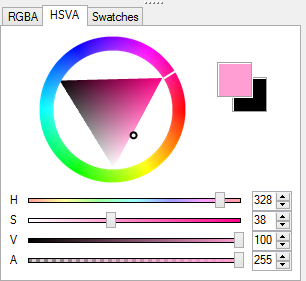
As you can see I now have 2 pallettes, Both are the same. Now when I go to the HSVA section I first select the 2nd color from the bottom with the color picker and it will show up like this for this color of i set out.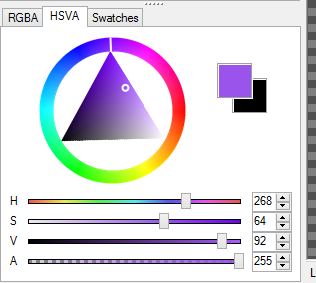 For more control here, And to make the pallette brighter, I edit the colors with the saturation and value while custom hueshifting with the color wheel above it, heading towards the red in small but big jumps.

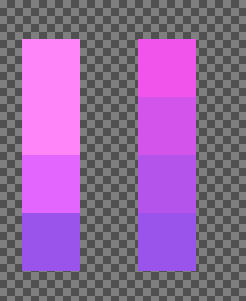
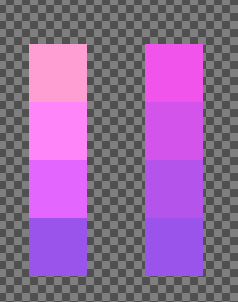
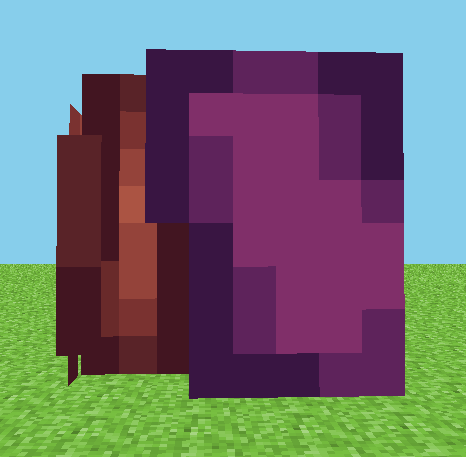
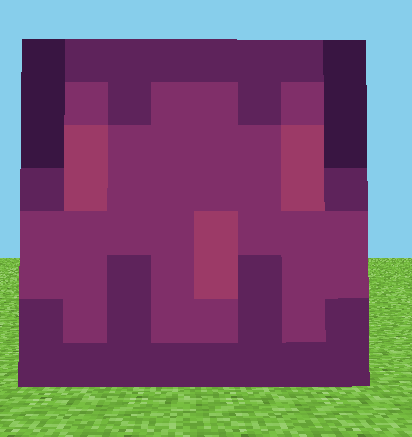
As you can see, I now have a pallette much brighter then its base color was. If I make this into a hair pallette heres the diffrence a little more obvious between the two.
Now as you can see one pallette is brighter then the other, That's why instead of hueshifting only through the RGBA section try using the HSVA section as well to help with how dark or bright your hueshifting will be. As you all saw i made the same length of jumps on them all but with help from the value and saturation I was able to make the same pallette brighter.
Thats a simple way on how to get vibrant colors when hueshifting.
Now, Theres a thing I do with my eyes. let me show you guys.
this is where the opacity section from MCSkin3D comes in handy.
 First start off with your eye color of choice. When I do my lashes, First, I try not to use plain black lashes so instead I make lashes close to black.
Heres what I mean, First I use the color picker and choose the dark section of the pupils. Then in the HSVA section, I move the saturation down significantly, near black but not entirely, Around here.
 Resulting in this.
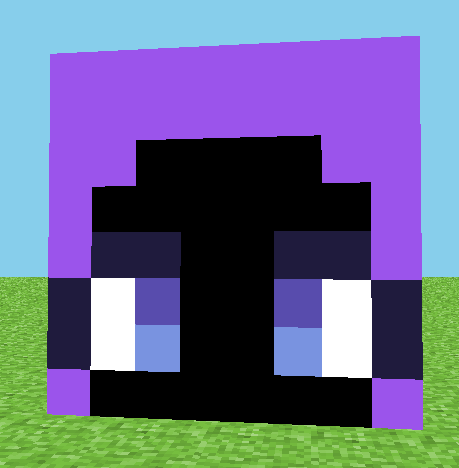
When I do shadows, I dont do simple grays like alot of other people, Instead, Using the color picker I select the brightest part of the pupil, And move the opacity to around here.
Then I place 1 layer over the whites, Like so.
 as you can see the white is a little more blue, mess around with the opacity if you want a pale look, or a darker looking shadow, then I add another shadow by the dark spot of the pupils once more, if they are too close together add another layer to the shadow by the dark art of the pupil.
 Then I get this. Depending on your color the opacity level varies depending on the look you want so mess around and see what you like best.
That's all im going to do for this bit today, I'm going to add another section either tomorrow or the day after but im not sure what I'll add in for sure so just leave suggestions below if you can.
For now I'm basically going to update my explanations and such for some things but for now I thought'd I'd talk a bit about hueshifting, Not too much though.
-----------------------------------------------------------------------------------------------------------------------------------------------------------
HUE SHIFTING
Before I start please go read these 2 amazing blogs on Hueshifting first to help you get an understanding on hueshifting, I'm just going to show how I do a bit of it in my way, As most of you know by now I mostly deal with bright,Vibrant skins. And I hueshift alot as well to help me achieve that.
~The Two Blogs~
The_Soups Hueshifting guide full credit to them, Please read it before I continue to help you understand better.
KnobleKnives hueshifting blog & color theory. Please read this before to help you understand hueshifting better before I do simple tips on it.
(Its okay if I link these blogs in here right? I take no credit for it at all, If Im not allowed to then please tell me and I'll remove them ASAP)
Okay lets get into this, I'm going to talk about how I make my hueshifts look bright, Alot of people tend to hueshift when making skins on PMC, But most keep their jumps close for me its a little diffrent.
Lets begin.
When I make skins I try to set out pallettes for certain parts before on the empty sections of my skins, So like outside the head layer is where I normally do it. To show you how to make the hueshift vibrant I'll just start off with a simple color.
This will be a 4 pallette for this one I am doing purple. I use MCSkin3D for my programs so I get 3 sections like this. HSVA will help with saturation and value if you want a little more control over your hueshifting. In the RGBA section it is a little easier to do hueshifting but in my opinion you dont have too much control over saturation and value unless you know how this section specifically works. This is why I wanted you to look at the above tutorials as I will show you a bit on this section.When using this section you need basic knowledge on how hueshifting works. If you had purple here, You would move the bar with the R (Means red) towards the right, Like in the color whell above it, It heads towards red.
Seeing as I have four colors and im usually very vibrant and bright with my skins I tend to make the jumps very big, The RGBA section is basically a cheat for hueshifting to help you. So if I do hueshifting with only the RGBA section it'd be like this. This is around how big i make my jumps from the base color. Once I am done with this pallette you can see that it doesnt look too bright. Sure its bright but not too much. This was just with a few little jumps in the RGBA section. In the HSVA section you'll recognize I said you have a little more control, When making my pallettes I first start off with a base RGBA pallette like the one above. Then I copy the pallette beside it like so.As you can see I now have 2 pallettes, Both are the same. Now when I go to the HSVA section I first select the 2nd color from the bottom with the color picker and it will show up like this for this color of i set out.
For more control here, And to make the pallette brighter, I edit the colors with the saturation and value while custom hueshifting with the color wheel above it, heading towards the red in small but big jumps. As you can see, I now have a pallette much brighter then its base color was. If I make this into a hair pallette heres the diffrence a little more obvious between the two.
Now as you can see one pallette is brighter then the other, That's why instead of hueshifting only through the RGBA section try using the HSVA section as well to help with how dark or bright your hueshifting will be. As you all saw i made the same length of jumps on them all but with help from the value and saturation I was able to make the same pallette brighter.
Thats a simple way on how to get vibrant colors when hueshifting.
Now, Theres a thing I do with my eyes. let me show you guys.
this is where the opacity section from MCSkin3D comes in handy.
First start off with your eye color of choice. When I do my lashes, First, I try not to use plain black lashes so instead I make lashes close to black.Heres what I mean, First I use the color picker and choose the dark section of the pupils. Then in the HSVA section, I move the saturation down significantly, near black but not entirely, Around here.
Resulting in this. When I do shadows, I dont do simple grays like alot of other people, Instead, Using the color picker I select the brightest part of the pupil, And move the opacity to around here.
Then I place 1 layer over the whites, Like so.
as you can see the white is a little more blue, mess around with the opacity if you want a pale look, or a darker looking shadow, then I add another shadow by the dark spot of the pupils once more, if they are too close together add another layer to the shadow by the dark art of the pupil. Then I get this. Depending on your color the opacity level varies depending on the look you want so mess around and see what you like best.That's all im going to do for this bit today, I'm going to add another section either tomorrow or the day after but im not sure what I'll add in for sure so just leave suggestions below if you can.
HOW TO STYLE-
HOW TO STYLE- HOODS
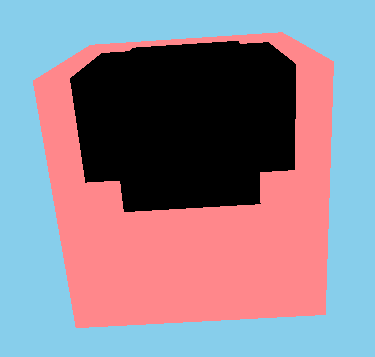
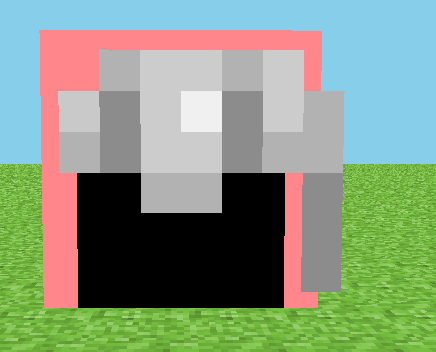
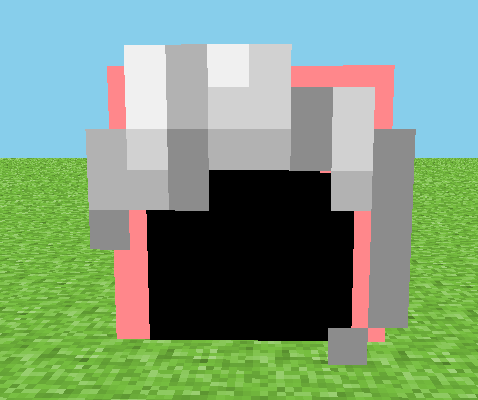
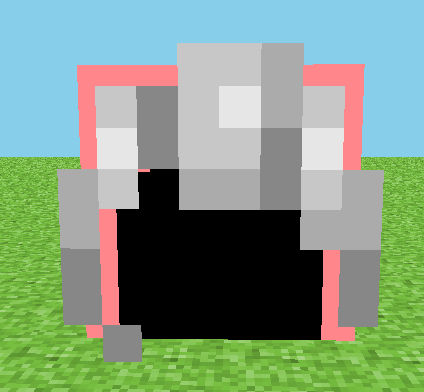
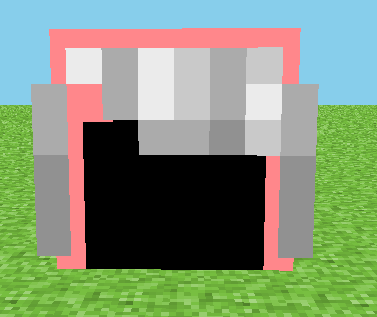
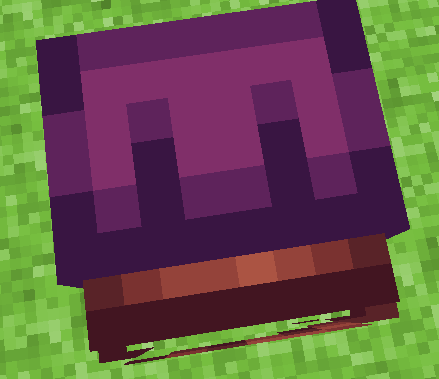
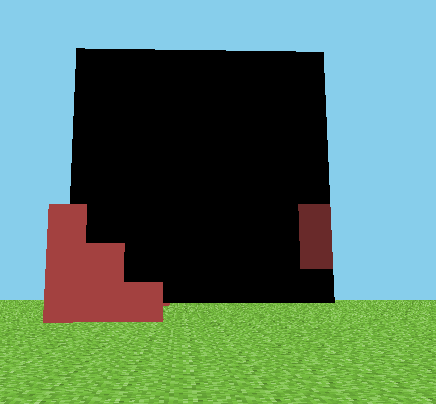
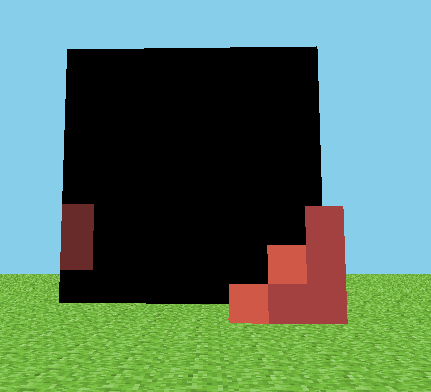
Allright I recently got someone asking if for the kin base i have the shading would be the same as the hair? Well no, Actually it wont be! Heres how I do them, Theres many diffrent shadings styles that can be used for the hood but these are just ones that I do.
Hood Up
This will be the one for the hoods that are up

Just an example of how it looks with basic hair and face stuff:
Style 1
Steps for style 1~
Start off with your darkest color and make a pattern like so ignorethe derpy ending of the hair:
 and mirror on both sides.
the top: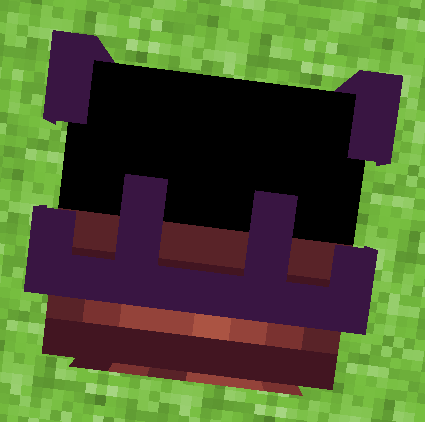
now grab the second darkest color and fill like so:
back: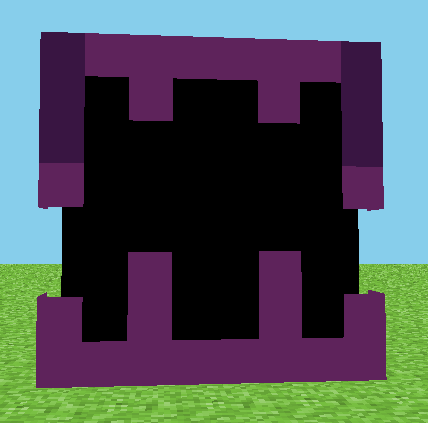
top: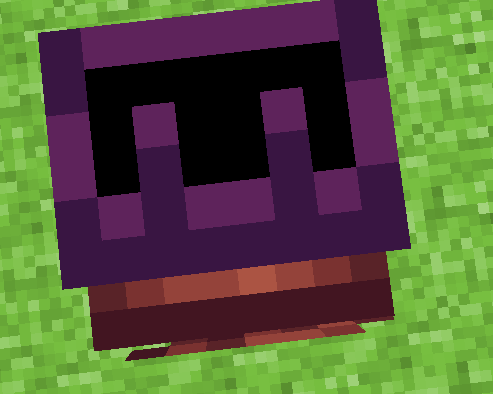
Grab the 3rd color and fill in all the empty space, it should look like so:
Now depending on how simple you want the shading to be that can work or you can do shines like so on these spots~
SIDE SHINES:
TOP SHINES:
BACK SHINES:
Start off with your darkest color and make a pattern like so ignorethe derpy ending of the hair:
and mirror on both sides.the top:
now grab the second darkest color and fill like so:
back:
top:
Grab the 3rd color and fill in all the empty space, it should look like so:
Now depending on how simple you want the shading to be that can work or you can do shines like so on these spots~
SIDE SHINES:
TOP SHINES:
BACK SHINES:
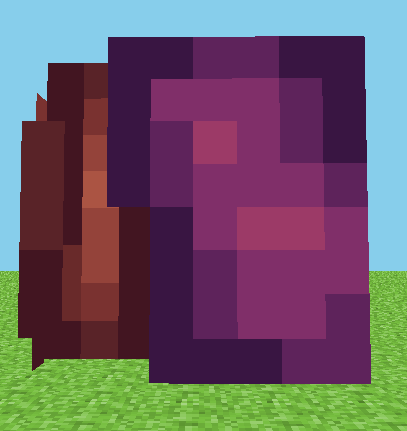
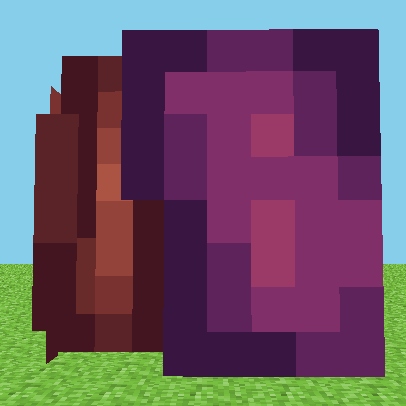
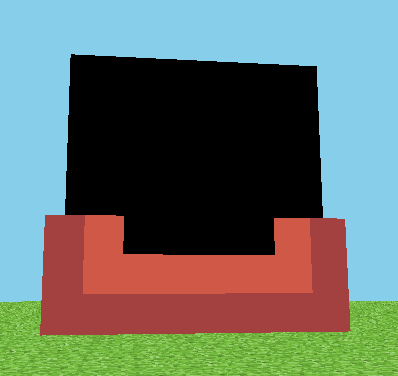
Style 2
Steps for style 2~
Start with the darkest color of the hood your making and make a pattern like so:
 The top using the same color will look like this:
 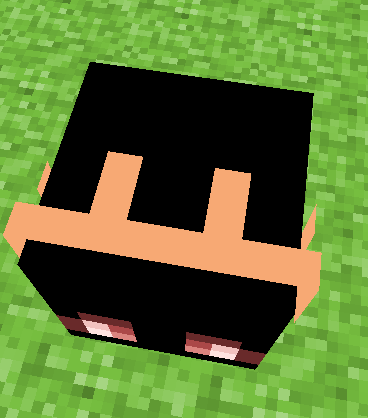 and the bottom mirror the edges like so:
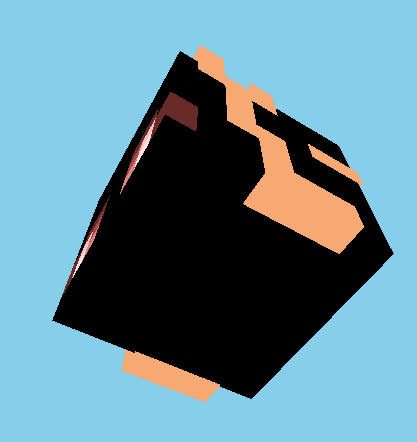
Now grabbing the second darkest color your going to fill in the areas as such:
back: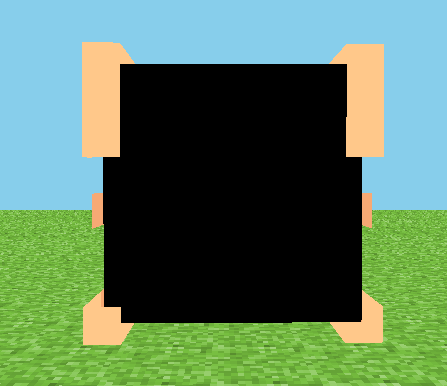
top: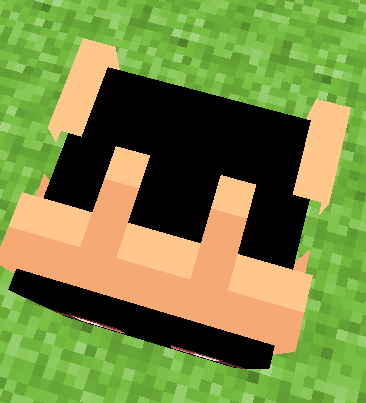
bottom looks like this
And now your done with that color! This hoodie consists of 3 colors but it can be 4 and I will show you that at the end.
Now grab the 3rd color and fill in all the emptiness like so:

And your done! But to add extra shine and shading, grab the lightest color and brighten it more, then shade like so in these areas:

Start with the darkest color of the hood your making and make a pattern like so:
The top using the same color will look like this: and the bottom mirror the edges like so: Now grabbing the second darkest color your going to fill in the areas as such:
back:
top:
bottom looks like this
And now your done with that color! This hoodie consists of 3 colors but it can be 4 and I will show you that at the end.
Now grab the 3rd color and fill in all the emptiness like so:
And your done! But to add extra shine and shading, grab the lightest color and brighten it more, then shade like so in these areas:
Just an example of how it looks with basic hair and face stuff:
Hood Down
This will be the one for the hoods that are down.
Style 2
Steps for style 2~
Make a staircase as so with the darkest color in the pallette on the sides:
The back shall look like this:

And the bottom like so: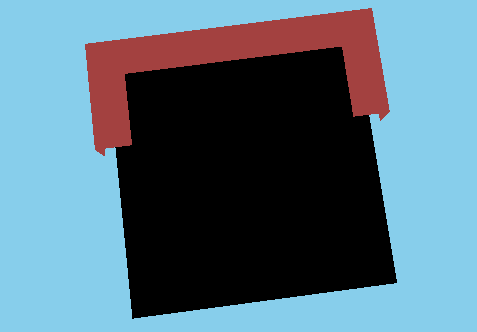
Next grab the second darkest color and shade like so on the edges:
 And like so on the back:
Now if your like me I hate when the shading just randomly stops abruptly as it did on the edges, So I mirror it a bit to the bottom. As well as grabbing the darkest color i used, and making a darker color then filling it in as such:
Then grab the lightest color you have and shade and fill as such keep in mind the one bright dot is optional on how you want the lighting to look:
And done!
Make a staircase as so with the darkest color in the pallette on the sides:
The back shall look like this:
And the bottom like so:
Next grab the second darkest color and shade like so on the edges:
And like so on the back:Now if your like me I hate when the shading just randomly stops abruptly as it did on the edges, So I mirror it a bit to the bottom. As well as grabbing the darkest color i used, and making a darker color then filling it in as such:
Then grab the lightest color you have and shade and fill as such keep in mind the one bright dot is optional on how you want the lighting to look:
And done!
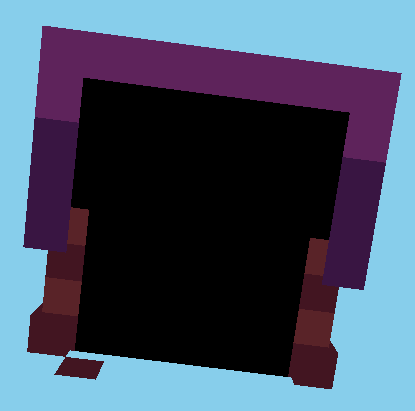
Style 2
This is the first style~
First grab the darkest color of the pallette your using for your hood, Then on the second layers on the sides, Make a square as so:
 (Ignore the side lashes, they are as I said, lashes xDD)
Then on the back you would make to small pillars like this:

And on the bottom using that color make an outline as so:
Grab the second color in the pallette and fill it in as such:
Then grab the next lightest color and fill in the empty spot as such:
 Igore the extra little dot, That is optional for extra brightness uvu And done!
First grab the darkest color of the pallette your using for your hood, Then on the second layers on the sides, Make a square as so:
(Ignore the side lashes, they are as I said, lashes xDD)Then on the back you would make to small pillars like this:
And on the bottom using that color make an outline as so:
Grab the second color in the pallette and fill it in as such:
Then grab the next lightest color and fill in the empty spot as such:
Igore the extra little dot, That is optional for extra brightness uvu And done!HOW TO STYLE- Dresses/DressSkirts
Spoiler title says it all this will show you how to do these!
I will only do a couple styles at a time so expect many updates.
I will only do a couple styles at a time so expect many updates.
Style 1
I'll be doing one style, It looks like such: 
Feel free to choose whatever color it is your looking for!!
STEPS:
Grab the lightest color from your pallette, And make lines like so: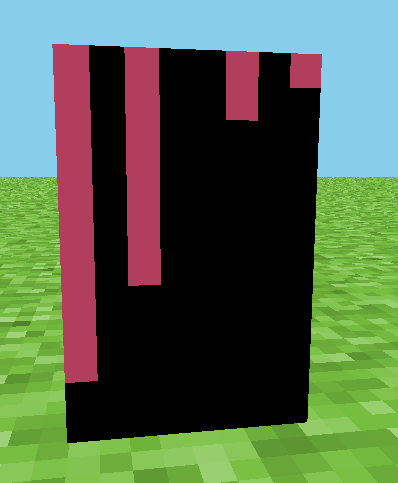 After having done so you will grab the second brightest color and make lines like this:
 After that you will grab the darkest color in the pallette and make a line like so
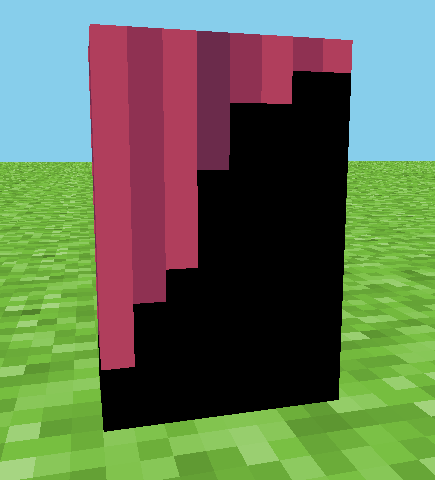
Done! Now you have the basic flat colors done. If you'd like you can keep it that way or you can add some shading to it, It can be shaded various ways but for the purpose of this one I'll just show you the one on the top.
After grabbing the lightest color, Your going to brighten the color as you wish and shade it from top to bottom like so:

Then after grabbing the second lightest color in the pallette you are going to brighten that color as well and use that color to shade it like so:
 then grab the darkest color from the skirt dress ruffle thing you used and brighten it as you wish, Then shade like so:
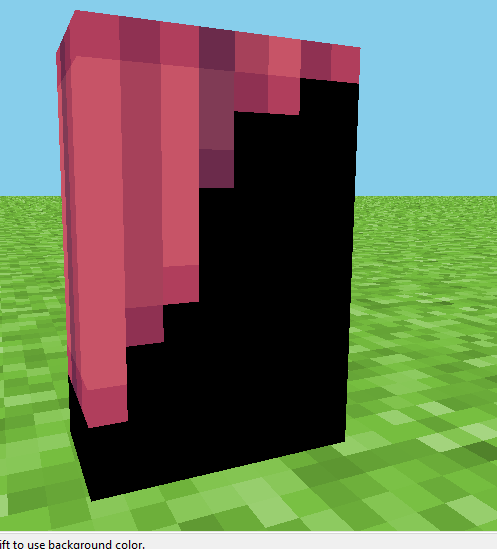
On the side it will look like this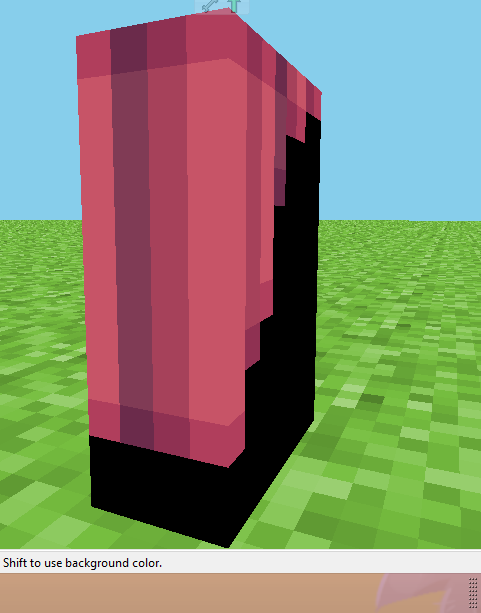
And then this is what the top looks like on the inside:
After that I like to add a belt of some sort, these are only on the legs so on the body part is where the belt would be that ties the whole thing together and gives it a neat look, The way you do so there is entirely up to you uvu
That's it for the first style uvu
Feel free to choose whatever color it is your looking for!!
STEPS:
Grab the lightest color from your pallette, And make lines like so:
After having done so you will grab the second brightest color and make lines like this: After that you will grab the darkest color in the pallette and make a line like so Done! Now you have the basic flat colors done. If you'd like you can keep it that way or you can add some shading to it, It can be shaded various ways but for the purpose of this one I'll just show you the one on the top.
After grabbing the lightest color, Your going to brighten the color as you wish and shade it from top to bottom like so:
Then after grabbing the second lightest color in the pallette you are going to brighten that color as well and use that color to shade it like so:
then grab the darkest color from the skirt dress ruffle thing you used and brighten it as you wish, Then shade like so: On the side it will look like this
And then this is what the top looks like on the inside:
After that I like to add a belt of some sort, these are only on the legs so on the body part is where the belt would be that ties the whole thing together and gives it a neat look, The way you do so there is entirely up to you uvu
That's it for the first style uvu
| Credit | The_Soup, KnobleKnives for their hueshifting blogs, They are linked in the top. |
| Tags |
2 Update Logs
Update #2 : by Abandon3dRain 02/15/2016 6:08:22 pmFeb 15th, 2016
Updated and added a HOW TO STYLE section with 2 diffrent categories in it so far.
LOAD MORE LOGS
tools/tracking
3477827
6
3-how-i-make-my-skin


 Dronko fire blaster
 Vanderfield100
 StormWatcher
 ScotsMiser
 BlueBoyBuilds
 PandaWonka
 Kypickle
 vitalikop
 CrystalRuby
![i.gyazo.com/689f210d48c15d4450442cb78cb70499.png[/img] 2nd](https://i.gyazo.com/689f210d48c15d4450442cb78cb70499.png[/img] 2nd)
Create an account or sign in to comment.
( p.s. I used to love animal crossing)