- 1,851 views, 2 today
90
Sorry for my poor English, please correct me if you see errors.
If you are not going to read all of this, and I'm sure you won't, at least read the last paragraph of this blog :P
Introduction
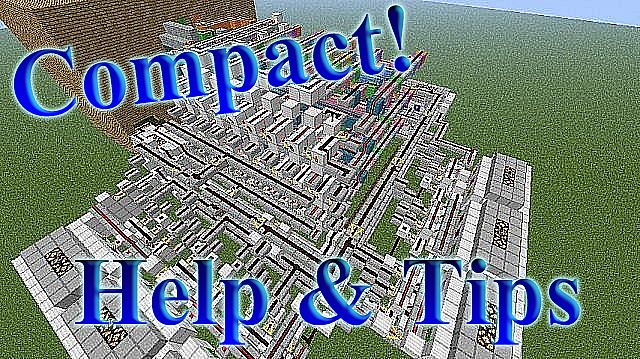
In this blog I will talk about why you need your redstone mechanisms compacted, how to make your machine compacted easily and how to understand how compacted mechanism works. I will give you some tips and examples that will help you to make your mechanism more compact and less expensive to build in survival mode.
Before you upload a redstone device to PMC or build it in survival - you most likely want to find the best form to build it.When you upload your project to PMC you probably want people to understand easily how to build it and of course if your machine takes less space (people might want to insert it into a room in their base) and requires less materials it will be easier to build and better than (if there are) older versions of it.
Compacting mechanisms means making them smaller so they take less space and - if possible - using less expensive blocks to build it. Not expensive blocks means using less hoppers or any other block that costs important materials, not counting solid blocks of course - they can be replaced with any other solid blocks the player prefer to use.
Sometimes you start from building a redstone device in a big and simple form, when it's all working you start compacting it. I don't recommend to start building it in a compacted form because you might need some space for adding something you thought about after most of the machine is done, it will also make it harder and much slower to complete building when you still didn't get it working in a simple form and solved all the problems problems.
Compacted mechanisms look so complicated, it's like a bunch of random blocks repeaters and pistons! How to understand how compacted redstone device works!?
Note: If you are not very good at redstone this method might still not help you because compacted mechanisms usually contain some compact tricks that are hard to understand if you don't know some advanced stuff about redstone.
Also, you don't have to worry about how people will understand your device because if it's enough simple to build in survival they will copy it as it is just to have it working.
Compacted mechanisms - in my opinion - are easier to understand if you do it in the right way:
1. Find the main input/s.
2. Follow the redstone from the inputs until it starts going to more than one direction, remember this spot and continue following in one of the directions it goes - make sure to count the timing delays to know where the redstone will be powered and where still not while the other direction the signal goes starts working too.
3. After you've done looking where the first direction leads and what it does continue to the next one doing the same until you explore all the machine.
4. Not you should understand how it works, if the machine is a duplicate of a smaller machine copied few times check only one of them and then take a short look at few others to make sure there is nothing different in other copies.
How to make my huge redstone device compact?
Compacting a big machine might be very hard, every machine includes some logic gates and other small machines that work together to do what you want them to do. Start from compacting every part of the mechanism separately and re-building your machine using the compacted form of the mechanisms it includes, make as short wire connections as you can and try to make it box-shaped - rotate some parts of the device if you need.
How to make it smaller?
Power pistons, dispensers, droppers, repeaters, comparators, hoppers and any other thing you can using a powered block.
Example:
The sticky piston represents whatever you want to power, the not sticky piston represents something important you can't remove or a place where you just can't run a wire.
*before*

*after*

If the images don't work
[@@@@@] = important thing you can't remove.
[target] = what you want to power.
*before*
[nothing] [redstone wire] [redstone wire]
[redstone wire] [redstone wire] [repeater facing to the target]
[input] [@@@@@] [target]
*after*
[redstone wire] [redstone wire] [block]
[input] [@@@@@] [target]
Explanation: the redstone wire you run into the block (not need to put redstone above the block) powers the block, the powered block powers the target. This method takes much less space than the method of rotating the redstone to power the target directly. This method will also make your machine to work faster because you use less repeaters, if you do want to activate it with a delay place the repeater before the block.
Run redstone wires through each other if you need instead of making a "bridge" to run one of the wires above the other.
Run the wires through each other not means just connect them together, it means use the block below the wire to send power through it to the other side of the second wire.
Example:
*before*

*after*

Explanation: The wire on the red blocks goes through the block of the second wire because the repeater powers the orange block (the block under the repeater on the white blocks wire), this block powers the redstone dust on it's other side and the wire gets the redstone pulse. The repeater above the orange block is to make sure the wire on the red blocks will not power the wire on the white blocks.
If you want to move a wire directly up don't make "stairs" for it, use slabs or glass (glowstone works too but it's kinda expensive) to move the wire up, or if you want it with a delay you can use a tower of solid blocks and redstone torches.
I call to this method "stairs", this is the worst method as it takes 2x2 space:

This is how you can use slabs or glass to make it 1x2:
This method has the advantage of ability to power anything in front of it because (as seen in the image) the wire is facing outside and not only to the next wire.

Note that the slabs must be on the top half of the block.
And if you want it with a delay you can do this:

As you can see in the image you also can move the signal sideways using this method so it is not worse than the 1x2 method.
Make sure it's not too long delay and it will not occasionally power something you don't want it to power, The disadvantage of this method is that it actually makes 3x3 area (without corners) a bad place to run other wires as it will power them. If there's nothing around it, it will work perfect as 1x1 way up for redstone.
That's it for the simple ways to make redstone devices a little more compact, if you want your machine to be compacted to a minimal space usage I can't help you with an advanced tutorial because every machine is something different and can be compacted using methods that won't work in other machines.
If you need help with compacting your machine feel free to contact me and send me the machine you want to get back compacted, with minimal space and materials usage. I love redstone and I'm glad to do the compacting work for you!
Please let me know if I helped you, it wasn't easy for me to write this blog!
Wow, I didn't expect this to happen, and so fast! :D

| Tags |
2 Update Logs
Update #2 : by Xbxp 01/31/2014 6:54:26 amJan 31st, 2014
Removed some s and other weird symbols that somehow appeared by themselves.
Fixed some errors.
Fixed some errors.
LOAD MORE LOGS
tools/tracking
2309112
6
help-and-tips-for-compacting-mechanisms


Create an account or sign in to comment.
ITS AMAZING
TL;DR