


- 35,909 views, 7 today

14
A perfect circle can be tough to create, especially when the only available sub-shapes are cubes or squares. However, there is a formula that makes it as easy as building a box. Almost. This formula will allow you to create a perfect circle of any size as long as the base is 2 blocks or larger. Before we begin, please remember that this tutorial only shows you how to create a flat circle or cylinder. Io ll be uploading a tutorial on creating a sphere very soon.
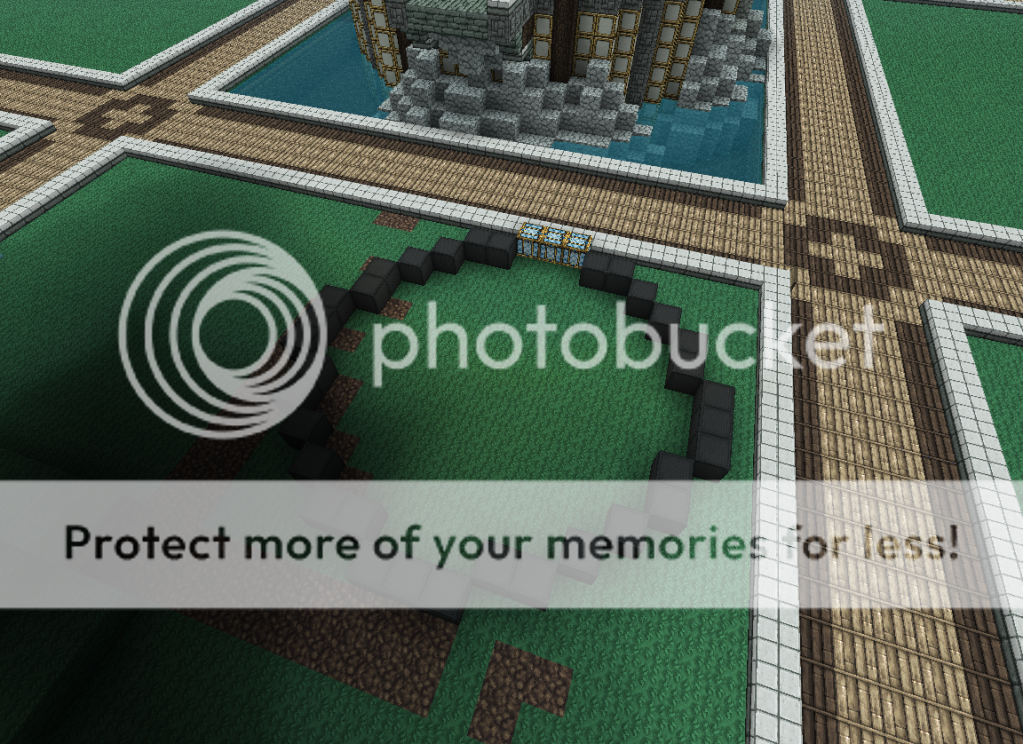
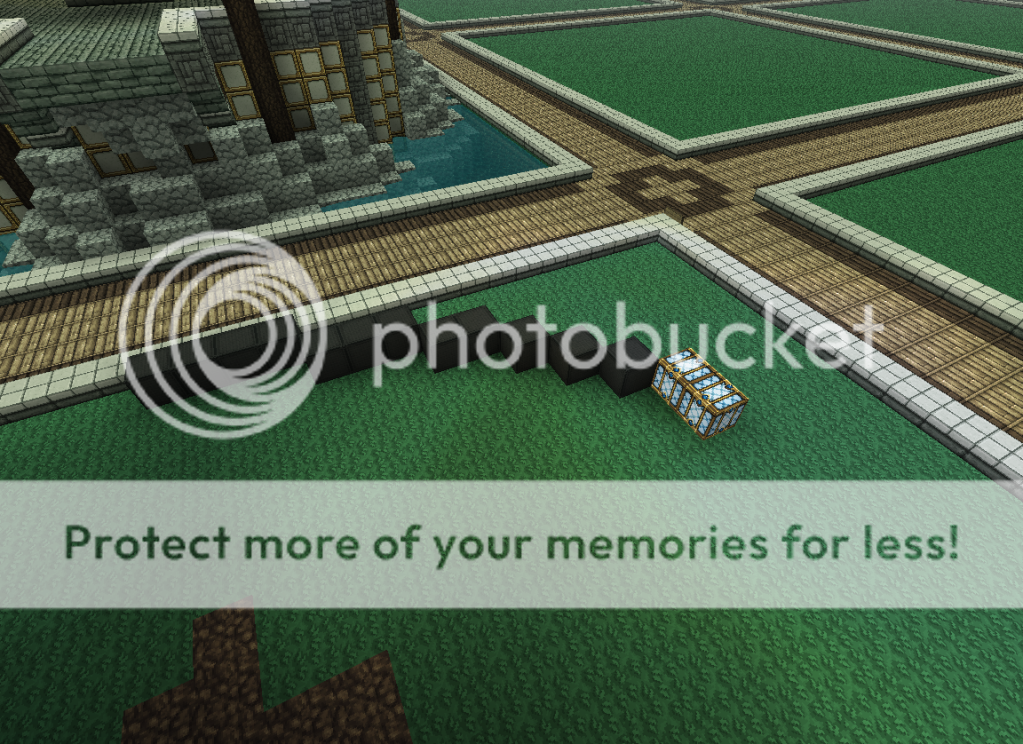
First off, as Io ve mentioned, youo ll need to figure out how large of a base you want. The image below highlights what the base of the circle is. It can be any of the 4 sides. The base has to be 2 blocks or larger in order for this formula to work. Any size larger than 2 will do. You can even have a base 100 blocks wide. The first step is to place base side down.
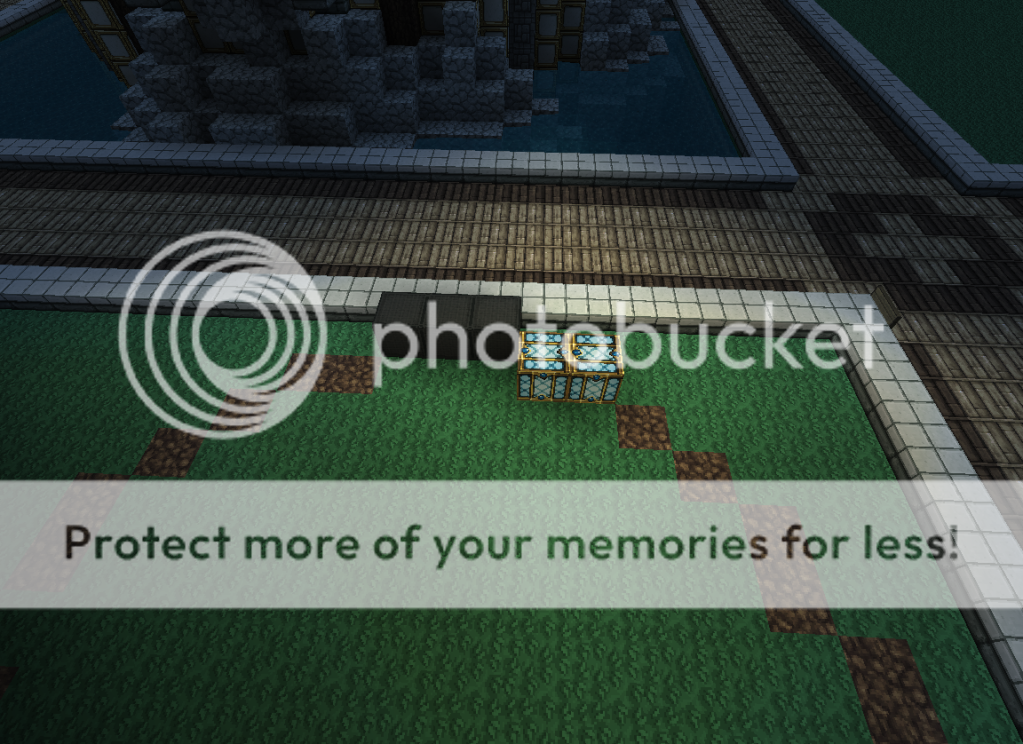
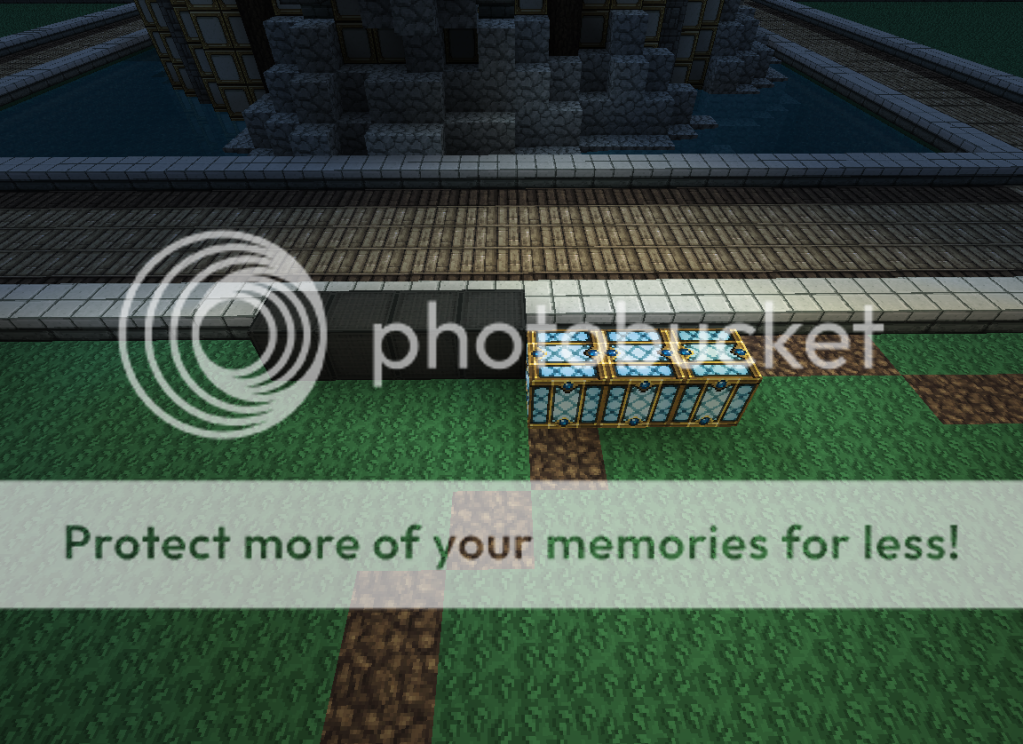
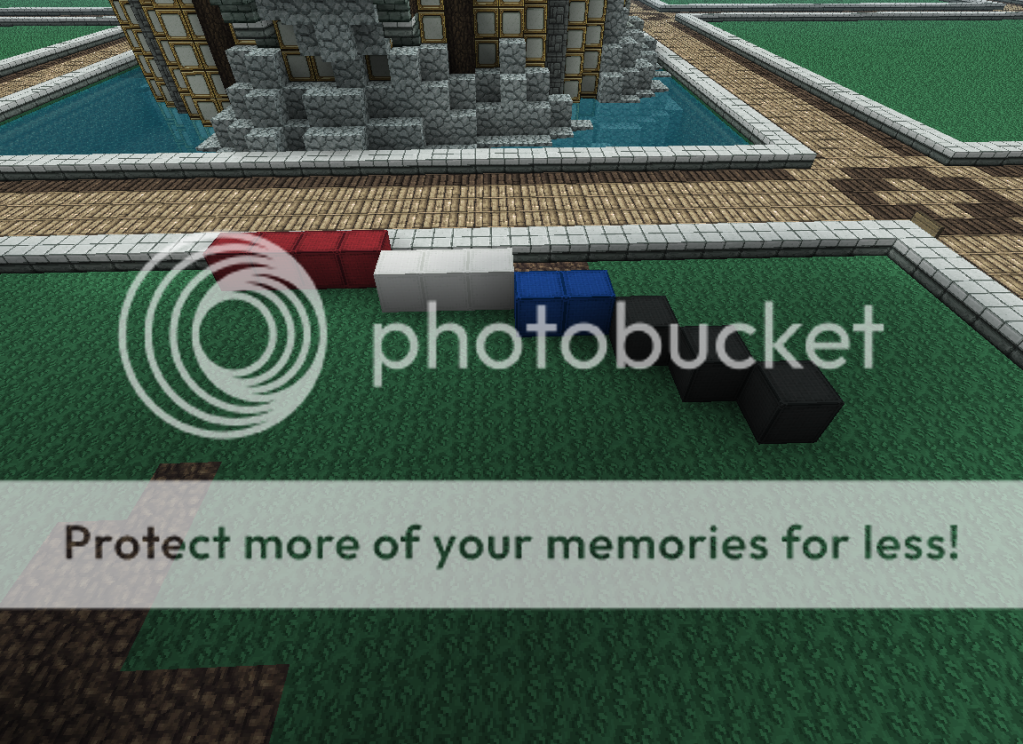
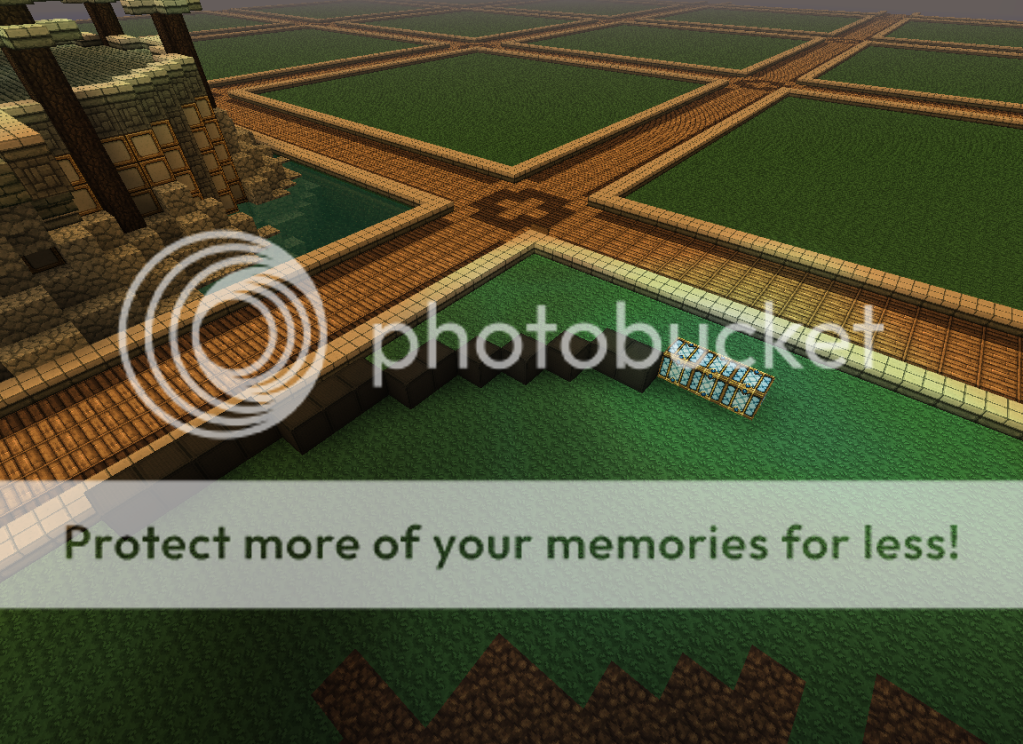
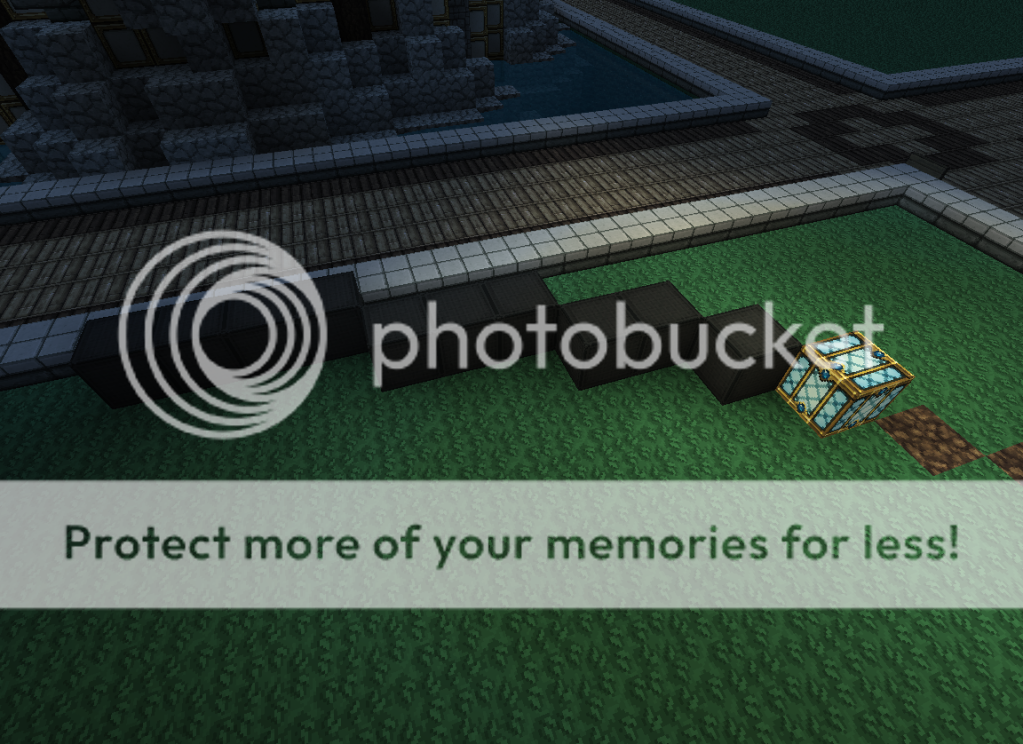
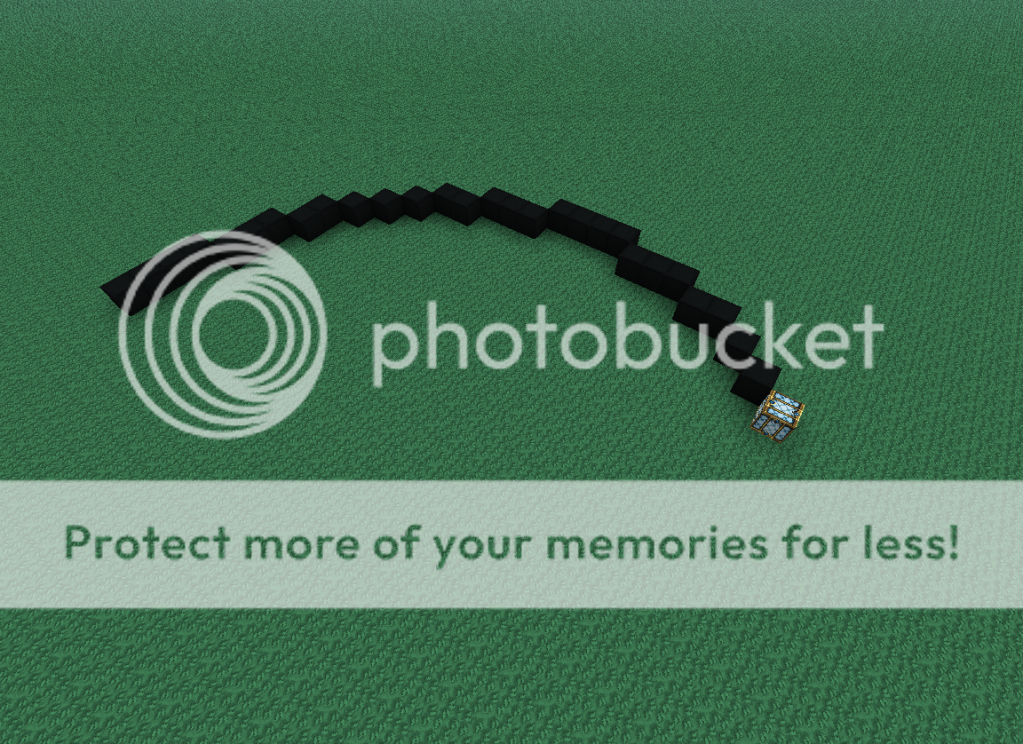
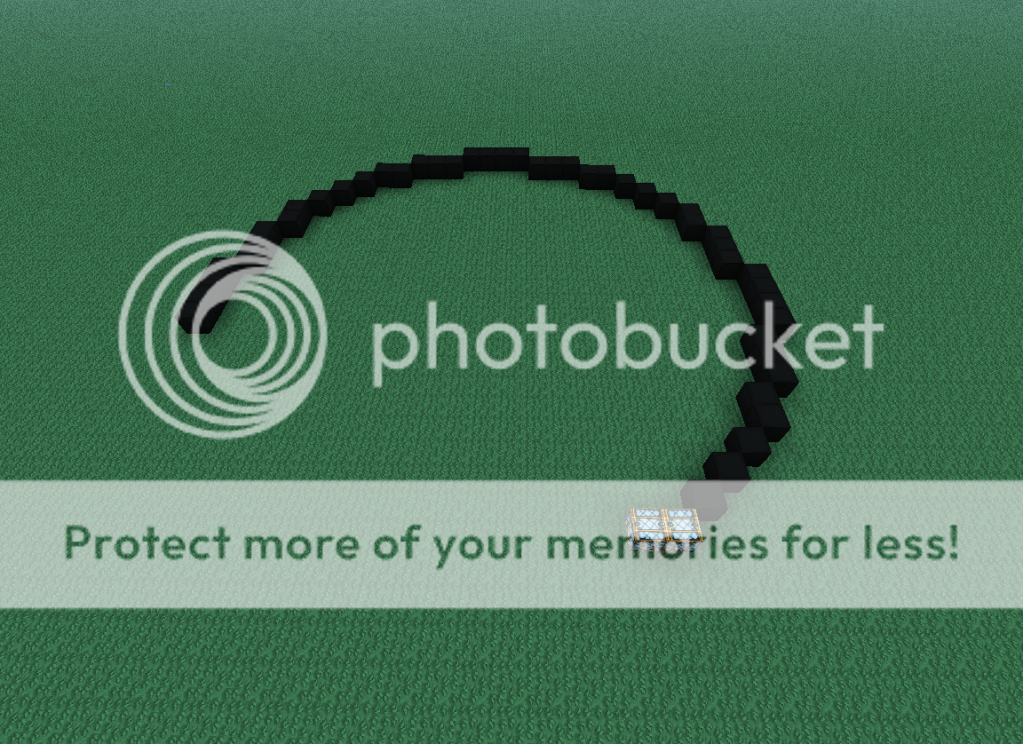
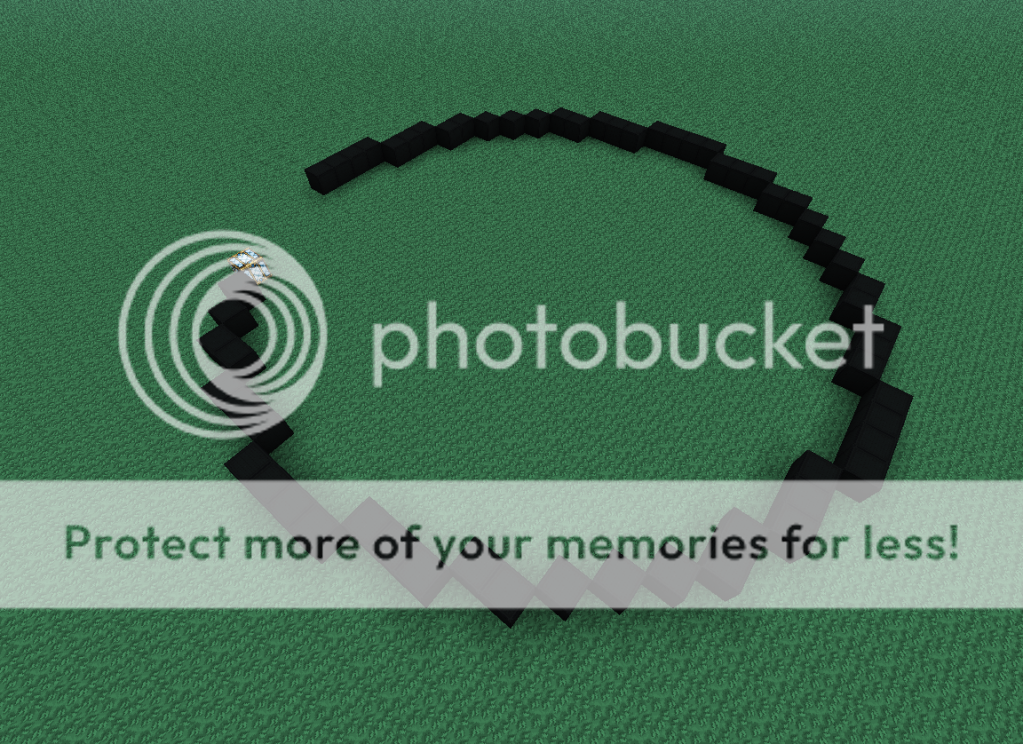
Next we have to create the first side of the circle. Yes, Minecraft circles have sides. A circle virtually has 4 sides, but lets focus on the first one. To simplify things, weo ll build this circle in a clock-wise motion. Place a row of the same number of blocks as the base, minus one, clock-wise or diagonally from the base. The image below highlights the new blocks in the position you shouldo ve placed them.
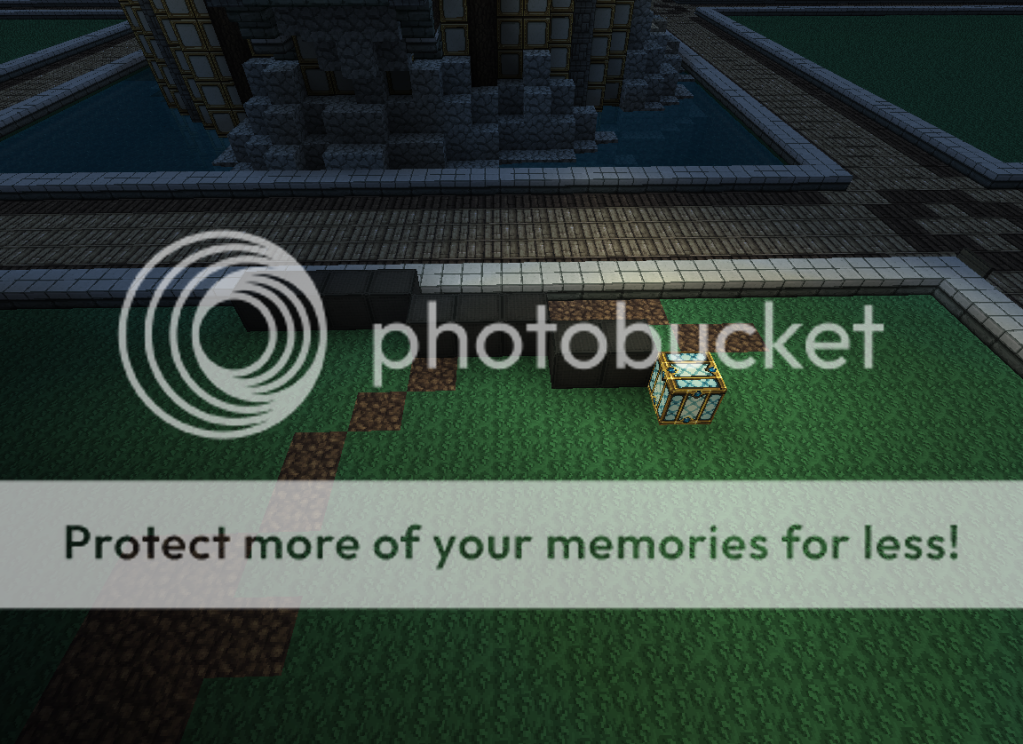
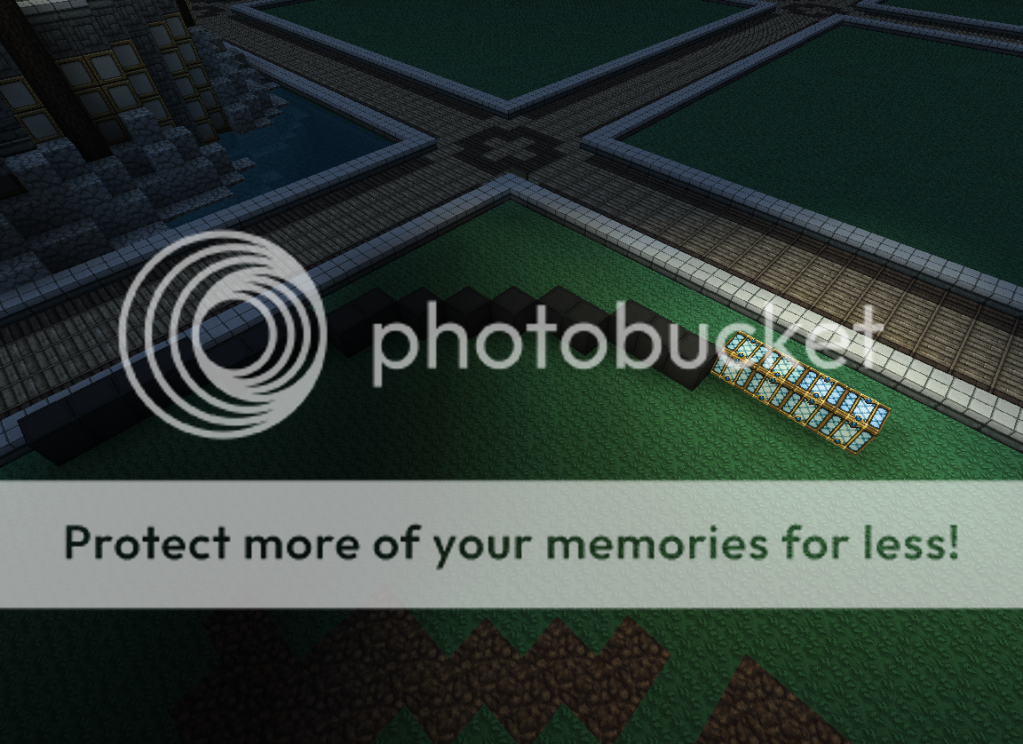
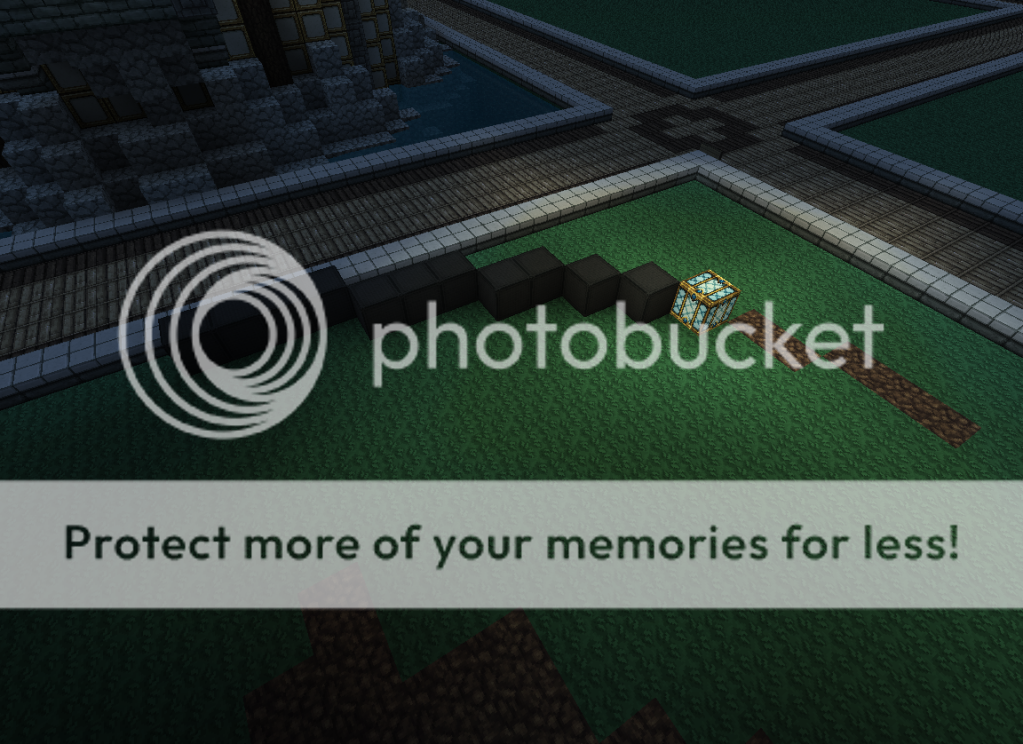
Now we want to repeat this step until weo re left with 1 block. The images below will show the process of positioning and subtracting.

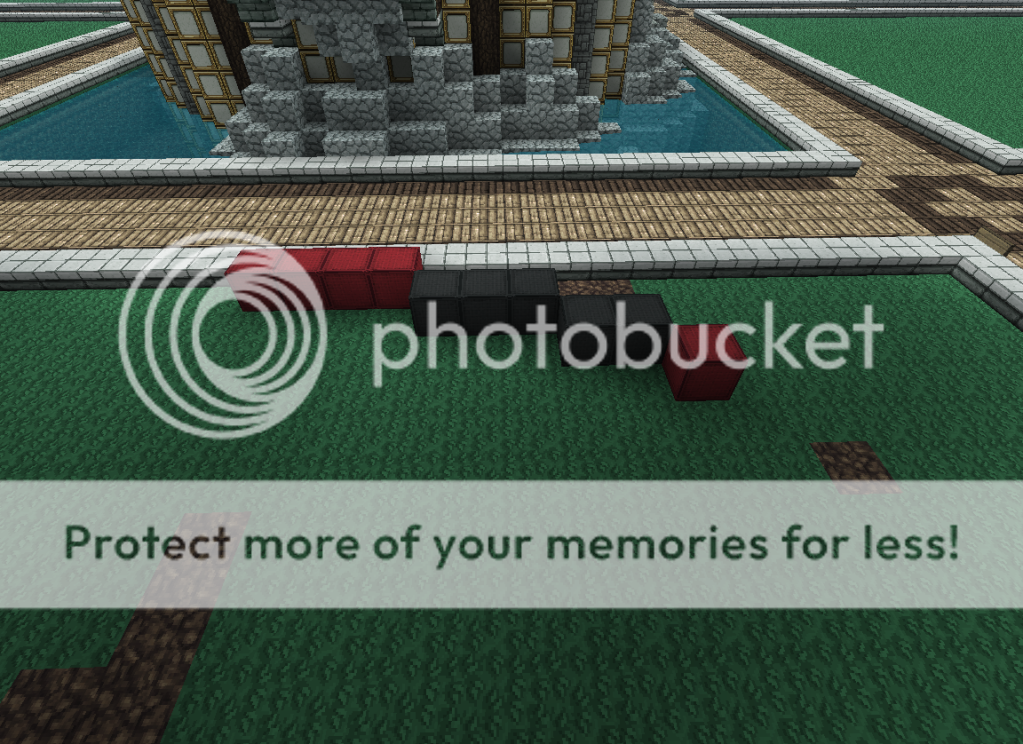
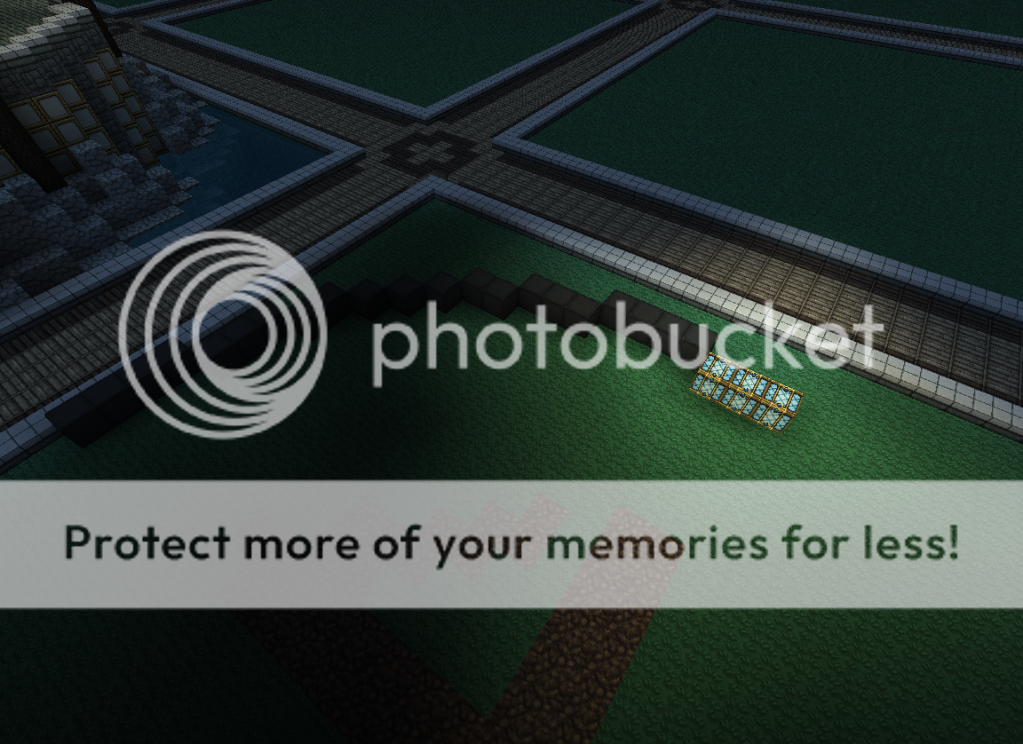
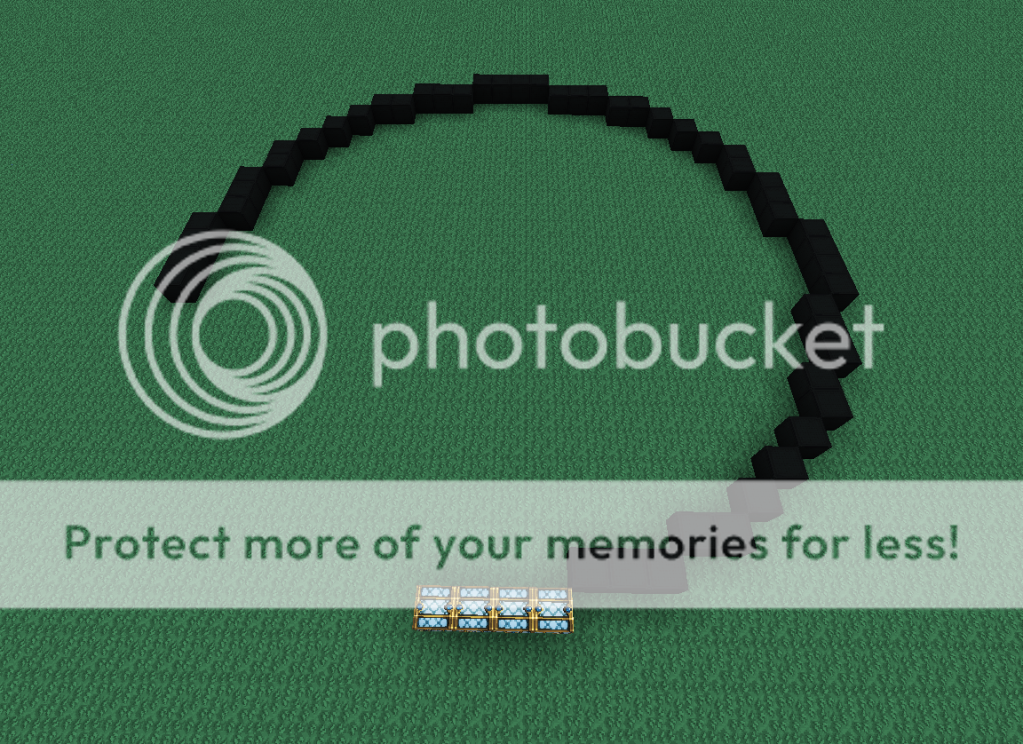
Alright, now we can begin on the hardest part, which isno t really hard at all. It may be a bit confusing though. If you cano t understand what is done in this step, study the images below. Each o intervalo is in a different color. Look at the o sideo that you created. Each time a row breaks off, it is an o intervalo . In the example below there are 3 intervals. Place a block clock-wise or diagonally from the last block placed for each interval you have. You should end up with an equal number of single blocks to the number of intervals on your base side. Again, if you find this confusing, study the images below.
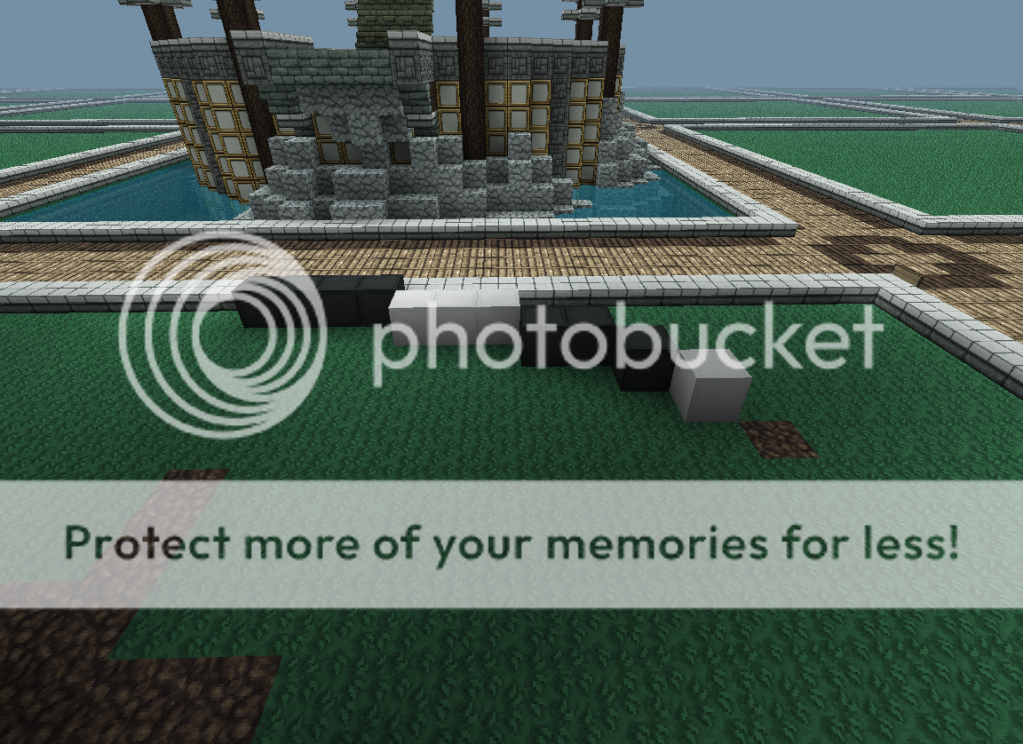
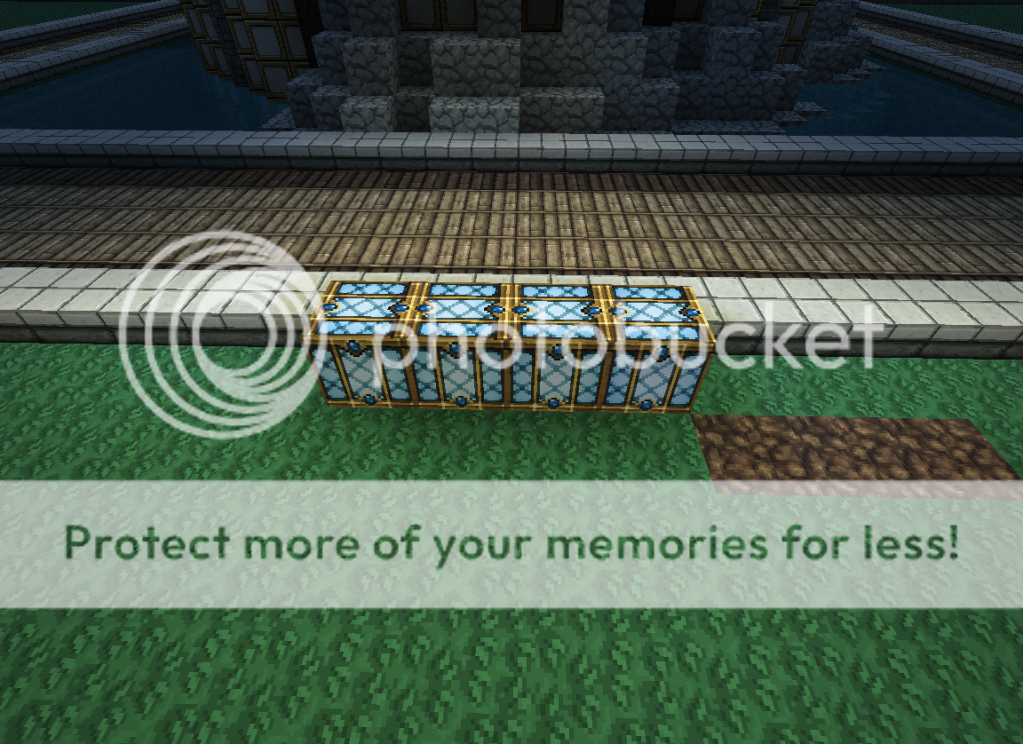
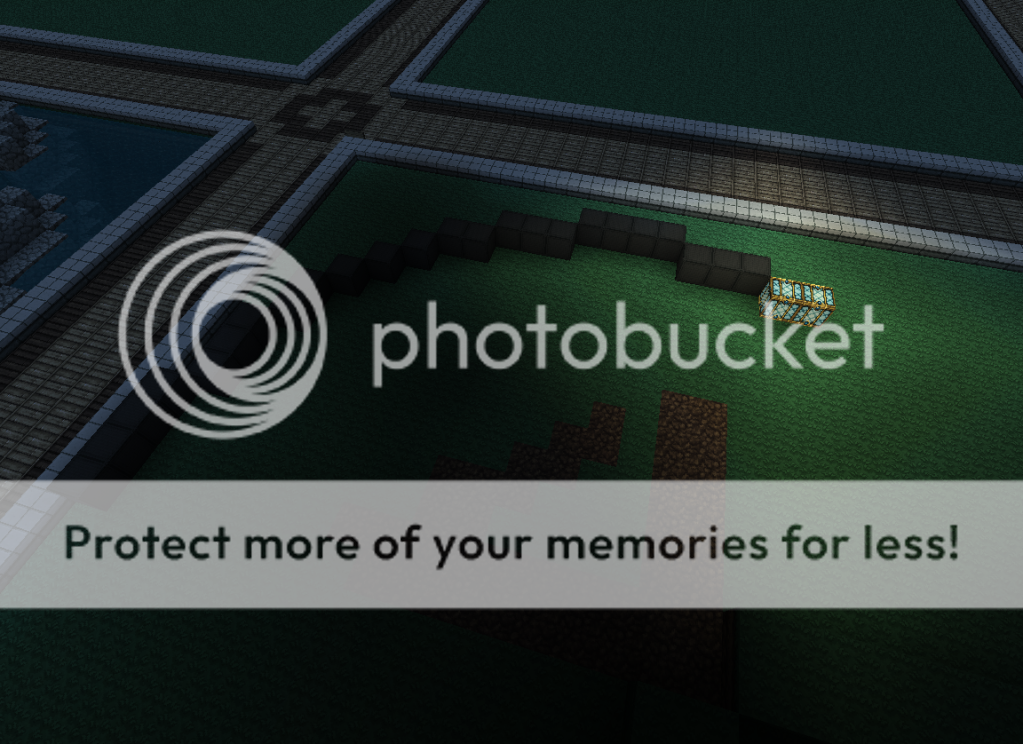
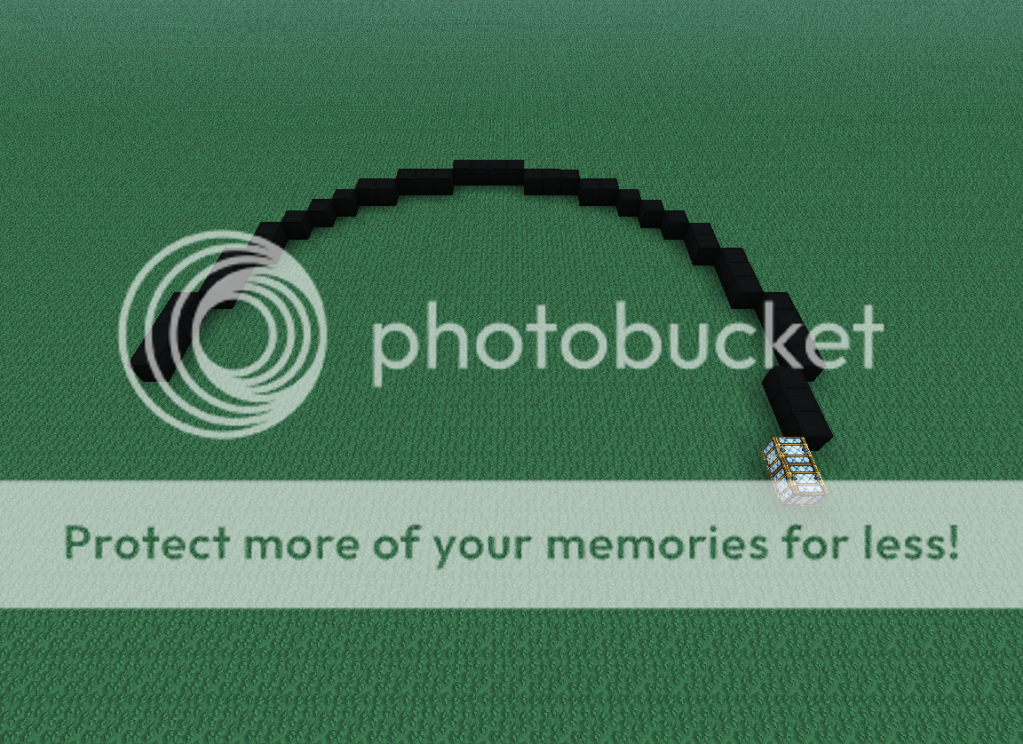
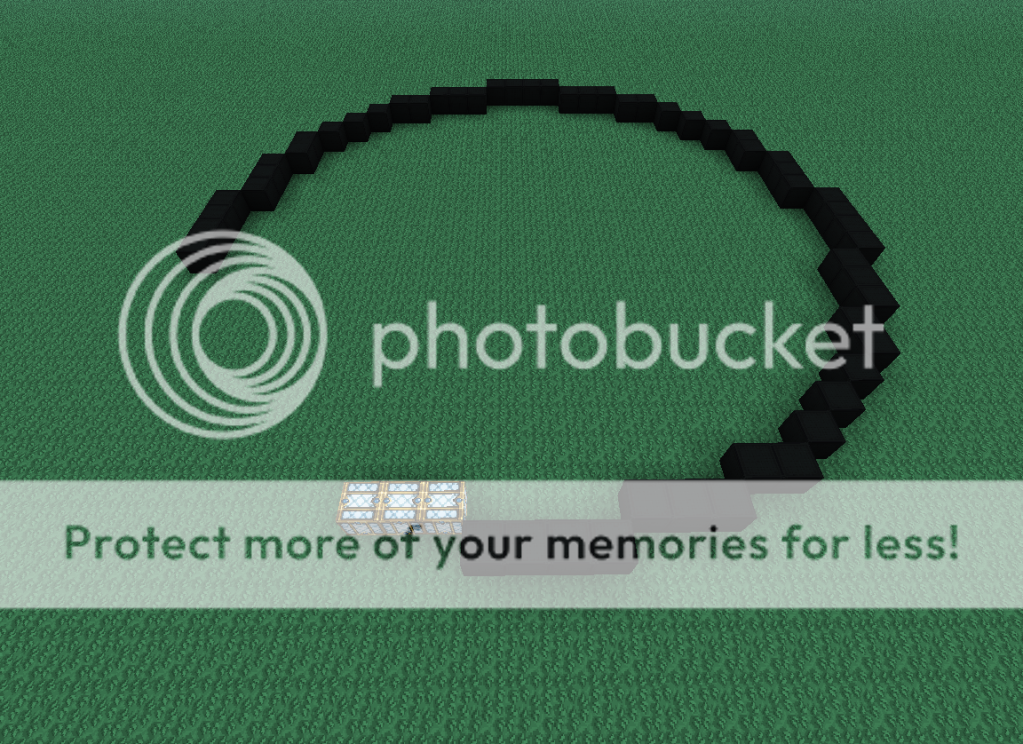
Sweet, weo re done the hard part! The next step will seem very familiar. Weo re basically just placing the blocks weo ve placed before in reverse. Place 2 blocks in a row at a 90 degree or a right angle from the base side, and diagonal or clock-wise from the last single block. The image below will show you what it should look like.
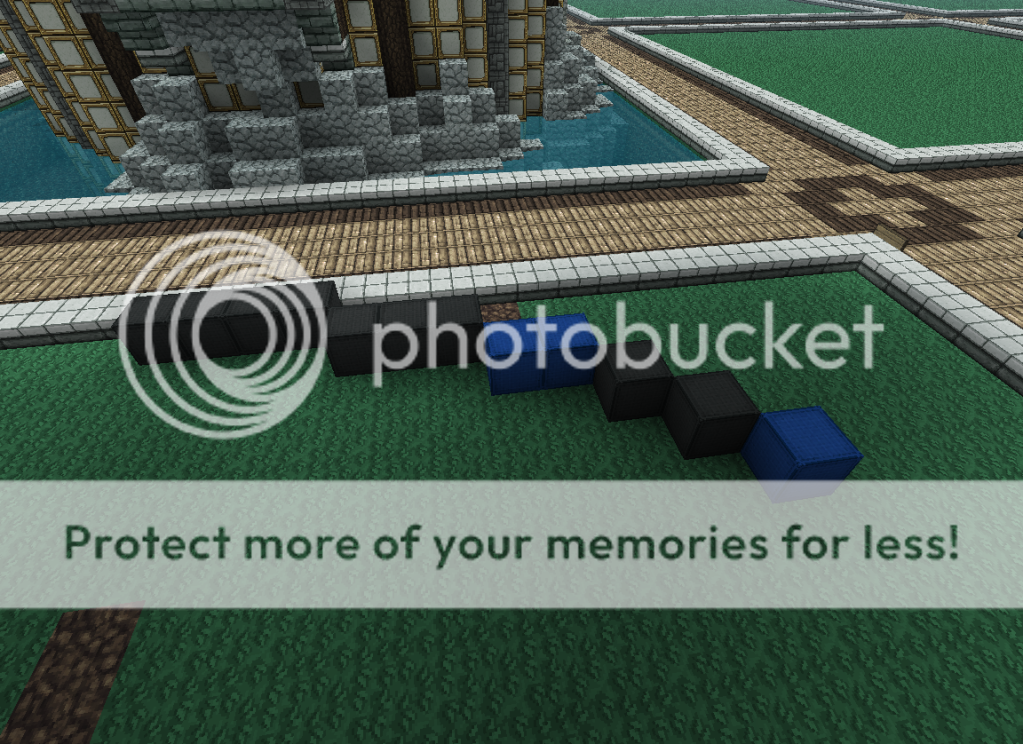
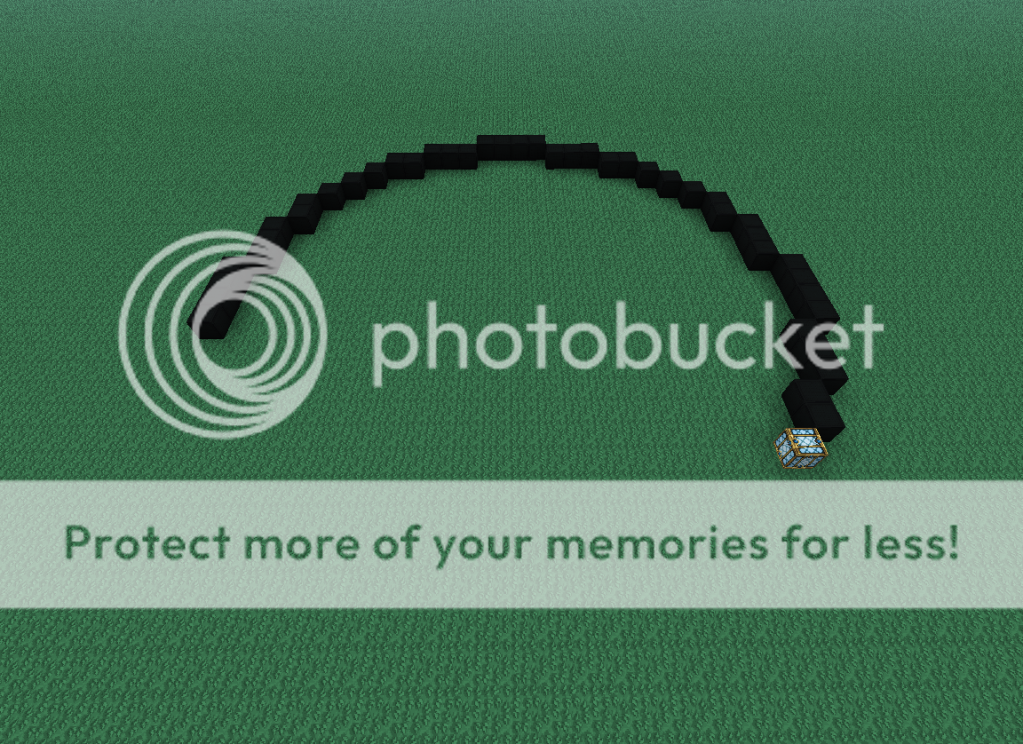
Now we want to repeat this step, adding another block each time until we have the same number of blocks as the base. The images below will show the process of positioning and adding.
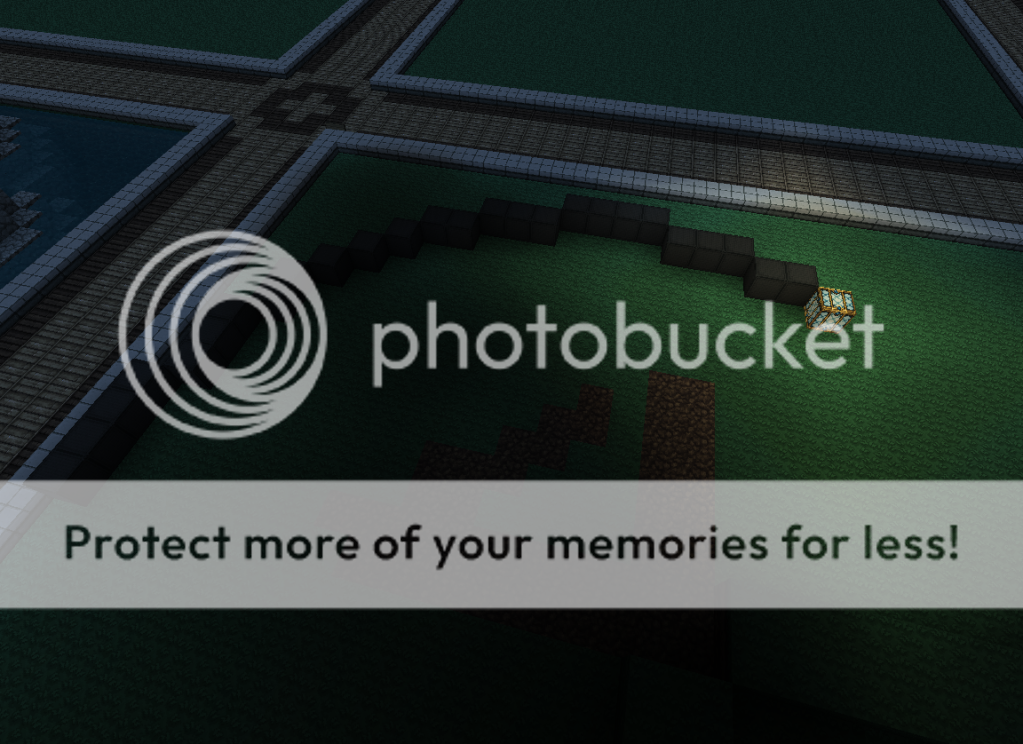
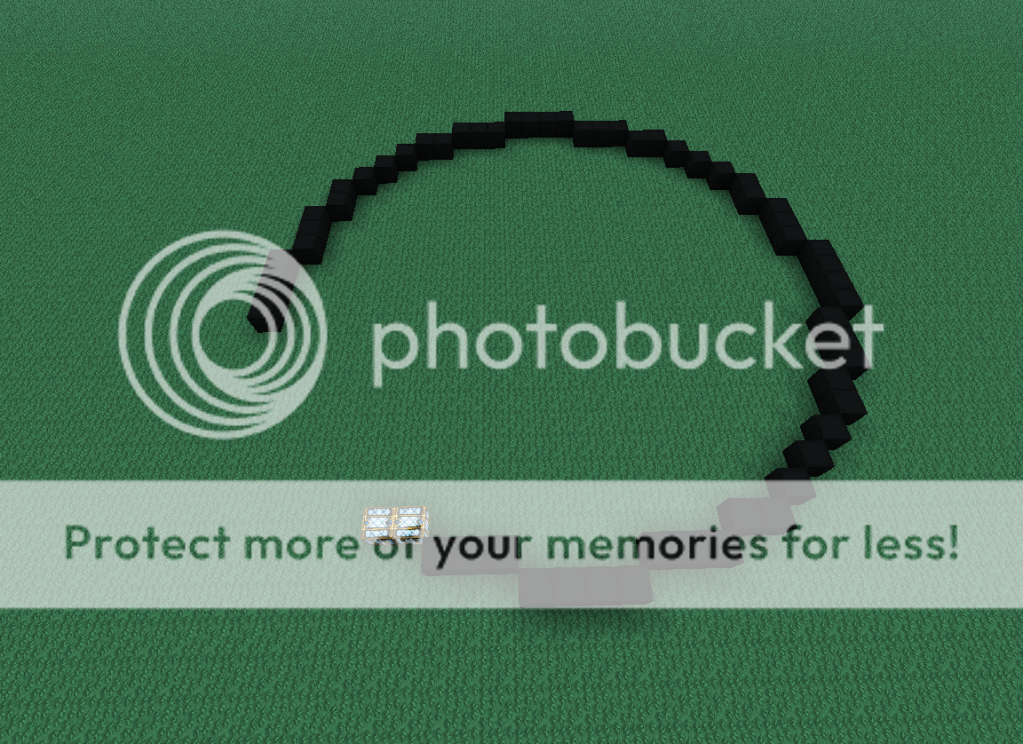
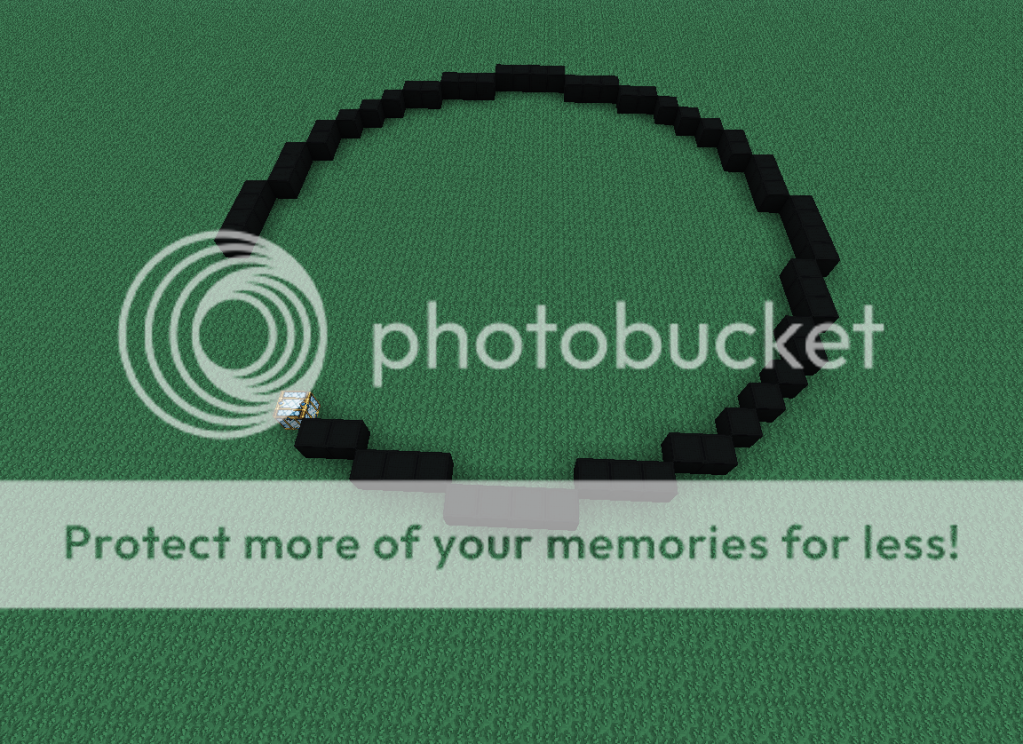
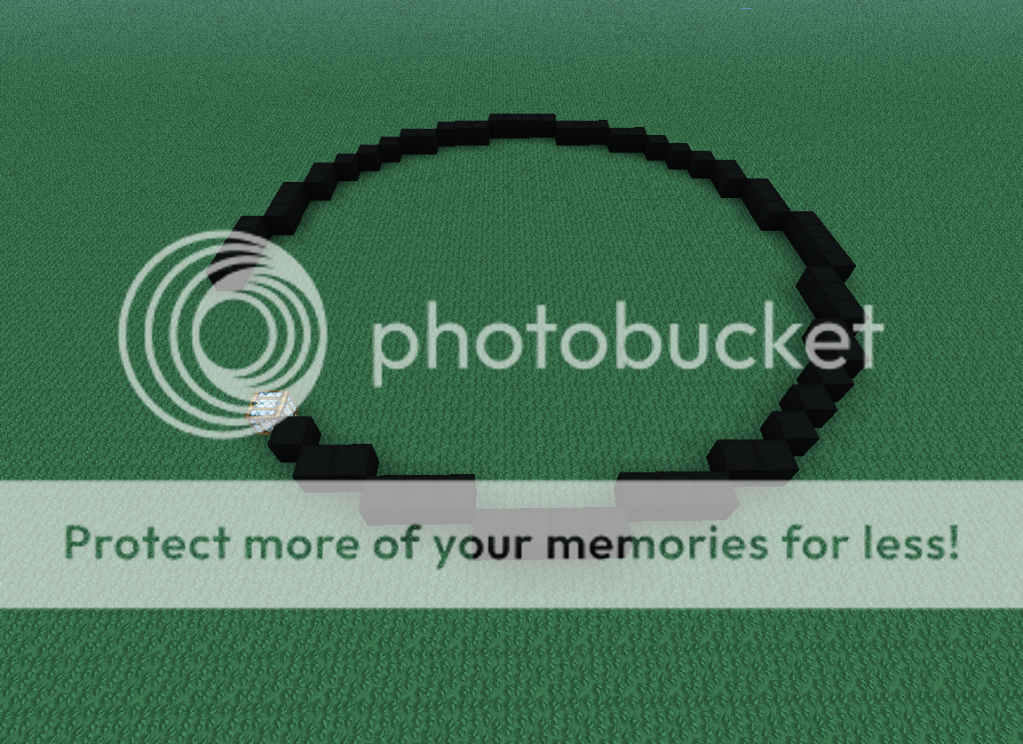
Weo re finally done the circle. Easy right? All you have to do from this point is repeat the steps until your circle is complete. The images below will show a summary of the entire process step-by-step.


Hopefully this guide helped you create your first or one of your first perfect circles! And hopefully it was as easy as I made it sound. Thanks for reading! Please subscribe for more guides, and diamond if it helped you! Also, I build quite a bit, and have my own collection of creative structures uploaded on the site. Please have a look at them if you have time.
You will now be able to build:
Circles
Cylinders
Circular Arches
Domes
You will be able to learn:
Spheres
Ellipses
First off, as Io ve mentioned, youo ll need to figure out how large of a base you want. The image below highlights what the base of the circle is. It can be any of the 4 sides. The base has to be 2 blocks or larger in order for this formula to work. Any size larger than 2 will do. You can even have a base 100 blocks wide. The first step is to place base side down.
Next we have to create the first side of the circle. Yes, Minecraft circles have sides. A circle virtually has 4 sides, but lets focus on the first one. To simplify things, weo ll build this circle in a clock-wise motion. Place a row of the same number of blocks as the base, minus one, clock-wise or diagonally from the base. The image below highlights the new blocks in the position you shouldo ve placed them.
Now we want to repeat this step until weo re left with 1 block. The images below will show the process of positioning and subtracting.
Alright, now we can begin on the hardest part, which isno t really hard at all. It may be a bit confusing though. If you cano t understand what is done in this step, study the images below. Each o intervalo is in a different color. Look at the o sideo that you created. Each time a row breaks off, it is an o intervalo . In the example below there are 3 intervals. Place a block clock-wise or diagonally from the last block placed for each interval you have. You should end up with an equal number of single blocks to the number of intervals on your base side. Again, if you find this confusing, study the images below.
Sweet, weo re done the hard part! The next step will seem very familiar. Weo re basically just placing the blocks weo ve placed before in reverse. Place 2 blocks in a row at a 90 degree or a right angle from the base side, and diagonal or clock-wise from the last single block. The image below will show you what it should look like.
Now we want to repeat this step, adding another block each time until we have the same number of blocks as the base. The images below will show the process of positioning and adding.
Weo re finally done the circle. Easy right? All you have to do from this point is repeat the steps until your circle is complete. The images below will show a summary of the entire process step-by-step.
Hopefully this guide helped you create your first or one of your first perfect circles! And hopefully it was as easy as I made it sound. Thanks for reading! Please subscribe for more guides, and diamond if it helped you! Also, I build quite a bit, and have my own collection of creative structures uploaded on the site. Please have a look at them if you have time.
You will now be able to build:
Circles
Cylinders
Circular Arches
Domes
You will be able to learn:
Spheres
Ellipses
| Tags |
4 Update Logs
Update #4 : by MasterChing 08/01/2012 8:34:51 amAug 1st, 2012
Added tech chart.
LOAD MORE LOGS
tools/tracking
1202683
6
how-to-create-a-perfect-circle-of-any-size-images-included
![[BEGINNER] How to Create A Perfect Circle of Any Size! (Images Included!) Minecraft Blog](https://static.planetminecraft.com/files/resource_media/screenshot/1230/2012-07-27_214825_3049533_thumb.jpg)
 Kypickle
 ajthepeach
 DarkwolfContent
 Siebbe
 LightingXII
 MistFaller
 GerardoPerry547
 waffles0

 WYHA-Storm
Create an account or sign in to comment.
I would also like to see the sphere guide. I understand that that would take a very long time though.
Thank you for the diamond and comment :D