


1,763
In this tutorial, I will show you step by step how to increase the resolution of a sprite while adding details not view-able in the lower-res image by using your mind and your creativity!
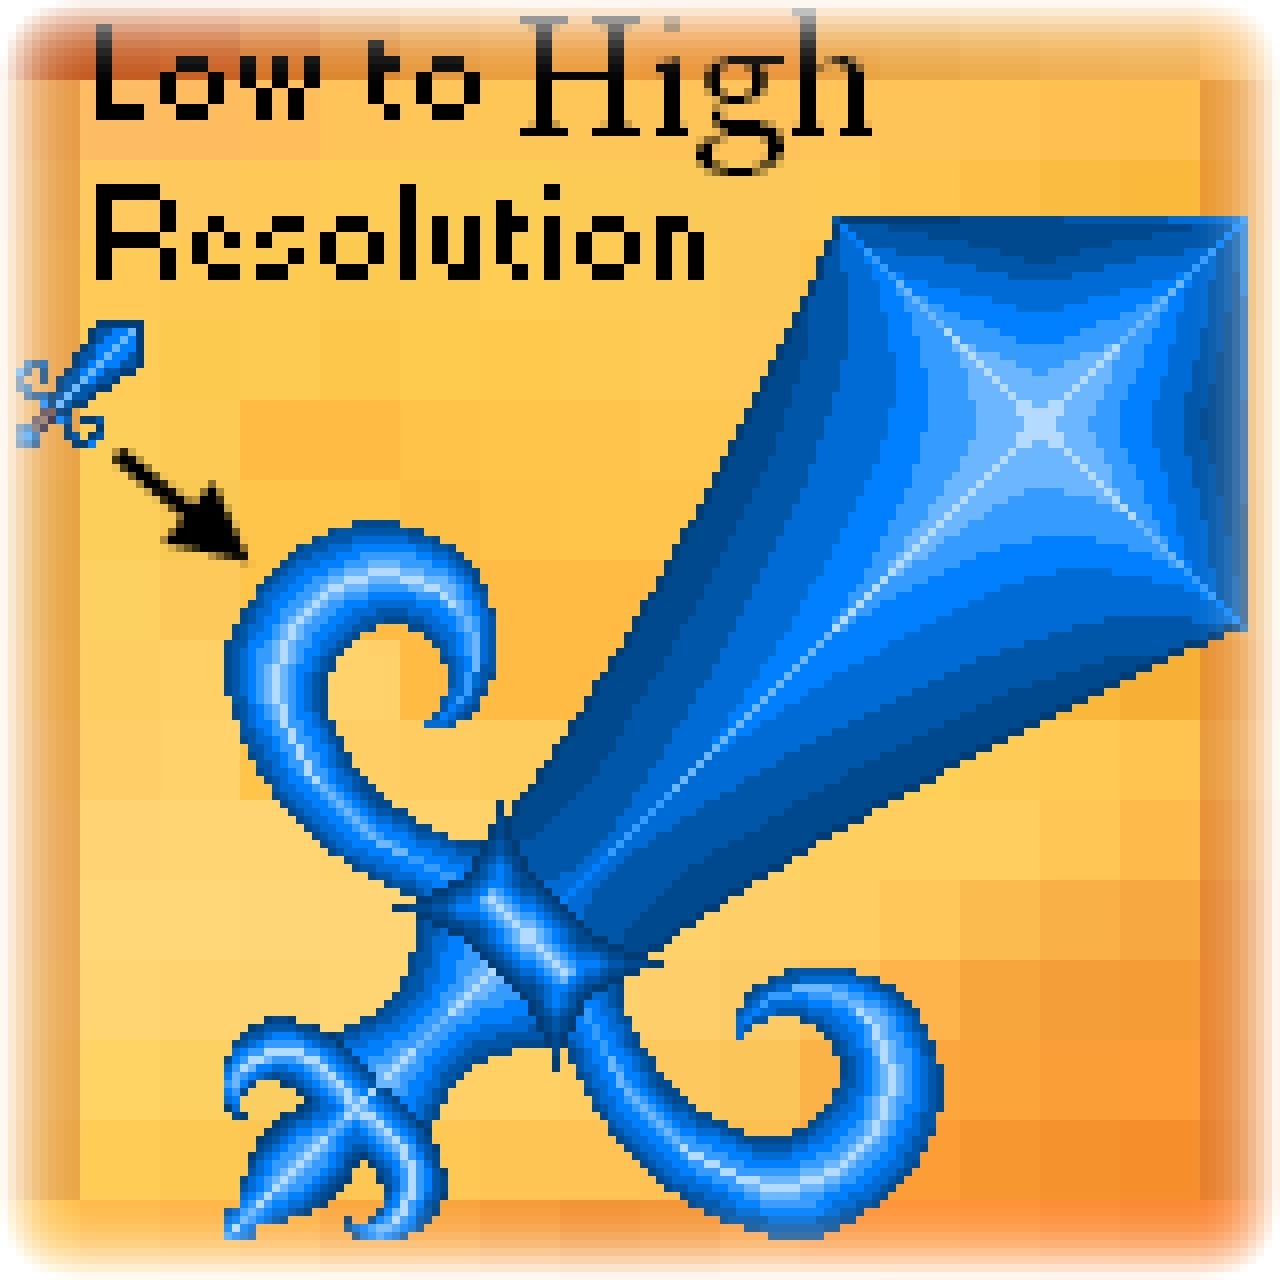
STEP 1: Find your image sprite
This is probably the most important part of the entire process. Not only do you need to find a cool image sprite, but you need to be able to visualize what it could look like with more detials. In my case, I made a sword for my Mystical Ore mod a while back and I'm going to be using that for the tutorial. So Here is the full size of my starting image:

This is probably the most important part of the entire process. Not only do you need to find a cool image sprite, but you need to be able to visualize what it could look like with more detials. In my case, I made a sword for my Mystical Ore mod a while back and I'm going to be using that for the tutorial. So Here is the full size of my starting image:
STEP 2: Increase Image size
This is one of the easy parts. Open your image in a image editor (I STRONGLY recommend Greenfish Icon Editor [GFIE].) and for GFIE double click on the page on the side and double the height and width of the image.
STEP 3: Produce Color Palette
This is one of the easy parts. Open your image in a image editor (I STRONGLY recommend Greenfish Icon Editor [GFIE].) and for GFIE double click on the page on the side and double the height and width of the image.
STEP 3: Produce Color Palette
For this, you need to find the lightest and darkest colors on the image and use the dropper tool to select them and then use the pencil to paint 2 pixels of each color in a line like this (L=Light color D=Dark color.): LLDD. After you do this, use the box selection tool and select the these pixels: LD. Then at the title bar, click on "Filters" and select "Average". this will produce a color directly in between the 2 selected. Another way you can do this is select the main color of the sprite and use that. Do this step multiple times with the averaged, light and dark colors until you get a color palette of about 7 colors.
STEP 4: Smooth Image and Shade
Once you have your color palette, I recommend selecting the 2nd darkest color and filling in the entire section you will be working on. Then use the pencil and eraser tools to smooth out the lines of the sprite while using your mind to envision if the lines should be slight curves or of curves should be arcs and so on. Once you've done that, start with the lightest color and produce similar shading on the higher res image as is on the lower res one. Do this with all sections and (in my case) will come up with something like this:

You can see that I didn't have a full palette and I didn't add many details other than curves. The next time I added more colors however:

STEP 5: Add Detail
STEP 4: Smooth Image and Shade
Once you have your color palette, I recommend selecting the 2nd darkest color and filling in the entire section you will be working on. Then use the pencil and eraser tools to smooth out the lines of the sprite while using your mind to envision if the lines should be slight curves or of curves should be arcs and so on. Once you've done that, start with the lightest color and produce similar shading on the higher res image as is on the lower res one. Do this with all sections and (in my case) will come up with something like this:
You can see that I didn't have a full palette and I didn't add many details other than curves. The next time I added more colors however:
STEP 5: Add Detail
This part I can't instruct you on, but just use your vision of what it could be, and draw it out. You may need to get the general shape at first and repeat STEP 4 to complete that portion.

After your have added all details possible you wanted to the image for that resolution, Go back and repeat STEPS 2-5. Improving detail as you increase resolution. Here is what I did from start to finish:
After your have added all details possible you wanted to the image for that resolution, Go back and repeat STEPS 2-5. Improving detail as you increase resolution. Here is what I did from start to finish:
-->-->--> -->
--> -->
--> -->
-->
For my sword, I only went to a resolution of 128x128px and it took me about a week to get it where it is now. Also, you can see the color palettes I was using in the corners of my pictures, as I didn't want to remove them yet.
| Tags |
tools/tracking
1206744
6
how-to-creatively-increase-the-resolution-of-a-image-sprite-in-5-steps


 TravisaInc
 SouperHeroMC
 S16LOL
 traincrisis
 Molitoola
 r3dleaf
 StormWatcher
 NobleBlackStone
 Christ8Pizza
Create an account or sign in to comment.
2. save as a high resolution :3 lol
becuase just making it smaller completely rips apart the image
i edit in paint get transparency elsewhere
oh could you possibly make just a download for the default minecraft texturepack (i cant find it anywhere :/)
and 1 thing i do say about that sword - im think the low-res 1 looks abit better the sword just looks abit curly in high res and looks like it has a sort of star in it :/ :/ :/ :? :/ :/ :/
and the thing about the low-res looking better. What i did to increase resolution was completely my creativity and so if you don't like my creativity then that's fine.