

- 909 views, 2 today

38
Hello, I often see tutorials on how to install things on Windows. I decided I'd post a tutorial on how to create a Resource Pack on Windows. For convenience, I have broken the tutorial into steps.
Step 1
Once you've downloaded those, create a folder on your desktop and name it whatever you like. For this example, I have named my folder Dr_Nickles -C Set ___ 1st Resource Pack. Just keep in mind that the name you give this folder will show up as the name of your resource pack. Now inside your newly created folder, create another folder and name this one assets. Inside assets create an additional folder and name it minecraft.
Step 2
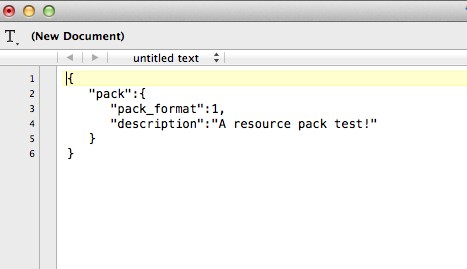
Now open Notepad++ and copy the following text into it:
{
"pack":{
"pack_format":1,
"description":""
}
}
Description displays the text below the Resource Pack name and picture
If you want to change your resource pack description, change the text that says "Resource pack sample" to something more fitting. The link is here
The link to the template. 1.8 Formats , OR-
you can open the minecraft.jar and find the files & folders for the textures & sounds
Once you've made your desired changes, click file and save as. In the corresponding window, save it as pack.mcmeta and then click save. Drag pack.mcmeta into your resource pack folder; in my case, I would drag it into Dr_Nickles -C Set ___ 1st Resource Pack
The resource pack name is the name of the folder the pack files are located
Step 3
Now lets set a picture for the resource pack that will be displayed when your choosing from the different resource packs in the selection screen. Just remember that the dimensions of the picture has to be 128 x 128. I'm going to take a random bucket of lava that I had on my desktop and just set it as the resource pack picture. Drag whatever you would like to set the picture as into GIMP and click file export. Name the picture pack.png, then click export and export again.
Step 4
Now we can get into editing the textures. Open the Default Resource Pack folder and open the assets folder, along with the minecraft folder inside of it. You should now see the following folders, font, icons, lang, music, records, sound, texts, and textures. The only folder we're interested in is the textures folder. Open it. Inside should be a whole host of folders, each has different textures for all the different items, blocks, mobs, and etcetera. Minimize the Default resource pack folder. Open your resource pack and open the assets folder, along with the minecraft folder inside of it. Create a textures folder and inside of it, a blocks folder. Click on the Default Resource Pack folder to un-minimize it and copy a texture from the blocks folder and paste it into your resource pack block folder. For the example, I chose the cobblestone.png and put it in my blocks folder.
Step 5
Open GIMP and drag whatever texture you chose into it. Now simply edit the texture and replace the default one that was in your resource pack.
To change any other textures just repeat the same process and make sure to put them in their correct folder.
Step 6
If you would like to change the sound of something, open the Default Resource Pack folder and open the following folders, assets, minecraft, and sound. You should now see several folders, all of which contain audio from the game. For this example, I'm going to open the damage folder; you may open any folder you like. Minimize the Default Resource Pack folder and open your resource pack. Open the assets folder along with the minecraft folder inside of it. Create a new folder and name it sound. Open the newly created sound folder. Since I chose to open the damage folder, I'm now going to create a damage folder inside of sound. Create whichever folder you opened inside of the sound folder.
Step 8
Un-minimize the Default Resource Pack folder and mentally select a sound file you would like to change. Keep in mind that if the sound file comes in 3 different versions you'd want to create 3 new versions. The sound files that I mentally selected were hit1.ogg, hit2.ogg, and hit3.ogg. Now open Audacity, and record something that you would like to replace your mentally selected sound files with. When you're done creating one of the sound files, click file export, name it the name of your mentally selected sound, hit save, and click ok in the next window that pops up. For this example, I recorded myself saying ouch three different times. Click choose file and select one of your sound files created in Audacity from your computer; then click the bubble for OGG and any quality of your choice.
Step 9
Open the resource packs folder and drag your resource pack into it.
Lastly, run Minecraft and you should be able to select your resource pack and view your changed textures and sounds.
Thank you for reading my tutorial, I hope it helped. If you have any questions or need help, don't be afraid to ask.
Part 2 -> How to package resource packs with worlds
Animated textures
-> Not supported in Version 1.6.x and later
-> 1.6.x and later use JSON to express animation and other effects
In Minecraft 1.5 or later, almost any block or item can be animated. Clocks, Compasses, Water, and Lava have special rules for animation (see Special Cases below). Animated textures require an additional .txt file to define the animation. The text file must have the same name as the image (such as "dirt.png.mcmeta " for "dirt.png") .
The format of the text file is simply numbers specifying which frames to pick (indices start from 0), separated by either commas or new lines. For example, if you would want to ping-pong an animation that has 4 frames, the contents of text file would look like this:
... or like this:
To make the animation slower than the default of 10 updates per second, the animation file can be specified to keep the frame for any number of ticks using an asterisk and the number of ticks to keep it. For example, to make the animation above four times slower, the file would look like this:
Read more about animated textures here
Step 1
Once you've downloaded those, create a folder on your desktop and name it whatever you like. For this example, I have named my folder Dr_Nickles -C Set ___ 1st Resource Pack. Just keep in mind that the name you give this folder will show up as the name of your resource pack. Now inside your newly created folder, create another folder and name this one assets. Inside assets create an additional folder and name it minecraft.
Step 2
Now open Notepad++ and copy the following text into it:
{
"pack":{
"pack_format":1,
"description":""
}
}
Description displays the text below the Resource Pack name and picture
If you want to change your resource pack description, change the text that says "Resource pack sample" to something more fitting. The link is here
The link to the template. 1.8 Formats , OR-
you can open the minecraft.jar and find the files & folders for the textures & sounds
Once you've made your desired changes, click file and save as. In the corresponding window, save it as pack.mcmeta and then click save. Drag pack.mcmeta into your resource pack folder; in my case, I would drag it into Dr_Nickles -C Set ___ 1st Resource Pack
The resource pack name is the name of the folder the pack files are located
Step 3
Now lets set a picture for the resource pack that will be displayed when your choosing from the different resource packs in the selection screen. Just remember that the dimensions of the picture has to be 128 x 128. I'm going to take a random bucket of lava that I had on my desktop and just set it as the resource pack picture. Drag whatever you would like to set the picture as into GIMP and click file export. Name the picture pack.png, then click export and export again.
Step 4
Now we can get into editing the textures. Open the Default Resource Pack folder and open the assets folder, along with the minecraft folder inside of it. You should now see the following folders, font, icons, lang, music, records, sound, texts, and textures. The only folder we're interested in is the textures folder. Open it. Inside should be a whole host of folders, each has different textures for all the different items, blocks, mobs, and etcetera. Minimize the Default resource pack folder. Open your resource pack and open the assets folder, along with the minecraft folder inside of it. Create a textures folder and inside of it, a blocks folder. Click on the Default Resource Pack folder to un-minimize it and copy a texture from the blocks folder and paste it into your resource pack block folder. For the example, I chose the cobblestone.png and put it in my blocks folder.
Step 5
Open GIMP and drag whatever texture you chose into it. Now simply edit the texture and replace the default one that was in your resource pack.
To change any other textures just repeat the same process and make sure to put them in their correct folder.
Step 6
If you would like to change the sound of something, open the Default Resource Pack folder and open the following folders, assets, minecraft, and sound. You should now see several folders, all of which contain audio from the game. For this example, I'm going to open the damage folder; you may open any folder you like. Minimize the Default Resource Pack folder and open your resource pack. Open the assets folder along with the minecraft folder inside of it. Create a new folder and name it sound. Open the newly created sound folder. Since I chose to open the damage folder, I'm now going to create a damage folder inside of sound. Create whichever folder you opened inside of the sound folder.
Step 8
Un-minimize the Default Resource Pack folder and mentally select a sound file you would like to change. Keep in mind that if the sound file comes in 3 different versions you'd want to create 3 new versions. The sound files that I mentally selected were hit1.ogg, hit2.ogg, and hit3.ogg. Now open Audacity, and record something that you would like to replace your mentally selected sound files with. When you're done creating one of the sound files, click file export, name it the name of your mentally selected sound, hit save, and click ok in the next window that pops up. For this example, I recorded myself saying ouch three different times. Click choose file and select one of your sound files created in Audacity from your computer; then click the bubble for OGG and any quality of your choice.
Step 9
Open the resource packs folder and drag your resource pack into it.
Lastly, run Minecraft and you should be able to select your resource pack and view your changed textures and sounds.
Thank you for reading my tutorial, I hope it helped. If you have any questions or need help, don't be afraid to ask.
Part 2 -> How to package resource packs with worlds
Animated Textures
Animated textures
-> Not supported in Version 1.6.x and later
-> 1.6.x and later use JSON to express animation and other effects
In Minecraft 1.5 or later, almost any block or item can be animated. Clocks, Compasses, Water, and Lava have special rules for animation (see Special Cases below). Animated textures require an additional .txt file to define the animation. The text file must have the same name as the image (such as "dirt.png.mcmeta " for "dirt.png") .
The format of the text file is simply numbers specifying which frames to pick (indices start from 0), separated by either commas or new lines. For example, if you would want to ping-pong an animation that has 4 frames, the contents of text file would look like this:
0,1,2,3,2,1
... or like this:
0
1
2
3
2
1
To make the animation slower than the default of 10 updates per second, the animation file can be specified to keep the frame for any number of ticks using an asterisk and the number of ticks to keep it. For example, to make the animation above four times slower, the file would look like this:
0*4,1*4,2*4,3*4,2*4,1*4TL:DR
Download the template from the link above.
inside your newly created folder, create another folder and name this one assets. Inside assets create an additional folder and name it minecraft.
Now open Notepad++ and copy the following text into it:
{
"pack":{
"pack_format":1,
"description":""
}
}
Save and Close it. The description is below the name. The name of it is the folder's name
Save it as pack.mcmeta
Create a logo for resource pack called pack.png and it needs to be 64x64 or 128x128, I don't know which one, but try both.
Use a paint-like program to change textures.
To make sounds. save the sound as a .ogg and use the name of that file for sound
To install it.
Run Minecraft and open Resource Packs and Open Folder
Place the files in a .zip file and place that newly created .zip into the resource pack folder
Select it
Ta Da! You got it working!
Read more about animated textures here
| Credit | SnowHawkKiller, checked01 (He exists on PMC) |
| Tags |
4 Update Logs
More Info on amimated textures : by Dr_Steve 03/14/2015 3:31:48 pmMar 14th, 2015
Added an additional link for more information on animated textures
LOAD MORE LOGS
tools/tracking
3229498
6
how-to-make-resource-packs-3229498


 ScotsMiser
 Dreadstrike Inferniclaw
 cutecatkid
 Nymphali22290
 A E Bunny
 Kypickle
 ajthepeach
 DarkwolfContent
 Siebbe

 WYHA-Storm
Create an account or sign in to comment.
Other than that, great job! It deserves a diamond. And if you want to see more about creating a pack from scratch, you can just look at my tutorial.