


871
To celebrate getting to level 42, I figured I would answer the ultimate question I've been asked. No, it isn't the answer to the ultimate question, life, the universe, and everything, to which had already definitively been answered. The ultimate question I've been asked by many people is how do I make the images for my builds? I will give an in-depth tutorial on how I render, and at the end, give a small tutorial on how to place a project in a real world location using Photoshop.
Chunky is a rendering software that is open sourced and is capable of adding somewhat realistic lighting to maps in Minecraft. It also adds some reflective qualities to some blocks, and gives glowstone and lanterns (when on) emitter qualities. You can download it for Mac, PC, and Linux here. Note that in this tutorial I am using the Mac version
Once you open the program, you will be prompted to pick a world save. Once loaded, you will get an overview of your world where your player last was. Move the screen over the area that you wish to render and zoom out as needed. Select the area by either clicking the chunks individually, or holding shift and selecting a large area with the mouse. Once your area is selected, right click, and you will be prompted to select where to save the render and to name the scene (this can help if you need to rerender)


A window will pop up, load the scene, and then a view screen will pop up. There are five tabs in the render control window, and by tinkering with them, you can achieve your desired effect


The Depth of field deals with how blurry things will be that are not in focus. A low value will mean the render will be very blurry, a high value will leave it much clearer. The Focal offset sets the focal range. These tools are great if you want to create a macro kind of render, but are not usually needed for larger builds.

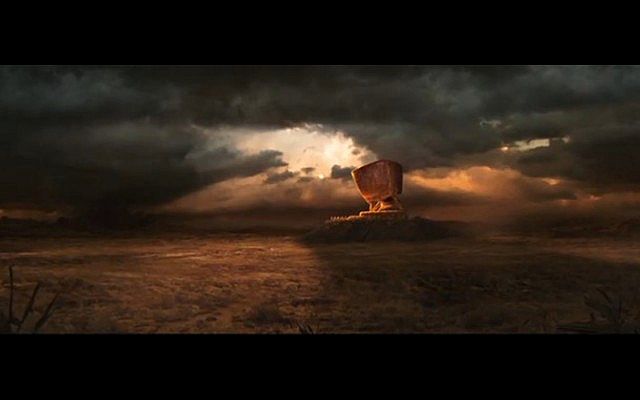
To create my typical render, which gives my glass that realistic glare and reflective qualities, I position the sun behind the build I am rendering, and place it in the shot, usually off on one corner. The lack of direct light on the glass surfaces allows the reflected light to take dominance on the surface, giving it that effect. This also allows me to place a lens flare later, something of which I enjoy doing in my renders.


Now that you have your render setup finish, all you need to do is press start and wait. You can pause the render at any time, and it will do a render dump every interval that you set it (i usually have mine at 500 frames). You can also save your render at any time. Just know that rendering does take up a lot of a CPU's power, so try to avoid doing other graphically or computer intensive things while rendering as it could either slow down the render significantly, crash the program, or even crash your computer. Always check on your renders periodically.

Now that you have your render, you can begin to post-process. If you used a sky map, there are only a few things you need to do to finalize it. First, adjust the brightness and contrast to fit your taste. You can use one of four methods to do this. First is to use the brightness and contrast sliders, which is fairly straightforward. The second is by exposure, where you adjust the exposure and gamma. The third is by curves, where you adjust a curve to either highlight the dark or light areas of your image. And the last is levels, which essentially is similar to curves. Then, what i like to do is add a lens flare, which is in the filter tab under render, and use the flare or flares you like. I use a combination of the 105mm, 35mm, and 50mm flares as I feel they give the sun a more realistic glare, and I enjoy the layering of the "light artifacts."


If you don't use a sky map, the prep will be a little more complicated. Due to the usefulness of this in creating renders in general, I will use one of my renders from a studio project. The ideas are the same, but I will go into more depth than most of you will need to go for most of your Minecraft renders. while this goes above and beyond what would normally be needed for a minecraft render, these are tips that you should be aware of, and if you are interested, should try out for yourself.
Start of with the image you wish to place your render in. Right click its layer and click layer from background so that you free its layer. Place a sky behind your background layer and erase the sky in the original image. Then place the image of your render over it. Erase any unnecessary parts of the rendered image (ground plane, sky, anything that you don't want in the final image). Then, select the render, and distort it using transformation to make to in the proper perspective with the rest of the image.


Now that the render is placed properly, duplicate the background layer and place it over the render layer. Now you must erase everything from the foreground layer that should be behind your render, leaving only the foreground. This can be tedious if you have various complicated shapes like trees or something in front, but it adds a realm of realism to your render. It helps if you copy your render layer and paint the copy a really bright color (conserving the shape of the render), like using a cyan or a bright green.


Once that is finished, you can just add the lens flare, if you wish, but if you are familiar with this render, as it is from a project I have shown this render before, I went a step further by adding reflections, puddles, and rain.
To add the rain. I generally add four levels of rain: overlay, background, middle ground, and foreground rain. The overlay used a new later, and use the noise filter. Then motion blur it in the direction you want your rain to go in. The lower the opacity of the layer. Thee next three layers are exactly the same as each other, with the only difference being that the background is smaller, the foreground is bigger. Simply use the brush, and adjust the preset so that there is a scatter and slight angle.


To make a rain drop brush, open a new Photoshop file and make it about 100 x 300, and place a dot on one of the far side at about 10pt. Then motion blur it towards the other side until it is fairly long. Then save it as a brush in the presets. Go back to your render, and use your rain drop brush. Make it white or grey, and go to the brush preset window. Then apply it to your render as you see fit. Below, i've included a different render of a yacht i designed that uses the rain drop brush in a different way to make it appear like water is coming off of the hulls.

To add all of the reflections (for puddles, light reflection on the road, and in the glass both on the render and the building opposite to the render), we will create multiple duplicate layers for each reflection. In each layer, you will use a mask of the areas you want the reflections to show up. What this does is provide a hole for an image to poke through in the areas you want, but not where you don't, while preserving the images of the layers. The layer behind (the actual reflection) must be flipped asking is respective axis. The glass reflections are flipped along a vertical axis, the puddles and the haze of the road are along the horizontal axis. To get the hazy reflection on the road, I used the burn to to make the road darker, and then I took the reflected image, and used a Gaussian blur filter and made it transparent.

That is basically everything I have in rendering for Minecraft (and then some). Hope this answers some of your questions and helps you. Thank you for reading.
Also, thank you for making this the tenth post i've had reach the popular reel. Thank you all for the support and encouragement.

Chunky
Chunky is a rendering software that is open sourced and is capable of adding somewhat realistic lighting to maps in Minecraft. It also adds some reflective qualities to some blocks, and gives glowstone and lanterns (when on) emitter qualities. You can download it for Mac, PC, and Linux here. Note that in this tutorial I am using the Mac version
Once you open the program, you will be prompted to pick a world save. Once loaded, you will get an overview of your world where your player last was. Move the screen over the area that you wish to render and zoom out as needed. Select the area by either clicking the chunks individually, or holding shift and selecting a large area with the mouse. Once your area is selected, right click, and you will be prompted to select where to save the render and to name the scene (this can help if you need to rerender)
A window will pop up, load the scene, and then a view screen will pop up. There are five tabs in the render control window, and by tinkering with them, you can achieve your desired effect
General
The General tab is your starting point. You can save and load scenes, reload chunks, edit the screen size, and edit how colors are rendered (by biome and through gamma correction), as well as how water is rendered (clear, still). This is usually the tab i have open during the render, as usually all other settings are in place, but you can have any tab open during a render and the information at the bottom will still be present. This information at the bottom allows you to see the progress of your render.Camera
The next thing you want to do is edit how the camera behaves. The three sliders offer different ways for the camera to behave. The first slider is field of view, and this is your zoom. It also changes the focal angle of the lens, so a higher an angle, the more fish eyed the lens will be. Usually, a good focal length that is fairly realistic is around 30, but for stylized reasons, i usually do around 50-70, as the higher angles allow for my builds to seem taller than they actually would in a standard render (to treat it like minecraft would, which distorts things at height).The Depth of field deals with how blurry things will be that are not in focus. A low value will mean the render will be very blurry, a high value will leave it much clearer. The Focal offset sets the focal range. These tools are great if you want to create a macro kind of render, but are not usually needed for larger builds.
Lighting
The next thing i edit is the lighting tab. Lighting tab has four sliders, one that controls the brightness of emitters (glowstone, lamps, torches), one that controls brightness of the sun (which you can control the color as well), one that controls the pitch of the sun (height in the sky), and one that controls the yaw of the sun (position laterally of the sun). Emitters can be turned off too speed up a render, and the sun can be turned off to make a night render. The sun color can be changed to give your render the effect of being at dusk or dawn, but I use pastel oranges and yellows for this to avoid the color becoming too over poweredTo create my typical render, which gives my glass that realistic glare and reflective qualities, I position the sun behind the build I am rendering, and place it in the shot, usually off on one corner. The lack of direct light on the glass surfaces allows the reflected light to take dominance on the surface, giving it that effect. This also allows me to place a lens flare later, something of which I enjoy doing in my renders.
Sky
The sky tab is where you insert your skymap. A skymap is a high resolution 360 degree panoramic image of a sky that chunky uses to place a realistic sky in your world. You can use the slider to rotate it to where you want it. If you choose not to use a skymap, the sky color will change with the position of the sun.Advanced
The advanced tab is rarely used by me, but you should know what these things do. The ray depth deals with how many times a light ray is allowed to bounce. A higher number results in a more realistic render, but increases the render time drastically. Gamma increases the brightness of a render. The higher the number, the brighter the render.Now that you have your render setup finish, all you need to do is press start and wait. You can pause the render at any time, and it will do a render dump every interval that you set it (i usually have mine at 500 frames). You can also save your render at any time. Just know that rendering does take up a lot of a CPU's power, so try to avoid doing other graphically or computer intensive things while rendering as it could either slow down the render significantly, crash the program, or even crash your computer. Always check on your renders periodically.
Photoshop
Now that you have your render, you can begin to post-process. If you used a sky map, there are only a few things you need to do to finalize it. First, adjust the brightness and contrast to fit your taste. You can use one of four methods to do this. First is to use the brightness and contrast sliders, which is fairly straightforward. The second is by exposure, where you adjust the exposure and gamma. The third is by curves, where you adjust a curve to either highlight the dark or light areas of your image. And the last is levels, which essentially is similar to curves. Then, what i like to do is add a lens flare, which is in the filter tab under render, and use the flare or flares you like. I use a combination of the 105mm, 35mm, and 50mm flares as I feel they give the sun a more realistic glare, and I enjoy the layering of the "light artifacts."
If you don't use a sky map, the prep will be a little more complicated. Due to the usefulness of this in creating renders in general, I will use one of my renders from a studio project. The ideas are the same, but I will go into more depth than most of you will need to go for most of your Minecraft renders. while this goes above and beyond what would normally be needed for a minecraft render, these are tips that you should be aware of, and if you are interested, should try out for yourself.
Start of with the image you wish to place your render in. Right click its layer and click layer from background so that you free its layer. Place a sky behind your background layer and erase the sky in the original image. Then place the image of your render over it. Erase any unnecessary parts of the rendered image (ground plane, sky, anything that you don't want in the final image). Then, select the render, and distort it using transformation to make to in the proper perspective with the rest of the image.
Now that the render is placed properly, duplicate the background layer and place it over the render layer. Now you must erase everything from the foreground layer that should be behind your render, leaving only the foreground. This can be tedious if you have various complicated shapes like trees or something in front, but it adds a realm of realism to your render. It helps if you copy your render layer and paint the copy a really bright color (conserving the shape of the render), like using a cyan or a bright green.
Once that is finished, you can just add the lens flare, if you wish, but if you are familiar with this render, as it is from a project I have shown this render before, I went a step further by adding reflections, puddles, and rain.
To add the rain. I generally add four levels of rain: overlay, background, middle ground, and foreground rain. The overlay used a new later, and use the noise filter. Then motion blur it in the direction you want your rain to go in. The lower the opacity of the layer. Thee next three layers are exactly the same as each other, with the only difference being that the background is smaller, the foreground is bigger. Simply use the brush, and adjust the preset so that there is a scatter and slight angle.
To make a rain drop brush, open a new Photoshop file and make it about 100 x 300, and place a dot on one of the far side at about 10pt. Then motion blur it towards the other side until it is fairly long. Then save it as a brush in the presets. Go back to your render, and use your rain drop brush. Make it white or grey, and go to the brush preset window. Then apply it to your render as you see fit. Below, i've included a different render of a yacht i designed that uses the rain drop brush in a different way to make it appear like water is coming off of the hulls.
To add all of the reflections (for puddles, light reflection on the road, and in the glass both on the render and the building opposite to the render), we will create multiple duplicate layers for each reflection. In each layer, you will use a mask of the areas you want the reflections to show up. What this does is provide a hole for an image to poke through in the areas you want, but not where you don't, while preserving the images of the layers. The layer behind (the actual reflection) must be flipped asking is respective axis. The glass reflections are flipped along a vertical axis, the puddles and the haze of the road are along the horizontal axis. To get the hazy reflection on the road, I used the burn to to make the road darker, and then I took the reflected image, and used a Gaussian blur filter and made it transparent.
That is basically everything I have in rendering for Minecraft (and then some). Hope this answers some of your questions and helps you. Thank you for reading.
Also, thank you for making this the tenth post i've had reach the popular reel. Thank you all for the support and encouragement.
| Tags |
tools/tracking
2755341
6
the-answer-to-the-ultimate-question

![Piercing Cold Blue [MGB_'s Story Writing Contest Entry] Minecraft Blog](https://static.planetminecraft.com/files/resource_media/screenshot/1425/piercingcoldblue_thumb.jpg)


 Escapazition
 illager
 cloudkitty
 waxon
waxon lordess2012
 JustaFlqmingo
 StormWatcher
 PandaWonka
Create an account or sign in to comment.
I must admit, at first i was quite jealous of you, (you are a really good builder) but now... I'm... I am speechless. This is amazing. I love you.