- 2,457 views, 1 today
210
Hello everyone!
Some distant forever ago I showed my little brother how I do my wreckage, ruins and just broken things in general, so I decided to share my tips and experience in this subject with you guys :D
'Why would I need this?'
What you learn here can be used in maps with ancient ruins and, what I do, war themed maps like WWI, WWII, Korean War, Vietnam War, Falklands war, Spanish Civil War, or any thing really 0_0
"Can I get a world save for this blogs displays?'
If you go to the end of this blog, you will find a link to the world save to get a visual feel for what we go over here :D
"Why are you so boring?"
Well, I'm sorry you aren't entertained 0_0 (not, I'm just a sarcastic pixelated nerd)
Walls
Walls are a very basic part in any map you make, ancient or war related, so this is first.
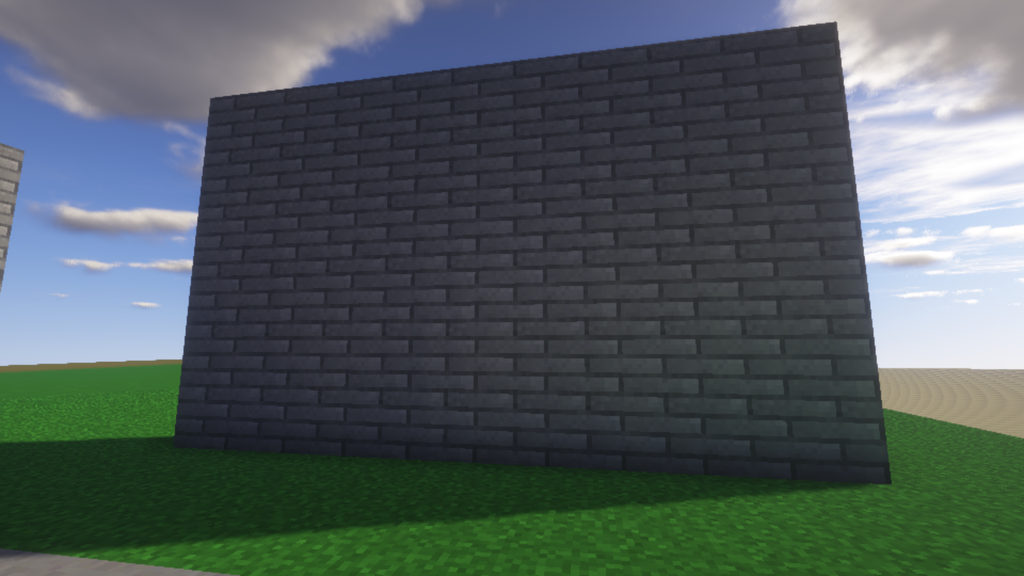
Here is a basic stone wall I threw together.
It's quite boring, let's Break everything about it :D
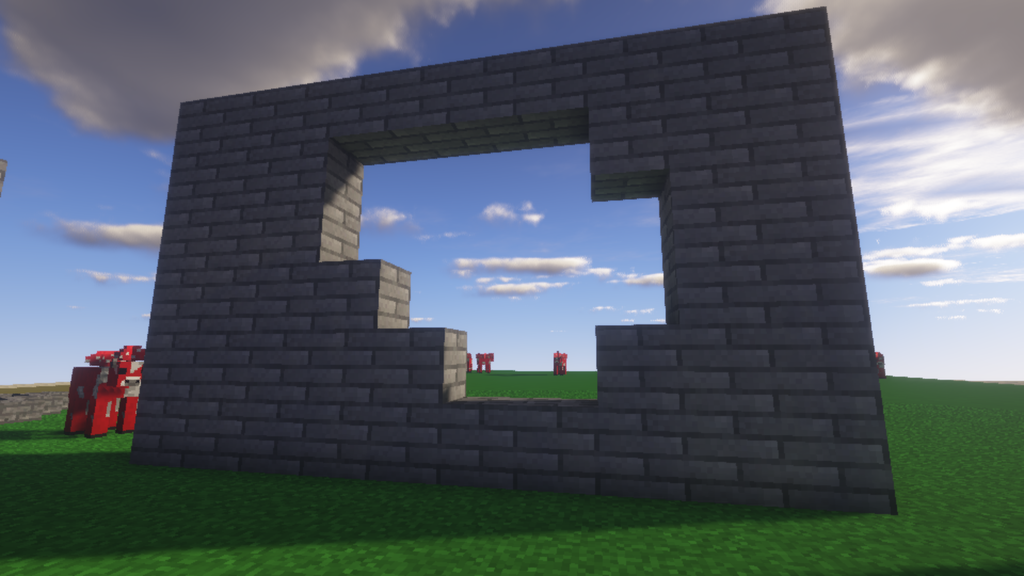
First, I took that boring wall and put a large hole in it, as shown below. It's not quite done though, if this wall just got this hole then there would be some rubble near it.
There we go! I've added in some rubble to the wall and now it looks a little less plain. Note that I've also used stairs to round off some edges in the hole itself.
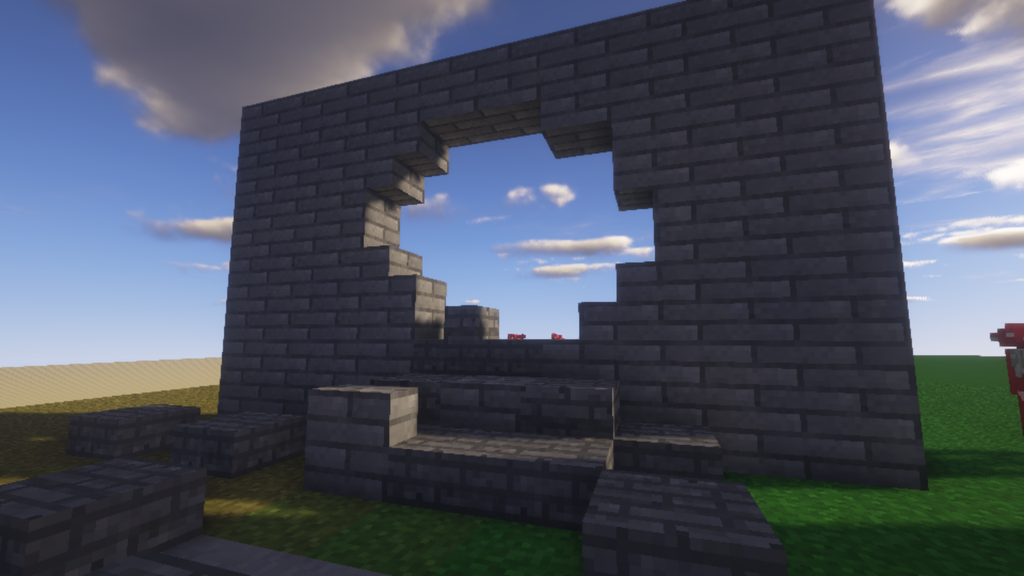
It is important to be random with these holes, a round hole is boring!
Walls are great and dandy, mostly because of their simplicity. However, a more complex, multi-layered wall may be different in how it comes down. For example a thick castle wall may just have a crater-like hole that dose not penetrate to the other side.
Bomb Craters/Holes
Next on our list of things to go over is holes and craters :D Before we get started, I'd like to say if you are doing ancient ruins, the craters or holes wouldn't be very deep or detailed because of the passing of time and erosion.
I'll start off with a great friend for doing these holes, TNT!
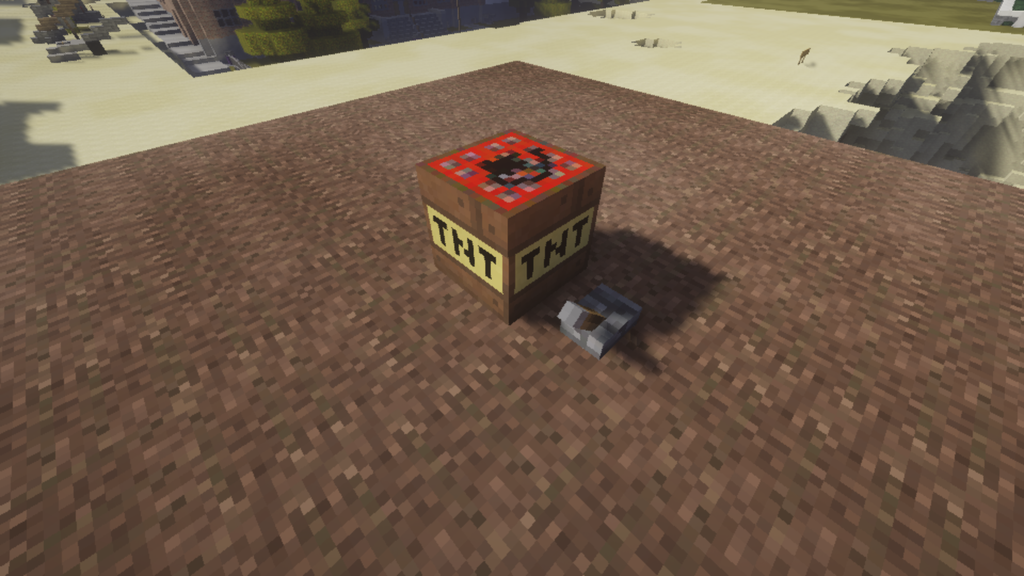
Now our friend has been set off and we have this hole in the ground. Notice some rough edges and random blocks still in place, It's not a perfect circle.
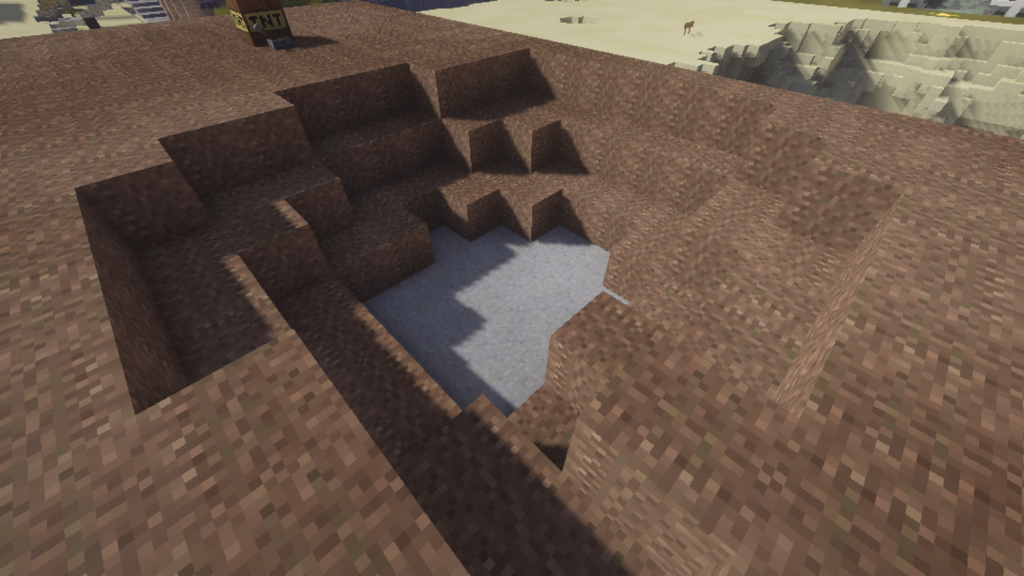
Now, as you can see, I've placed some Soul Sand at the bottom to represent mud and some cobblestone slabs for rocks. I've also removed blocks that stick out in this crater because I have an OCD with that. You could say we're done, however we can take this even further!
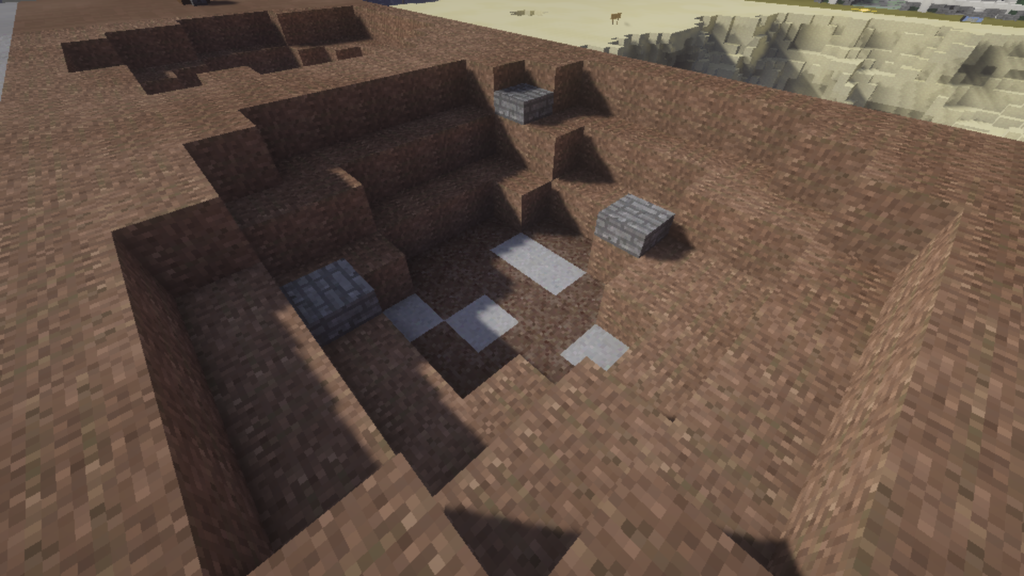
Now in this step, I've placed some water in the crater, as if it rained not too long ago. WWI maps would benefit from this a lot.
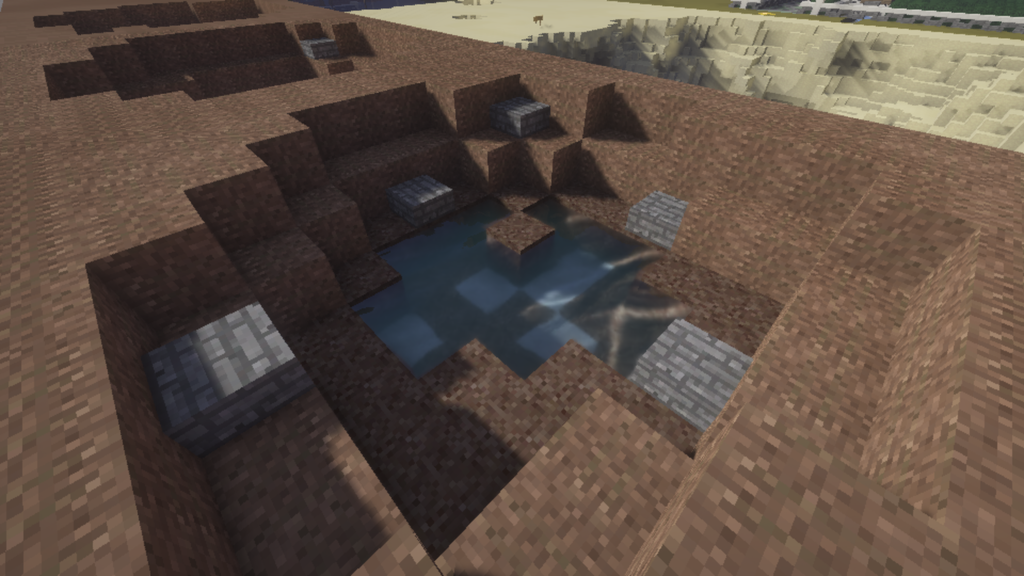
For this example, I've placed a section of a partially destroyed wall beside the crater and added some rubble. Quite useful in city maps.
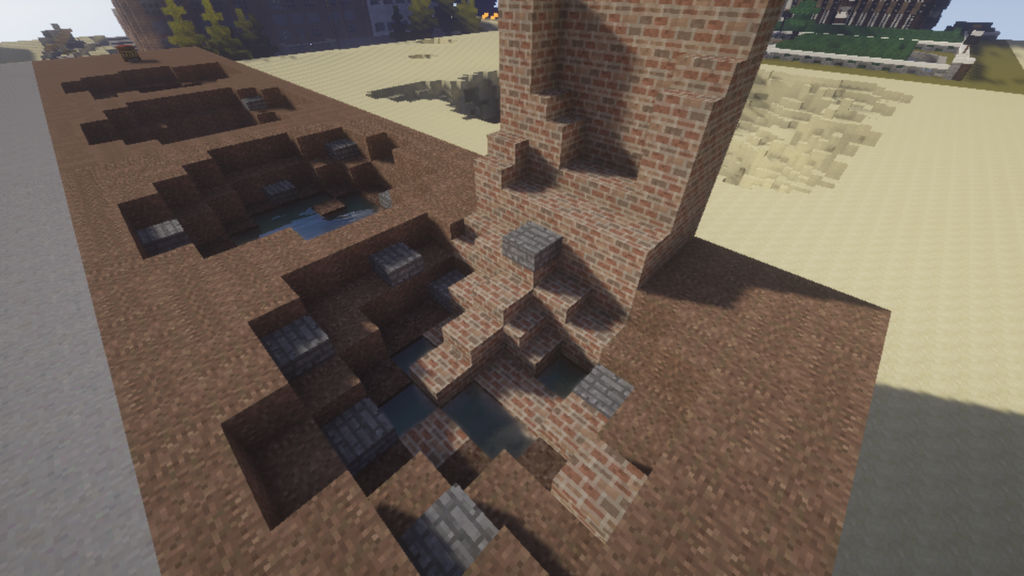
Just as a side note, if you place a crater in the side of a hill or mountain, the craters depth may be lessened because of more stone being present.
Just like I said for walls, being a bit random is key to making a battlefield or ruined ancient structure look like it went through the chaos of war or was victim to Mother-nature/Father-time.
Buildings
Now we get into what I think is the funnest but also the toughest part. Buildings and any structures really.
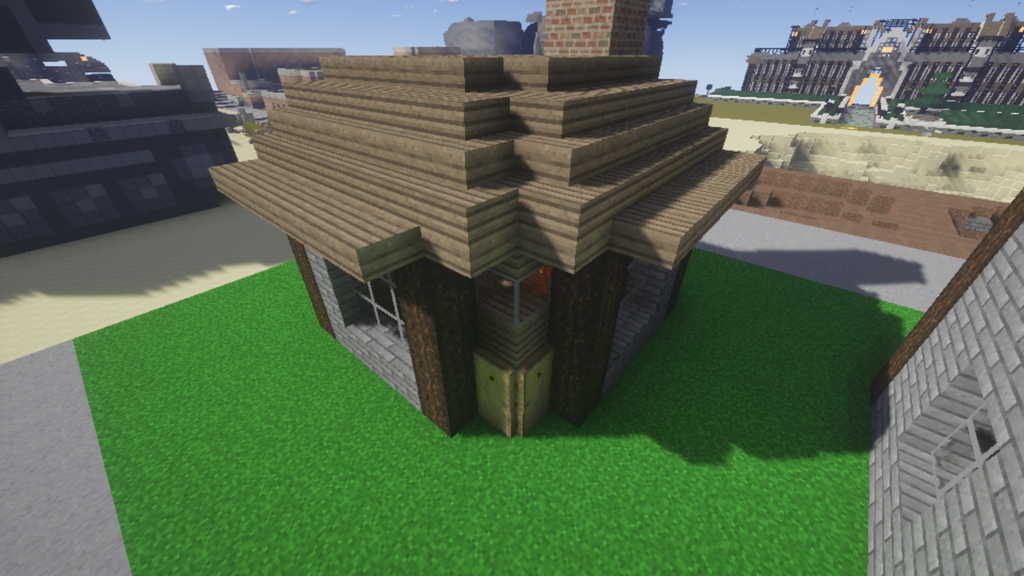
First off, I have this little house I made in like 10 minutes, it's quite boring honestly. Let's wreck it :D
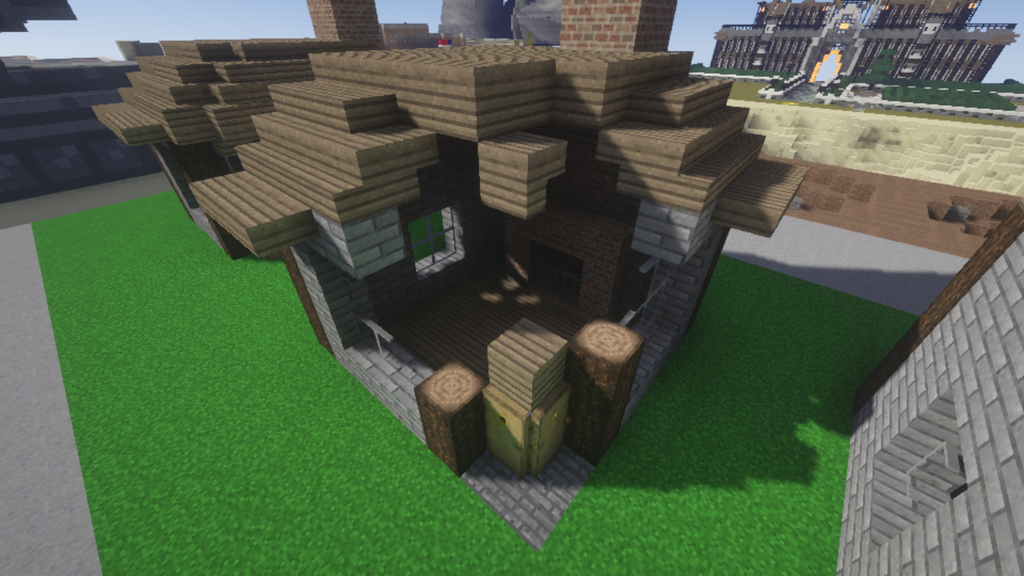
Using our trusty TNT friend, I've blown out a hole in the house. Now lets add some detail :D
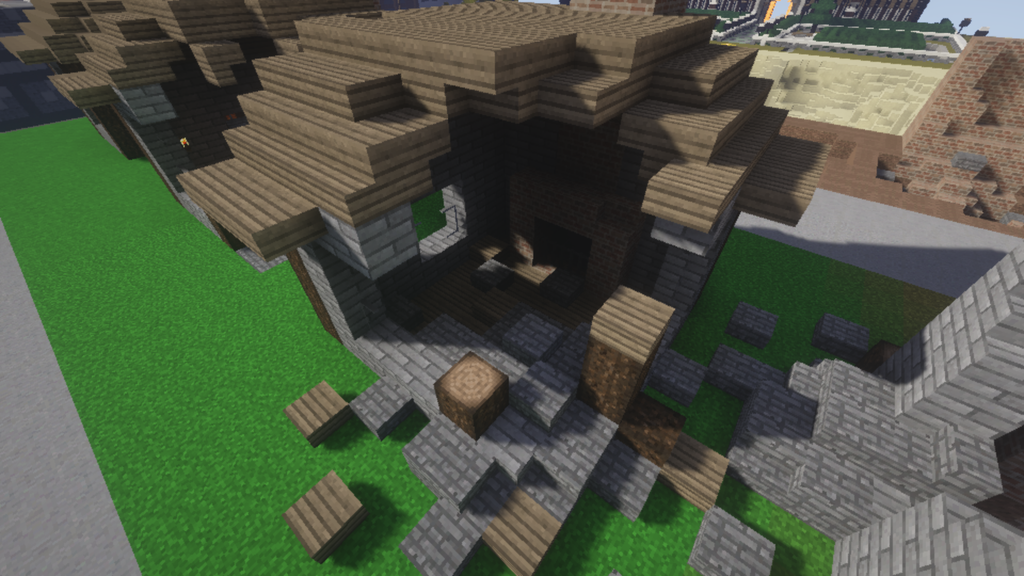
Using stairs and half slabs, I've given this house a more rough look to it and added rubble piled up where the explosion occurred. Our finished product gives us a house with a large hole in it and a bunch of rubble. Quite suitable for urban war maps.
However! I just want to watch the world burn!
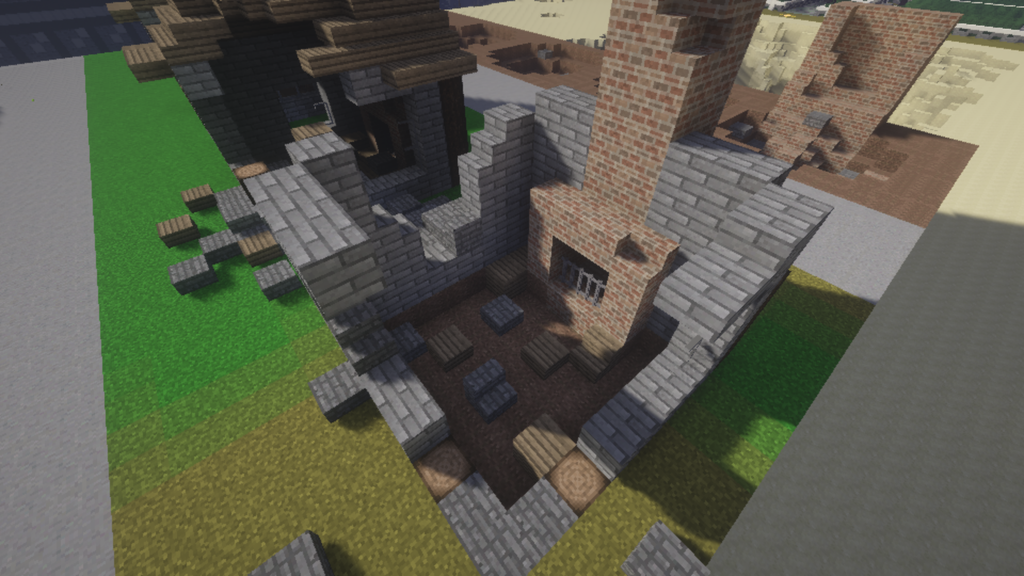
This time I've made the same house but with a more burnt out wreckage feel, you know as a result of fire. Notice I didn't take out all of the wood just to give some variety and I used stairs to put a small gash in the chimney.
How many times must I say it? No ruins or wreckage can look the same, or else it is boring
Trees
Here is a little something I learned working on my own maps. Nature takes a hit in many different ways aside from what I've shown you. So why not a simple nature section? Who needs to save the trees when we can just watch them BURN!
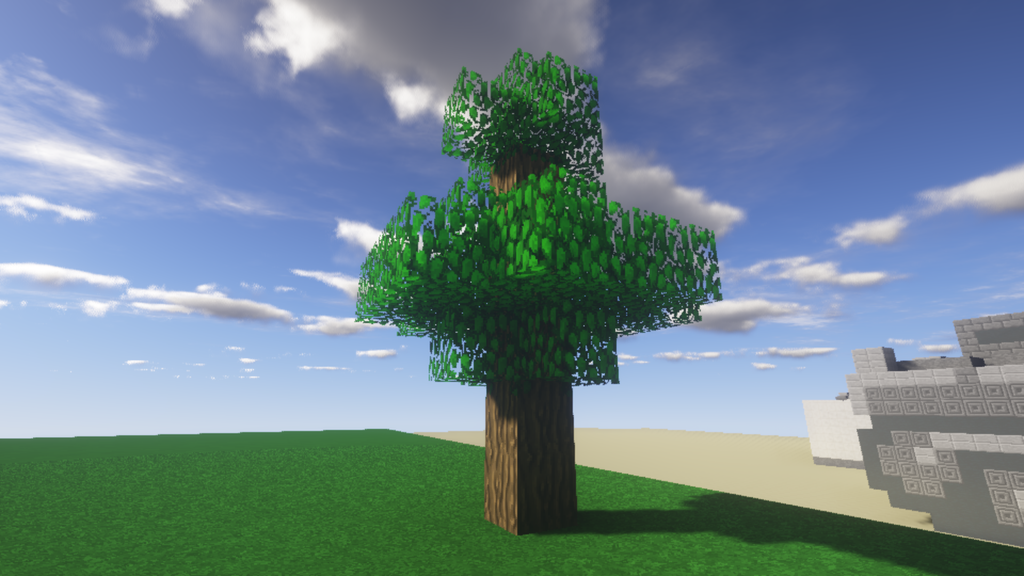
This is a nice simple spruce tree (with oak leaves to troll you ^_^) that I am going to work with.
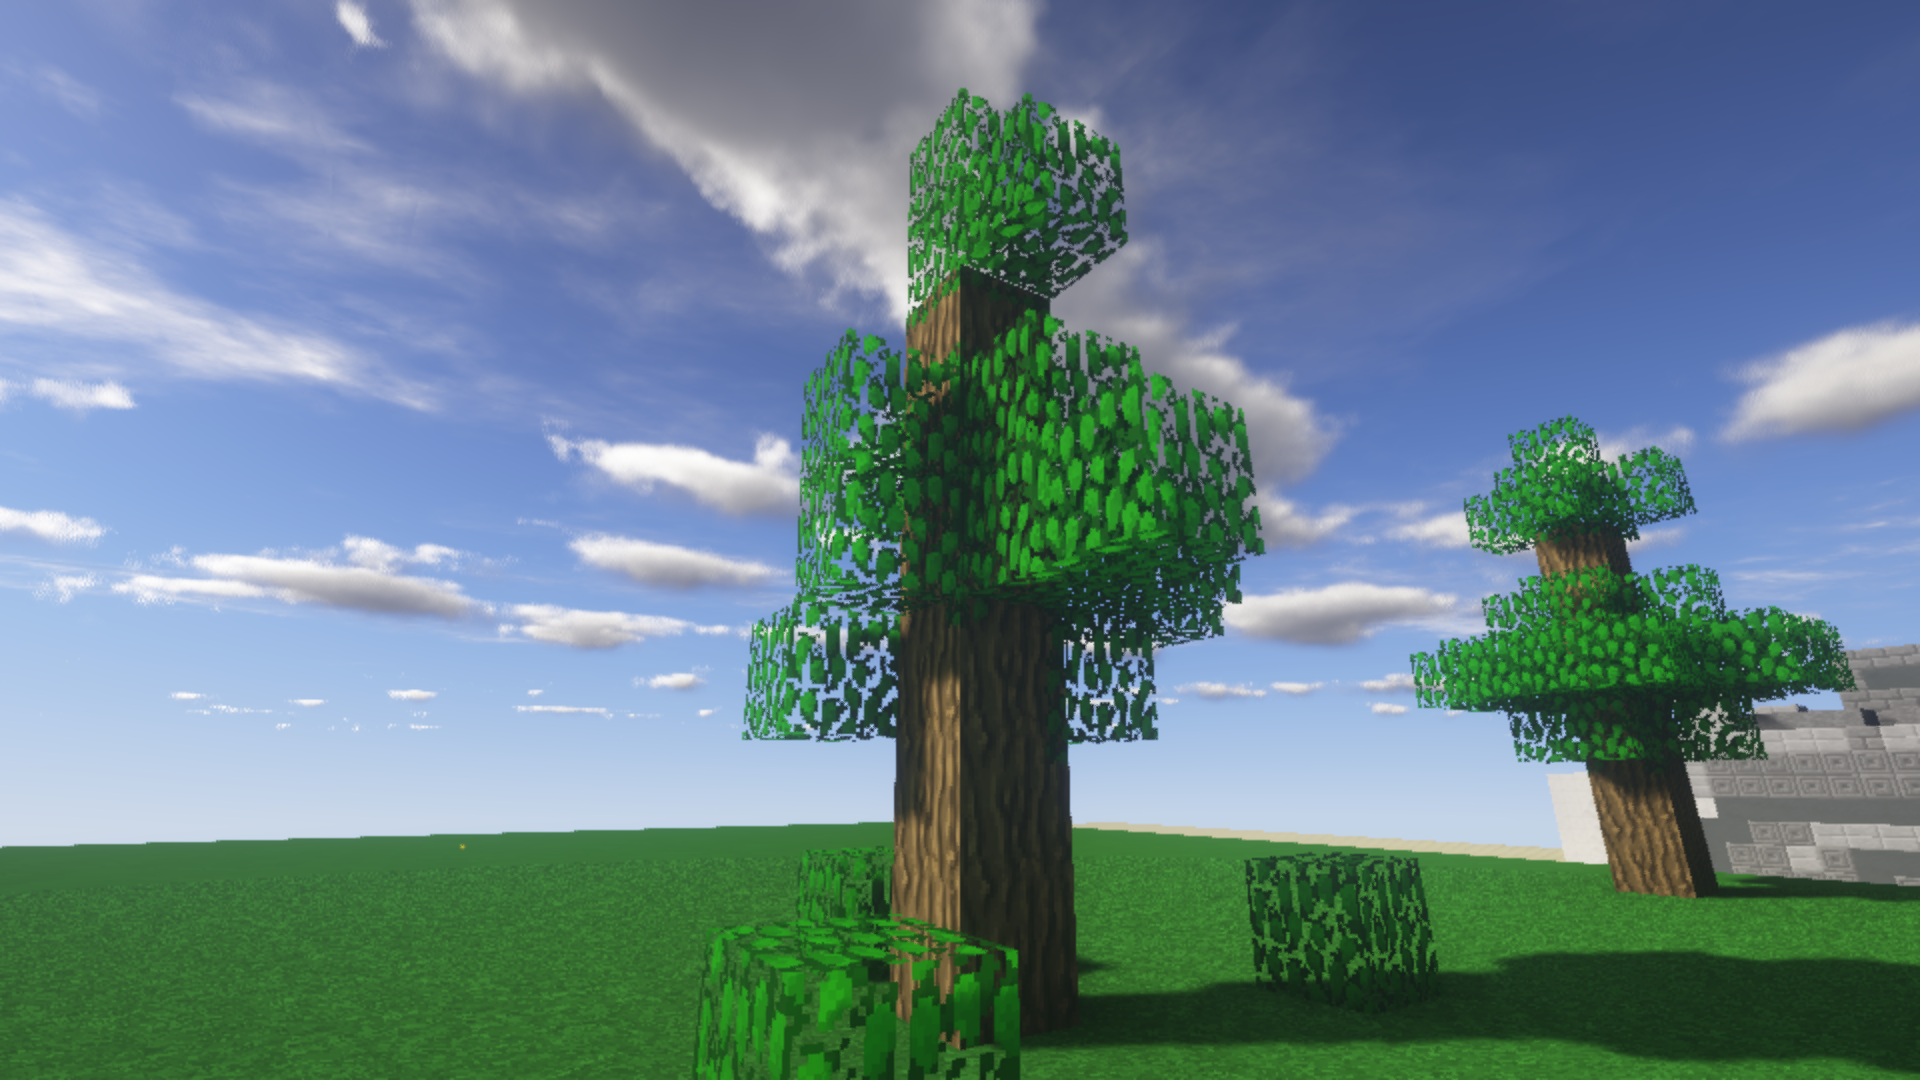
So I took the same tree and I stole away some leaves to feed my flames of war and warm my cold feet in the Ardennes Forest. While I was at it, I forgot to pick up some of the branches and leaves that are now on the ground. Some Germans might try to disguise their tanks with them...
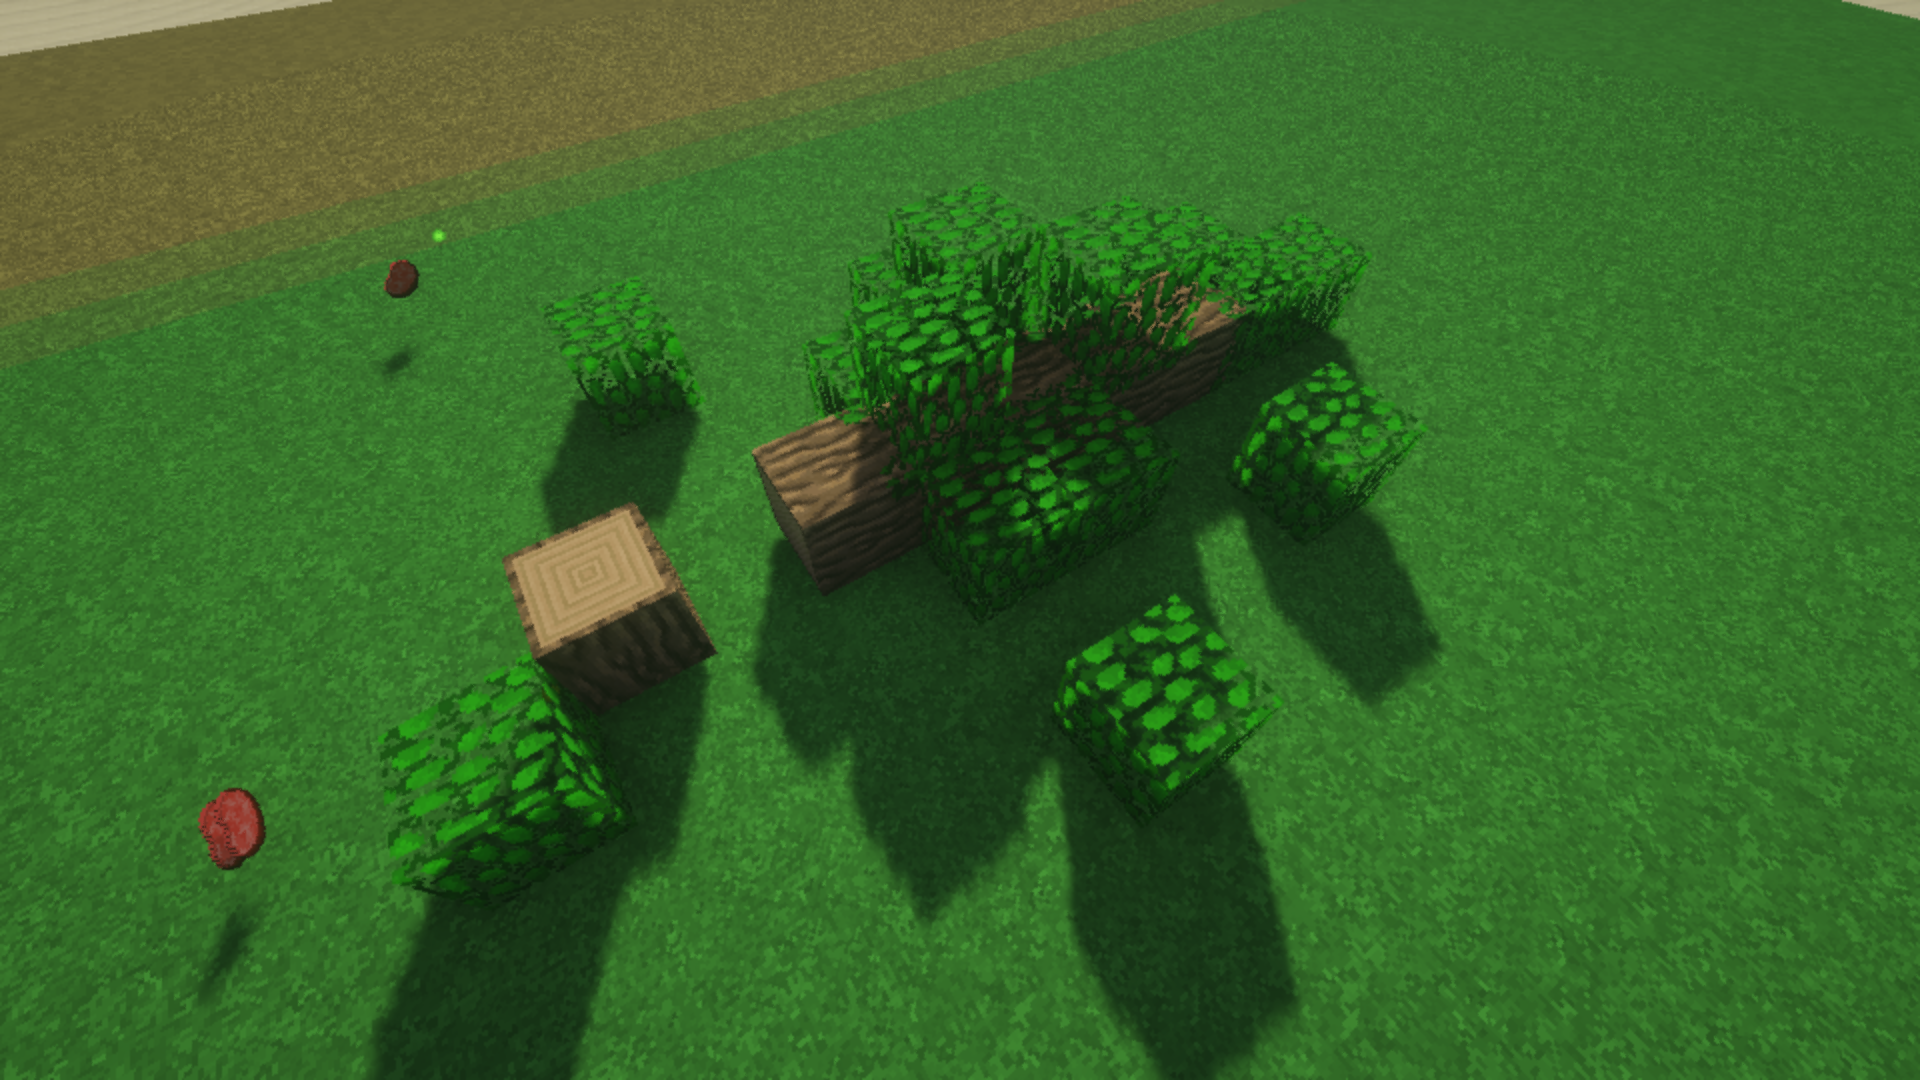
After warming my feet, I decided to let out my anger with a falcon punch because the tree didn't burn hot enough. Well, not really because all I did was run over this tree with a tank. 0_0
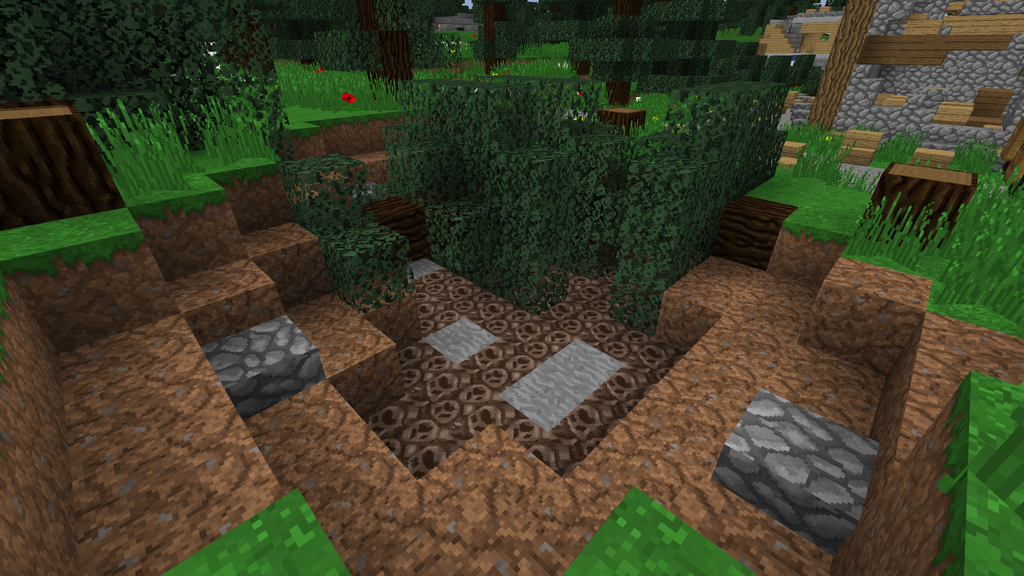
Here are some trees that were blown up and fell into a crater. Or maybe they are trying to multiply... (hey, get that image out of your head -_-) This is a fine example of how you can make something look more unique with some randomness and a stick or seven of good old fashioned TNT.
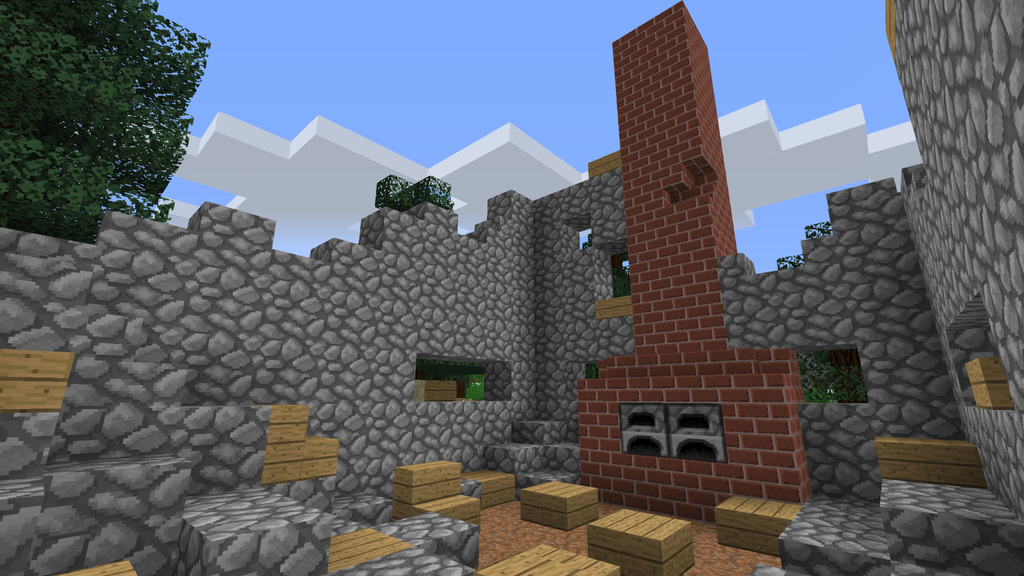
Here's an example of a burnt-out house I made. Notice I also used my method of creating holes on the walls.
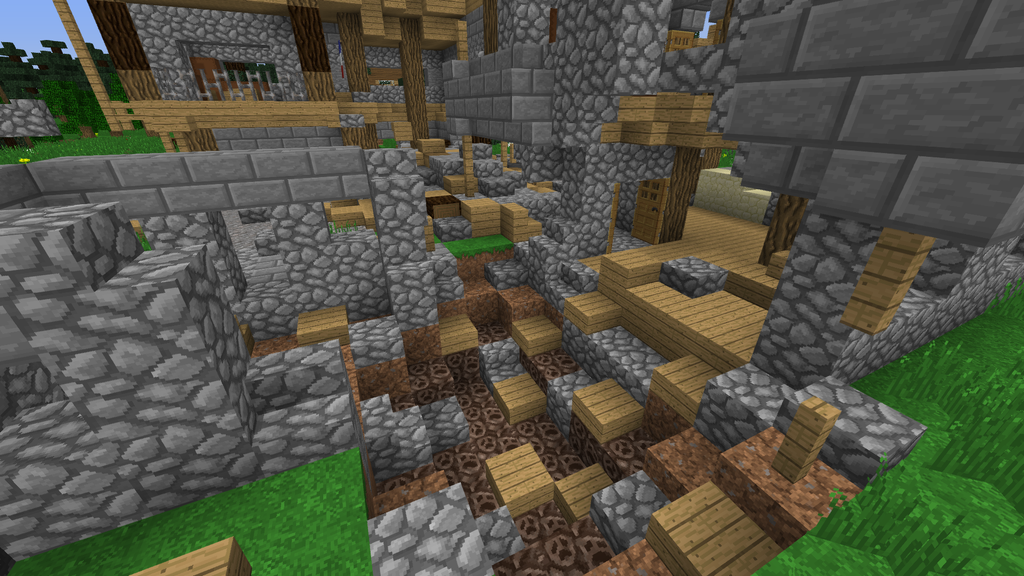
Here's another example of ruins from my Normandy map. Notice not one building is destroyed just like another one, they all are different.
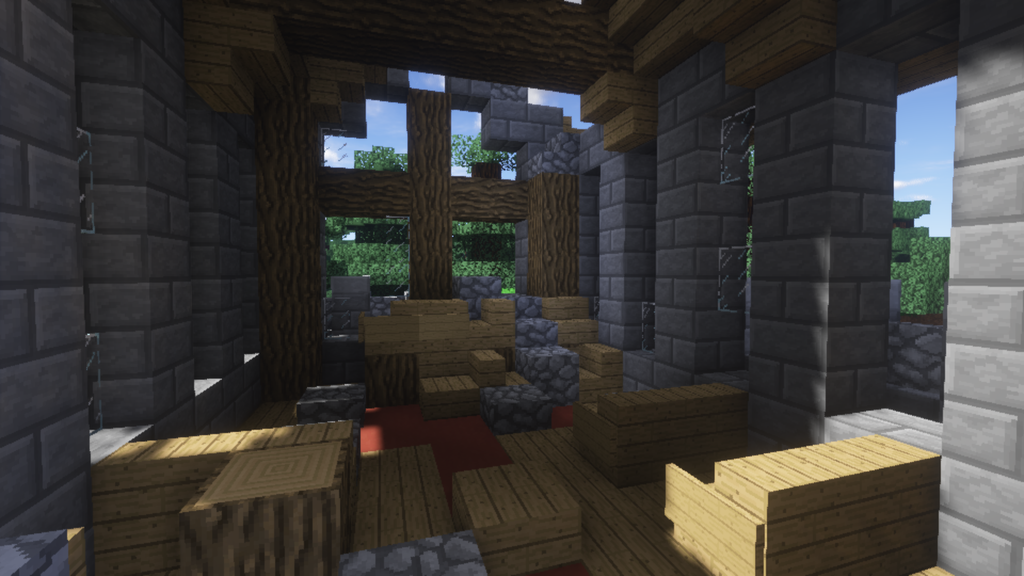
Here's another example from my Normandy PVP special. It also acts as my take on how a ruined interior may appear using my style. (Or lack of, it all depends on how MVP you think of yourself...)
Want to download the world with the crater, wall and house steps? Click that blue link and download the world :D
Awesome Projects World Save
Well that covers everything I wanted to punch in the face! (for now) I hope this was of help to any ancient ruin or war builders (or arsonists) and I hope to see anything you've done with my advice!
Happy trails!
*AngryLoyer
Some distant forever ago I showed my little brother how I do my wreckage, ruins and just broken things in general, so I decided to share my tips and experience in this subject with you guys :D
'Why would I need this?'
What you learn here can be used in maps with ancient ruins and, what I do, war themed maps like WWI, WWII, Korean War, Vietnam War, Falklands war, Spanish Civil War, or any thing really 0_0
"Can I get a world save for this blogs displays?'
If you go to the end of this blog, you will find a link to the world save to get a visual feel for what we go over here :D
"Why are you so boring?"
Well, I'm sorry you aren't entertained 0_0 (not, I'm just a sarcastic pixelated nerd)
Walls
Walls are a very basic part in any map you make, ancient or war related, so this is first.
Here is a basic stone wall I threw together.
It's quite boring, let's Break everything about it :D

First, I took that boring wall and put a large hole in it, as shown below. It's not quite done though, if this wall just got this hole then there would be some rubble near it.

There we go! I've added in some rubble to the wall and now it looks a little less plain. Note that I've also used stairs to round off some edges in the hole itself.

It is important to be random with these holes, a round hole is boring!
Walls are great and dandy, mostly because of their simplicity. However, a more complex, multi-layered wall may be different in how it comes down. For example a thick castle wall may just have a crater-like hole that dose not penetrate to the other side.
Bomb Craters/Holes
Next on our list of things to go over is holes and craters :D Before we get started, I'd like to say if you are doing ancient ruins, the craters or holes wouldn't be very deep or detailed because of the passing of time and erosion.
I'll start off with a great friend for doing these holes, TNT!

Now our friend has been set off and we have this hole in the ground. Notice some rough edges and random blocks still in place, It's not a perfect circle.

Now, as you can see, I've placed some Soul Sand at the bottom to represent mud and some cobblestone slabs for rocks. I've also removed blocks that stick out in this crater because I have an OCD with that. You could say we're done, however we can take this even further!

Now in this step, I've placed some water in the crater, as if it rained not too long ago. WWI maps would benefit from this a lot.

For this example, I've placed a section of a partially destroyed wall beside the crater and added some rubble. Quite useful in city maps.

Just as a side note, if you place a crater in the side of a hill or mountain, the craters depth may be lessened because of more stone being present.
Just like I said for walls, being a bit random is key to making a battlefield or ruined ancient structure look like it went through the chaos of war or was victim to Mother-nature/Father-time.
Buildings
Now we get into what I think is the funnest but also the toughest part. Buildings and any structures really.

First off, I have this little house I made in like 10 minutes, it's quite boring honestly. Let's wreck it :D

Using our trusty TNT friend, I've blown out a hole in the house. Now lets add some detail :D

Using stairs and half slabs, I've given this house a more rough look to it and added rubble piled up where the explosion occurred. Our finished product gives us a house with a large hole in it and a bunch of rubble. Quite suitable for urban war maps.
However! I just want to watch the world burn!

This time I've made the same house but with a more burnt out wreckage feel, you know as a result of fire. Notice I didn't take out all of the wood just to give some variety and I used stairs to put a small gash in the chimney.
How many times must I say it? No ruins or wreckage can look the same, or else it is boring
Trees
Here is a little something I learned working on my own maps. Nature takes a hit in many different ways aside from what I've shown you. So why not a simple nature section? Who needs to save the trees when we can just watch them BURN!

This is a nice simple spruce tree (with oak leaves to troll you ^_^) that I am going to work with.

So I took the same tree and I stole away some leaves to feed my flames of war and warm my cold feet in the Ardennes Forest. While I was at it, I forgot to pick up some of the branches and leaves that are now on the ground. Some Germans might try to disguise their tanks with them...

After warming my feet, I decided to let out my anger with a falcon punch because the tree didn't burn hot enough. Well, not really because all I did was run over this tree with a tank. 0_0

Here are some trees that were blown up and fell into a crater. Or maybe they are trying to multiply... (hey, get that image out of your head -_-) This is a fine example of how you can make something look more unique with some randomness and a stick or seven of good old fashioned TNT.

Here's an example of a burnt-out house I made. Notice I also used my method of creating holes on the walls.

Here's another example of ruins from my Normandy map. Notice not one building is destroyed just like another one, they all are different.

Here's another example from my Normandy PVP special. It also acts as my take on how a ruined interior may appear using my style. (Or lack of, it all depends on how MVP you think of yourself...)
Want to download the world with the crater, wall and house steps? Click that blue link and download the world :D
Awesome Projects World Save
Well that covers everything I wanted to punch in the face! (for now) I hope this was of help to any ancient ruin or war builders (or arsonists) and I hope to see anything you've done with my advice!
Happy trails!
*AngryLoyer
| Tags |
3 Update Logs
Update #2.5 : by Seames39 03/15/2018 4:25:21 pmMar 15th, 2018
Images were messed up. Had to fix them
LOAD MORE LOGS
tools/tracking
2844510
6
wreckage-ruins-and-general-broken-things-tutorial


Create an account or sign in to comment.
Just found this hidden gem of a blog post! (Big shiny diamond for you!)
I'm recently building an Endless Oceans: Blue World structures map and I'm struggling a bit on shipwrecks. Would you please make a tutorial on shipwrecks and sunken structures?
Thnx in advance
L3GIT349
There are some things you could try though, looking at examples of sunken ships may be a good start. When making a ship wreck, I'd ask myself two questions, why did this ship sink and on what side did it land on the sea floor? Was it sunk in a storm? If so, maybe its a sail ship that broke masts as it went down, or it simply capsized due to wind and large waves. Was it sunk in a battle? Maybe it was burned a bit or cannon balls punctured the hull causing it to sink? Did it strike an iceberg? If so, perhaps evidence of where it struck the ice could remain as evidence on the sea floor?
Most sunken structures are usually as a result of one of two things, they collapsed/washed away into the water or they simply flooded because of a storm/ a dam was built which made a reservoir thus submerging the buildings in its wake. In any case, did the water rush through and submerge the structure quickly? If so, perhaps parts of it were washed away if not completely collapsing the building? perhaps the flooding was more gradual? Then the structure would generally be more intact. How long was it under water? Has all the wood rotted away or is some of it still there as if it was more recent? How much algae and coral has grown on the structure since it was submerged? Perhaps an under water creature tried to make it into a home/nest?
Lots of things to consider in such projects, just like ruins XD