


- check_circle Art
- check_circle Environment
- check_circle Font
- check_circle GUI
- check_circle Misc
- check_circle Terrain
- 42,335 views, 4 today
- 11,420 downloads, 0 today

48

Hello, welcome to my resourcepack's page,
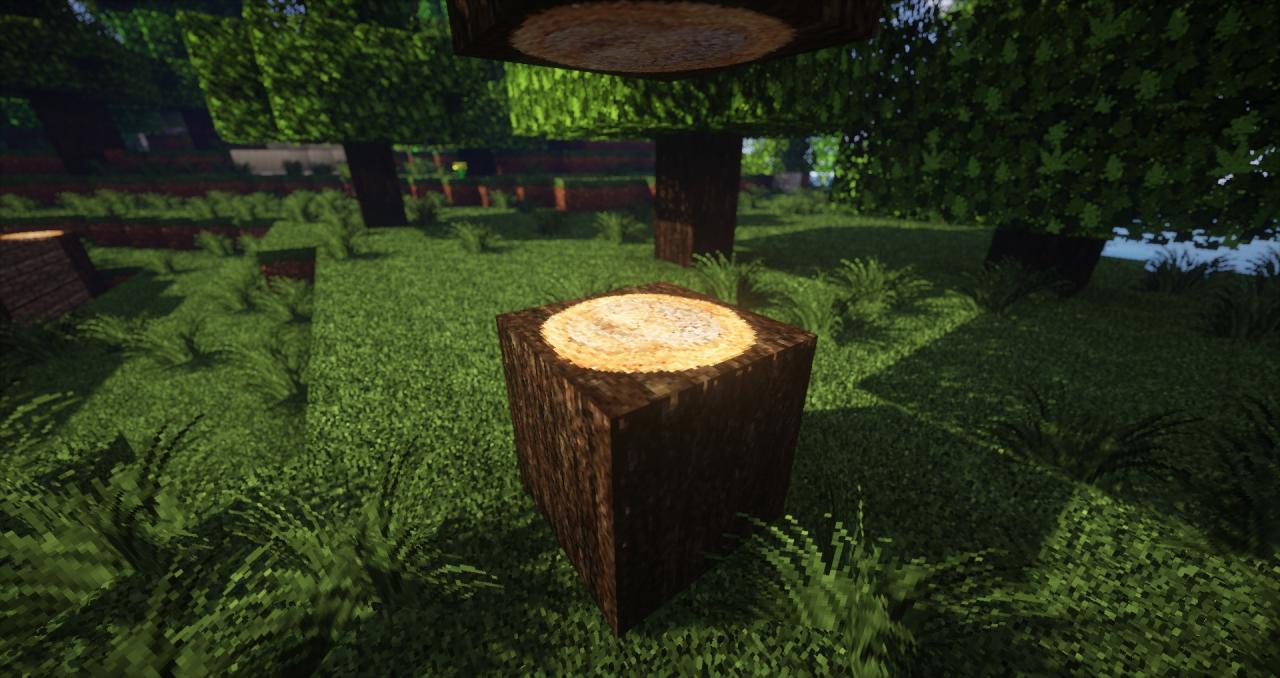
This resourcepack is a little project I am working on to get more familiar with texturing, normal mapping etc.
My textures use methods called: normal mapping, parallax occlusion mapping and spectacular mapping,
explanation about these methods can be found in the lower section of this page, hidden in spoilers.
It's HEAVY work in progress, there's only around 30 of textures yet (pictures) and they may not be perfect yet, they can have white borders, sharp transitions, ugly normal mapping, misplaced textures etc.
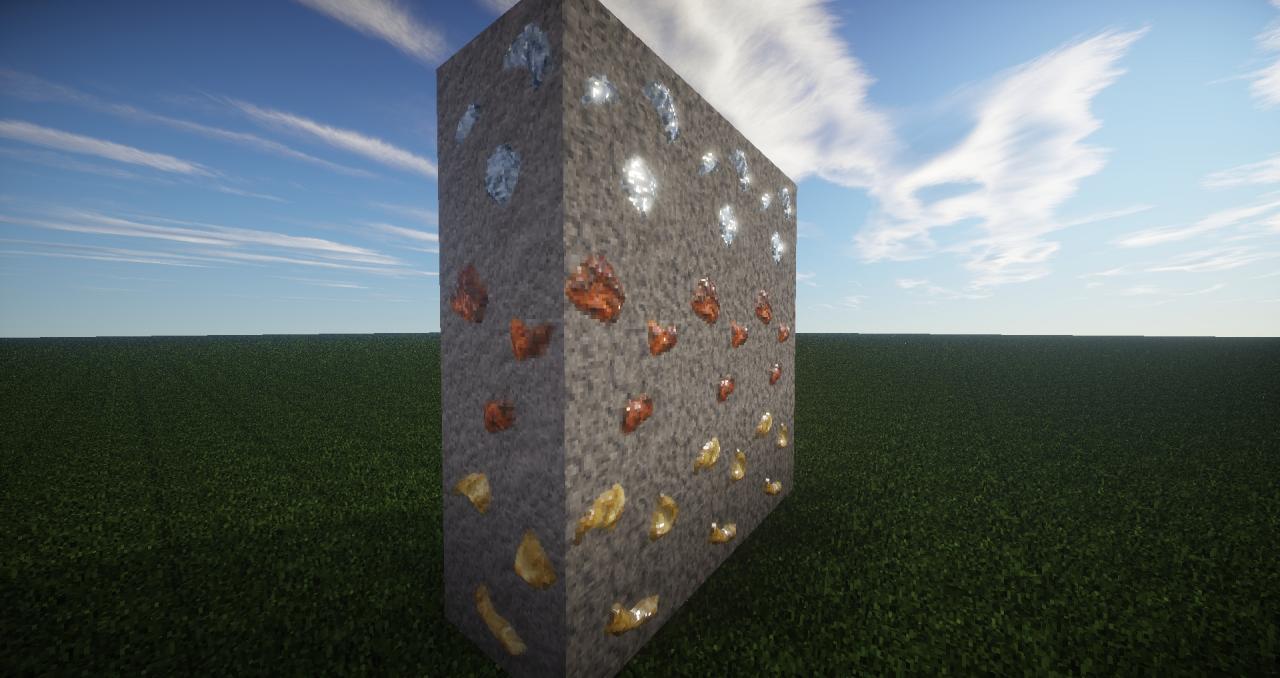
What is "Normal mapping"?
Normal mapping adds depth detail to textures that are lit by the sun or are covered with shadows, provided by a texture file name with "_n" at the end, for example "grass_n.png".
So basically it adds depth to a texture provided with normal mapping.
(*Sonic Ether's Unbelievable Shaders are REQUIRED for this function).
So basically it adds depth to a texture provided with normal mapping.
(*Sonic Ether's Unbelievable Shaders are REQUIRED for this function).
What is "Parallax Occlusion mapping"?
Parallax occlusion adds even more depth detail textures, most of its methods are identical to Normal mapping.
This method adds really deep pixel sections to textures, so it looks really 3D if you strafe around it.
(*Sonic Ether's Unbelievable Shaders are REQUIRED for this function).
This method adds really deep pixel sections to textures, so it looks really 3D if you strafe around it.
(*Sonic Ether's Unbelievable Shaders are REQUIRED for this function).
Shaderpack modification for parallax occlusion mapping
First download the shaderpack from Sonic Ether's website:
[url=(Link removed)]Shaderpack v10.1 Preview 2[/url]
After downloading this, open up that archive you've just downloaded and open the "shaders" folder,
in there will be around 30 files, open the file called "gbuffers_terrain.fsh" with notepad++ or whatever you use.
Enabling Parallax Occlusion Mapping:
notepad++: Go to line 24 and remove the "//" infront of the line "#define PARALLAX".
wordpad: press CTRL + F and search for "#define PARALLAX", after finding it, remove the "//" infront of it.
Fixing the "ugly line crossing the texture in the middle"
notepad++: Go to line 115 and replace the line with this piece of code: ivec2 atlasTiles = ivec2(16, 8);
wordpad: press CTRL + F and search for: ivec2 atlasTiles = ivec2(32, 16);
replace this line of code with: ivec2 atlasTiles = ivec2(16, 8);
Now you're all set to enjoy the amazing Parallax Occlusion Mapping method.
I am open to any critism, tell me what you liked and disliked, it may help me out a lot, thanks!
Map used at the 2nd picture here:
Fable The Lost Chapters in Minecraft
NOTE:
I am looking for someone who could make a video review about this resource pack, the video will be placed between the gallery of pictures, you will also be given full credit of the video.

| Progress | 30% complete |
| Game Version | Minecraft 1.7.8 |
| Resolution | 64x |
| Tags |
12 Update Logs
Update #12 : by SoulTakerl996 06/01/2014 9:23:59 amJun 1st, 2014
Redone many blocks, made with a more "rustic" look, tell me what you think.
New
- Torch
- All Tulips
- Poppy
- Dandelion
- Blue Orchid
- Allium
- Azure Bluet
- Peony
- Sunflower
- High res stars(MCPatcher required)
Redone
- All planks
- Oak leaves
- Birch leaves
- Spruce leaves
- All stone bricks
- Cobblestone
- Mossy cobblestone
- Glass
- Glass pane
- Bookcase
- Crafting table
- Door
- Oak log
- Grass
- Grass snow
UI Changes
Redone
- Hotbar
- Menu buttons
- Menu sliders
- Options background
- Menu panorama
I have not yet optimized the size for this version of the pack, this will be done later.
LOAD MORE LOGS
tools/tracking
2694634
4
stcm-texturepack-174-wip-normal-mapping


 CrystalRuby
 ScotsMiser
 KongPlayz
 PandaWonka
 lampytbltofficial
 ObisidianSMP24
 TheMountaineer
![iPhone 15 [1.20] [1.20.1] Minecraft Texture Pack](https://static.planetminecraft.com/files/image/minecraft/texture-pack/2024/625/17720996-pack_s.jpg)
 Chivanden
 Xiggir
![iPad Air 1 [1.20] [1.20.1] Minecraft Texture Pack](https://static.planetminecraft.com/files/image/minecraft/texture-pack/2024/319/17719299_s.jpg)

 AtomGraphicsWork
 JoeEnderman
Create an account or sign in to comment.
1. Right-click the zipped SEUS folder
2. Click "Open with WinRAR"
3. Edit the gbuffers_terrain.fsh file, in the "shaders" folder.
4. Make sure you save it in WinRAR as well. (it will ask for confirmation)
5. This stuff might all be in read-only folders, which I had a bit of trouble with, If you leave the "properties" window open after disabling "read-only", then it should work. I had a problem with the folders not keeping the changes.