


- 2,457 views, 1 today

128
Shapes and Lines
Shapes and Lines
First of all, every straight line is made by humans, there are no straight lines in nature. This is a good thing to look out for to decide how you build, looking at what you are building.
You have 4 main shapes:
Rectangle
Triangle
Circle
square
all of these distribute weight very well. Therefore they are often used to support buildings. Of course in minecraft you dono t have to be realistic so you can do as you like, but then still these shapes are very handy. You can use these shapes for making a layout for your build. This gives you variety but also this lets you create a focus, which is good.
A focus draws the attention of the spectators. A lot of people make builds without a focus. With these kind of builds people dono t know what to look for. They stare around and look at the total thing in general. When you have a focus you can make things pop out (the better parts of your builds), then the spectator looks at certain points and they will feel much more comfortable.
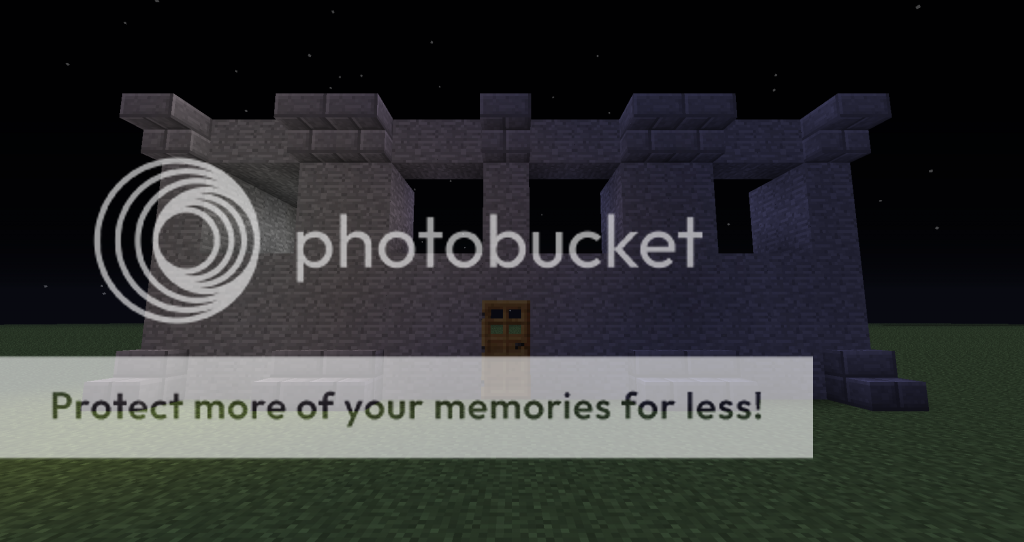
Shapes in general:
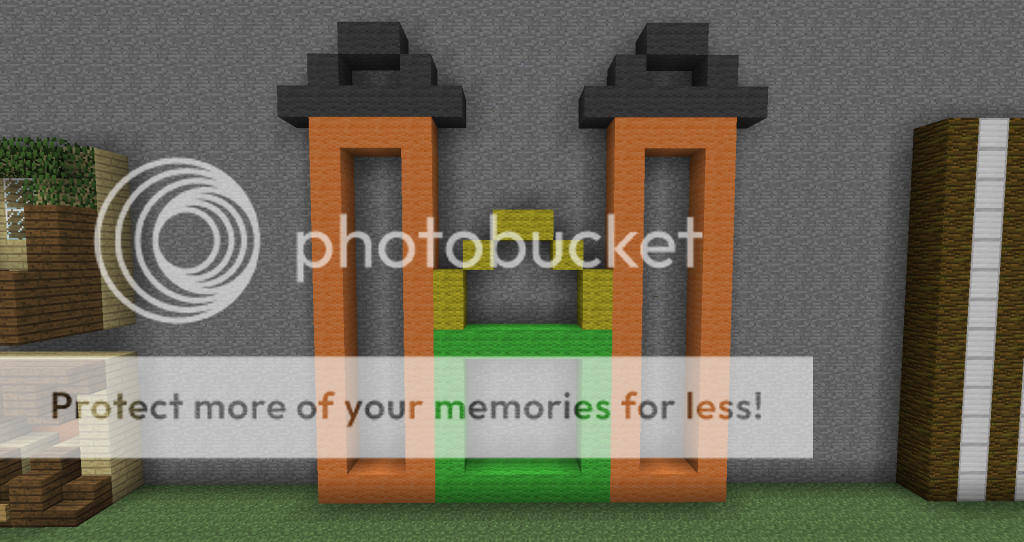
shapes in one of my builds:
Lines are important too. There are 3 different lines:
Horizontal: make things look fatter and wider.
Vertical: make things look thinner and taller.
Diagonal: makes things look big, taller and wider.
when building for example a tower. Ito s good to make use of this, so your tower looks tall instead of fat (ugly). You can make this effect using texture packs, but also with blocks.
Example of the lines:
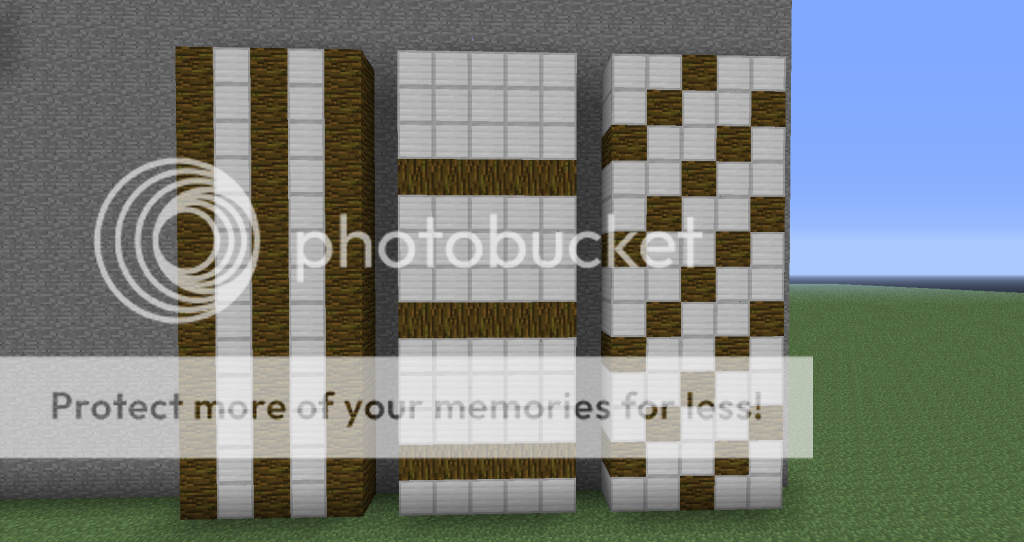
Click to reveal
Colors and Textures
Colors are VERY important when building. Before I explain the use of these colors, Io ll explain which colors there are.
Neutral colors: Brown, White, Black and shades of grey.
These colors often give you more of a dull feeling. White is an exception, this is lightness, clearness and perfection.
Cold colors: Blue, Green and Purple.
These colors give you more of a calm feeling.
Warm colors: Red, Yellow and Orange.
These colors give you anger, happy or warmth.
When you are building you can of course see what kind of feeling your build should show.
Next an important thing is the color wheel.
primary colors are red, blue and yellow. When combining these you get the secondary colors: green, orange and purple.
So 2 primary colors make a new secondary color. The three of these colors usually go very well together. So when building you can see what materials obey this rule.
Complementary colors:
These are colors which are the opposite of each other.

These can be used to draw attention to a certain point: to make a focus.
of course we learned: this is good. But dono t overuse this because then your building will look messy and chaotic.
Analogous colors:
These are colors are in harmony with eachother.

The best use of these are when you pick 1 of these as a Dominant color, 1 to support and 1 for accents.
Triadic colors:
These colors are quite vibrant.

Use these colors very carefully. Use 2 of the colors as accents the other one as dominating color. When these are not balanced your build will look chaotic and messy.
Split complementary colors:
These colors can be used to create a strong contrast.

Same use as complementary colors, but these are more in harmony with each other. (easier to make things look good).
Tetradic colors:
These colors can be used to create great veriaty.

Best is if you pick one dominant color and also balance the warm and cold colors.
Square colors:
same as tetradic.

Same function as tetradic.
An important thing to keep in mind is: the dominant color is always the focus.
These color schemes can be created using textures. What a good thing is, is all the different texture packs out there which lets you choose which colors, and which lines you have in your textures. These lines can be used to draw a focus to a certain point, so choose carefully.
Another good thing is depth. We will discuss this more later. But with textures depth can also be created, using leaves, glass and beacons.
some of the material colors:
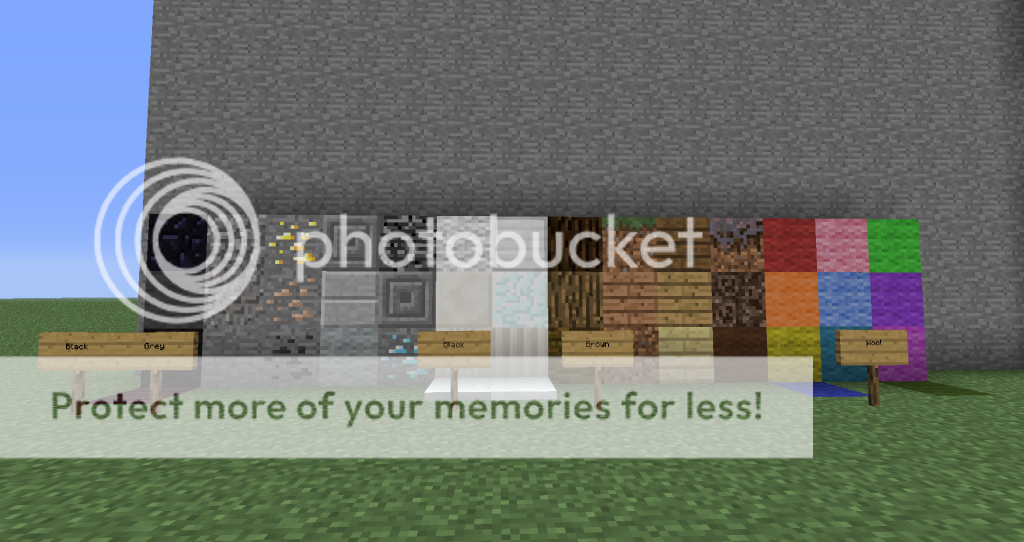
(sign at white blocks should say white, not black xD)
Space and Lighting
Space and Lighting
Lightning can be used in many ways, First of all to create a great influence on the colors. They create shadows, which can create a nice hue.
Lightning can also be used to create a certain focus, which as before, is good. For example in a house ito s good to only light certain parts of a house, you will just overuse it and you take away the interesting feature (and the focus) away. So inside, but also outside, be careful with the amount of light you use and only create light where you want to draw attention to. This feature can be used in hallways or rooms. People always tend to go to the light, so this could be used to trick people, or give them clues.
Light can also be used to create a certain mood: dark makes you feel sad, light makes you feel happy. This can also be used to make a building show a certain feeling, which is important if you want to give the spectator a certain feeling.
Light also creates space. People usually feel more comfortable in a lightened room than a dark room. So you can use this to create space, and create an illusion to make stuff look bigger than it actually is. The same can be done with the size of a room. You can make rooms look small: low roof. Or make things look big: high roof. This feature is used to make people feel comfortable or less comfortable. You can use this to make people stay in a room or to make them walk on.
Example:
you looked at the light part, didn't you :)
Patterns and Repetition
Patterns and Repetition
Patterns are extremely important for builds. Lets say you have a plain wall and you have no idea what to do with it. USE PATTERNS! They make them look interesting and awesome! This feature is also for the use of windows. Of course some might find it hard to come up with these. A tip I can give you is circles and waves. Try to experiment with circles and waves. Eventually you will develop your own style and patterns will be easy! NEVER SHALL UR BUILDINGS LOOK DULL!
Repetition is used in almost every (if not all) build. Repetition is the using a certain part of your build multiple times. For example using a pattern twice, a window, a pillar, a wall, a door, anything can be used twice. This also makes it possible for builds to be symmetrical. Also repetition makes it easier to detail a building, to make it more interesting. It gives you a calm feeling, makes it easy to look at. To practice at this you could walk through your city and look if you can recognize these. What is important however is that you use different parts that you use multiple. When youonly make 1 part come back different it might look messy. Also you shouldno t overuse this. when you overuse repetition it becomes chaotic.
A great thing about repetition is that it symbolizes the build. You can recognize a building by a certain part, because that part is used multiple times. This can also make your minecraft build unique.
(For an example of patterns, look at the example of depth and symbols below)
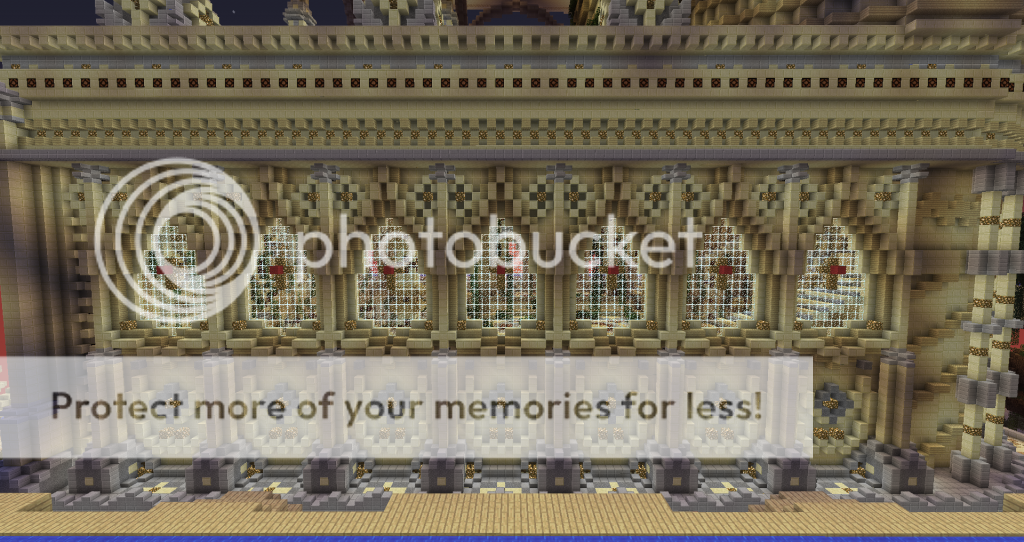
Two Examples in one of my builds (wool shows the parts that used multiple times):
Effort and Planning
Effort and Planning
Of course what really makes a build is the effort you put in. without putting any effort in you build, it will never look good. An important thing is to never give up. A rule of mine is: try until you die. This does not mean that you should keep on working on a certain build until it looks good. But it does mean that you should try different things and dono t give up to easily on them. Trial and error, allow mistakes in your life, you can only learn from it!
Planning is a good thing on a build FOR CERTAIN PEOPLE! some people have an amazingly creative mind. Planning will only hold you back when you have a certain mind. This is another rule of mine: Plan as you go along. To find out if you have such a mind is TRYING. Just try to make a build without planning, if it works out, dono t plan anymore (or less). Of course if you are going to make a build, you should plan for 2 to 5 minutes, to decide what youare going to make. This is very important, otherwise your build will be random and end up chaotic.
Of course for those who do need planning, my advice would be: do it carefully. Here ill make a step by step plan:
- Draw out the idea on a piece of paper. Make multiple sketches! (you never know if something else might pop up).
- Think about colors: what kind of feeling shuld it represent? what mood?
- If the above step takes more time than u expect, try out some combinations in minecraft. also: what colors can support? what colors can make accents? (look at color schemes)
- Plan out the build in minecraft. dont just start to build. make a layout on the ground of where u want what. possibly make poles in the middle of your layout, to see how high you want that area to be.
- Start building, fill in the gaps, make ur layout into a 3D model.
- Add Depth, symbols, patterns, accents, lights etc.
- Look at your build. Are you happy with your result? what could be improved? maybe some colors have to be changed?
Depth and Symbols
Depth and Symbols
Depth is very important for a build. If you dono t create any depth in your build it will look dull and boring. When using multiple layers in one wall you create depth, which adds detail and DEPTH in a wall. This will make it more interesting and a lot more awesome!
Depth cannot just be created with multiple layers. Also this can be achieved with leaves, glass, fences, beacons, stairs, slabs and all other similar blocks. These blocks include depth like glass, fences, leaves and beacons, or they can create depth, like stairs and slabs. The best advice I can give you for the use of this is: TRY! Just experiment with these blocks, see what makes it more interesting. When looking at my builds you can find a lot of this. Keep in mind that over using this will make it chaotic instead of interesting.
Symbols are amazing for builds. Crosses, hearts any symbol you can think of can be used with REPETITION in your build. This can be used as an identifier for your build, but also as a nice extra detail. In my builds you will find a lot of this. my best advice is to use these with DEPTH.
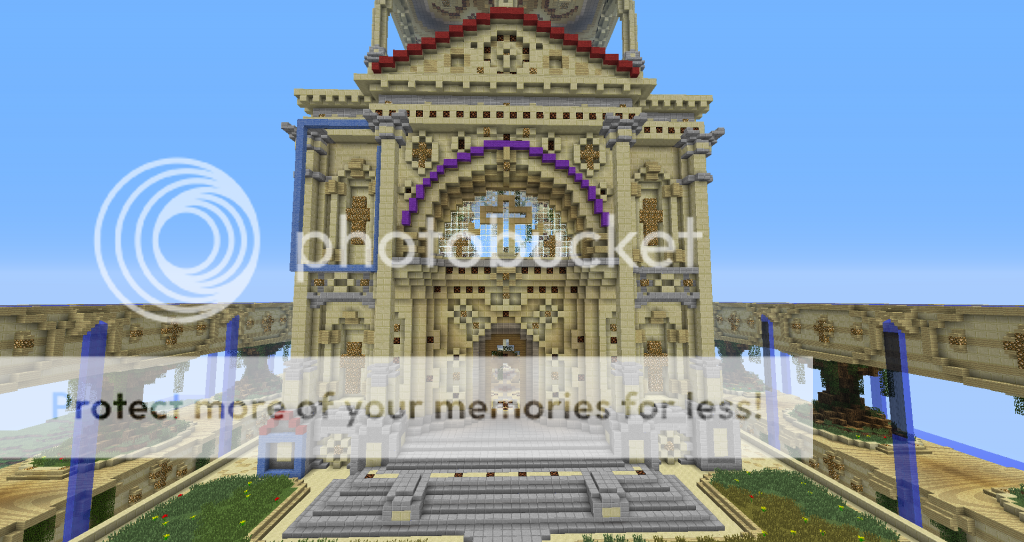
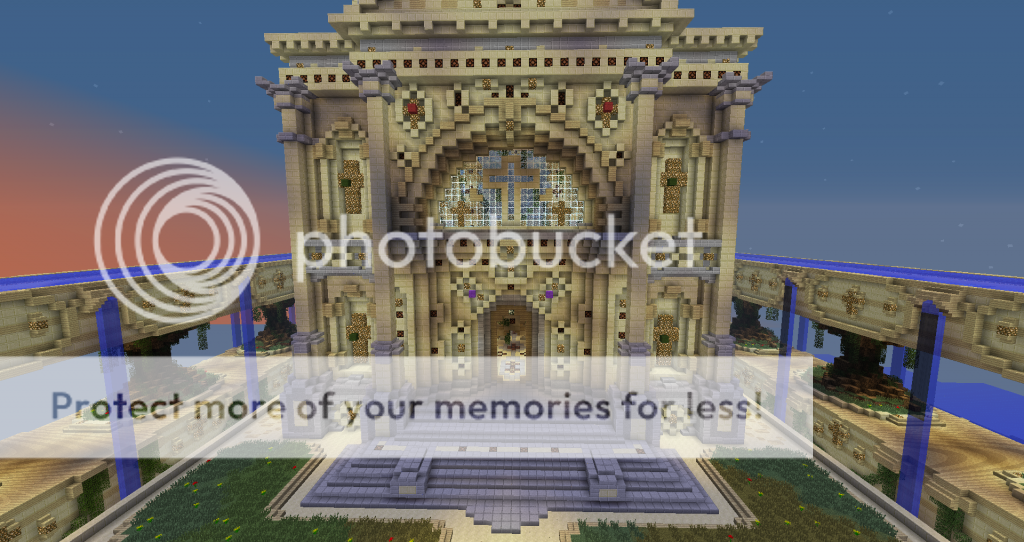
Here an example of depth, symbols, patterns and a plain wall:

Last comment:
NEVER EVER EVER overuse things, this is the worst thing (at least in my opinion) you can do. It makes things look ugly, messy and chaotic. SO DONo T!
Anything I forgot? Anything you want added (pictures maybe)? More explanation? Comment it !
Reader's Tips:
-
-
-
-
Updates coming:
- Pictures for visual demonstration.
- Material-color combinations.
- Diagonal lines.
- Reader's tips (constantly updating)
- Building styles
- Symmetry/Assymetry
- Elements
- Planning update
| Credit | special thanks to lentebriesje, for learning me some of this. |
| Tags |
1 Update Logs
Update #1 : by Drawly 04/17/2013 11:02:07 amApr 17th, 2013
Added:
planning update
visual demonstrations
diagonal lines
reader's tips section
planning update
visual demonstrations
diagonal lines
reader's tips section
2071055
6


 Suzune Horikita
 EccentricEremite
 User5142137G
 IceKingA121
 CrystalRuby
 Clone_trooper_7
 star_weaver
 mister kostya
 Blueybird
Create an account or sign in to comment.
Thing's I would add to the guide are: terra-forming (like i mentioned), using tools (i.e World Edit, VoxelSniper, World Painter, etc), and maybe presentation (like how to show off your build etc, although this might not have much to do with building, lol)