


- 632 views, 1 today

978
This is my complete skin tutorial. You will learn many things in this lesson so please continue. This is a tutorial on my whole Skinning life. And I'm telling you how to do it! I will continue to add stuff the more I know.
Programs to use
There are many options. I personally like Paint.net
You could also use MCskin3D, gimp, photoshop, or many other drawing tools. It really doesn't matter as long as you have
1. a pencil
2. a color picker
3. an eraser
4. paint bucket/fill
5. any kind of select.
6. Be able to have layers and transparency
I normally use all of these tools. There are other helpful ones but you won't really need them in this tutorial. I will say helpful things in Paint.net and all the tools, but you can either read them and see if you have any of those tools or skip it.We will go through 2 different shadings in this tutorial. Which are a lot so I'll name them with a picture so you can choose which you want. (They don't come until later but I'm giving you a heads up)
Using Paint.net/programs
I'll go through all the tools first and then give you helpful tips.
1. Rectangle Select: It lets you select a certain part of the skin in a rectangle shape. Helpful for beginners that way you don't draw where you are not supposed to. I don't use it in skins (I do in logos because they help there. won't go through it in this tutorial though) because I don't normally go out of line but it is very helpful. (that's why I put it in the 5 tools)
2. Move Selected Pixels: with a Rectangle Select (or any kind of select) you can move the pixels with this tool. You won't need to use it with skins because won't need to be moving your parts.
3. Lasso Select: This one let's you select pixels freely. You don't have any certain shape to follow.
4. Move Selection: This one is a lot like Move Selected Pixels only you don't get the pixels. With this you get the box of selection but you don't get the any pixels or color.
5. Eclipse Select: another select tool. You select pixels in an eclipse shape.
6. Zoom: Zoom is a useful tool but not needed. You can always zoom with something else but it is useful. when left clicking it it zooms in. When right clicking it it zooms out.
7. Magic Wand: This tool took me a lot of time to find out exactly what it does. It is yet another selection tool. When you left click it it selects the common color.
8. Pan: Pan is a very simple tool. All it does is move where you see. so you can go to a different side by using pan.
9. Paint Bucket: Paint Bucket fills in a different color. You can adjust the tolerance and it is a very helpful tool. Mostly used for coloring.
10. Gradient: You can pick a color for it to gradient. You won't be using this in skins but it is a fun tool when making logos or pictures!
11. Paint Brush: I never use this tool because I hate it but I'll give you a ruff meaning. It is a tool that is more than 1 pixel and leaves behind clearness. You can't post skins with clearness so I don't like this tool.
12. Eraser: I'm sure you all know what this does. It erases any pixels you don't want. You can adjust the size and it helps a lot.
13. Pencil: I'm sure you all know what this is too. it is your main drawing tool. The main thing you will be using because it drawing a single pixel of the color of your choice.
14. Color Picker: The name basically says what it does. It picks any color on the skin that way you don't have to go and find the color. Very helpful and you will be using it a lot in your skins.
15. Clone Stamp: I don't use this often in skins but it does help.You press Crtl and then click where you want the other place to be cloned. (that might not make very much sense but you won't really be needing it....)
16. Recolor: It's where if you want to recolor something than you use that and it doesn't go over the recolor.
I just went through the other color and the other color was still there.
17. Text: You can write with this. You won't need to write on skins though.
18. Line/Curve: You can make a straight line or a curve with this.
19. Rectangle: You can draw a rectangle with this. You have the choice of making it filled or not.
20. Rounded Rectangle: It makes the shape of a rounded rectangle and you can choice to make it filled or not
21. Eclipse: makes an Eclipse shape and you can choice to make it filled or not.
22. Freedom shape: Same with the others but you can make any shape you want!
Those are all the tools. I'll give you tips while we are going through but here are some basic ones
1. this is one.
 this is another. Many people get the body wrong and it looks terrible. With this you can look at it and know all the parts.
2. if you are doing black hair and eyes with eyebrows make the eyebrows either a dark gray or a dark purple.
3. If you are doing gloves make sure to make the bottom of the hand also the color of the glove.
4. With long hair make some hair on the neck that way it looks connected.
5. Make sure to scan all over the skin for errors before you post it.
The others I'll tell you while we are doing the tutorial.
A note before we get to the skin
Don't steal skin/skin parts. It's wrong and you better not do it. Be creative yourself and do your own ideas. I know sometimes we feel like no one likes our stuff so we want to get popular and we want to do whatever it takes to get popular but make your own skins. I've been here for almost 2 years and I'm not popular. Yes, I've stolen skin parts and I'm still not popular. I haven't stolen a lot just some. Stealing doesn't help because you will probably get reported. and when you do it makes you have a hole. (it at least does to me) The trick to getting recognized is making something most people haven't seen. That includes new shading people haven't seen.
Skin bases
Now, some people can't find any skin bases. It's not allowed to post steve skins on here but I have some good bases for you! They aren't shaded because it's a lot easier to shade it after you make what kind of clothes/designs/etc. you want before shading.
Boy and girl pale (The girl is in the description)
Boy and girl tan (The girl is in the description)
There are also other bases from other people such as leostereo's, dinowcookie's, and freyaaa's.
Picking your colors
Now, I'll try to explain this as simple as possible.

These are the 4 different ways. the first is value, the second is saturation, the third is hue, and the fourth is a mix of all of them.

This is value, it looks a little....plain, and just not quite right.

This is saturation. It looks weird, foggy, and dull.

This is hue. It is a lot like saturation. Just a little weird and dull.

and this is the combination! it looks fun, interesting, and cool. If this didn't make sense or help then maybe the_soup's will help! There are some exceptions with using the hue-shift. I figured out that doing the hue-shift with brown hair looks bad so just do saturation and value. Also, with yellow don't make it green make it more pure yellow. Also, with red, it's your choice. Dinowcookie clams it makes it have the christmas ball effect. where it doesn't make it shiny, but I haven't noticed that. With gray don't do anything but value. With gray it will change colors and you don't want gray to change colors! Also, with skin mostly change the saturation. Only do the value down once or twice in each lower color and with the hue only do 2 to 3 times.
Tips
Here are a few tips when skinning.
1. don't over change the skin color, or it will look terrible.
2. If you use the hue-shift WAY too much it will look bad.
3. If you are making your hair black make the eyelashes dark purple.
4. Do accesories. It makes the skin cutter/better.
5. Don't use a hard pink color when doing blush. When I say hard I mean don't make it JUST pink. make it have a skinnish look to it.
6. Don't use dull colors. When I say dull, I mean like this:

like this. the one on the left is dull. The one on the right is not dull. It pops out a lot more. the dull one...just doesn't look as good.........
7. Try mixing things up a bit when you're skinning!
8. When making hair black, you need to shade it, so instead of going gray, go really dark blue.
Choosing your style
Now...this is where people part....

 other hair.
 the skin
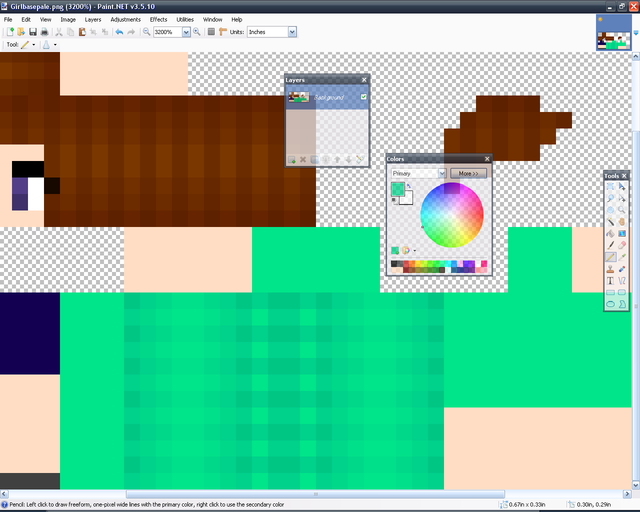
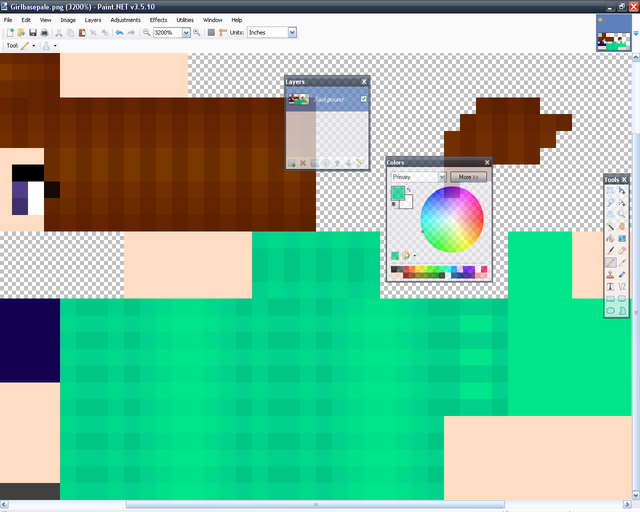
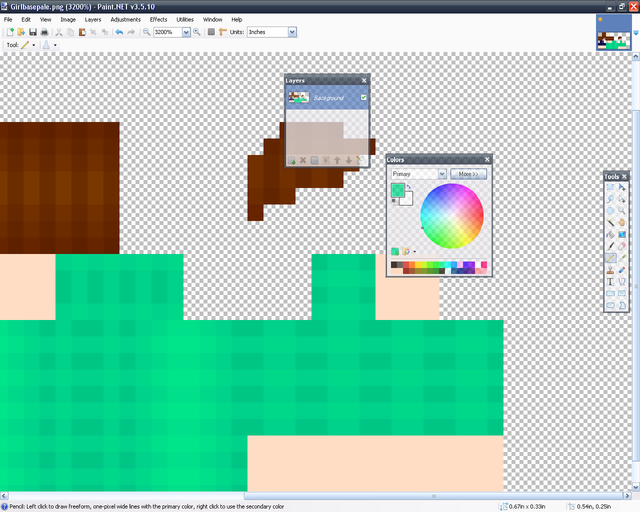
So, first you make your base. I'm doing a simple one for starters. You can do a lot more complex one but I wanted something simple. Note: I did the bangs shorter because I'm doing short hair. I would suggest doing that
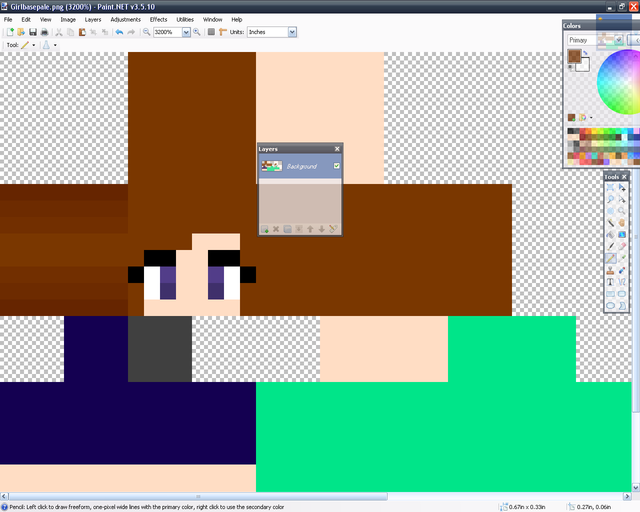
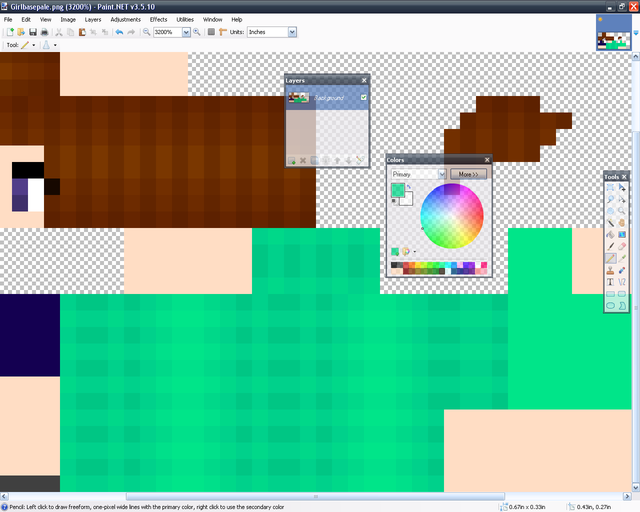
Let's start with the hair. You get a dark color and go darker like that. It's very simple.
You just do that for the rest of the hair except the top. Note: Don't go through the eyelashes or any other part, justskip the pixel/pixels.
With the top of the hair, simple do it the other way. You don't have to it's just how I do it.
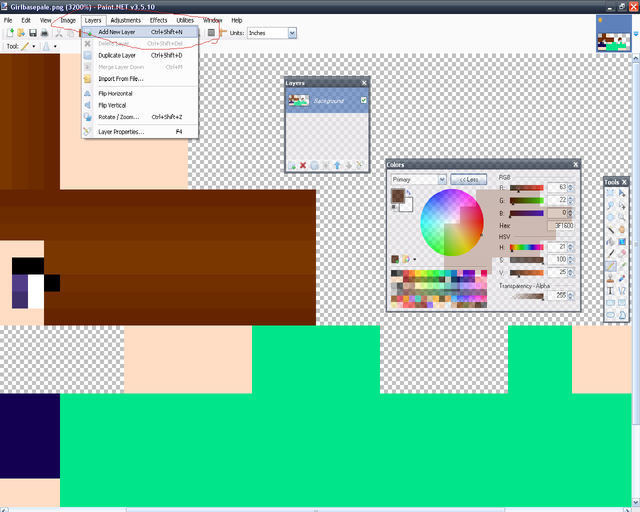
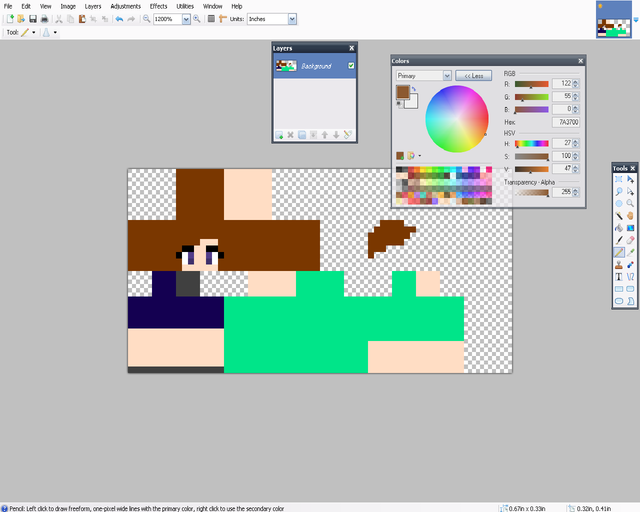
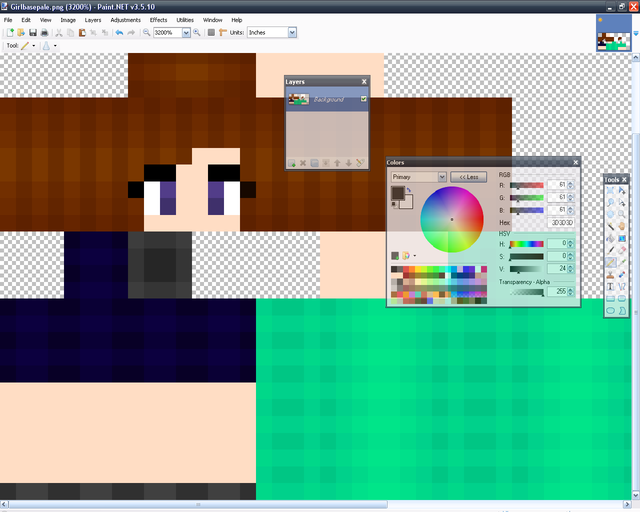
For this hair you need to make a new layer. It is right there where the red is circled.
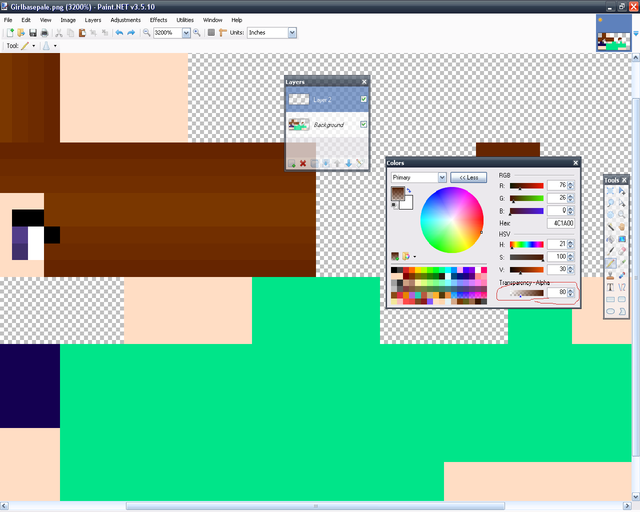
Make it transparent. I do around 70-98.
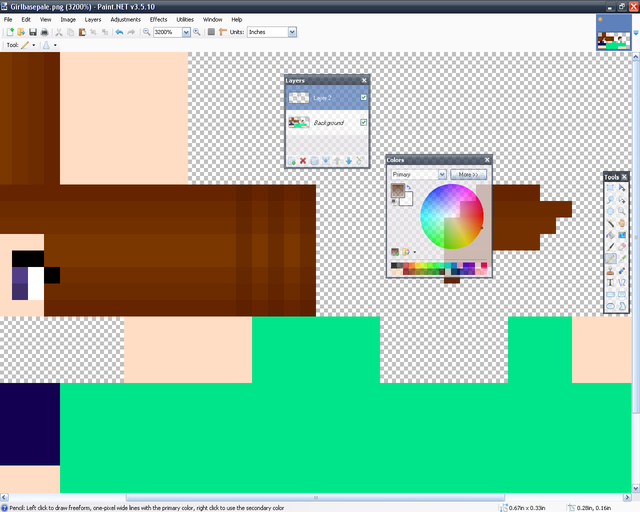
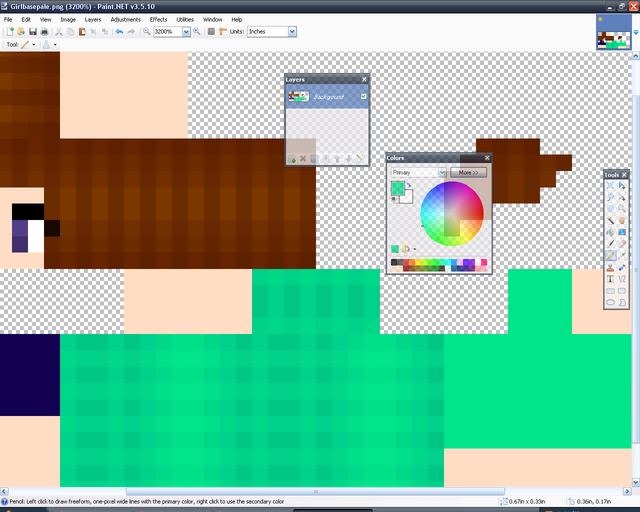
Then do lines every other.
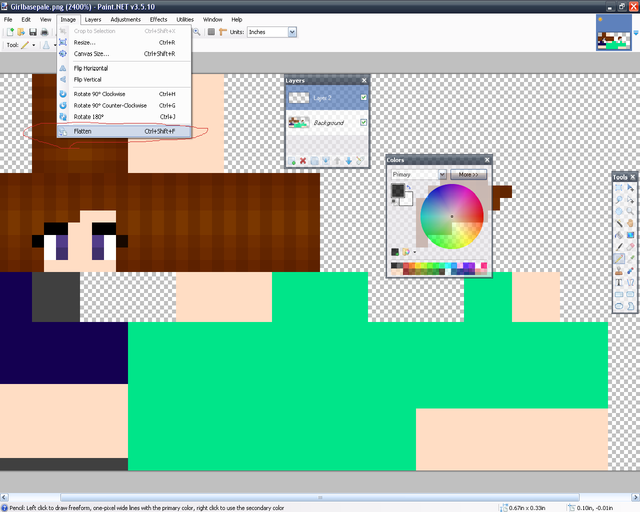
You keep doing that until you're finished. Then you have to flatten the image. it is where the red is circled. Note:You do the same shading with the bangs. We've just finished the hair!
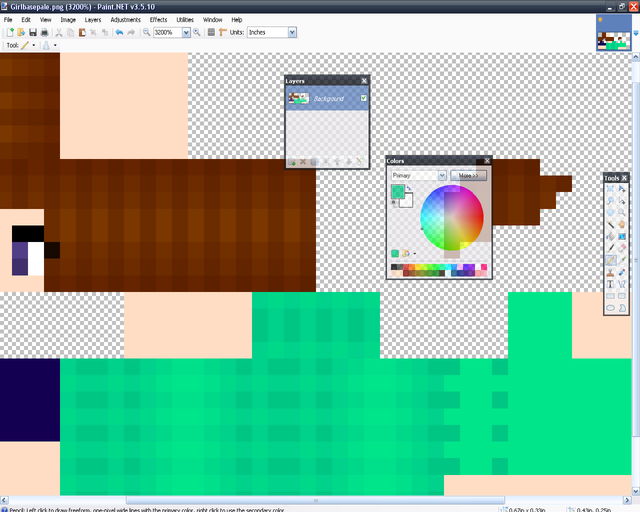
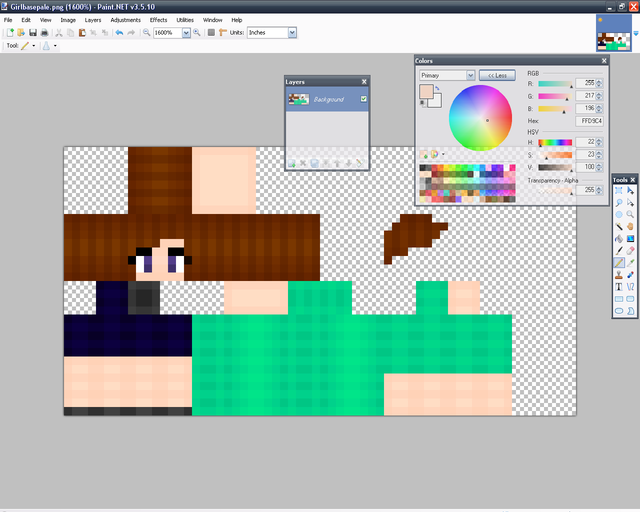
To do the chest you start out like this.
Then you do like this! it's very simple, really. You just keep doing this until you get the final product

Tada! But...the darkest color looks a little to blue for me...I'm gonna change that.
Tada! Now that's perfect! You do the exact same thing with the back.

See, you can copy and paste it or copy the colors and do it again.
Next is the inside of the shirt. You do dots like this.
Then you go around it like this!

Then you take the next color and finish up!
Then you just do the exact same thing on the other side.
Then you do the exact same thing with that part. Now to the sleeves!
You start out doing simple dots like that.
Then you kinda....outline? it like that.
Then you just fill the rest in! Very simple.
Then you just do the rest like that. Note: the elbow goes the exact same.
Now to the shorts. You do the exact same thing that you do with the sleeves. You put dots on every other spot and then outline, and fill.

See, you do the same thing! Remember, don't make the contrast on the shorts too much because then it won't look very good.
Shoe shading is simple. On the bottom of the shoe make it dark. The center the darkest, remember that the bottom of the shoe is where people are walking so it's gonna be dark. On the sides just do something like that. If you are doing boots or something more do the same shading that I showed you with the sleeves and shorts.
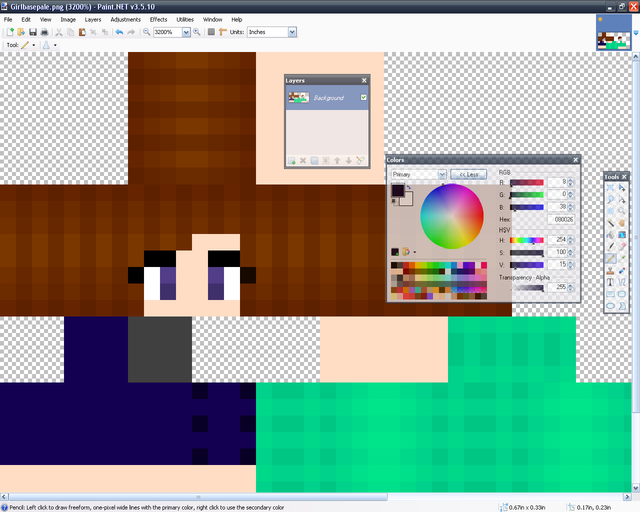
Then with the hands, and legs you do the same shading that you do with the sleeves. On the neck you just make a block, you don't need much detail there. on the face just do what you did with the hair. Only no layers or transparency.


How I make my clothes and more
I put how I make hair, shoes, etc here!
Bunny ears

Collared shirt

Tiria/crown

Egg shirt

rose

Soccer shirt

sword on the back

tie
I'll add more later.
Announcement: I'm starting back up on this!
Programs to use
There are many options. I personally like Paint.net
You could also use MCskin3D, gimp, photoshop, or many other drawing tools. It really doesn't matter as long as you have
1. a pencil
2. a color picker
3. an eraser
4. paint bucket/fill
5. any kind of select.
6. Be able to have layers and transparency
I normally use all of these tools. There are other helpful ones but you won't really need them in this tutorial. I will say helpful things in Paint.net and all the tools, but you can either read them and see if you have any of those tools or skip it.We will go through 2 different shadings in this tutorial. Which are a lot so I'll name them with a picture so you can choose which you want. (They don't come until later but I'm giving you a heads up)
Using Paint.net/programs
I'll go through all the tools first and then give you helpful tips.
1. Rectangle Select: It lets you select a certain part of the skin in a rectangle shape. Helpful for beginners that way you don't draw where you are not supposed to. I don't use it in skins (I do in logos because they help there. won't go through it in this tutorial though) because I don't normally go out of line but it is very helpful. (that's why I put it in the 5 tools)
2. Move Selected Pixels: with a Rectangle Select (or any kind of select) you can move the pixels with this tool. You won't need to use it with skins because won't need to be moving your parts.
3. Lasso Select: This one let's you select pixels freely. You don't have any certain shape to follow.
4. Move Selection: This one is a lot like Move Selected Pixels only you don't get the pixels. With this you get the box of selection but you don't get the any pixels or color.
5. Eclipse Select: another select tool. You select pixels in an eclipse shape.
6. Zoom: Zoom is a useful tool but not needed. You can always zoom with something else but it is useful. when left clicking it it zooms in. When right clicking it it zooms out.
7. Magic Wand: This tool took me a lot of time to find out exactly what it does. It is yet another selection tool. When you left click it it selects the common color.
8. Pan: Pan is a very simple tool. All it does is move where you see. so you can go to a different side by using pan.
9. Paint Bucket: Paint Bucket fills in a different color. You can adjust the tolerance and it is a very helpful tool. Mostly used for coloring.
10. Gradient: You can pick a color for it to gradient. You won't be using this in skins but it is a fun tool when making logos or pictures!
11. Paint Brush: I never use this tool because I hate it but I'll give you a ruff meaning. It is a tool that is more than 1 pixel and leaves behind clearness. You can't post skins with clearness so I don't like this tool.
12. Eraser: I'm sure you all know what this does. It erases any pixels you don't want. You can adjust the size and it helps a lot.
13. Pencil: I'm sure you all know what this is too. it is your main drawing tool. The main thing you will be using because it drawing a single pixel of the color of your choice.
14. Color Picker: The name basically says what it does. It picks any color on the skin that way you don't have to go and find the color. Very helpful and you will be using it a lot in your skins.
15. Clone Stamp: I don't use this often in skins but it does help.You press Crtl and then click where you want the other place to be cloned. (that might not make very much sense but you won't really be needing it....)
16. Recolor: It's where if you want to recolor something than you use that and it doesn't go over the recolor.
I just went through the other color and the other color was still there.
17. Text: You can write with this. You won't need to write on skins though.
18. Line/Curve: You can make a straight line or a curve with this.
19. Rectangle: You can draw a rectangle with this. You have the choice of making it filled or not.
20. Rounded Rectangle: It makes the shape of a rounded rectangle and you can choice to make it filled or not
21. Eclipse: makes an Eclipse shape and you can choice to make it filled or not.
22. Freedom shape: Same with the others but you can make any shape you want!
Those are all the tools. I'll give you tips while we are going through but here are some basic ones
1.
this is one.this is another. Many people get the body wrong and it looks terrible. With this you can look at it and know all the parts.2. if you are doing black hair and eyes with eyebrows make the eyebrows either a dark gray or a dark purple.
3. If you are doing gloves make sure to make the bottom of the hand also the color of the glove.
4. With long hair make some hair on the neck that way it looks connected.
5. Make sure to scan all over the skin for errors before you post it.
The others I'll tell you while we are doing the tutorial.
A note before we get to the skin
Don't steal skin/skin parts. It's wrong and you better not do it. Be creative yourself and do your own ideas. I know sometimes we feel like no one likes our stuff so we want to get popular and we want to do whatever it takes to get popular but make your own skins. I've been here for almost 2 years and I'm not popular. Yes, I've stolen skin parts and I'm still not popular. I haven't stolen a lot just some. Stealing doesn't help because you will probably get reported. and when you do it makes you have a hole. (it at least does to me) The trick to getting recognized is making something most people haven't seen. That includes new shading people haven't seen.
Skin bases
Now, some people can't find any skin bases. It's not allowed to post steve skins on here but I have some good bases for you! They aren't shaded because it's a lot easier to shade it after you make what kind of clothes/designs/etc. you want before shading.
Boy and girl pale (The girl is in the description)
Boy and girl tan (The girl is in the description)
There are also other bases from other people such as leostereo's, dinowcookie's, and freyaaa's.
Picking your colors
Now, I'll try to explain this as simple as possible.
These are the 4 different ways. the first is value, the second is saturation, the third is hue, and the fourth is a mix of all of them.
This is value, it looks a little....plain, and just not quite right.
This is saturation. It looks weird, foggy, and dull.
This is hue. It is a lot like saturation. Just a little weird and dull.
and this is the combination! it looks fun, interesting, and cool. If this didn't make sense or help then maybe the_soup's will help! There are some exceptions with using the hue-shift. I figured out that doing the hue-shift with brown hair looks bad so just do saturation and value. Also, with yellow don't make it green make it more pure yellow. Also, with red, it's your choice. Dinowcookie clams it makes it have the christmas ball effect. where it doesn't make it shiny, but I haven't noticed that. With gray don't do anything but value. With gray it will change colors and you don't want gray to change colors! Also, with skin mostly change the saturation. Only do the value down once or twice in each lower color and with the hue only do 2 to 3 times.
Tips
Here are a few tips when skinning.
1. don't over change the skin color, or it will look terrible.
2. If you use the hue-shift WAY too much it will look bad.
3. If you are making your hair black make the eyelashes dark purple.
4. Do accesories. It makes the skin cutter/better.
5. Don't use a hard pink color when doing blush. When I say hard I mean don't make it JUST pink. make it have a skinnish look to it.
6. Don't use dull colors. When I say dull, I mean like this:
like this. the one on the left is dull. The one on the right is not dull. It pops out a lot more. the dull one...just doesn't look as good.........
7. Try mixing things up a bit when you're skinning!
8. When making hair black, you need to shade it, so instead of going gray, go really dark blue.
Choosing your style
Now...this is where people part....
Pillow Shading
The only reason I call it pillow shading is because I made another shading tutorial on this and someone said it was pillow shading. Now let's start! I'm starting out with the whole parts chosen. So it doesn't look like a base. If you want to know how I do some of my bases then go to How I make my clothes.

This is what I decided to make mine look like.

You make a little palette up there with the steps I taught you in coloring.

Then you put a little "corner" in every spot you can. on the four pixeled places put one dots in areas. Notice the shoes. I did a little two dot thing there since there was no room to do corners.

then you take the lighter color and do that. with the shoes I did the lighter color in the middle. There is no highlights on those shoes since there's no room. Notice the front part of the hair. I made it look connected.

HIGHTLIGHTS!!!!!! You don't put any highlights on the neck to make it look a little more realistic. make sure not to make everything look the same. Like with the corners and highlights there isn't a certain corner pattern.

the very last step is putting the lightest highlight in the middle of the other highlight. once you finish this your skin is complete! Gratz, you guys just learned how to shade! If you want to learn more you can go to the bottom to learn more about how I make clothes, hates, accesories, etc. You can find the skin here
This is what I decided to make mine look like.
You make a little palette up there with the steps I taught you in coloring.
Then you put a little "corner" in every spot you can. on the four pixeled places put one dots in areas. Notice the shoes. I did a little two dot thing there since there was no room to do corners.
then you take the lighter color and do that. with the shoes I did the lighter color in the middle. There is no highlights on those shoes since there's no room. Notice the front part of the hair. I made it look connected.
HIGHTLIGHTS!!!!!! You don't put any highlights on the neck to make it look a little more realistic. make sure not to make everything look the same. Like with the corners and highlights there isn't a certain corner pattern.
the very last step is putting the lightest highlight in the middle of the other highlight. once you finish this your skin is complete! Gratz, you guys just learned how to shade! If you want to learn more you can go to the bottom to learn more about how I make clothes, hates, accesories, etc. You can find the skin here
Ultra Shading
I call it Ultra Shading because it takes a lot of steps. With this one...I'm gonna do the hair a little different. What you do is you take that color and make it darker with just value. and then you shade it like lines.

This is the base.
So then I made my palette

You get the darkest color for the darker color and put it at the ends. then you do the lighter color's dark."

You do that again only with the less darker color

then you do highlights. With the highlights you just do one dot on each.

You go over that dot on each and tada! Now to the shirt/chest

You get the darkest color and put a little dot like that there.

and then you cover it with the lighter color

and then you cover the lighter color.

then you do highlights where you just make a line under the base color.

then you get the lightest color and put it in the middle.

what you do next is you get the darkest color and out it at the bottom of the skirt and sleeve. then you make little corners in the other places. You keep piling the colors on the skirt and sleeve until you get to the top. With the corners you put the lighter color over that and then make a little dot with each highlight.

You do the same thing you did with the skirt and sleeve with the leggings/socks. Instead you do the darkest color at the top instead of the bottom. with the gloves you just go in a line.

With the bell you take the darkest color and put it at the edges. Then you take the less dark color and put it at the edges. Then you take a highlight and put it at the one place where the highlight wouldn't be toughing the shade. With the golden part you take a darker color and put it at the edges.

Then with the shoes you take the dark color and put it at the edge of each side and take the less dark color and put it in the middle. With the bottom of the shoe you do what you did with the corners. And you're done! You can find the skin here
This is the base.
So then I made my palette
You get the darkest color for the darker color and put it at the ends. then you do the lighter color's dark."
You do that again only with the less darker color
then you do highlights. With the highlights you just do one dot on each.
You go over that dot on each and tada! Now to the shirt/chest
You get the darkest color and put a little dot like that there.
and then you cover it with the lighter color
and then you cover the lighter color.
then you do highlights where you just make a line under the base color.
then you get the lightest color and put it in the middle.
what you do next is you get the darkest color and out it at the bottom of the skirt and sleeve. then you make little corners in the other places. You keep piling the colors on the skirt and sleeve until you get to the top. With the corners you put the lighter color over that and then make a little dot with each highlight.
You do the same thing you did with the skirt and sleeve with the leggings/socks. Instead you do the darkest color at the top instead of the bottom. with the gloves you just go in a line.
With the bell you take the darkest color and put it at the edges. Then you take the less dark color and put it at the edges. Then you take a highlight and put it at the one place where the highlight wouldn't be toughing the shade. With the golden part you take a darker color and put it at the edges.
Then with the shoes you take the dark color and put it at the edge of each side and take the less dark color and put it in the middle. With the bottom of the shoe you do what you did with the corners. And you're done! You can find the skin here
other hair.the skinCute Shading

So, first you make your base. I'm doing a simple one for starters. You can do a lot more complex one but I wanted something simple. Note: I did the bangs shorter because I'm doing short hair. I would suggest doing that

Let's start with the hair. You get a dark color and go darker like that. It's very simple.

You just do that for the rest of the hair except the top. Note: Don't go through the eyelashes or any other part, justskip the pixel/pixels.

With the top of the hair, simple do it the other way. You don't have to it's just how I do it.

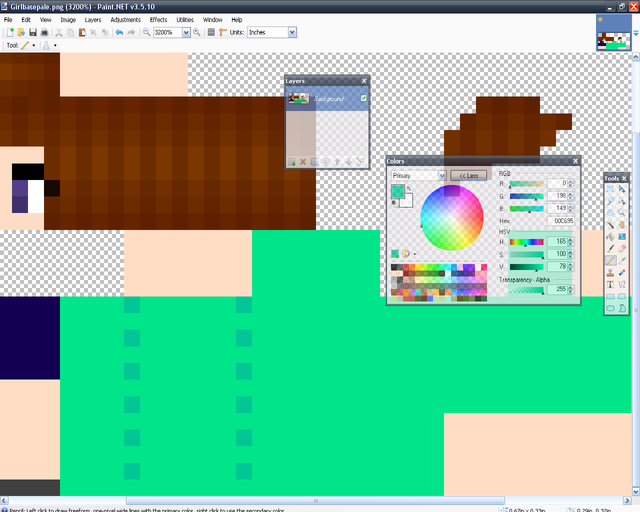
For this hair you need to make a new layer. It is right there where the red is circled.

Make it transparent. I do around 70-98.

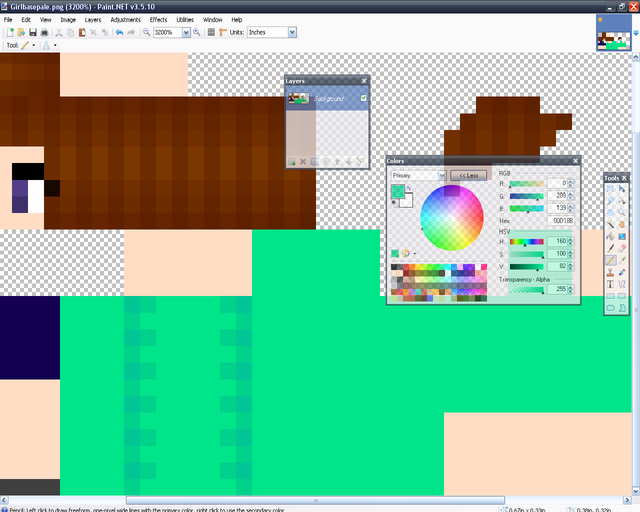
Then do lines every other.

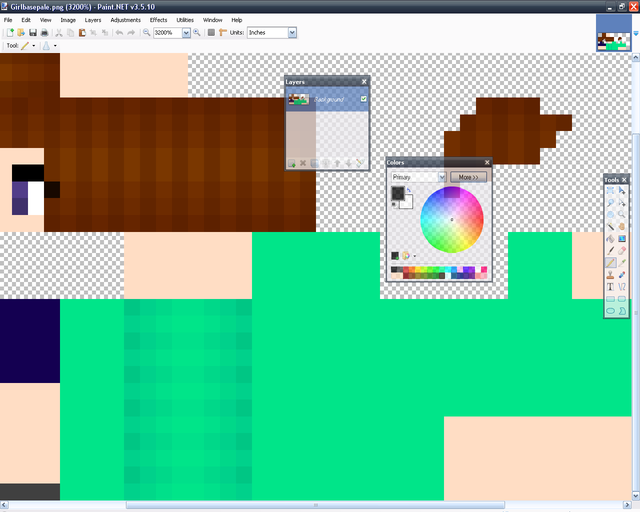
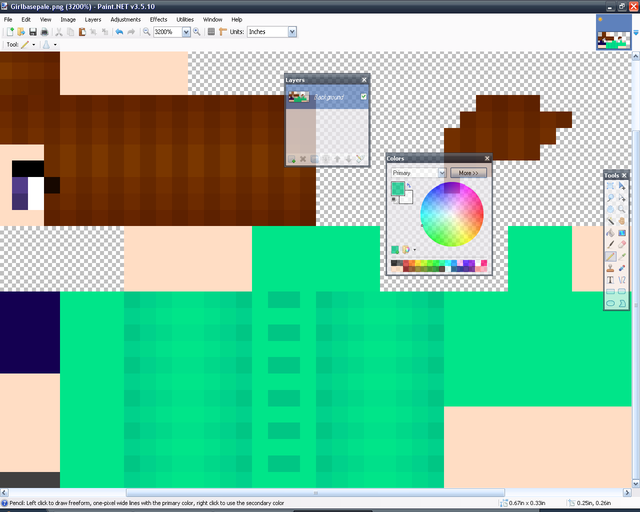
You keep doing that until you're finished. Then you have to flatten the image. it is where the red is circled. Note:You do the same shading with the bangs. We've just finished the hair!

To do the chest you start out like this.

Then you do like this! it's very simple, really. You just keep doing this until you get the final product

Tada! But...the darkest color looks a little to blue for me...I'm gonna change that.

Tada! Now that's perfect! You do the exact same thing with the back.

See, you can copy and paste it or copy the colors and do it again.

Next is the inside of the shirt. You do dots like this.

Then you go around it like this!

Then you take the next color and finish up!

Then you just do the exact same thing on the other side.

Then you do the exact same thing with that part. Now to the sleeves!

You start out doing simple dots like that.

Then you kinda....outline? it like that.

Then you just fill the rest in! Very simple.

Then you just do the rest like that. Note: the elbow goes the exact same.

Now to the shorts. You do the exact same thing that you do with the sleeves. You put dots on every other spot and then outline, and fill.

See, you do the same thing! Remember, don't make the contrast on the shorts too much because then it won't look very good.

Shoe shading is simple. On the bottom of the shoe make it dark. The center the darkest, remember that the bottom of the shoe is where people are walking so it's gonna be dark. On the sides just do something like that. If you are doing boots or something more do the same shading that I showed you with the sleeves and shorts.

Then with the hands, and legs you do the same shading that you do with the sleeves. On the neck you just make a block, you don't need much detail there. on the face just do what you did with the hair. Only no layers or transparency.
How I make my clothes and more
I put how I make hair, shoes, etc here!
Bunny ears
Collared shirt
Tiria/crown
Egg shirt
rose
Soccer shirt
sword on the back
tie
I'll add more later.
Announcement: I'm starting back up on this!
| Tags |
6 Update Logs
Update #6 : by CuteMurphy 02/02/2013 9:34:17 pmFeb 2nd, 2013
added Cute Shading
LOAD MORE LOGS
1679262
6

![Interview: MayaCookieGirl [#1] Minecraft Blog](https://static.planetminecraft.com/files/resource_media/screenshot/1529/interviewwithmaya9166786_thumb.jpg)


 IronRobot777
 azuko
azuko DoomStryker
 MythicWolf
 KaiOceansword
 Amazing Zane

 Noncommercial
 ZappyGru
 Datapack Hub
Create an account or sign in to comment.