


18
Hey guys! Flaxcon4397, and today Silly Joe is going to teach you how to shade the hair on your Minecraft skin's head. So, let's get started!
Step 1: Get a Base Head. Start by making a head for your skin without shading. Don't forget hair! (Back of Head Below)
Step 2: Make a Pallet. This step is best done in "Texture" view/editing mode. Go in the black part above "Head Back" and make a Pallet with the current collor in the center and up 1, then on a lower row, go left using SLIGHTLY lighter colors 3 times, (Best if you
use "Swatches" for colors) and right using SLIGHTLY darker colors 3 times. It should look something like this:

Step 3: Dip and Paint 3 Dots. Now that we have all of our tools, we can start. Select the "Dropper" button up top then click on the lightest color of your pallet. Then click the Penciel tool and make 3 dots like so:

Step 4: Surrond Those Dots With More Dots! Use the dropper tool and this time use number 2 on your pallet. (Easiest to count them) Surrond your first dots with these dot as shown bellow:

Step 5: Continue Step 4. Constantly go out, surronding the dots from before. (Skipping the one of origanal color because it's already there. I never said skip it!) On spaces like the front, add dots somewhere. I will mark the dots the color of the orignal hair Pink. The finished project:

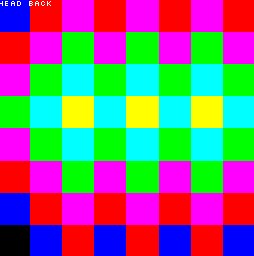
Here it is in BRIGHT colors!

Stick around for a tutorial on how to shade body and maybe, just maybe, one on how to shade pants. And our good friend Silly Joe will help too!
Step 1: Get a Base Head. Start by making a head for your skin without shading. Don't forget hair! (Back of Head Below)
Step 2: Make a Pallet. This step is best done in "Texture" view/editing mode. Go in the black part above "Head Back" and make a Pallet with the current collor in the center and up 1, then on a lower row, go left using SLIGHTLY lighter colors 3 times, (Best if you
use "Swatches" for colors) and right using SLIGHTLY darker colors 3 times. It should look something like this:
Step 3: Dip and Paint 3 Dots. Now that we have all of our tools, we can start. Select the "Dropper" button up top then click on the lightest color of your pallet. Then click the Penciel tool and make 3 dots like so:
Step 4: Surrond Those Dots With More Dots! Use the dropper tool and this time use number 2 on your pallet. (Easiest to count them) Surrond your first dots with these dot as shown bellow:
Step 5: Continue Step 4. Constantly go out, surronding the dots from before. (Skipping the one of origanal color because it's already there. I never said skip it!) On spaces like the front, add dots somewhere. I will mark the dots the color of the orignal hair Pink. The finished project:
Here it is in BRIGHT colors!
Stick around for a tutorial on how to shade body and maybe, just maybe, one on how to shade pants. And our good friend Silly Joe will help too!
| Tags |
tools/tracking
3511317
6
how-to-shade-hair-with-pictures


 MistFaller
 JoelHacker
 ScotsMiser
 Panda_Wolfe
 anatolijsharij
 Papa Enny
 VocalMC
 Panda_Tyger

 WYHA-Storm
Create an account or sign in to comment.