

- 24,658 views, 11 today

249
Hey Boys and Girls,
here is my input for the Blog Contest
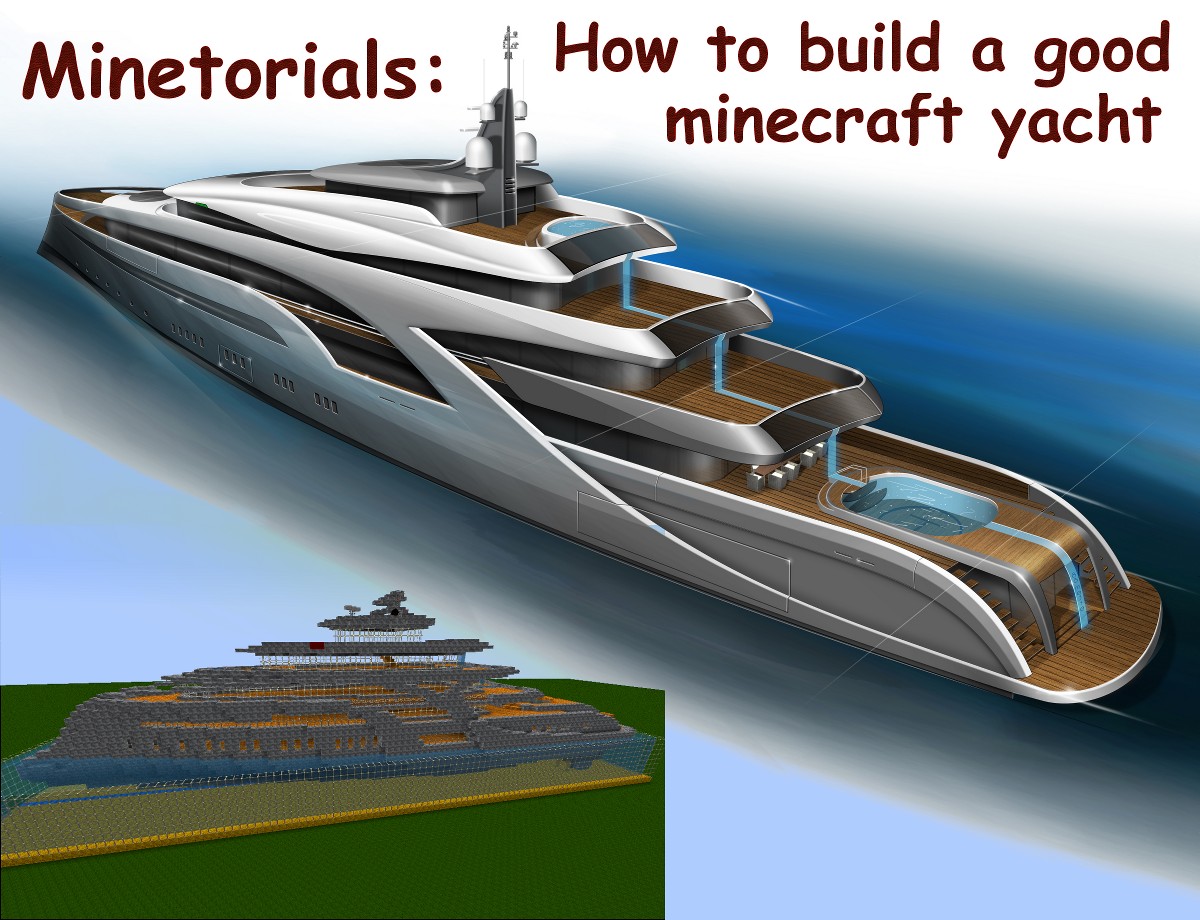
Minetorials: Tutorials with a Minecraft Theme
used texturepack(s): GI-Texturepack (x16, x32, x64 and x128)
--> you'll get them here
My question is: How to build a good yacht in Minecraft?
In this 10 steps you'll get the answer:
maybe you see a real yacht or just an image of a yacht, whatever inspired you it is the right
(I often use photos, concept-images, sketches, design-drawings, and even layouts or construction-plans)

this is a concept by Tony Castro for a 90-metre Superyacht with negative bow
The Tony-Castro-Design is my current project, so it is part of this blog (but it wouldn't be the only example).
At first you need to know how big your yacht will be, after you know the size approximately you can look for a
building site
(TIP: build the yacht in ca. this scale: 1 block = 1 metre)
If you use MCEdit it is simple: create a new world (flatland, no generated structures) and start to build.
(TIP: build the yacht in the direction you want to use it later, beds and doors won't rotate in MCEdit)
Otherwise it is a little bit more complicate to build a yacht cause you need a lake or better an ocean.
Be sure that there is enough space in length, beam, hight and enough space to the ground for the
underwaterstructure

this is a bad place to build a yacht, there is only space for a 30-blocks yacht and the water isn't deep enough

here you could build a large yacht (I've tested it with a 110 blocks long yacht)
It sounds easy but it isn't!
In this step of the yacht-building-process I use the creative-mode and a "simple" yacht-dock.
Out of glowstone, glass and lapis-lazuli (blocks) it is the indication for the size of the future yacht.

this is an example of my yacht-docks (the blue line is in the middle of the dock and the arrows are for the direction)
Then build the outline of the underwater-hull (I build it upside-down, it's easier to overpeer the free-form surface)
(TIP: build only one half of the hull and then mirror it with MCEdit)
If you haven't got MCEdit, then you have to build the whole hull ingame. (be sure to make it symmetrical)
Required Feature (1) of a good yacht is a free-form hull, it just looks horrible if you see a yacht (ship) with a
straight bow, straight hull and even straight stern (rear end). And make sure that your underwater-construction
isn't straight too.
Required Feature (2) is an underwater-hull. A yacht without it would sink immediately
(remember the TITANIC - the ship not the movie - it only had one small leakage,...)
Because the Tony-Castro-Concept isn't a classical yacht, I use another yacht ("Vibrant Curiosity") for the screenshots

here is the outline of "Vibrant Curiosity" (upside-down, and only one half)

the bow of the yacht should be smoothly curved as you can see it in this image
A - select your halfside-hull, mirror it and nudge it to the right place to complete the other half of the hull
B - nudge the now completed hull up in the air (maybe 10 blocks)
C - replace the air in the future underwater-area with sand-blocks. Between sand and ground have to be at least
as much space as the draft (for the british: draught) of the yacht

the half-side hull of "Vibrant Curiosity" in a huge sandblock up in the air (for better images the hull is still one half,
if you follow the steps above it is already mirrored and completed)
D - return ingame and destroy one (only one) block of sand at the bottom, maybe at one of the lower edges
Now the whole sand outside the ship will fall down, but the sand inside the ship will stay at the inside

it looks like this after you destroyed one single block and the sand is fallen down
E - still ingame, look at the special points of the yacht (bulbous bow, impulsion (PODS, propeller) and maybe
stabilizers) and remove the remaining sandblocks outside the ship

here you need to remove the sand above the bulbous bow
F - go back into MCEdit and remove the fallen sand-blocks
G - select an area as large as the underwater-hull or bigger and fill it with water, in my case I fill the yacht-dock
with water
H - take your yacht-hull (copy it) and put it into the water, untick the copy-air-box

the hull in the water (normally the hull is completed yet, but for you to show it is still halfside)

here is the whole hull in the water
I - your hull is "swimming" now, remove the sand-blocks inside your yacht and continue building your yacht.
This sounds easy too, but it isn't.
Just because it might be very complex (Sometimes I need a few days to complete the decks)
You need to build all the decks, walls, windows and also the main entrances to the decks.
Building the decks ceiling two blocks high you could have different colors of ceiling and the floor.
(TIP: If this is too thick for your yacht use half slabs)
Maybe you could think about the beachclub, tender areas and boarding options, such as stairs and platforms.
(TIP: reflect about the place, the size and also the future appearance of these parts)

Vibrant Curiosity looks after this step like this

the Tony-Castro-Design looks like this now
After completing the hull and superstructure your yacht need a stairway to get from one deck to the others.
This is sometimes very difficult, because the space onboard is not endless.
I work sometimes a few hours on the main staircase and the next day I remove it and build a new one...

here you can see the main staircase of Vibrant Curiosity

from outside you can see the red staircase on every deck (it starts on the lowest level and goes through the complete yacht to the topdeck)
Another important element is the way onto the yacht. For this part it's good to see the yacht and the
environment as one object and then build the boarding paths adapted to the conditions.
You could build them at the stern of the yacht or at the side of it. Just do it the way you like it best.

here is an example of boarding stairs at the side of a yacht
In reallife owners and guests boards by helicopter or yacht tenders. For this case your yacht need a landing site
(see STEP 7) or a platform for the tenders to berth. Often yachts have their own tenders, so please don't forget
to add them to your minecraft yacht.

this is one of the two tender garages of my superyacht-design "The Lion's Sky"
Special features of a yacht, such as cinema, sauna, indoor pool, garden, ... need a lot of space. So you should
build these part as early as possible, to be sure that there is enough space for them. (more in STEP 10)
If you gathered some ideas yet, it would be easier to build those special parts of your yacht.
(TIP: Don't hesitate to remove parts of your completed hull / superstructure if you guess it would looks better
with an other design)
here are some of my ideas:
pool:
~ at least one and a half blocks deep
~ surrounded by wood if the pool perorate with the surface of the deck
~ if your pool is on top of your deck, be sure that there is no gap in the side covering of the pool and also put
blocks, e.g. a half slabs, into the edges of your covering, if not the water in the inner edges of the pool
wouldn't be flat
~ maybe make one of the side coverings out of glass-blocks
~ glass-bottom
~ make a waterfall into or even outwards the pool

here you see the lower after deck pool of "The Lion's Sky" with waterfall from the pool on the deck above
helideck:
~ be sure that there is enough place for the complete helicopter (including the airfoils and the jib)
~ highlight the landing site with redstone-wire, glowstone, lanterns or other materials

here some versions of helicopter landing sites from my yachts
beachdeck:
~ large doors, windows or flaps (sometimes you could mix all together)
~ seating area(s)
~ skylight, maybe the glass-bottom of a pool above the beachclub
~ boarding facility
~ stairs to the next deck

the beachclub of "The Lion's Sky" with seating area below the pool-skylight

this stern includes a normal-sized beachdeck, (large) doors to the beachclub and stairs to the next deck
This step is maybe the most difficult step in the building process.
If you build a yacht without any additives - just realize your own vision, you have to think about size, form,
quantity and adjustment of all the little parts of the yacht.
Here some example your yacht should feature:
- master / owner suite
including: bath, bedroom, children's room, salon or informal lounge, maybe an office
- VIP suites (at least one)
with: bath and bedroom
- guest suites or guest cabins
- gym (if there is enough space)
- several salons (maindeck, upperdeck + topdeck)
- galley / kitchen
- bridge
- captains room (next to the bridge)
- crew cabins (usually double booths)
- crew mess with galley
Below you can see the way I design the different suites/rooms on a yacht. Putting blocks on the floor shows you
the size of the booths and also the remaining space for other elements.

the floor of "The Lion's Sky" with the first base of the future walls
If you build a copy of a real yacht, you probably have got an original layout of this special yacht. In this case just
copy it into Minecraft and maybe adapt it a little bit.
(TIP: the original character should be preserved)

This is the original layout of "Anastasia" a 75,50-metre Superyacht build at Oceanco in the Netherlands in 2008.
I want to build this yacht in Minecraft after the 1.3.-update, put it into my marina, and of cause I'll publish it on PMC).
(for more details of the original follow this link: http://www.superyachttimes.com/yachts/details/171/)
In this step you fill all the different rooms with furniture. When you've gained some experience in designing rooms
you can merge step 8 with this one.
Just equip the yacht with all the stuff YOU want to have on a yacht (or in a similar sized house).
This step would be an own tutorial (I guess there is already one). So here are just some examples from my
yachts. (especially from "The Lion's Sky", if not the yacht-name is in [...])

clockwise (start: top left corner): owner salon, small owner bedroom, owner bath, overview of the lower owner suite

clockwise (start: top left corner):complete VIP booth, VIP bedder, VIP bathroom ["A"], VIP seating area

clockwise (start: top left corner): grand salon, gym ["A"], galley, informal lounge

clockwise (start: top left corner): bridge (sideview), crew cabin, crew mess, captains booth
(TIPs for the bridge: brewing stand as joystick (to steer the yacht), cauldron with water as map-plotter and
enchantment tables as satnav)
Your task is now make your yacht an uinque one. For doing so you can add special rooms and features,
such as cinema, bar, gym, indoor pool, lounge,...
As usual I have some pics for you:

cinema including a bar on "The Lion's Sky"

the double-deck salon (main salon) on my superyacht-design "The Lion's Sky"

grand piano in the main salon of "A" designed by Philipp Stark
You could also add some tender(s) to make your yacht an unique one

clockwise (start: top left corner): in-water tender of "A", helicopter on my Lapis-Explorer, tender-yacht "The Lioness's Sky" part of my superyacht "The Lion's Sky", onboard storage of tenders on the SWATH-yacht
The other way making your yacht something special is to make the yacht special itself (special hull form - e.g.
trimaran, garden, sail(s) out of glass-pane, carbon-hull (I retextured the sponge), other special material)

the afterdeck garden on my Lapis-Lazuli Explorer

this is the indoor garden on my SWATH-yacht

"Les Ailes d'Or" with the main-sail build out of glass-pane

water-cascade from the topdeck to the beachdeck on the superyacht-design by Tony Castro

special appearance: "Renovatio" a carbon superyacht, copy of the Wally Power 118, one of this yachts was part of the movie "The Island"

"Flying Shark" - superyacht trimaran with martial front design an huge owner-deck

this is "Sigmund 98" build as copy of a concept by Sigmund-Yacht-Design
of cause there are many many more ideas, here are some I've build yet:
~ under water viewing area
~ yacht out of gold , diamond-blocks or lapis-lazuli
~ party yacht with different lighting modes for the underwater spots
~ special superyacht entrance (concept "Eva" by Luerssen)
~ superyacht with split-level-design
~ three-masted sailing superyacht "Maltese Falcon" with Dyna-Rigg sails
~ indoor pool (for the crew)
~ sauna
~ secret path through the pool
~ wheat-fields inside the hull
~ ...
This is not really a necessary step in the yacht building process, because your yacht is already finished.
But if you built the yacht with MCEdit, you need to do this.
Just select a nice environment or a place to put the yacht in.
In my case I put the yacht into Port Vauban or into my world "Secret Yacht Bay" (some of you might know this).

"The Lion's Sky" at it's berth in my marina

the speedyacht "Panthera" in the Secret Yacht Bay
Your yacht is ready now.
Enjoy your very own ship and/or share it with other members on PMC.
I hope this blog helped you if you are building a yacht at the moment or at least inspired you to build one.
And if you just wanted to know how to do it, it's also fine.
There just two things left, I want to add:
~ Please write ideas to improve this blog into the comments
~ If you want me to check your yacht, please write it into the comments or send me a private message.
So I hope you enjoy it
please don't hesitate to give a diamond, leave a comment,
favorite or subscribe if you like it
it's just one click - or some simple words - and you show your support
here is my input for the Blog Contest
Minetorials: Tutorials with a Minecraft Theme
used texturepack(s): GI-Texturepack (x16, x32, x64 and x128)
--> you'll get them here
My question is: How to build a good yacht in Minecraft?
In this 10 steps you'll get the answer:
STEP 1. At first you need an idea (as usual...)
maybe you see a real yacht or just an image of a yacht, whatever inspired you it is the right
(I often use photos, concept-images, sketches, design-drawings, and even layouts or construction-plans)
this is a concept by Tony Castro for a 90-metre Superyacht with negative bow
The Tony-Castro-Design is my current project, so it is part of this blog (but it wouldn't be the only example).
STEP 2. You need now a place to build the yacht.
At first you need to know how big your yacht will be, after you know the size approximately you can look for a
building site
(TIP: build the yacht in ca. this scale: 1 block = 1 metre)
If you use MCEdit it is simple: create a new world (flatland, no generated structures) and start to build.
(TIP: build the yacht in the direction you want to use it later, beds and doors won't rotate in MCEdit)
Otherwise it is a little bit more complicate to build a yacht cause you need a lake or better an ocean.
Be sure that there is enough space in length, beam, hight and enough space to the ground for the
underwaterstructure
this is a bad place to build a yacht, there is only space for a 30-blocks yacht and the water isn't deep enough
here you could build a large yacht (I've tested it with a 110 blocks long yacht)
STEP 3. Start to build
It sounds easy but it isn't!
In this step of the yacht-building-process I use the creative-mode and a "simple" yacht-dock.
Out of glowstone, glass and lapis-lazuli (blocks) it is the indication for the size of the future yacht.
this is an example of my yacht-docks (the blue line is in the middle of the dock and the arrows are for the direction)
Then build the outline of the underwater-hull (I build it upside-down, it's easier to overpeer the free-form surface)
(TIP: build only one half of the hull and then mirror it with MCEdit)
If you haven't got MCEdit, then you have to build the whole hull ingame. (be sure to make it symmetrical)
Required Feature (1) of a good yacht is a free-form hull, it just looks horrible if you see a yacht (ship) with a
straight bow, straight hull and even straight stern (rear end). And make sure that your underwater-construction
isn't straight too.
Required Feature (2) is an underwater-hull. A yacht without it would sink immediately
(remember the TITANIC - the ship not the movie - it only had one small leakage,...)
Because the Tony-Castro-Concept isn't a classical yacht, I use another yacht ("Vibrant Curiosity") for the screenshots
here is the outline of "Vibrant Curiosity" (upside-down, and only one half)
the bow of the yacht should be smoothly curved as you can see it in this image
STEP 4. Turn the hull and place it into water (only when you build your yacht with MCEdit)
A - select your halfside-hull, mirror it and nudge it to the right place to complete the other half of the hull
B - nudge the now completed hull up in the air (maybe 10 blocks)
C - replace the air in the future underwater-area with sand-blocks. Between sand and ground have to be at least
as much space as the draft (for the british: draught) of the yacht
the half-side hull of "Vibrant Curiosity" in a huge sandblock up in the air (for better images the hull is still one half,
if you follow the steps above it is already mirrored and completed)
D - return ingame and destroy one (only one) block of sand at the bottom, maybe at one of the lower edges
Now the whole sand outside the ship will fall down, but the sand inside the ship will stay at the inside
it looks like this after you destroyed one single block and the sand is fallen down
E - still ingame, look at the special points of the yacht (bulbous bow, impulsion (PODS, propeller) and maybe
stabilizers) and remove the remaining sandblocks outside the ship
here you need to remove the sand above the bulbous bow
F - go back into MCEdit and remove the fallen sand-blocks
G - select an area as large as the underwater-hull or bigger and fill it with water, in my case I fill the yacht-dock
with water
H - take your yacht-hull (copy it) and put it into the water, untick the copy-air-box
the hull in the water (normally the hull is completed yet, but for you to show it is still halfside)
here is the whole hull in the water
I - your hull is "swimming" now, remove the sand-blocks inside your yacht and continue building your yacht.
STEP 5. build / complete the superstructure
This sounds easy too, but it isn't.
Just because it might be very complex (Sometimes I need a few days to complete the decks)
You need to build all the decks, walls, windows and also the main entrances to the decks.
Building the decks ceiling two blocks high you could have different colors of ceiling and the floor.
(TIP: If this is too thick for your yacht use half slabs)
Maybe you could think about the beachclub, tender areas and boarding options, such as stairs and platforms.
(TIP: reflect about the place, the size and also the future appearance of these parts)
Vibrant Curiosity looks after this step like this
the Tony-Castro-Design looks like this now
STEP 6. main elements (stairway(s), tender(s), special feature(s) - also see STEP 10)
After completing the hull and superstructure your yacht need a stairway to get from one deck to the others.
This is sometimes very difficult, because the space onboard is not endless.
I work sometimes a few hours on the main staircase and the next day I remove it and build a new one...
here you can see the main staircase of Vibrant Curiosity
from outside you can see the red staircase on every deck (it starts on the lowest level and goes through the complete yacht to the topdeck)
Another important element is the way onto the yacht. For this part it's good to see the yacht and the
environment as one object and then build the boarding paths adapted to the conditions.
You could build them at the stern of the yacht or at the side of it. Just do it the way you like it best.
here is an example of boarding stairs at the side of a yacht
In reallife owners and guests boards by helicopter or yacht tenders. For this case your yacht need a landing site
(see STEP 7) or a platform for the tenders to berth. Often yachts have their own tenders, so please don't forget
to add them to your minecraft yacht.
this is one of the two tender garages of my superyacht-design "The Lion's Sky"
Special features of a yacht, such as cinema, sauna, indoor pool, garden, ... need a lot of space. So you should
build these part as early as possible, to be sure that there is enough space for them. (more in STEP 10)
STEP 7. special places of the yacht: pool, helideck, beachdeck, ...
If you gathered some ideas yet, it would be easier to build those special parts of your yacht.
(TIP: Don't hesitate to remove parts of your completed hull / superstructure if you guess it would looks better
with an other design)
here are some of my ideas:
pool:
~ at least one and a half blocks deep
~ surrounded by wood if the pool perorate with the surface of the deck
~ if your pool is on top of your deck, be sure that there is no gap in the side covering of the pool and also put
blocks, e.g. a half slabs, into the edges of your covering, if not the water in the inner edges of the pool
wouldn't be flat
~ maybe make one of the side coverings out of glass-blocks
~ glass-bottom
~ make a waterfall into or even outwards the pool
here you see the lower after deck pool of "The Lion's Sky" with waterfall from the pool on the deck above
helideck:
~ be sure that there is enough place for the complete helicopter (including the airfoils and the jib)
~ highlight the landing site with redstone-wire, glowstone, lanterns or other materials
here some versions of helicopter landing sites from my yachts
beachdeck:
~ large doors, windows or flaps (sometimes you could mix all together)
~ seating area(s)
~ skylight, maybe the glass-bottom of a pool above the beachclub
~ boarding facility
~ stairs to the next deck
the beachclub of "The Lion's Sky" with seating area below the pool-skylight
this stern includes a normal-sized beachdeck, (large) doors to the beachclub and stairs to the next deck
STEP 8. layout
This step is maybe the most difficult step in the building process.
If you build a yacht without any additives - just realize your own vision, you have to think about size, form,
quantity and adjustment of all the little parts of the yacht.
Here some example your yacht should feature:
- master / owner suite
including: bath, bedroom, children's room, salon or informal lounge, maybe an office
- VIP suites (at least one)
with: bath and bedroom
- guest suites or guest cabins
- gym (if there is enough space)
- several salons (maindeck, upperdeck + topdeck)
- galley / kitchen
- bridge
- captains room (next to the bridge)
- crew cabins (usually double booths)
- crew mess with galley
Below you can see the way I design the different suites/rooms on a yacht. Putting blocks on the floor shows you
the size of the booths and also the remaining space for other elements.
the floor of "The Lion's Sky" with the first base of the future walls
If you build a copy of a real yacht, you probably have got an original layout of this special yacht. In this case just
copy it into Minecraft and maybe adapt it a little bit.
(TIP: the original character should be preserved)
This is the original layout of "Anastasia" a 75,50-metre Superyacht build at Oceanco in the Netherlands in 2008.
I want to build this yacht in Minecraft after the 1.3.-update, put it into my marina, and of cause I'll publish it on PMC).
(for more details of the original follow this link: http://www.superyachttimes.com/yachts/details/171/)
STEP 9. interior (furniture)
In this step you fill all the different rooms with furniture. When you've gained some experience in designing rooms
you can merge step 8 with this one.
Just equip the yacht with all the stuff YOU want to have on a yacht (or in a similar sized house).
This step would be an own tutorial (I guess there is already one). So here are just some examples from my
yachts. (especially from "The Lion's Sky", if not the yacht-name is in [...])
clockwise (start: top left corner): owner salon, small owner bedroom, owner bath, overview of the lower owner suite
clockwise (start: top left corner):complete VIP booth, VIP bedder, VIP bathroom ["A"], VIP seating area
clockwise (start: top left corner): grand salon, gym ["A"], galley, informal lounge
clockwise (start: top left corner): bridge (sideview), crew cabin, crew mess, captains booth
(TIPs for the bridge: brewing stand as joystick (to steer the yacht), cauldron with water as map-plotter and
enchantment tables as satnav)
STEP 10. special feature(s)
Your task is now make your yacht an uinque one. For doing so you can add special rooms and features,
such as cinema, bar, gym, indoor pool, lounge,...
As usual I have some pics for you:
cinema including a bar on "The Lion's Sky"
the double-deck salon (main salon) on my superyacht-design "The Lion's Sky"
grand piano in the main salon of "A" designed by Philipp Stark
You could also add some tender(s) to make your yacht an unique one
clockwise (start: top left corner): in-water tender of "A", helicopter on my Lapis-Explorer, tender-yacht "The Lioness's Sky" part of my superyacht "The Lion's Sky", onboard storage of tenders on the SWATH-yacht
The other way making your yacht something special is to make the yacht special itself (special hull form - e.g.
trimaran, garden, sail(s) out of glass-pane, carbon-hull (I retextured the sponge), other special material)
the afterdeck garden on my Lapis-Lazuli Explorer
this is the indoor garden on my SWATH-yacht
"Les Ailes d'Or" with the main-sail build out of glass-pane
water-cascade from the topdeck to the beachdeck on the superyacht-design by Tony Castro
special appearance: "Renovatio" a carbon superyacht, copy of the Wally Power 118, one of this yachts was part of the movie "The Island"
"Flying Shark" - superyacht trimaran with martial front design an huge owner-deck
this is "Sigmund 98" build as copy of a concept by Sigmund-Yacht-Design
of cause there are many many more ideas, here are some I've build yet:
~ under water viewing area
~ yacht out of gold , diamond-blocks or lapis-lazuli
~ party yacht with different lighting modes for the underwater spots
~ special superyacht entrance (concept "Eva" by Luerssen)
~ superyacht with split-level-design
~ three-masted sailing superyacht "Maltese Falcon" with Dyna-Rigg sails
~ indoor pool (for the crew)
~ sauna
~ secret path through the pool
~ wheat-fields inside the hull
~ ...
STEP 11. environment of the yacht
This is not really a necessary step in the yacht building process, because your yacht is already finished.
But if you built the yacht with MCEdit, you need to do this.
Just select a nice environment or a place to put the yacht in.
In my case I put the yacht into Port Vauban or into my world "Secret Yacht Bay" (some of you might know this).
"The Lion's Sky" at it's berth in my marina
the speedyacht "Panthera" in the Secret Yacht Bay
Your yacht is ready now.
Enjoy your very own ship and/or share it with other members on PMC.
I hope this blog helped you if you are building a yacht at the moment or at least inspired you to build one.
And if you just wanted to know how to do it, it's also fine.
There just two things left, I want to add:
~ Please write ideas to improve this blog into the comments
~ If you want me to check your yacht, please write it into the comments or send me a private message.
So I hope you enjoy it
please don't hesitate to give a diamond, leave a comment,
favorite or subscribe if you like it
it's just one click - or some simple words - and you show your support
| Tags |
8 Update Logs
Update #8 : by Luxury_Creeper 12/03/2012 12:42:28 pmDec 3rd, 2012
the contest was long time ago, but I guess it's time to update this blog...
With this update I spoilered the long text into the different parts, so if you're building a yacht it's easier to find the information you need for your current part.
I appreciated feedback
With this update I spoilered the long text into the different parts, so if you're building a yacht it's easier to find the information you need for your current part.
I appreciated feedback
LOAD MORE LOGS
tools/tracking
1153229
6
10-steps-to-a-minecraft-yacht-contest-entry


 Cristian2013
 S673R2
 Antique
 Christ8Pizza
 HeyThisGuyVapes
 _Blanc__

 WYHA-Storm
Create an account or sign in to comment.
ask if you have more questions
send me a link when finished (if you want)