


67
♥ hey guys!
i noticed a lot of you like drawn avatars so i put together a guide showing how i generally make them.
i drew my oc lunacy.
skin based off
enjoy ♥
♥ setting up
i use Paint Tool SAI, but Photoshop or any drawing program could work.
i start with a 2000px square canvas and choose colors as i go. don't worry about the huge canvas size, as you can shrink it down later.
♥ sketching
i've drawn anime style digitally for around 4 years now, and honestly it's just practice.
lay down the sketch. my end result looked a little different since i really just use the sketch as a guide.
i used a 7px brush to sketch with various colors.

♥ lineart
once you have that down, start the line art. lower the sketch, and start with the eyes.
use your sketch to get a feel for where the lines go. try not to just trace it. remember to vary your thickness!
i used a 2-3px brush for lineart.
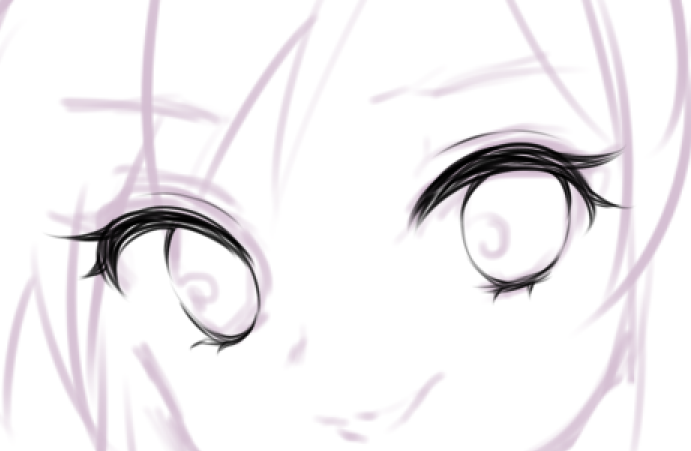
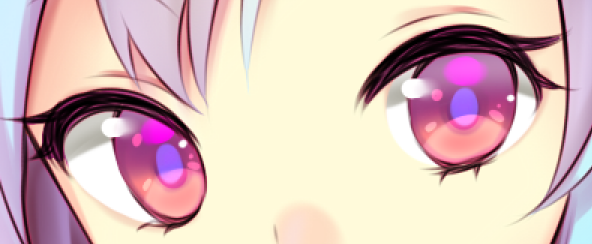
zoomed in 150%
i start with the top part and layer lines on top to thicken it (3px) . i then draw in the lower eyelids and lashes (2px). lastly, i draw in the actual eye part. notice how the lines are not continuous, but broken up instead.

zoomed out 50%
used 2px brush, 3px to thicken.
i got lazy and left out the headband and overalls lol. i also drew above the eye layer and hid it as i drew so that i can tell what i'm doing. honestly do what you want haha.
vary your line widths! for longer lines, try to zoom out. CTRL + Z is your friend!

zoomed out 50%
finished line art.
♥ coloring
pretty simple. use the brush / bucket tool to fill in colors on different layers. i also color the line art at this point.
zoomed out 50%
i start shading the skin. the light source is coming from the left, so shadows go rightward. i draw hard edges first and then blur them out.
i add a darker tone for more depth, and shade in details like the collarbone and eyelids
 .
.
it's hard to notice but i airbrushed a super faint purple shade around the neck and forehead for some more light.
i start shading hair. i shade in chunks for the bangs, and for the rest of the hair, in up and down motions. CTRL + Z is still your friend, don't forget!
same as before, but i shaded more sparingly and used a darker color.
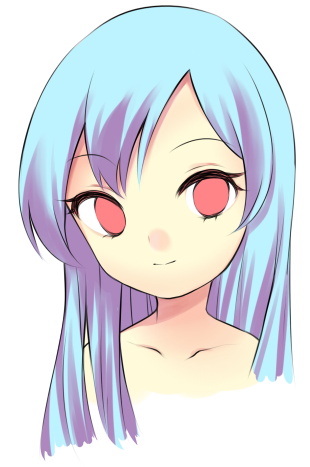
highlights! i airbrushed a skin tone around the bangs and bottom of the hair and drew in highlights.
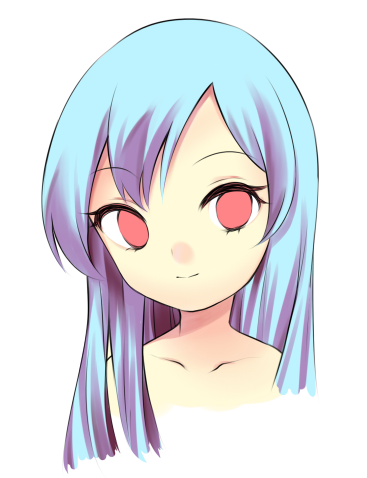
i airbrushed that super faint purple color again. sorry it's hard to notice!
eyes! shade in the shadows and pupil!
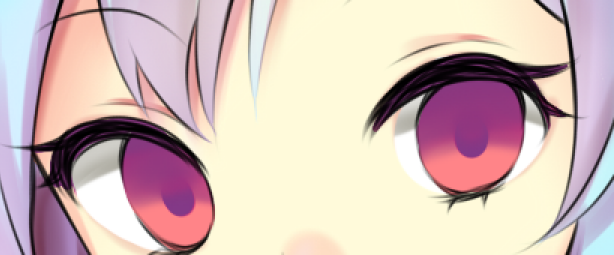
i add a darker shade to the pupils

add shading around the edges
add two shiny colors. don't make them too bright since you still need to do highlights!

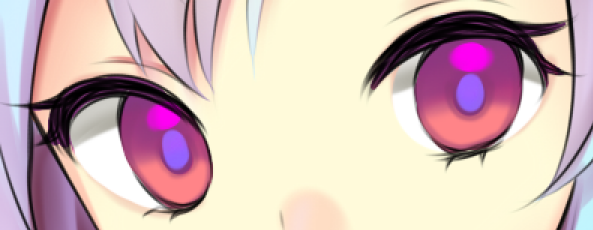
more shiny! i made a new layer and changed the mode to overlay, if you understand. i also took a soft eraser and erased down the middle of the round shapes i blocked in.
add eye highlights. i faded out one of them.
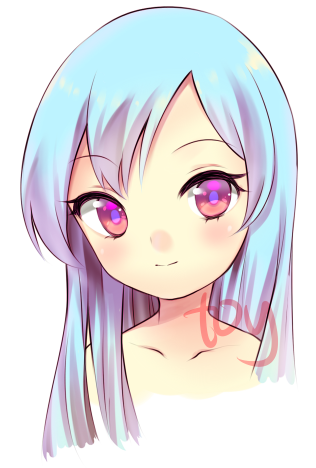
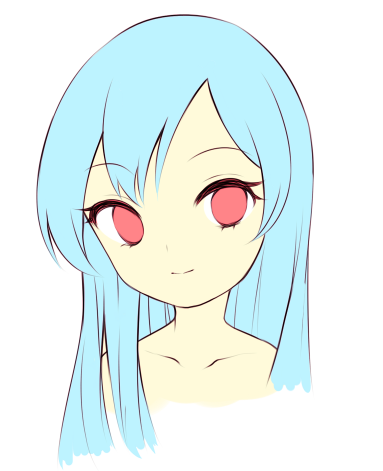
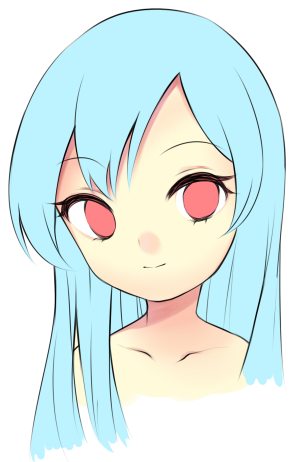
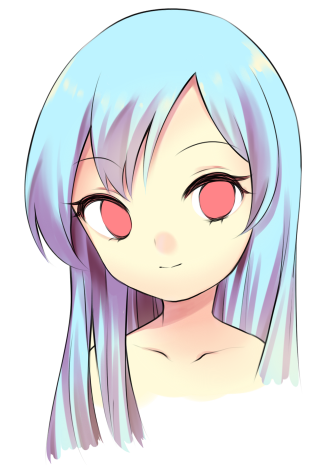
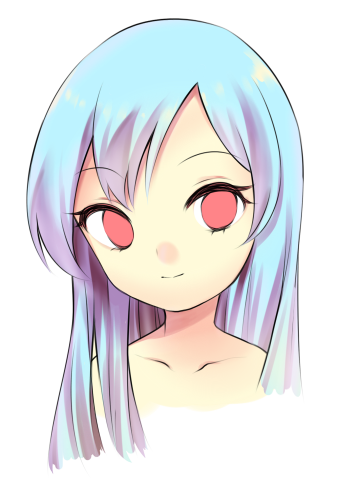
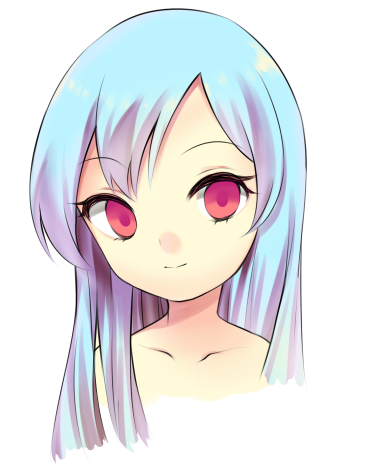
finishing touches! added blush and minor color adjustments.
♥ turning it into an avatar
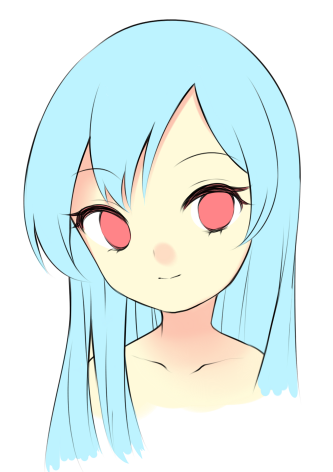
i added a background color so i't's not boring lol.
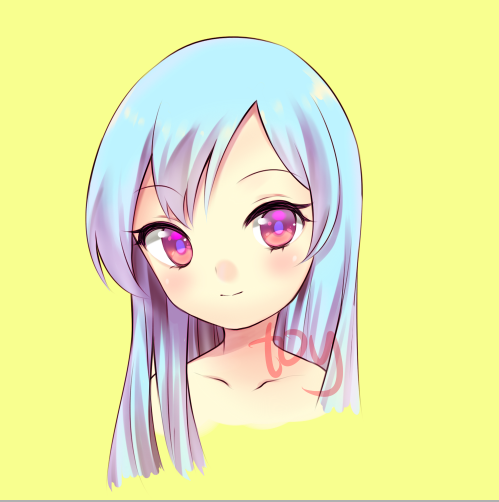
here's the full canvas at 50%.
aaand...
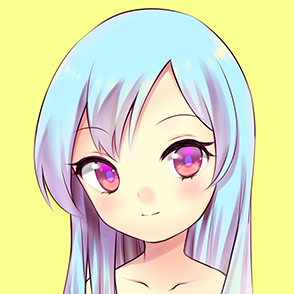
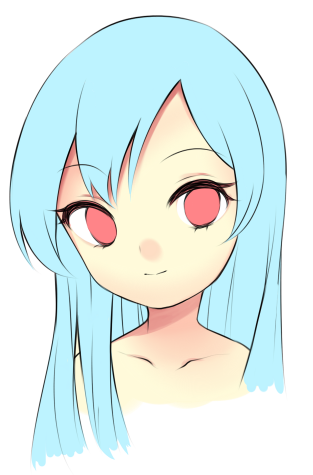
cropped! the painted bits are less awkward now lol.
thank you for reading through this tutorial! i hope it helped you in some way.
please do not reuse any images you see in this tutorial. they are mine.
i'll answer any comments or questions in the comments.
thank you! ♥
i noticed a lot of you like drawn avatars so i put together a guide showing how i generally make them.
i drew my oc lunacy.
skin based off
enjoy ♥
♥ setting up
i use Paint Tool SAI, but Photoshop or any drawing program could work.
i start with a 2000px square canvas and choose colors as i go. don't worry about the huge canvas size, as you can shrink it down later.
♥ sketching
i've drawn anime style digitally for around 4 years now, and honestly it's just practice.
lay down the sketch. my end result looked a little different since i really just use the sketch as a guide.
i used a 7px brush to sketch with various colors.
♥ lineart
once you have that down, start the line art. lower the sketch, and start with the eyes.
use your sketch to get a feel for where the lines go. try not to just trace it. remember to vary your thickness!
i used a 2-3px brush for lineart.
zoomed in 150%
i start with the top part and layer lines on top to thicken it (3px) . i then draw in the lower eyelids and lashes (2px). lastly, i draw in the actual eye part. notice how the lines are not continuous, but broken up instead.
zoomed out 50%
used 2px brush, 3px to thicken.
i got lazy and left out the headband and overalls lol. i also drew above the eye layer and hid it as i drew so that i can tell what i'm doing. honestly do what you want haha.
vary your line widths! for longer lines, try to zoom out. CTRL + Z is your friend!
zoomed out 50%
finished line art.
♥ coloring
pretty simple. use the brush / bucket tool to fill in colors on different layers. i also color the line art at this point.
zoomed out 50%
i start shading the skin. the light source is coming from the left, so shadows go rightward. i draw hard edges first and then blur them out.
i add a darker tone for more depth, and shade in details like the collarbone and eyelids
.it's hard to notice but i airbrushed a super faint purple shade around the neck and forehead for some more light.
i start shading hair. i shade in chunks for the bangs, and for the rest of the hair, in up and down motions. CTRL + Z is still your friend, don't forget!
same as before, but i shaded more sparingly and used a darker color.
highlights! i airbrushed a skin tone around the bangs and bottom of the hair and drew in highlights.
i airbrushed that super faint purple color again. sorry it's hard to notice!
eyes! shade in the shadows and pupil!
i add a darker shade to the pupils
add shading around the edges
add two shiny colors. don't make them too bright since you still need to do highlights!
more shiny! i made a new layer and changed the mode to overlay, if you understand. i also took a soft eraser and erased down the middle of the round shapes i blocked in.
add eye highlights. i faded out one of them.
finishing touches! added blush and minor color adjustments.
♥ turning it into an avatar
i added a background color so i't's not boring lol.
here's the full canvas at 50%.
aaand...
cropped! the painted bits are less awkward now lol.
thank you for reading through this tutorial! i hope it helped you in some way.
please do not reuse any images you see in this tutorial. they are mine.
i'll answer any comments or questions in the comments.
thank you! ♥
| Tags |
tools/tracking
3991793
6
draw-an-avatar-or-draw-anime-digitally-in-general

 CrystalRuby
 PixelCraft__YT
 Vunder - Lucas
 PrincessLuna16
 GalaxyCat24
 Hut
Hut justaminecraft-creator
 Arkaliasus
 BlockyMan2000

 Fantasy Niche
 Sushifox
 Ayanoaishi
 Boarrito MCBoar
Create an account or sign in to comment.
I actually haven't been drawing digitally for a year yet, but half a year.
I either draw with my finger or the mouse :(. That's why I draw my sketch on paper, get the light board and make the final thing. And then I trace it with the mouse, I've actually gotten good is at it. I wish I could be as good as you some time!❤❤
Yet- I can't use it. When I try and follow a tutorial- it all goes wrong, and i just give up.
But i'm going to stop myself there.
Anyways- good job.
also, just a question about the hair, how exactly do you shade it? as in, how do you determine where all the darker shades go? i think the shading looks a bit sporadic, a bit random sorta (especially with the bottom-left corner of the artwork, lots of different lines going on). also why is the left eye bigger than the right aAGHHHHH
nice tutorial! and welcome to pmc :)