


- 3,794 views, 1 today

253
Disclaimer: This guide will tell you tricks to make your screenshots optimized for PlanetMinecraft, and not for other social media or creative work.
Thanks to Monsterfish_, for letting me use his unreleased project for pictures. Be sure to follow him so you know when it is released!
Useful mods
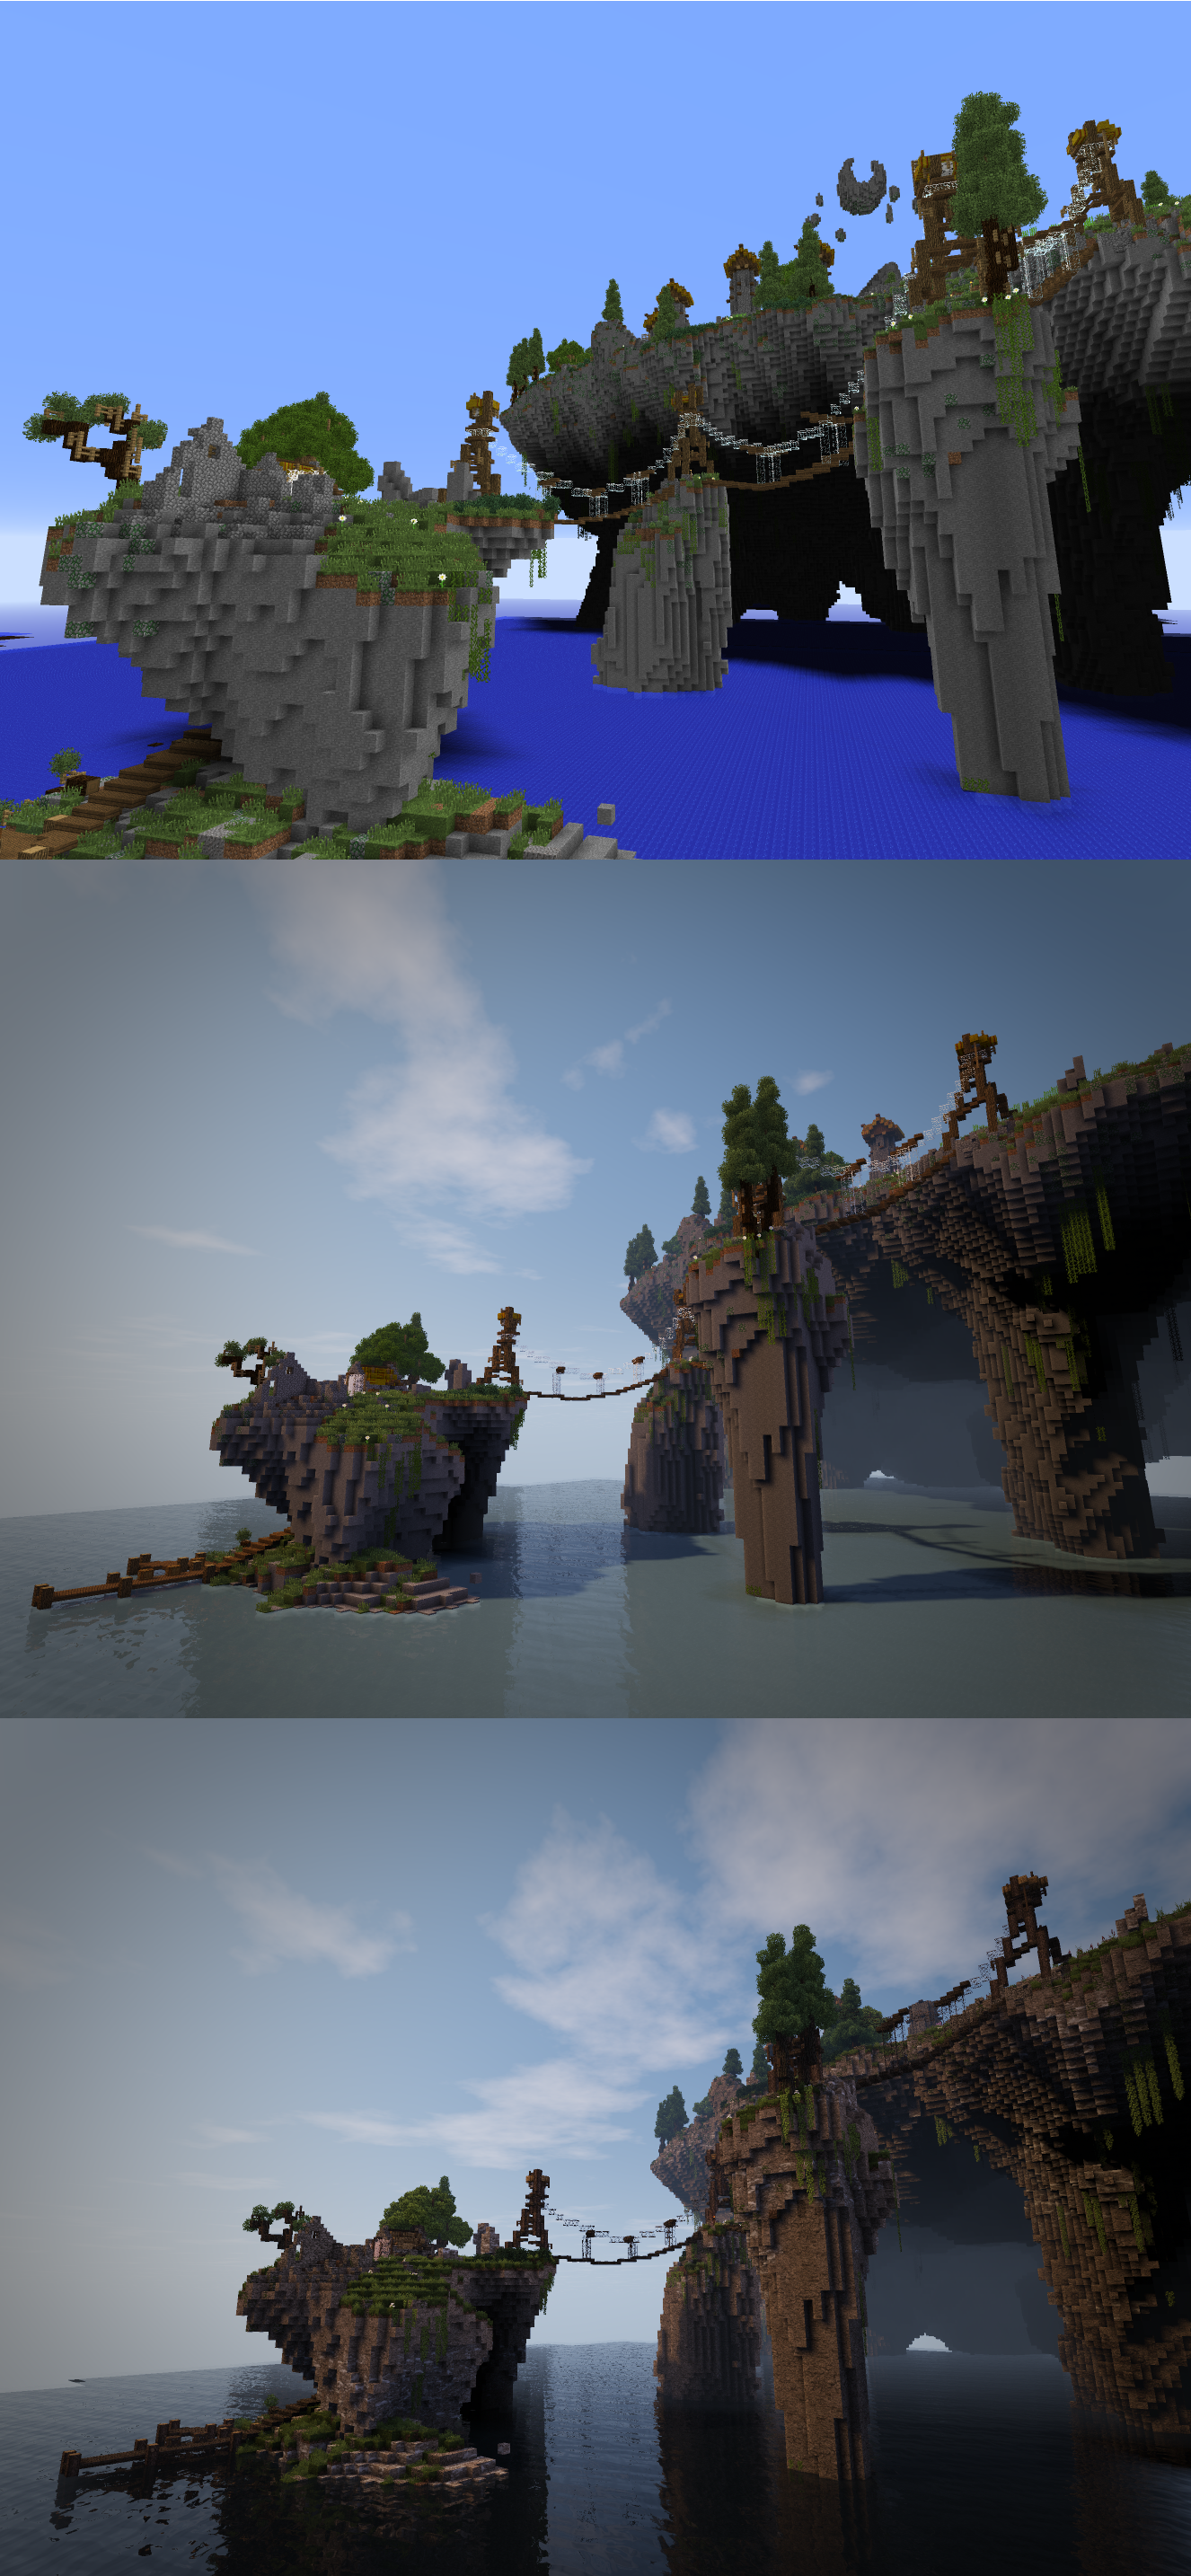
Example Images - Pictures taken with different settings - Foliage, Shaders, Resourcepack, Optifine.

Aspect Ratio
Aspect ratio is the size your Minecraft window takes on your screen. Different monitors uses different Aspect ratios, and different websites uses different aspect ratios on pictures as well. Commonly known aspect ratios are for example widescreen(16:9(This means that for every 16 pixels in width, there is 9 in height) or paper(√2:1).
To set the aspect ratio, start minecraft and select either new or edit profile. Put your aspect ratio to: 1326x956.
This will make your screenshots fill out the whole window in the picture-scroller, and not have black lines on the bottom and top of the pictures.
Field of Vision
Field of Vision is the extent of the observable world from 1 point of view. Turning this option up will give you increased vision and stretch blocks. Turning this down will reduce your vision and remove the stretch from blocks.
Never use more than 80 FoV for screenshots.
You can increase or decrease FoV easily by pressing ESC ingame.
For frog-view screenshots(from below), I recommend using a higher FoV. This will make your build seem bigger.
For bird-view screenshots(from above), I recommend using a lower FoV. This will make your build seem smaller.
For 1-point perspective screenshots, use 70 FoV.
Time of Day
When taking pictures, with or without mods(Shadermod, foliage, etc) the time of day is pretty important.
For vanilla minecraft, time between 0700-1800 has the same light.
For shadermod minecraft, time will change the angle of the sun, and the closer time is to 1600 the warmer the light.
Note that you can take pictures from dusk-dawn, but if you have not used proper light in your project (Torch, redstone, lava, glowstone, portals and fire), it will probably not be possible to see anything. A common mistake to make is to take screenshots while looking at the sun, which usually results in lens-flare. (Which, for the record, looks bad)
Shadermod Settings
NormalMap: ON
SpecularMap: ON
RenderResMul: 2,000
ShadowResMul: 2,000
HandDepth: 0,1250
CloudShadow: OFF
OldLighting: ON
Misc.
Usually for screenshots you want to turn your graphics to full, as well as your render-distance.
Leaves will become see-through, consider turning this off. Particles will appear, consider turning this off.
Clouds follows your height, and might be in the way depending on the size of your build, consider turning this off.
Entity shadows are in the way, turn them off.
If you are taking pictures on a server mind that the maximum render-distance is 16, even if you use optifine and set it to 32.
Remember to turn off/on particles.
Taking the shot
Before taking the picture there is a few rules of thumb you should go over:
Does the shot clearly show the things I want to take pictures of? When making a project stuff is sometimes pretty cramped. Make sure your bottom left and right corner does not have stuff in the way that blocks the view.
Are all the chunks correctly rendered? If you are using vanilla minecraft, chances are your render-distance is pretty low compared to if using for example optifine which lets you render up to 32 chunks. To avoid unloaded chunks I recommend having something that stops perspective from going to infinity/end of visible chunks.
Some shots require that you preload the chunks, and move to the desired location before the chunks unload.
Good luck, and happy snapping!
Thanks to Monsterfish_, for letting me use his unreleased project for pictures. Be sure to follow him so you know when it is released!
Useful mods
Spoiler - click to reveal
Example Images - Pictures taken with different settings - Foliage, Shaders, Resourcepack, Optifine.
Spoiler - click to reveal
Aspect Ratio
Aspect ratio is the size your Minecraft window takes on your screen. Different monitors uses different Aspect ratios, and different websites uses different aspect ratios on pictures as well. Commonly known aspect ratios are for example widescreen(16:9(This means that for every 16 pixels in width, there is 9 in height) or paper(√2:1).
To set the aspect ratio, start minecraft and select either new or edit profile. Put your aspect ratio to: 1326x956.
This will make your screenshots fill out the whole window in the picture-scroller, and not have black lines on the bottom and top of the pictures.
Field of Vision
Field of Vision is the extent of the observable world from 1 point of view. Turning this option up will give you increased vision and stretch blocks. Turning this down will reduce your vision and remove the stretch from blocks.
Never use more than 80 FoV for screenshots.
You can increase or decrease FoV easily by pressing ESC ingame.
For frog-view screenshots(from below), I recommend using a higher FoV. This will make your build seem bigger.
For bird-view screenshots(from above), I recommend using a lower FoV. This will make your build seem smaller.
For 1-point perspective screenshots, use 70 FoV.
Time of Day
When taking pictures, with or without mods(Shadermod, foliage, etc) the time of day is pretty important.
For vanilla minecraft, time between 0700-1800 has the same light.
For shadermod minecraft, time will change the angle of the sun, and the closer time is to 1600 the warmer the light.
Note that you can take pictures from dusk-dawn, but if you have not used proper light in your project (Torch, redstone, lava, glowstone, portals and fire), it will probably not be possible to see anything. A common mistake to make is to take screenshots while looking at the sun, which usually results in lens-flare. (Which, for the record, looks bad)
Shadermod Settings
NormalMap: ON
SpecularMap: ON
RenderResMul: 2,000
ShadowResMul: 2,000
HandDepth: 0,1250
CloudShadow: OFF
OldLighting: ON
Misc.
Usually for screenshots you want to turn your graphics to full, as well as your render-distance.
Leaves will become see-through, consider turning this off. Particles will appear, consider turning this off.
Clouds follows your height, and might be in the way depending on the size of your build, consider turning this off.
Entity shadows are in the way, turn them off.
If you are taking pictures on a server mind that the maximum render-distance is 16, even if you use optifine and set it to 32.
Remember to turn off/on particles.
Taking the shot
Before taking the picture there is a few rules of thumb you should go over:
Does the shot clearly show the things I want to take pictures of? When making a project stuff is sometimes pretty cramped. Make sure your bottom left and right corner does not have stuff in the way that blocks the view.
Are all the chunks correctly rendered? If you are using vanilla minecraft, chances are your render-distance is pretty low compared to if using for example optifine which lets you render up to 32 chunks. To avoid unloaded chunks I recommend having something that stops perspective from going to infinity/end of visible chunks.
Some shots require that you preload the chunks, and move to the desired location before the chunks unload.
Good luck, and happy snapping!
| Tags |
1 Update Logs
The BIG small shadersettingsupdate. : by TheShadyJester 04/14/2017 4:06:02 pmApr 14th, 2017
Added what settings you should use to get the best resolution on your screens.
tools/tracking
3692952
6
guide-how-to-take-the-best-screenshot

 GalaxyCat24
 DarkwolfContent
 User5098101G
 EarthUser
 Team UNNAMED
 User5115289G
 MindOfSocial
 Silabear
 WYHA-Storm
Create an account or sign in to comment.