


61
Command Usages
In this course, lots of extremely useful commands will be covered in detail with examples, explanations, and how they can be used easily and effectively. NOTE: I didn't do all the commands as it would take way too long, and most can be worked out yourself by using Tab Completion.
If you don't know everything perfectly by the end that is OK, the main task is so you have a general idea of what you are doing so you can begin learning commands. We will always consolidate lessons from this course later down the line.
Good luck! ~Panda
If you don't know everything perfectly by the end that is OK, the main task is so you have a general idea of what you are doing so you can begin learning commands. We will always consolidate lessons from this course later down the line.
Good luck! ~Panda
/tell
In this tutorial, I will be showing you how to use the /tell command along with showing some example commands.
The /tell command is a mix between the say command and the tellraw command. It has the ability to send the message to certain people only like tellraw however lacks support for color codes or any formatting at all.
To use the command the first argument is who it messages, this could be an IGN (EG: BluePvps) or a selector (EG @a[limit=3])
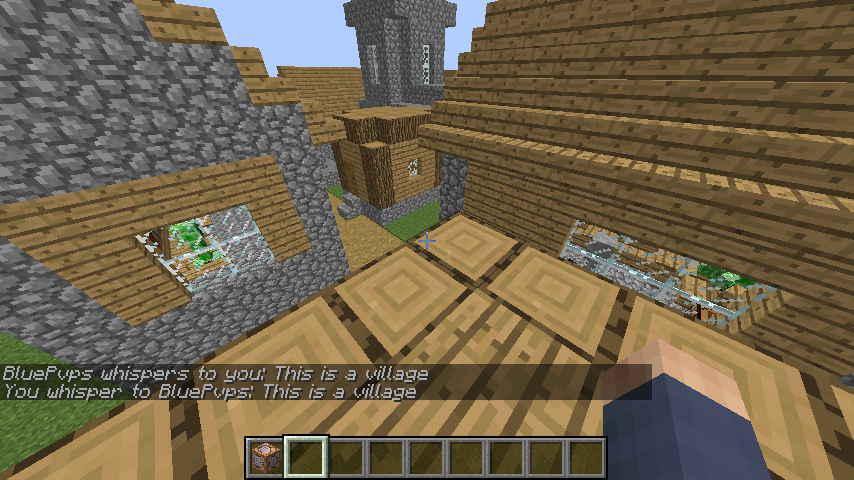
This is what it looks like when you send and receive a message.
If you want to send a message to yourself you can do this:
/tell @s This is a village
/tell <player> <private message ...>The /tell command is a mix between the say command and the tellraw command. It has the ability to send the message to certain people only like tellraw however lacks support for color codes or any formatting at all.
To use the command the first argument is who it messages, this could be an IGN (EG: BluePvps) or a selector (EG @a[limit=3])
This is what it looks like when you send and receive a message.
If you want to send a message to yourself you can do this:
/tell @s This is a village
/kill
In this tutorial, I will be showing you how to use the /kill command along with showing some example commands.
The /kill command was previously used without the additional option in Minecraft 1.12 as it killed the person executing the command. However, in 1.13+ the argument <targets> is now required.
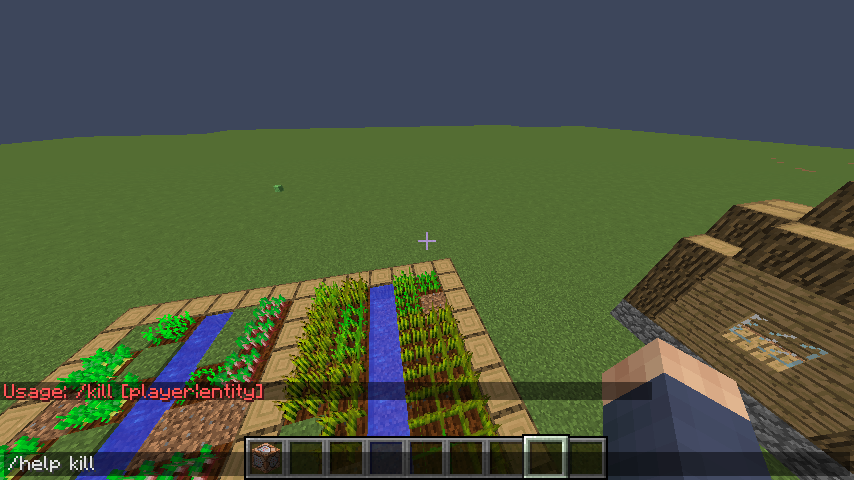
This second argument can be an IGN or a selector.
For example:
/kill @e[type=!player]
Kills everything in your world except players.
/kill <targets>The /kill command was previously used without the additional option in Minecraft 1.12 as it killed the person executing the command. However, in 1.13+ the argument <targets> is now required.
This second argument can be an IGN or a selector.
For example:
/kill @e[type=!player]
Kills everything in your world except players.
/tp
In this tutorial, I will be showing you how to use the /tp command along with showing some example commands.
The /tp command is one of the most useful commands out there and has two different versions. One teleports one entity to another for example:
The first argument is the one who will be teleporting and the second is the destination mob. The destination much only be one entity so make sure you use limit=1. So this will teleport all cows to a chicken. If you want to teleport yourself you can just put in the destination player without the target player and it assumes the target it you.
/tp @e[type=chicken,limit=1]
This will teleport me to the nearest chicken coordinates. It also matches my head rotation but the chicken moved in the picture.
The second version of this command you choose your target entity but instead of a destination entity you put in coordinates (X,Y,X), and if you want to you can also put in the head rotation after the coordinates (Yaw, Pitch).
For example:
For head rotation, the first value is LEFT/RIGHT and the second value is UP/DOWN.
/tp [target player] <destination player> OR /tp [target player] <x> <y> <z> [<yaw> <pitch>]The /tp command is one of the most useful commands out there and has two different versions. One teleports one entity to another for example:
/tp @e[type=cow] @e[type=chicken,limit=1]The first argument is the one who will be teleporting and the second is the destination mob. The destination much only be one entity so make sure you use limit=1. So this will teleport all cows to a chicken. If you want to teleport yourself you can just put in the destination player without the target player and it assumes the target it you.
/tp @e[type=chicken,limit=1]
This will teleport me to the nearest chicken coordinates. It also matches my head rotation but the chicken moved in the picture.
The second version of this command you choose your target entity but instead of a destination entity you put in coordinates (X,Y,X), and if you want to you can also put in the head rotation after the coordinates (Yaw, Pitch).
For example:
/tp @p ~ ~5 ~Will teleport the nearest player (Which if done in chat will be you) 5 blocks up./tp @e[type=pig] 235 66 875Will teleport all pigs in the world to the coordinates above./tp @s ~ ~ ~ 0 90Will keep me in the same place and make me look straight down.For head rotation, the first value is LEFT/RIGHT and the second value is UP/DOWN.
/teleport
In this tutorial, I will be showing you how to use the /teleport command along with showing some example commands.
When running the a /tp command and using relative coordinates, the coordinates are calculated from the entity focused by the command
When running a /teleport command, relatives coordinates are calculated from the entity who is executing the command
For example:
This is mainly useful for maintaining head rotations while teleporting entities.
/teleport <entity> <x> <y> <z> [<y-rot> <x-rot>]The difference between /tp and /teleport is:When running the a /tp command and using relative coordinates, the coordinates are calculated from the entity focused by the command
When running a /teleport command, relatives coordinates are calculated from the entity who is executing the command
For example:
/tp @e[type=pig,name=APig] ~ ~3 ~ Will teleport the pig named "APig" 3 blocks above itself./teleport @e[type=pig,name=APig] ~ ~3 ~ Will teleport the pig named "APig" 3 blocks above you if ran it in chat.This is mainly useful for maintaining head rotations while teleporting entities.
/replaceitem
In this tutorial, I will be showing you how to use the /replaceitem command along with showing some example commands.
The /replaceitem command is used to add items or blocks in a specific place in a specific entity or tile block (EG chest, hopper etc). It also has two different versions one for the adding it to a block, one for the entities. They both with very similarly.
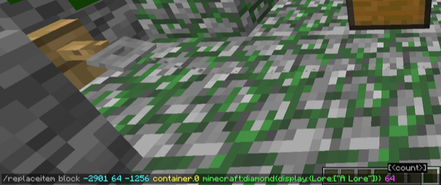
First the block mode. After putting 'block' you then put in your coordinates, these can be normal ones of relative just make sure the coordinates lead to a block that has a container which can have items but inside it. Then for slot this is referring to where it should put it, eg the slot in the chest.
The best was to find what you want is by using Tab Completion but if you are using 'block' you will be wanting slot.container.0 as this is what puts it in a specific slot in the container. All the other different type of slots are for entities. The 0 is what slot, not when counting what slot you want it will be one less in the command as the first slot is 0. slot.container works on all containers, so hoppers too for example.
Then you put in the item. Your can optionally also put in amount too. If you want data tags on your replaceitem you can add it straight after item. Here is an example below!

Then we have the entity mode, it works similarly although instead of putting in coordinates you put in a selector. Then you put the slot like you do for 'block' however you will never use slot.container. Instead use tab to see all of the options but if you want something in their inventory is it slot.hotbar for their first 9 slots then slot.inventory for the rest but with entity you can also do a lot more such as amour slots, horse slots (if a horse), players enderchest slots and more!
Then put your item, amount etc like with block.
Here is some examples using entity:
/replaceitem block <x> <y> <z> <slot> <item> [amount]OR/replaceitem entity <selector> <slot> <item> [amount]The /replaceitem command is used to add items or blocks in a specific place in a specific entity or tile block (EG chest, hopper etc). It also has two different versions one for the adding it to a block, one for the entities. They both with very similarly.
First the block mode. After putting 'block' you then put in your coordinates, these can be normal ones of relative just make sure the coordinates lead to a block that has a container which can have items but inside it. Then for slot this is referring to where it should put it, eg the slot in the chest.
The best was to find what you want is by using Tab Completion but if you are using 'block' you will be wanting slot.container.0 as this is what puts it in a specific slot in the container. All the other different type of slots are for entities. The 0 is what slot, not when counting what slot you want it will be one less in the command as the first slot is 0. slot.container works on all containers, so hoppers too for example.
Then you put in the item. Your can optionally also put in amount too. If you want data tags on your replaceitem you can add it straight after item. Here is an example below!
Then we have the entity mode, it works similarly although instead of putting in coordinates you put in a selector. Then you put the slot like you do for 'block' however you will never use slot.container. Instead use tab to see all of the options but if you want something in their inventory is it slot.hotbar for their first 9 slots then slot.inventory for the rest but with entity you can also do a lot more such as amour slots, horse slots (if a horse), players enderchest slots and more!
Then put your item, amount etc like with block.
Here is some examples using entity:
/replaceitem entity @p slot.hotbar.8 minecraft:stone 64Gives the nearest player a stack of stone./replaceitem entity BluePvps slot.enderchest.0 minecraft:acacia_boat 1 0Puts an acacia boat in my first enderchest slot./summon
In this tutorial, I will be showing you how to use the /summon command along with showing some example commands.
The /summon command is used to add an entity into your world like a spawn egg would, however you can customise the mobs a lot using the data tags.
Firstly we put the mobs id, to find it start typing the first few letters of its name and tab it and it should pop up with its entity id. Then you can just enter the command like that and it will summon the mob at the coordinates you are, or if the command was run in the command block it would be summoned in the command block.
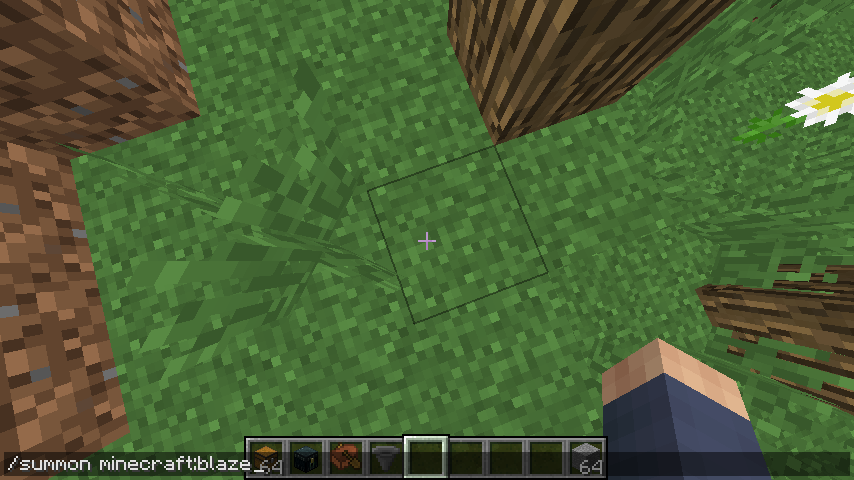
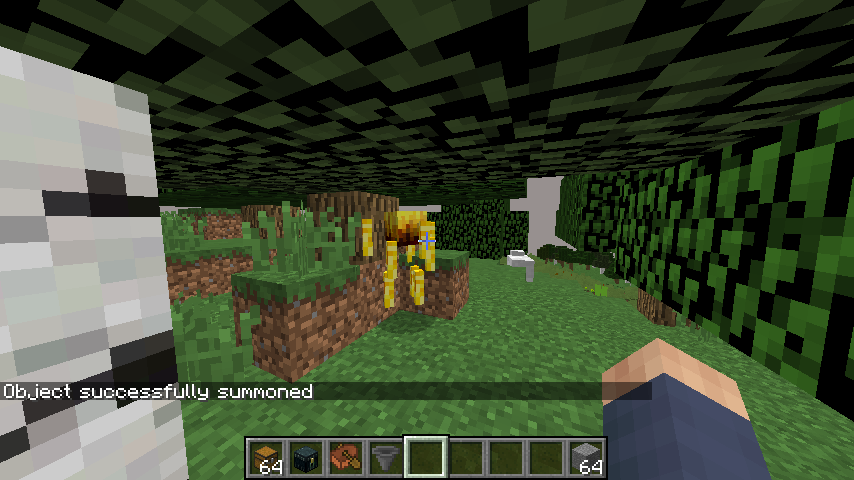
But if you don't want it to be summoned in the same place, you can then put in the coordinates. After the coordinates you can put in data tags if you want to which will customize the mobs nbt. Check out the tutorial on data tags if you don't understand them here.
When doing /summon, unless it is a really easy mob (Without data tags), I recommend going to great website called McStacker to create the command for you instead of learning all the mob ids and the data tags. You can choose your mob and it has a menu of all the data tags possible for that mob.
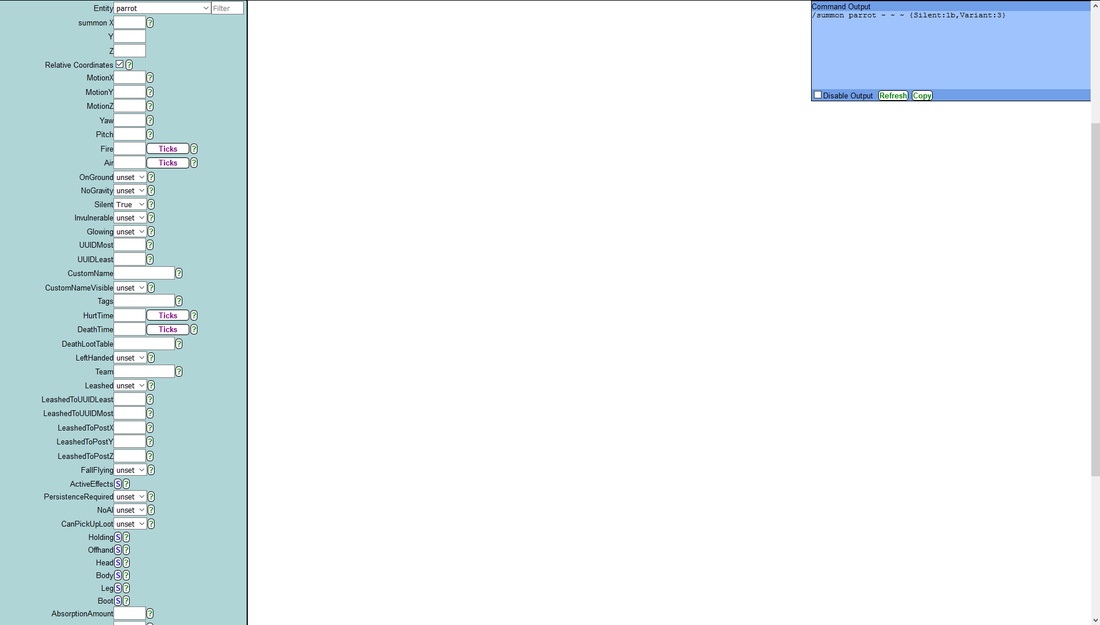
You can check out McStacker here!
/summon <entityname> [x] [y] [z] [dataTag]The /summon command is used to add an entity into your world like a spawn egg would, however you can customise the mobs a lot using the data tags.
Firstly we put the mobs id, to find it start typing the first few letters of its name and tab it and it should pop up with its entity id. Then you can just enter the command like that and it will summon the mob at the coordinates you are, or if the command was run in the command block it would be summoned in the command block.
But if you don't want it to be summoned in the same place, you can then put in the coordinates. After the coordinates you can put in data tags if you want to which will customize the mobs nbt. Check out the tutorial on data tags if you don't understand them here.
When doing /summon, unless it is a really easy mob (Without data tags), I recommend going to great website called McStacker to create the command for you instead of learning all the mob ids and the data tags. You can choose your mob and it has a menu of all the data tags possible for that mob.
You can check out McStacker here!
/effect
In this tutorial, I will be showing you how to use the /effect command along with showing some example commands.
The /effect command is super useful as it does the equivalent of a potion but has way more customization and it is in command blocks which always makes anything cooler ;)
There are two commands one is used to add effects one is used to remove them, I will explain the /effect give first.
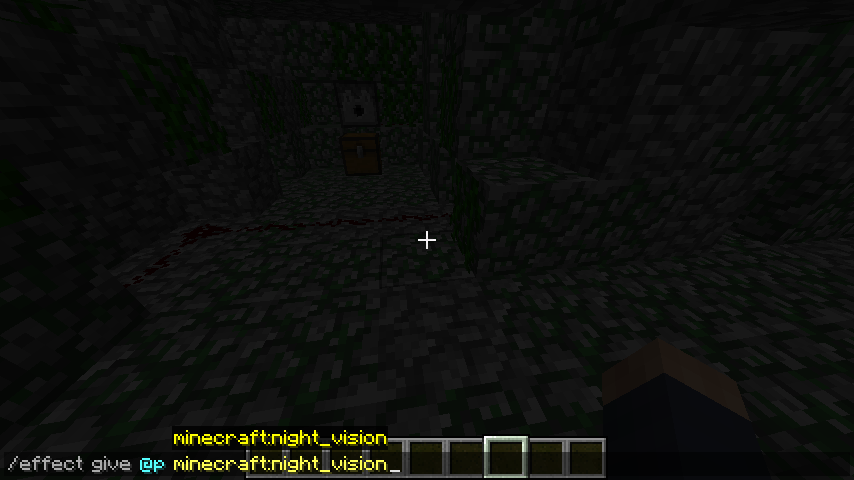
Firstly we have a selector like normal who we want to be effected by this effect. Then we have the effect, you can just tab complete through them or to be quicker you could type the first few letters of the effect then tab it.
That is all you have to do to get the command running. By default the effect lasts for 30 seconds at the lowest level and it shows particles, but we can change all that if we want to.
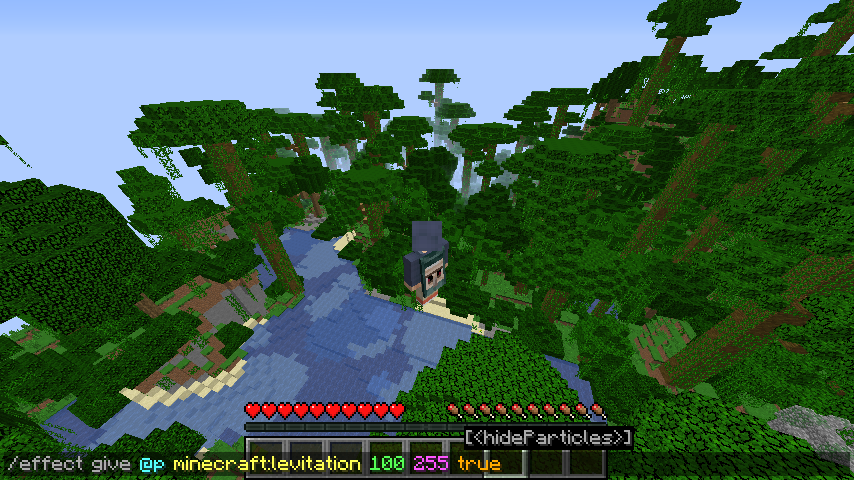
Just simple put the time after the effect, then after that put the amplifier/strength (Lowest is 0 then goes up) and then at the end we can put true or false to tell Minecraft whether we want it to have the particles or not that appear around the body. If you have hide particles to true it also doesn't show the effect in the top right of the screen like other normal effects.
If you make the seconds large enough, it will change it infinity which makes it last until they die.
Amplifiers max out at 255 and when the amplifier is over 250 the effects start to mutate and they have cool effects. Take levitation. For example, when you set the amplifier to 255 it makes you hover!
And when you set it to 254 for example it makes you hover down instead of up.
You can also do for the second command:
/effect clear <targets> [<effects>]/effect give <targets> <effect> [seconds] [amplifier] [hideParticles]The /effect command is super useful as it does the equivalent of a potion but has way more customization and it is in command blocks which always makes anything cooler ;)
There are two commands one is used to add effects one is used to remove them, I will explain the /effect give first.
Firstly we have a selector like normal who we want to be effected by this effect. Then we have the effect, you can just tab complete through them or to be quicker you could type the first few letters of the effect then tab it.
/effect give @p minecraft:night_visionThat is all you have to do to get the command running. By default the effect lasts for 30 seconds at the lowest level and it shows particles, but we can change all that if we want to.
Just simple put the time after the effect, then after that put the amplifier/strength (Lowest is 0 then goes up) and then at the end we can put true or false to tell Minecraft whether we want it to have the particles or not that appear around the body. If you have hide particles to true it also doesn't show the effect in the top right of the screen like other normal effects.
If you make the seconds large enough, it will change it infinity which makes it last until they die.
/effect give @p minecraft:jump_boost 10000Amplifiers max out at 255 and when the amplifier is over 250 the effects start to mutate and they have cool effects. Take levitation. For example, when you set the amplifier to 255 it makes you hover!
/effect give @p minecraft:levitation 100 255 trueAnd when you set it to 254 for example it makes you hover down instead of up.
/effect @p minecraft:levitation 30 254 trueMost effects do similar weird effects when they become max for example jump boost stops you from jumping at all.You can also do for the second command:
/effect clear <selector>To remove all effects on the entity specified or/effect clear <selector> [<effect>]To clear a specific effect./data
In this tutorial, I will be showing you how to use the /data command along with showing some example commands.
/data get (block|entity) <pos/target> [<path>]/data merge (block|entity) <pos/target> <nbt>/data remove (block|entity) <pos/target> [<path>]The /data command is used to get, edit and remove the nbt of any block or entity using Data Tags.
I will start with /data get. This is used to view an entity or blocks nbt. Type '/data get' and then 'block' or 'entity' depending on what you are doing. Then for blocks we put the coordinates of where the block we want to edit is or for entity we use a selector - make sure it is limit=1 - and then press enter and it should return with the data.
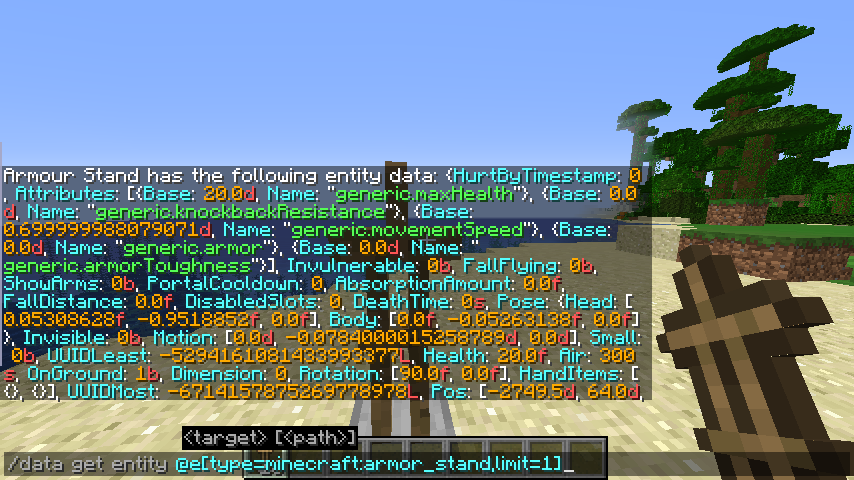
You can also put a path in which is a specific nbt so for example say I put
/data get entity @e[type=minecraft:armor_stand,limit=1] RotationInstead of showing all of that information it will just tell me the rotation.Next it /data merge. This is used to edit the nbt we previously viewed.
Blocks such as chests, dispensers all have different settings (Chests and dispensers have containers) and for entity they all have their own nbt to edit to.
For blocks we put the coordinates of where the block we want to edit is or for entity we use a selector and then we are going to use McStacker to edit the data tags as it has a /data option on the website or you can use /data get.
Check out McStacker here!
Then it should all work! Here is an example.
/data merge block -2751 64 -1244 {Owner:{Name:"Notch"}}
Or for example with entities:
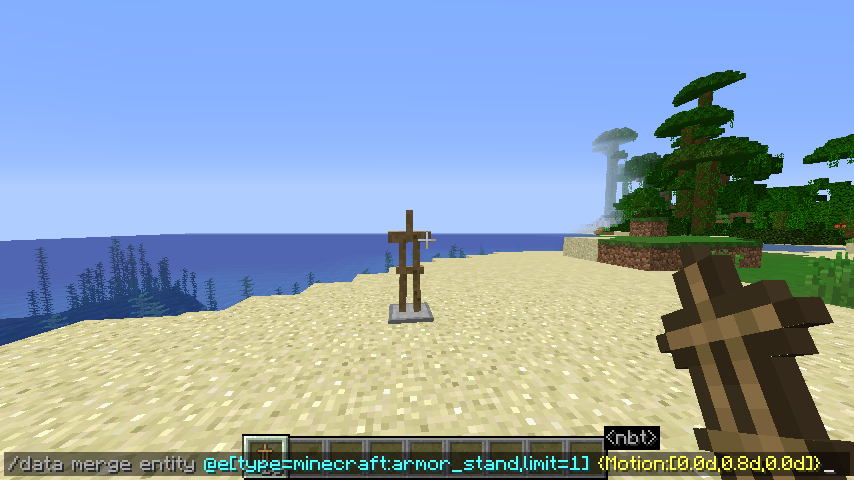
/data merge entity @e[type=minecraft:armor_stand,limit=1] {Motion:[0.0d,0.8d,0.0d]}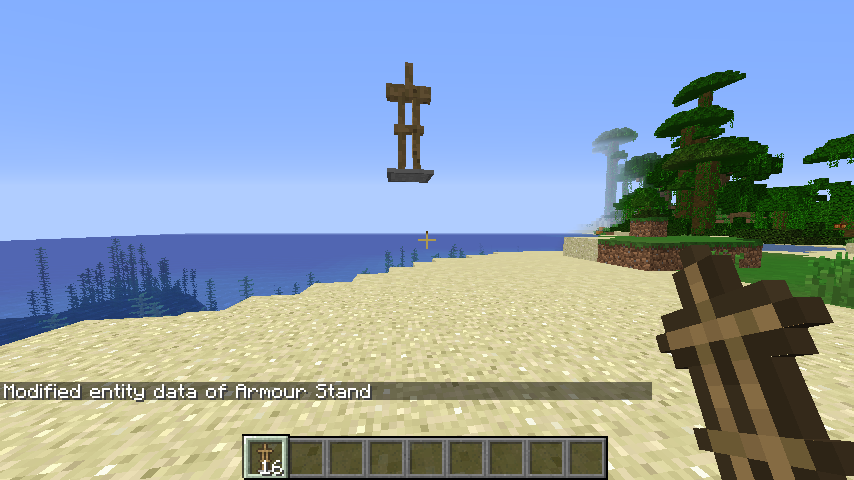
Finally is /data remove. The command format is exactly the same as /data get but instead of telling you the result it remove it. This isn't very useful as you can just do this with /data merge as I won't cover it much.
/setblock
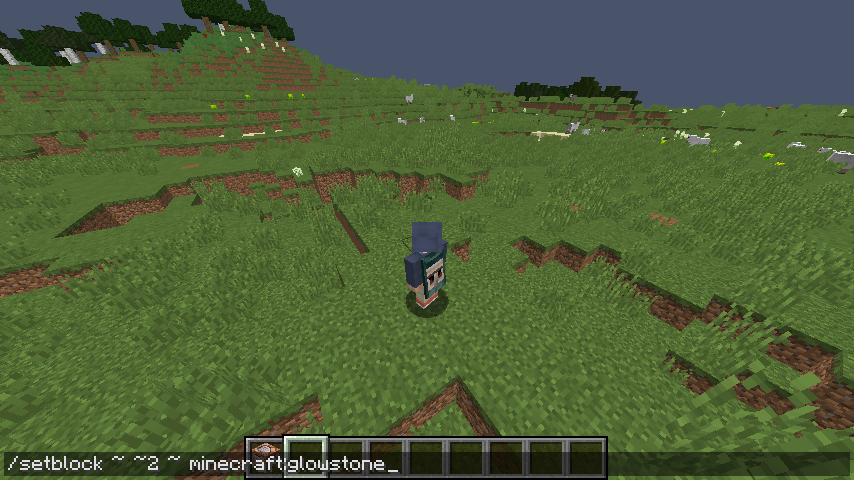
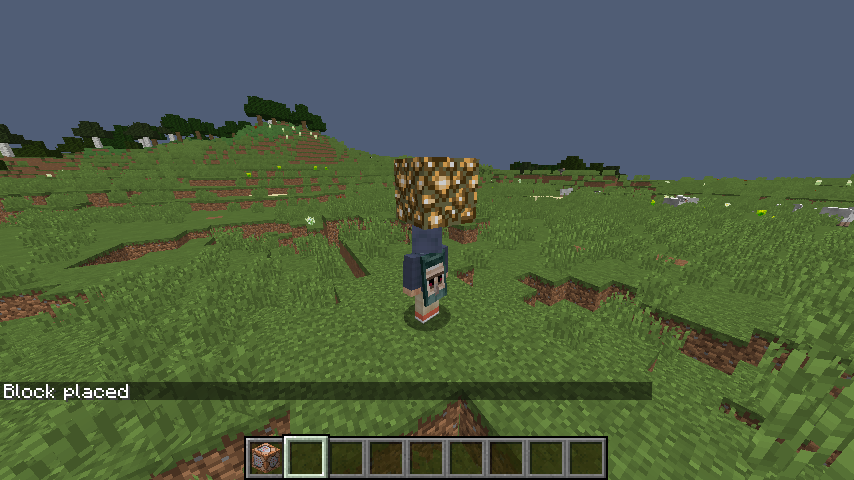
In this tutorial, I will be showing you how to use the /setblock command along with showing some example commands.
The /setblock command is used to place a block anywhere in a world. To use it we first need to put in the coordinates where we want the block to be, this can be an air block or where a block already exists.
Then we put in our block using block ids. If you don't know your blocks id, type some of it out and press tab or view a complete list here. We can now run the command and it will work perfectly fine.
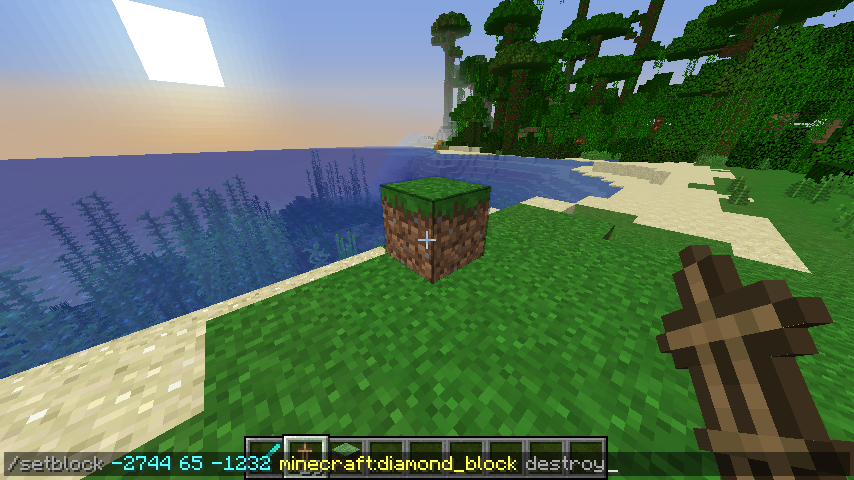
But we can also add more. We can choose what happens to the block there before it (If there is one). The options are:
Destroy - This breaks it like a survival player would (Block drops, exp etc)
Keep - Only sets the block if it is air
Replace - Removes the block like it would in creative (No drops etc)
You can also add data tags straight after the block id (You can also use McStacker)
Check out McStacker here!

I hope you now understand how it works!
/setblock <pos> <block> [destroy|keep|replace]The /setblock command is used to place a block anywhere in a world. To use it we first need to put in the coordinates where we want the block to be, this can be an air block or where a block already exists.
Then we put in our block using block ids. If you don't know your blocks id, type some of it out and press tab or view a complete list here. We can now run the command and it will work perfectly fine.
But we can also add more. We can choose what happens to the block there before it (If there is one). The options are:
Destroy - This breaks it like a survival player would (Block drops, exp etc)
Keep - Only sets the block if it is air
Replace - Removes the block like it would in creative (No drops etc)
You can also add data tags straight after the block id (You can also use McStacker)
Check out McStacker here!
/setblock 255 65 84 minecraft:stained_glass 13 destroyI hope you now understand how it works!
/give
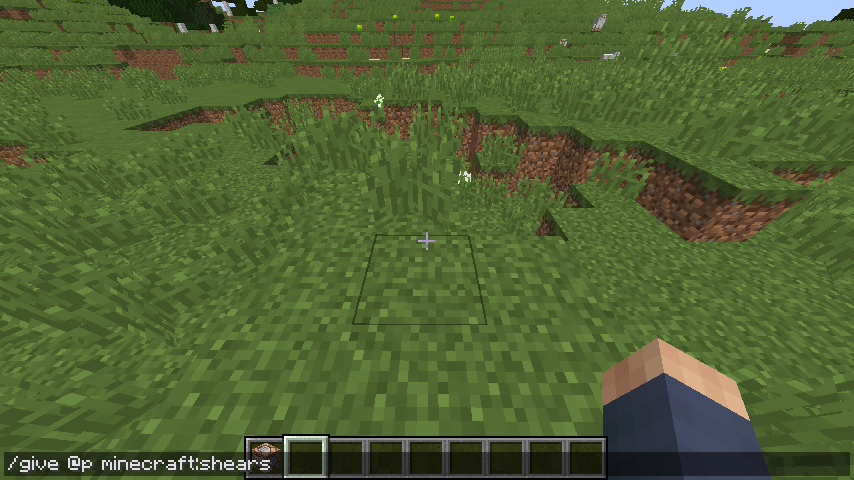
In this tutorial, I will be showing you how to use the /give command along with showing some example commands.
The /give command is used to get any item or block you want.
The first argument is the selector. Then you choose the item by typing the first few letters then using Tab Completion or you can see a complete list of ids here.
Then you can choose the amount after as well. For data tags I recommend using the same as I did for /data:
McStacker
I always use McStacker but trust me it is very useful! If you do not want to and know what you are doing and what tags you want to do they go straight after the item for example diamond_sword{...}
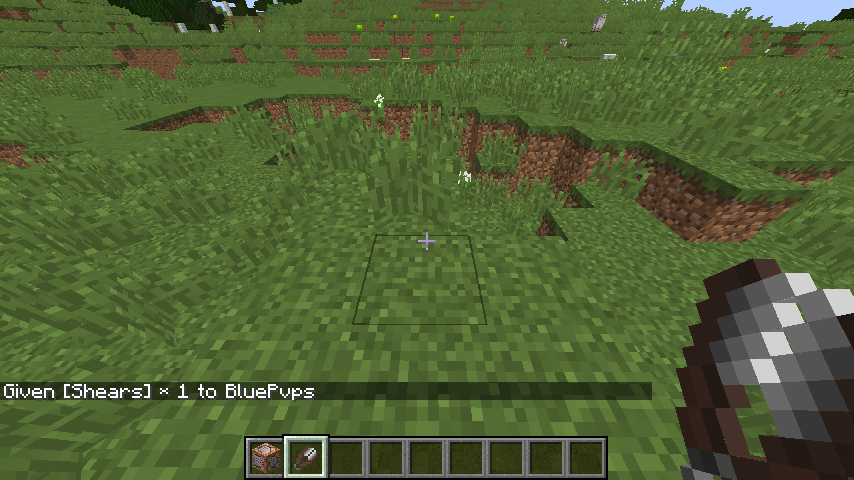
/give <targets> <item> [amount]The /give command is used to get any item or block you want.
The first argument is the selector. Then you choose the item by typing the first few letters then using Tab Completion or you can see a complete list of ids here.
/give @p minecraft:shearsThen you can choose the amount after as well. For data tags I recommend using the same as I did for /data:
McStacker
I always use McStacker but trust me it is very useful! If you do not want to and know what you are doing and what tags you want to do they go straight after the item for example diamond_sword{...}
/particle
In this tutorial, I will be showing you how to use the /particle command along with showing some example commands.
The /particle command is very useful, if you couldn't have guessed it shows particles! It is very customizable. If you do not know what I particle is then I recommend reading here.
Our first argument is what we want our particle to be, you can use Tab Completion to cycle through them all or you can see a complete list here.
The next arguments are the coordinates of where the particles will be. Then the next three arguments are the direction where the particles will go in (X,Y,Z) however you can not use relatives are if you used relatives for the coordinates they will already be relative and these X,Y and Z values are usually from -1 to 1 although they can go higher if you want to really spread them out.
Here are some examples of what I mean:

~ ~ ~ 0 1 0 -> This would go directly up

~ ~ ~ 1 0 0 -> This would go in the positive X (East)

~ ~ ~ -1 0 -1 -> This would go negative X and Z (North-West)
Then we choose how fast the particles go, I recommend 0.01 as 1 or even 0 is too fast I find but you can choose whatever looks good for you. Then that is all the required arguments, you should find your command works.
But you will find there is only one, if you want more (you most likely will) the next argument is the count so just put however many particles you want.
Then there is a mode argument. There are two options, force and normal. If the state is force, particles will be shown to players even if their particles are decreased or on minimal.
By default the particles show to everyone, but if you want it to show to specific people you can put a selector here too.
I hope this helped!
/particle <name> <x> <y> <z> <xd> <yd> <zd> <speed> [count] [mode] [player]The /particle command is very useful, if you couldn't have guessed it shows particles! It is very customizable. If you do not know what I particle is then I recommend reading here.
Our first argument is what we want our particle to be, you can use Tab Completion to cycle through them all or you can see a complete list here.
The next arguments are the coordinates of where the particles will be. Then the next three arguments are the direction where the particles will go in (X,Y,Z) however you can not use relatives are if you used relatives for the coordinates they will already be relative and these X,Y and Z values are usually from -1 to 1 although they can go higher if you want to really spread them out.
Here are some examples of what I mean:
~ ~ ~ 0 1 0 -> This would go directly up
~ ~ ~ 1 0 0 -> This would go in the positive X (East)
~ ~ ~ -1 0 -1 -> This would go negative X and Z (North-West)
Then we choose how fast the particles go, I recommend 0.01 as 1 or even 0 is too fast I find but you can choose whatever looks good for you. Then that is all the required arguments, you should find your command works.
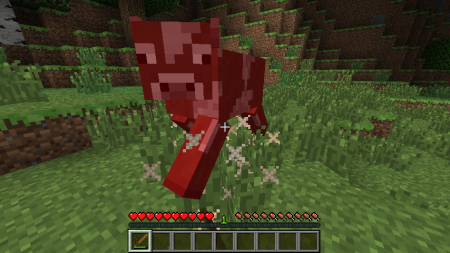
/particle angryVillager ~ ~2 ~ 0 1 0 0.01But you will find there is only one, if you want more (you most likely will) the next argument is the count so just put however many particles you want.
/particle angryVillager ~ ~2 ~ 0 1 0 0.01Then there is a mode argument. There are two options, force and normal. If the state is force, particles will be shown to players even if their particles are decreased or on minimal.
By default the particles show to everyone, but if you want it to show to specific people you can put a selector here too.
/particle angryVillager ~ ~2 ~ 0 1 0 0.01 force @pI hope this helped!
/playsound
In this tutorial, I will be showing you how to use the /playsound command along with showing some example commands.
The /playsound command is used to, you guessed it. Play a sound! Any noise played in minecraft can be played with this command and you can also make it sound different to almost make your own sounds, so let's begin!
Firstly you need to put in a sound, you can use Tab Completion to find the one you want or use this great playsound list created by TheRedEngineer here. The list was created for 1.9 so it doesn't have some of the newer sounds but it is still useful.
Next we need to choose the source. What this means it when you go to your game settings in the 'Music and Sounds options' it has all the sources there. I usually just put 'master' but if you want a different source you can use tab completion again to go through them all.
Then you need to choose what players hear it with a selector or an IGN. Then that is all the required arguments so your command should now work. Here is an example:
But there is also some optional arguments, the first one being the location the sound it played at. This is useless in my opinion as but if you want it to sound further away I guess you can use coordinates away from the plauer here otherwise just put '~ ~ ~'.
Then you can choose the volume which needs to be at least 0, pitch which needs to be between 0 and 2 (This controls the speed) and minimum volume which needs to be at least one and at most one.
Playing around with the pitch can be fun to make your own unique sounds and set the minimum volume to 1 if you want it to stay the same volume even if they walk around, otherwise it will become more quiet when they walk away from their original point.
/playsound <sound> <source> <player> [x] [y] [z] [volume] [pitch] [minimumVolume]The /playsound command is used to, you guessed it. Play a sound! Any noise played in minecraft can be played with this command and you can also make it sound different to almost make your own sounds, so let's begin!
Firstly you need to put in a sound, you can use Tab Completion to find the one you want or use this great playsound list created by TheRedEngineer here. The list was created for 1.9 so it doesn't have some of the newer sounds but it is still useful.
Next we need to choose the source. What this means it when you go to your game settings in the 'Music and Sounds options' it has all the sources there. I usually just put 'master' but if you want a different source you can use tab completion again to go through them all.
Then you need to choose what players hear it with a selector or an IGN. Then that is all the required arguments so your command should now work. Here is an example:
/playsound minecraft:ui.toast.challenge_complete master @pBut there is also some optional arguments, the first one being the location the sound it played at. This is useless in my opinion as but if you want it to sound further away I guess you can use coordinates away from the plauer here otherwise just put '~ ~ ~'.
Then you can choose the volume which needs to be at least 0, pitch which needs to be between 0 and 2 (This controls the speed) and minimum volume which needs to be at least one and at most one.
Playing around with the pitch can be fun to make your own unique sounds and set the minimum volume to 1 if you want it to stay the same volume even if they walk around, otherwise it will become more quiet when they walk away from their original point.
/playsound minecraft:ui.toast.challenge_complete master @p ~ ~ ~ 1 2 1/execute
In this tutorial, I will be showing you how to use the /execute command along with showing some example commands.
The /execute command is, in my opinion, one of the most useful commands in the entire game and without it command block creations would be so much worse. This command has a tone of sub commands which can effect THE WAY you are running a command. I had already wrote up this page for 1.12 but in 1.13 this command went under so many changes I have to scrap it all. Rather than explaining it myself I will leave it to kwerti a minecraft forum member who did an incredible job to document the changes.
Here is what he said about how to use the changes - full credit to him:
Dinnerbone announced several changes to commands for 1.13, among them the removal of the /execute command in favor of more powerful alternatives.
The New Commands
The old syntax of the /execute command is:
This will be refactored as follows:
These commands are actually subcommands, which means you can leave off the /execute label when chaining them. The final command is signified by the keyword run.
Who's executing?
/execute as <selector> ...
This runs the specified command with the specified entity(s) as command senders. However, the position the command runs from remains unchanged. For example, running the following from a command block:
will give stone to the single player nearest the command block, one block for each creeper named Bob. Use /as for commands where the sender is important, such as the below. A good rule of thumb is to use /as if you plan to use @s later in the command, and to otherwise use /at.
/execute as @e run say @s //each entity says their name
/execute as @a[scores={importance=5..}] run function importance:do_important_things //each matched player does important things
Now...where to execute?
/execute at <selector> ...
The /at command is similar to /as, but runs the command from the position of the entity(s) and not using the entity(s) as command senders. For example, the intended use of the previous command targeting creepers named Bob is this.
This command will give stone to the player(s) nearest to any creeper named Bob. Use /at for when the sender is not important. When both the sender and the position are important, use both.
/execute as @e[type=creeper] at @s run tell @p Ssssss... //each creeper creeps out the nearest player
/execute at @p run teleport @e[tag=special] ~ ~-5 ~ //teleports the special entity five blocks below the nearest player
The /positioned command may be used as a direct correspondence to the portion of the original /execute command, to be used in the same circumstances. I don't really have much to say about this one other than to use it when you put anything other than "~ ~ ~" as the coordinates to the old /execute.
The /rotated command additionally sets the rotation used by the command, either in the specified direction or the same as the specified entity. The /facing command also sets the rotation, but either looks at the specified block or at the specified entity's feet or eyes. The /anchored command sets the local coordinate origin at the sender's feet or eyes, and the /in command sets the command to run in the specified dimension.
The /at command sets position, rotation, and dimension to the specified entity.
Conditionals
The conditional commands are the new and improved /execute ... detect command syntax. For example, this command, which kills arrows that hit tripwire:
is rewritten as this:
/if block is the new version of /testforblock, while /if blocks is the new version of /testforblocks and /if entity is the new version of /testfor. /if score is the replacement for /scoreboard test.
Note that all of the conditional commands can be negated by using "unless" in place of "if".
When to use /as or /at?
Each command provides half the functionality of /execute. Which one to use depends on what functionality you need.
Removal of common commands
In the process of overhauling /execute, several common commands were removed in favor of the new /execute. Migrating these commands is as follows.
Recommended Command Order
When writing complex /execute commands, I recommend this ordering of sub-commands.
Examples
For writing commands, I recommend the order listed in this thread (/as, /at, /if) as this will reduce bugs caused by incorrect positions or entities. That is, set the command sender, set the position, test conditions.
As you can see he did an excellent job! I hope he helped you as I did barely anything! Show him some love on the original post here!
/execute as <selector> ...
/execute at <selector> ...
/execute positioned <x y z> ...
/execute positioned as <selector> ...
/execute rotated <yaw> <pitch> ...
/execute rotated as <selector> ...
/execute facing <x y z> ...
/execute facing entity <selector> feet|eyes ...
/execute anchored feet|eyes ...
/execute in <dimension> ...
/execute if|unless block <x y z> <block> ...
/execute if|unless blocks <src-begin> <src-end> <dest> all|masked ...
/execute if|unless entity <selector> ...
/execute if|unless score <selector1> <objective1> <|>|<=|>=|= <selector2> <objective2> ...
/execute if|unless score <selector> <objective> matches <range> /execute store result|success score <selector> <objective> ... /execute store result|success block <x y z> <block> <nbt-key> <numeric-type> <scale> ...
/execute store result|success entity <selector> <nbt-key> <numeric-type> <scale> ...
/execute run ...
The /execute command is, in my opinion, one of the most useful commands in the entire game and without it command block creations would be so much worse. This command has a tone of sub commands which can effect THE WAY you are running a command. I had already wrote up this page for 1.12 but in 1.13 this command went under so many changes I have to scrap it all. Rather than explaining it myself I will leave it to kwerti a minecraft forum member who did an incredible job to document the changes.
Here is what he said about how to use the changes - full credit to him:
Dinnerbone announced several changes to commands for 1.13, among them the removal of the /execute command in favor of more powerful alternatives.
The New Commands
The old syntax of the /execute command is:
/execute <selector> <x> <y> <z> <command>
/execute <selector> <x> <y> <z> detect <x> <y> <z> <block> <data> <command>
This will be refactored as follows:
/execute as <selector> ...
/execute at <selector> ...
/execute positioned <x y z> ...
/execute positioned as <selector> ...
/execute rotated <yaw> <pitch> ...
/execute rotated as <selector> ...
/execute facing <x y z> ...
/execute facing entity <selector> feet|eyes ...
/execute anchored feet|eyes ...
/execute in <dimension> ...
/execute if|unless block <x y z> <block> ...
/execute if|unless blocks <src-begin> <src-end> <dest> all|masked ...
/execute if|unless entity <selector> ...
/execute if|unless score <selector1> <objective1> <|>|<=|>=|= <selector2> <objective2> ...
/execute if|unless score <selector> <objective> matches <range> /execute store result|success score <selector> <objective> ... /execute store result|success block <x y z> <block> <nbt-key> <numeric-type> <scale> ...
/execute store result|success entity <selector> <nbt-key> <numeric-type> <scale> ...
/execute run ...
These commands are actually subcommands, which means you can leave off the /execute label when chaining them. The final command is signified by the keyword run.
Who's executing?
/execute as <selector> ...
This runs the specified command with the specified entity(s) as command senders. However, the position the command runs from remains unchanged. For example, running the following from a command block:
/execute as @e[type=creeper,name=Bob] run give @p stonewill give stone to the single player nearest the command block, one block for each creeper named Bob. Use /as for commands where the sender is important, such as the below. A good rule of thumb is to use /as if you plan to use @s later in the command, and to otherwise use /at.
/execute as @e run say @s //each entity says their name
/execute as @a[scores={importance=5..}] run function importance:do_important_things //each matched player does important things
Now...where to execute?
/execute at <selector> ...
The /at command is similar to /as, but runs the command from the position of the entity(s) and not using the entity(s) as command senders. For example, the intended use of the previous command targeting creepers named Bob is this.
/execute at @e[type=creeper,name=Bob] run give @p stoneThis command will give stone to the player(s) nearest to any creeper named Bob. Use /at for when the sender is not important. When both the sender and the position are important, use both.
/execute as @e[type=creeper] at @s run tell @p Ssssss... //each creeper creeps out the nearest player
/execute at @p run teleport @e[tag=special] ~ ~-5 ~ //teleports the special entity five blocks below the nearest player
The /positioned command may be used as a direct correspondence to the portion of the original /execute command, to be used in the same circumstances. I don't really have much to say about this one other than to use it when you put anything other than "~ ~ ~" as the coordinates to the old /execute.
The /rotated command additionally sets the rotation used by the command, either in the specified direction or the same as the specified entity. The /facing command also sets the rotation, but either looks at the specified block or at the specified entity's feet or eyes. The /anchored command sets the local coordinate origin at the sender's feet or eyes, and the /in command sets the command to run in the specified dimension.
The /at command sets position, rotation, and dimension to the specified entity.
Conditionals
/execute if|unless block <x y z> <block> ...
/execute if|unless blocks <src begin> <src end> <dest> all|masked ...
/execute if|unless entity <selector> ...
/execute if|unless score <selector> <objective> <cmp> <selector2> <objective2> ...
The conditional commands are the new and improved /execute ... detect command syntax. For example, this command, which kills arrows that hit tripwire:
/execute @e[type=arrow] ~ ~ ~ detect ~ ~ ~ tripwire -1 kill @sis rewritten as this:
/execute as @e[type=arrow] at @s if block ~ ~ ~ tripwire run kill @s/if block is the new version of /testforblock, while /if blocks is the new version of /testforblocks and /if entity is the new version of /testfor. /if score is the replacement for /scoreboard test.
/execute if block ~ ~5 ~ red_wool run function mymap:do_red_wool_things
/execute if entity @e[scores={awesome=1..}] run setblock ~ ~5 ~ redstone_block
/execute if score @p Health < @e[name=Boss] Health run say Your health is less!
Note that all of the conditional commands can be negated by using "unless" in place of "if".
When to use /as or /at?
Each command provides half the functionality of /execute. Which one to use depends on what functionality you need.
- Use /as when you need a specific entity or entities to run the command
- Use /as when you use @s later in the command (including functions)
- Use /at when you need the command run at an entity's position
- Use /if entity when you are testing for the existence of an entity
- Use both when you need the functionality of both
- Remember: /as @s makes no sense!
Removal of common commands
In the process of overhauling /execute, several common commands were removed in favor of the new /execute. Migrating these commands is as follows.
/testfor <entity>
/execute if entity <entity>

/testforblock <x y z> <block>
/execute if block <x y z>

/testforblocks <src begin> <src end> <dest> all|masked
/execute if blocks <src begin> <src end> <dest> all|masked

/tp <selector> <~x ~y ~z>
/execute as <selector> at @s run tp @s <~x ~y ~z>
Recommended Command Order
When writing complex /execute commands, I recommend this ordering of sub-commands.
- store
- as
- at
- anchored/positioned/rotated/facing/in
- if
Examples
For writing commands, I recommend the order listed in this thread (/as, /at, /if) as this will reduce bugs caused by incorrect positions or entities. That is, set the command sender, set the position, test conditions.
/execute @e[type=creeper,name=Bob] ~ ~ ~ detect ~ ~-1 ~ minecraft:wool 14 give @p[r=3] stone
/execute at @e[type=creeper,name=Bob] if block ~ ~-1 ~ minecraft:red_wool run give @p[distance=..3] stone

/execute @e[tag=destroyable] ~ ~ ~ execute @p ~ ~ ~ playsound portal:destroy player @s ~ ~ ~ 1 1
/execute at @p if entity @e[tag=destroyable] run playsound portal:destroy player @p ~ ~ ~ 1 1

/execute @p ~ ~ ~ detect ~ ~ ~ tripwire -1 function portal:destroy_portals
/execute at @p if block ~ ~ ~ tripwire run function portal:destroy_portals

/execute @e[tag=portal] ~ ~-1 ~ scoreboard players set @p[dy=1] cooldown 1
/execute at @e[tag=portal] at ~ ~-1 ~ run scoreboard players set @p[dy=1] cooldown 1

/execute @e[name=BluePortal] ~ ~-1 ~ execute @p[dy=1] ~ ~ ~ function portal:teleport_b2o
/execute at @e[name=BluePortal] offset ~ ~-1 ~ as @p[dy=1] run function portal:teleport_b2o
As you can see he did an excellent job! I hope he helped you as I did barely anything! Show him some love on the original post here!
/clone
In this tutorial, I will be showing you how to use the /clone command along with showing some example commands.
/clone <x1> <y1> <z1> <x2> <y2> <z2> <x> <y> <z> [maskMode] [cloneMode]
The /clone command seems really complicated at first however as long as you know how coordinates work you should understand it quite quickly.
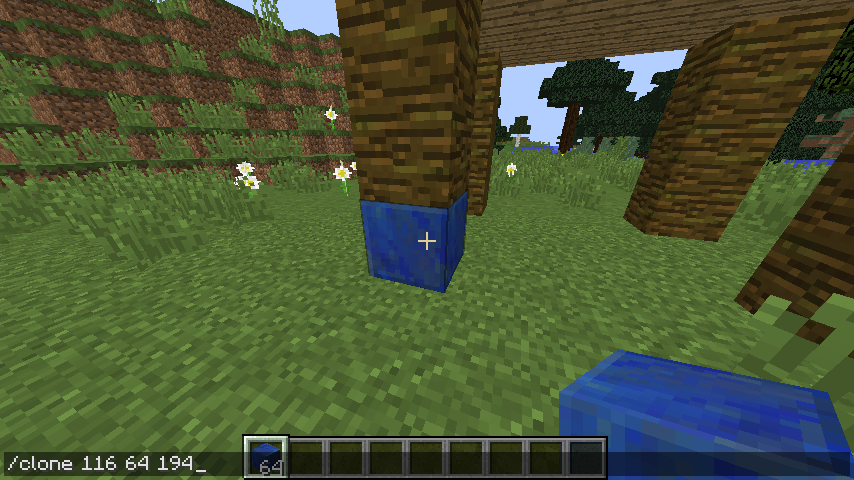
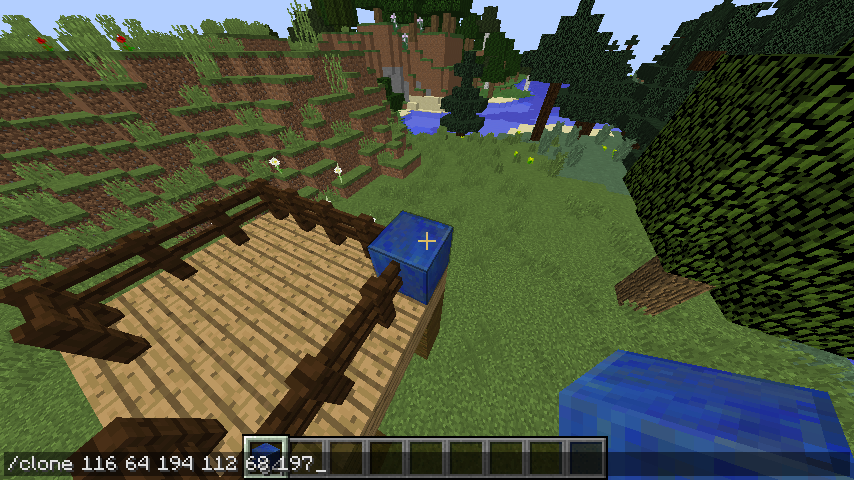
The first three arguments is the first corner of the area you want to clone, it can be any corner but make sure your second point is the opposite corner.
Then go to the opposite corner and the next three arguments are the x,y and z or that corner.
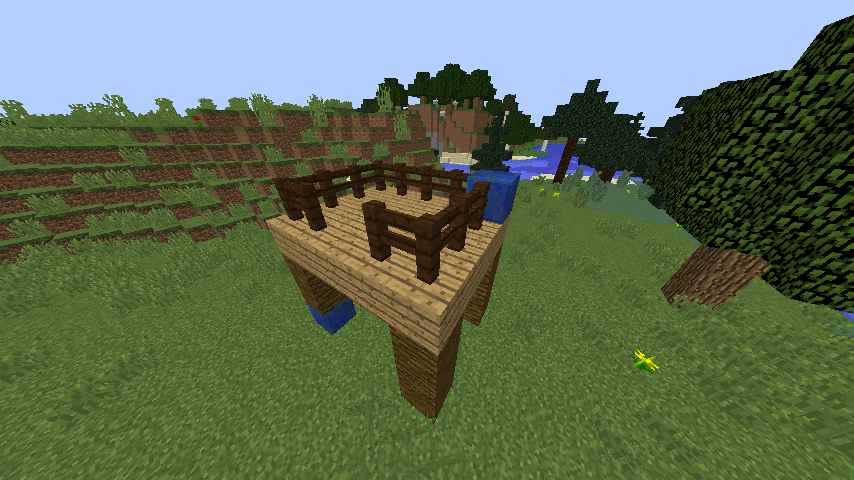
Here is what I will clone. The lapis blocks represent the two opposing corners.
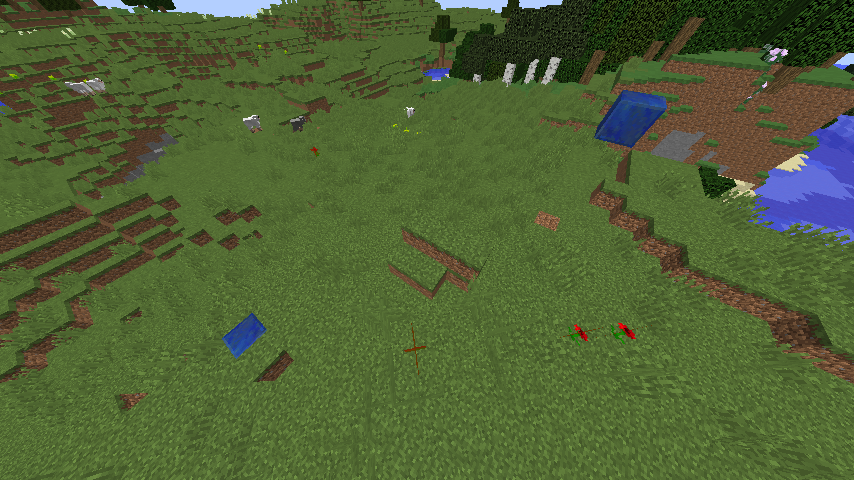
Then we have another three arguments that are coordinates too, the location it will be clones to. The coordinates need to be the lower northwest corner (The smallest coordinates of each axis) of the destination region. You can if you want to, use relative coordinates to a specify a distance relative to the command's execution, but I am going to use a normal coordinate.

And as you can see, it worked! Now there is some other optional arguments. The first one being the mask mode. Mask mode specifies whether to filter the blocks being cloned. Here are the different types:
The other option after mask mode is clone mode. Clone mode specifies how to treat the original region. Here are the different types:
IF AND ONLY IF YOU USED THE FILTERED MASK MODE: You need to put a block id after it.
/clone <x1> <y1> <z1> <x2> <y2> <z2> <x> <y> <z> [maskMode] [cloneMode]
The /clone command seems really complicated at first however as long as you know how coordinates work you should understand it quite quickly.
The first three arguments is the first corner of the area you want to clone, it can be any corner but make sure your second point is the opposite corner.
Then go to the opposite corner and the next three arguments are the x,y and z or that corner.
Here is what I will clone. The lapis blocks represent the two opposing corners.
Then we have another three arguments that are coordinates too, the location it will be clones to. The coordinates need to be the lower northwest corner (The smallest coordinates of each axis) of the destination region. You can if you want to, use relative coordinates to a specify a distance relative to the command's execution, but I am going to use a normal coordinate.
And as you can see, it worked! Now there is some other optional arguments. The first one being the mask mode. Mask mode specifies whether to filter the blocks being cloned. Here are the different types:
- filtered — Clone only blocks with the block id specified. I will tell you where to put this block id in a minute.
- masked — Copy only non-air blocks. Blocks in the destination region that would otherwise be overwritten by air are left unmodified.
- replace — Copy all blocks, overwriting all blocks in the destination with the blocks from the original region.
The other option after mask mode is clone mode. Clone mode specifies how to treat the original region. Here are the different types:
- force — Force the clone even if the origin and destination overlap.
- move — Clone the original region to the destination region, then replace the original region with air. When used in filtered mask mode, only the cloned blocks will be replaced with air.
- normal — Don't move or force.
IF AND ONLY IF YOU USED THE FILTERED MASK MODE: You need to put a block id after it.
/fill
In this tutorial, I will be showing you how to use the /fill command along with showing some example commands.
/fill <x1> <y1> <z1> <z2> <y2> <z2> <block> [oldBlockHandling]
The /fill command is used to place a collection of blocks anywhere in a world. To use it we first need to put in the coordinates of one corner of the box we will fill. Then our next three arguments are the opposite corner. This command is like a hybrid between /setblock and /clone.
Then we put in our block using block ids. If you don't know your blocks id type some of it out and press tab or view a complete list here. We can now run the command and it should work perfectly fine.
 The region I want to fill
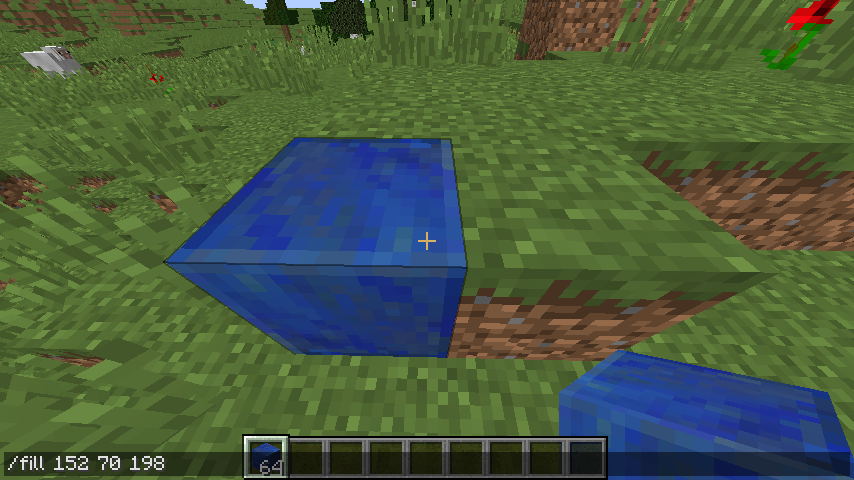 The first corner of my box
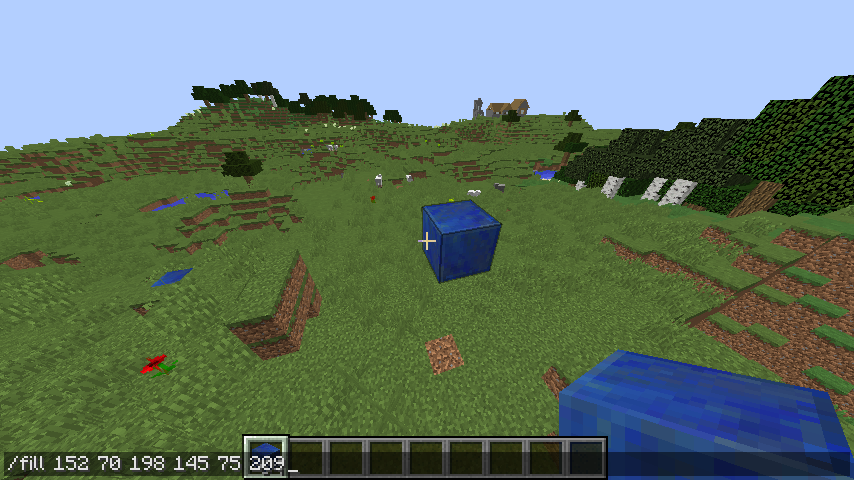 The second corner of my box
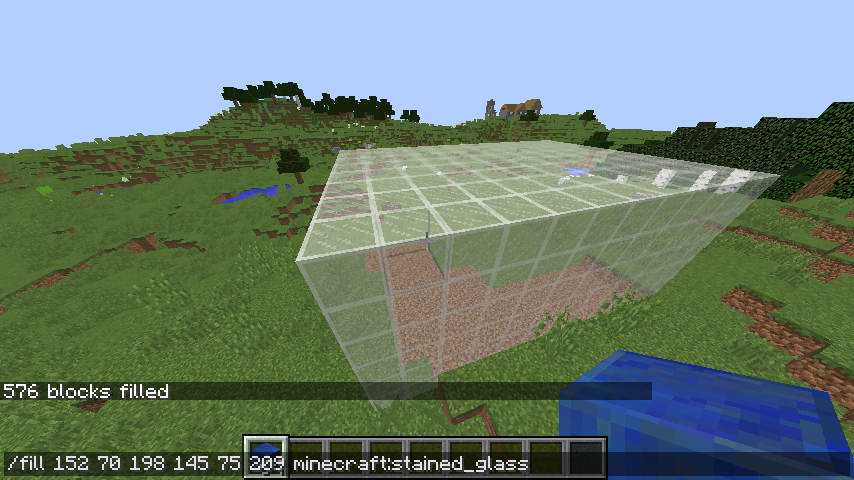 It worked!
There is a limit of 32,768 blocks that can be filled otherwise you can go wild!
But we can also add more with some optional arguments. We can choose what happens to the blocks there before it (If there is any). The options are:
Destroy - This breaks all blocks like a survival player would (Leaves block drops, exp etc)
Keep - Only sets the block if it is air
Replace - Removes the blocks like it would in creative (No drops etc)
If the option is replace you can, if you want to, add a block id afterwards and it will only replace the block you specified.
You can also add data tags straight after the block (You can also use McStacker)
Check out McStacker here
I hope this is useful!
/fill <x1> <y1> <z1> <z2> <y2> <z2> <block> [oldBlockHandling]
The /fill command is used to place a collection of blocks anywhere in a world. To use it we first need to put in the coordinates of one corner of the box we will fill. Then our next three arguments are the opposite corner. This command is like a hybrid between /setblock and /clone.
Then we put in our block using block ids. If you don't know your blocks id type some of it out and press tab or view a complete list here. We can now run the command and it should work perfectly fine.
The region I want to fillThe first corner of my boxThe second corner of my boxIt worked!There is a limit of 32,768 blocks that can be filled otherwise you can go wild!
But we can also add more with some optional arguments. We can choose what happens to the blocks there before it (If there is any). The options are:
Destroy - This breaks all blocks like a survival player would (Leaves block drops, exp etc)
Keep - Only sets the block if it is air
Replace - Removes the blocks like it would in creative (No drops etc)
If the option is replace you can, if you want to, add a block id afterwards and it will only replace the block you specified.
You can also add data tags straight after the block (You can also use McStacker)
Check out McStacker here
I hope this is useful!
/tag
In this tutorial, I will be showing you how to use the /tag command along with showing some example commands.
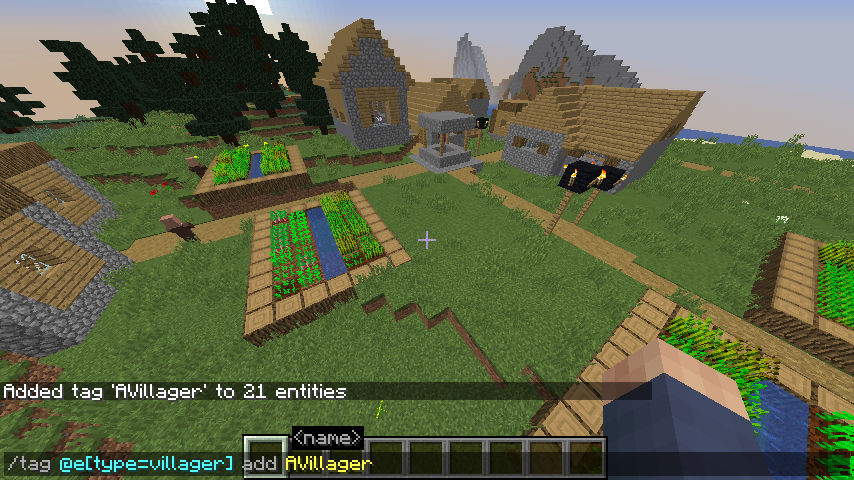
'/tag' can be used to tag entities to track them and target them specifically. It is used as a boolean in coding terms (for true or false). If you need multiple values instead of just true or false that is where scoreboards come into play.
/tag <targets> (add|remove) <tag>
Simply choose a player or entity to tag, whether you want to add or remove the tag, then choose a name (You can choose it on the spot you do not need to have one set up like scoreboard objectives).
/tag <targets> list
Use this command to check what tags an entity or player has!
How do I check for a tag?
For tags you put:
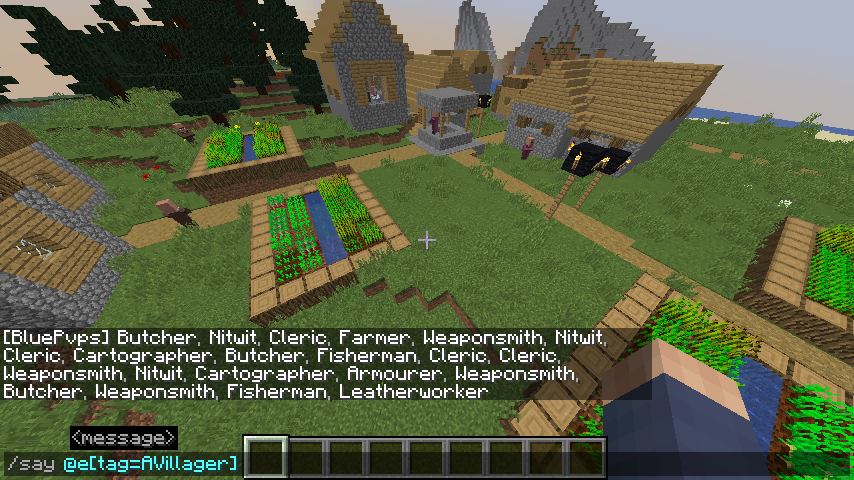
@e[tag=NAME]
Or if you want to check if they do not have a tag you can do
@e[tag=!NAME]
Using the exclamation mark as an opposite.
This command is very easy to use and very useful so I suggest you try learn this one by heart!
/tag <targets> (add|remove) <tag>
/tag <targets> list'/tag' can be used to tag entities to track them and target them specifically. It is used as a boolean in coding terms (for true or false). If you need multiple values instead of just true or false that is where scoreboards come into play.
/tag <targets> (add|remove) <tag>
Simply choose a player or entity to tag, whether you want to add or remove the tag, then choose a name (You can choose it on the spot you do not need to have one set up like scoreboard objectives).
/tag <targets> list
Use this command to check what tags an entity or player has!
How do I check for a tag?
For tags you put:
@e[tag=NAME]
Or if you want to check if they do not have a tag you can do
@e[tag=!NAME]
Using the exclamation mark as an opposite.
This command is very easy to use and very useful so I suggest you try learn this one by heart!
/team
In this tutorial, I will be showing you how to use the /team command along with showing some example commands.
'/team' is where you create teams along with make people join and leave them and change the team options. They are used as have are cool options with it such as:
Most of these commands you can work out and go through yourself as they are not complicated and are quite self explanatory. However I will go over a how to create one and the options as that is the main reason people use them. To create a team just do:
/team add <name> [<displayName>]
And you should have a team set up.
The optional display name uses JSON which is a syntax for storing and exchanging data. You don't need to know it however, as long as you know what you are doing you can just use the website here.
Then if we use the modify command
/team modify <team> <option> <value>
We can change the settings. Here are all the different options and what they do:
In this example I will change the color of both teams:
/team modify BlueTeam color blue
/team modify RedTeam color red
For the possible values, just tab complete it. Now if I join one of the teams and talk in chat, I will be in the color of the team.
/team join BlueTeam/RedTeam @s
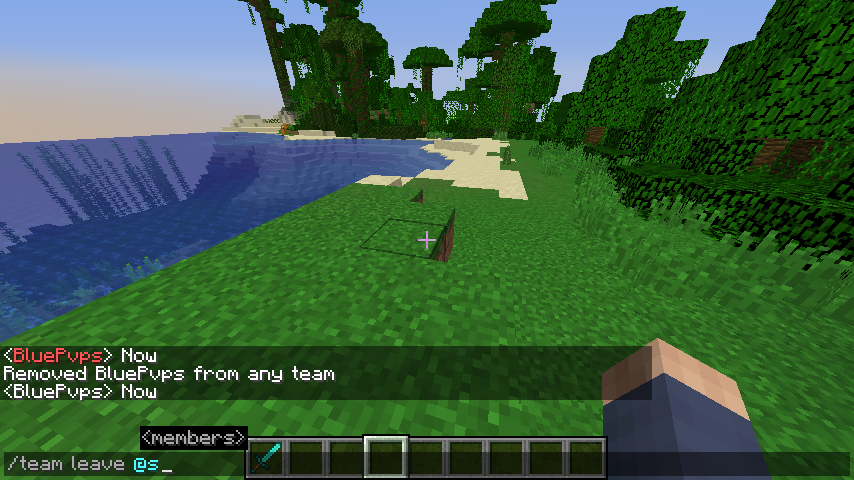
And if you ever want to leave a team you can just do:
/team leave @s
If you have any questions about the other team settings or anything at all just leave a comment on this post!
/team add <team> [<displayName>]
/team empty <team>
/team join <team> [<members>]
/team leave <members>
/team list [<teams>]
/team modify <team> (collisionRule|color|deathMessageVisibility|displayName|friendlyFire|nametagVisibility|prefix|seeFriendlyInvisibles|suffix)
/team remove <team>'/team' is where you create teams along with make people join and leave them and change the team options. They are used as have are cool options with it such as:
- Removing collision
- Adding a display name color to all people in the team
- Turn friendly fire in the team on and off
- Managing players
- So many more pros
Most of these commands you can work out and go through yourself as they are not complicated and are quite self explanatory. However I will go over a how to create one and the options as that is the main reason people use them. To create a team just do:
/team add <name> [<displayName>]
And you should have a team set up.
 | 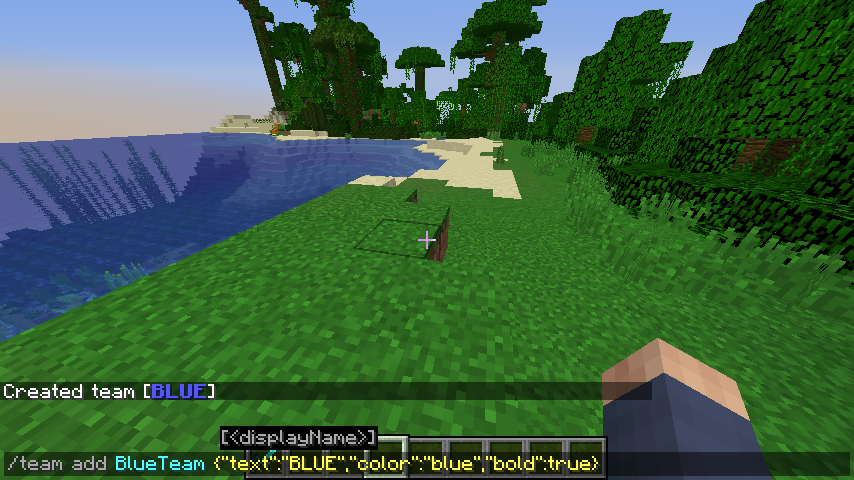 |
Then if we use the modify command
/team modify <team> <option> <value>
We can change the settings. Here are all the different options and what they do:
- collisionRule - Who you can collide with
- color - The color your name is in chat, tab, scoreboard etc.
- deathMessageVisibility - Who's death messages you view
- displayName - The display name of the team (Same thing optionally set when creating a team)
- friendlyFire - Who you can hit
- nametagVisibility - Who's nametags you can view
- prefix - Text put in front of the name of everyone in the team (Uses JSON as well)
- seeFriendlyInvisibles - Whether you can see invisible players on your team
- suffix - Text put at the end of the name of everyone in the team (Uses JSON as well)
In this example I will change the color of both teams:
/team modify BlueTeam color blue
/team modify RedTeam color red
For the possible values, just tab complete it. Now if I join one of the teams and talk in chat, I will be in the color of the team.
/team join BlueTeam/RedTeam @s
 | 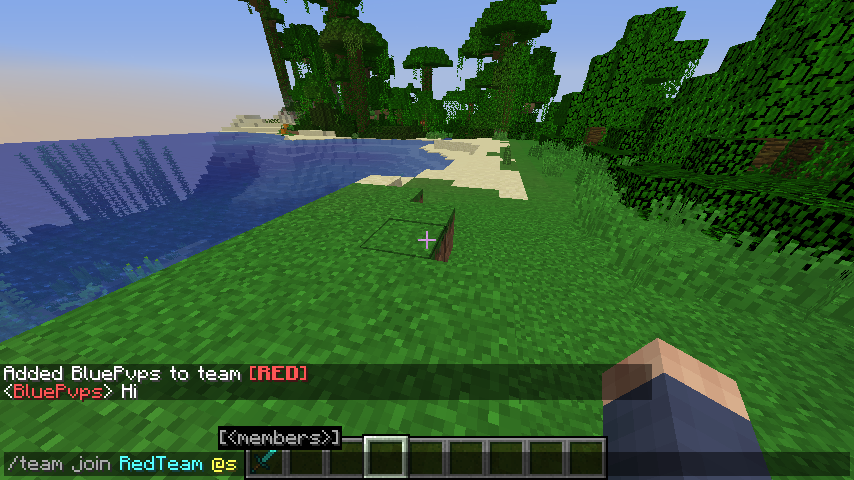 |
/team leave @s
If you have any questions about the other team settings or anything at all just leave a comment on this post!
/scoreboard
In this tutorial, I will be showing you how to use the /scoreboard command along with showing some example commands.
If you have ever coded before in any language, scoreboards are variables. This means each scoreboard you have stores a number for every player and entity. You can change peoples scores, make there score go up when a game event happens (eg. they shoot a bow) and you can test for anyone with a certain score in a selector. They are very powerful.
The /scoreboard command is very complicated at first but once you get use to it and practice they start to make more sense. When I started I didn't get them at all but now I know how it works, /scoreboard has become one of my favorite commands.
/scoreboard has lots of different commands to do separate purposes so I will start with the '/scoreboard objectives' commands.
/scoreboard objectives
This part of the command is used to create, remove, etc. It is essentially the part where you manage your scoreboards.
The first command we will look at is to add a scoreboard, to do this you need to use '/scoreboard objectives add'.
/scoreboard objectives add <name> <criteriaType> [display name ...]
The first argument to '/scoreboard objectives add' is the name, this is uses to make the scoreboard unique to all the rest. Then you need to put in a criteria type. Criteria types are what makes people gain score on the scoreboard.
You can either have one which automatically updates to game events or you can put 'dummy' and its score is only changed by commands, and not by game events such as death. This is useful for event flags, state mappings, and currencies.
If you want it to automatically update, the best way to understand it is to check out this complete list of them here.
Complete list of criterias here
Or you can just tab through them (I do that for everything!)
Once you have selected criteria type then you can optionally have a display name, this is for the sidebar but if you leave this empty it will have its display name the same as its actual name (The difference is display names can have spaces, colour coding and formatting). However adding a display name may seem very complicated.
Display names are written is JSON which is a syntax for storing and exchanging data. You can use this website here to try make a display name if you wish but make sure you paste in the same information I have used in the screenshot below and not ALL of the command given.
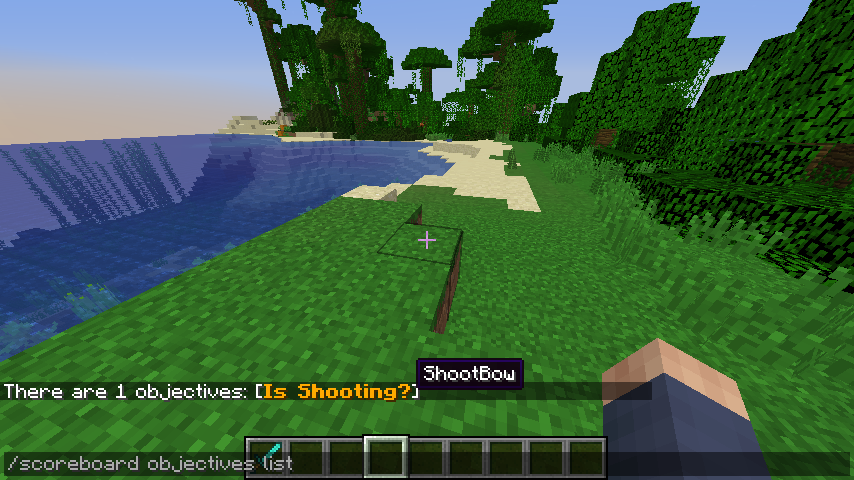
Your scoreboard objective should now be created! If you are unsure or ever want to check all your scoreboards do:
If you ever want to remove a scoreboard objective you can also do
There is also a command called '/scoreboard objectives setdisplay' where you can make it show on your screen somewhere.
/scoreboard objectives setdisplay <slot> [objective]
Slot is the place you want it to show, here is a complete list of the options.
Then put the objective name you want to be displayed.
Here is what they all look like:

belowName

list

Sidebar (Same for sidebar.team)
Note if the objective name is shown (for example the sidebar) it will show the display name if there is one. (The screenshots 2/3 are the outdated 1.12 screenshots but you get the idea)
/scoreboard players
This part of the command is used to edit peoples scores in the scoreboard we created in the last part of the command.
Firstly we have the add command:
/scoreboard players add <player> <objective> <count>
This command is used to increase any players score on any objective. The arguments are quite obvious. Here is an example:
/scoreboard players add @e[limit=3,sort=nearest] ShootBow 1
/scoreboard players remove <player> <objective> <count>
You can also do the exact same thing but to remove a score instead.
You may want to set peoples scores instead of adding to their current scores, to do this just use a 'set' instead:
/scoreboard players set <player> <objective> <count>
/scoreboard players set @e[limit=5,sort=nearest] ShootBow 0
However if you are using it for the same example I used above (Reset peoples scores) then instead you can use the 'reset' command:
/scoreboard players reset <player> [objective]
This makes them not have a score at all instead of having a score of 0, this is what entities have by default.
There are lots of other commands in scoreboard players such as 'list'
/scoreboard players list
And 'operation' which you can add, multiply etc. two scoreboards together. However you do not need to know this for now and these are rarely ever used. If you ever want to look into them just search it on the internet, send me a comment on my youtube channel or try work it out yourself using Tab Completion. Most of these commands are very self explanatory.
How do I check for a certain score?
Well if you check back on my selectors tutorial you will see a complete list of them all and what to do. However to save you the effort and summarize, you put:
To check for a minimum score on a scoreboard:
@e[scores={NAME=AMOUNT..}]
To check for a maximum score on a scoreboard:
@e[scores={NAME=..AMOUNT}]
To check if a score is between two values on a scoreboard:
@e[scores={NAME=AMOUNT1..AMOUNT2}]
And to check if a score is an exact value on a scoreboard:
@e[scores={NAME=AMOUNT}]
So for example
say @a[scores={ShootBow=5}]
Would say all players who have an exact 'ShootBow' score of 5.
/scoreboard objectives (add|list|modify|remove|setdisplay)
/scoreboard players (add|enable|get|list|operation|remove|reset|set)
If you have ever coded before in any language, scoreboards are variables. This means each scoreboard you have stores a number for every player and entity. You can change peoples scores, make there score go up when a game event happens (eg. they shoot a bow) and you can test for anyone with a certain score in a selector. They are very powerful.
The /scoreboard command is very complicated at first but once you get use to it and practice they start to make more sense. When I started I didn't get them at all but now I know how it works, /scoreboard has become one of my favorite commands.
/scoreboard has lots of different commands to do separate purposes so I will start with the '/scoreboard objectives' commands.
/scoreboard objectives
This part of the command is used to create, remove, etc. It is essentially the part where you manage your scoreboards.
The first command we will look at is to add a scoreboard, to do this you need to use '/scoreboard objectives add'.
/scoreboard objectives add <name> <criteriaType> [display name ...]
The first argument to '/scoreboard objectives add' is the name, this is uses to make the scoreboard unique to all the rest. Then you need to put in a criteria type. Criteria types are what makes people gain score on the scoreboard.
You can either have one which automatically updates to game events or you can put 'dummy' and its score is only changed by commands, and not by game events such as death. This is useful for event flags, state mappings, and currencies.
If you want it to automatically update, the best way to understand it is to check out this complete list of them here.
Complete list of criterias here
Or you can just tab through them (I do that for everything!)
Once you have selected criteria type then you can optionally have a display name, this is for the sidebar but if you leave this empty it will have its display name the same as its actual name (The difference is display names can have spaces, colour coding and formatting). However adding a display name may seem very complicated.
Display names are written is JSON which is a syntax for storing and exchanging data. You can use this website here to try make a display name if you wish but make sure you paste in the same information I have used in the screenshot below and not ALL of the command given.
/scoreboard objectives add ShootBow minecraft.used:minecraft.bow ["",{"text":"Is Shooting?","color":"gold","bold":true}]Your scoreboard objective should now be created! If you are unsure or ever want to check all your scoreboards do:
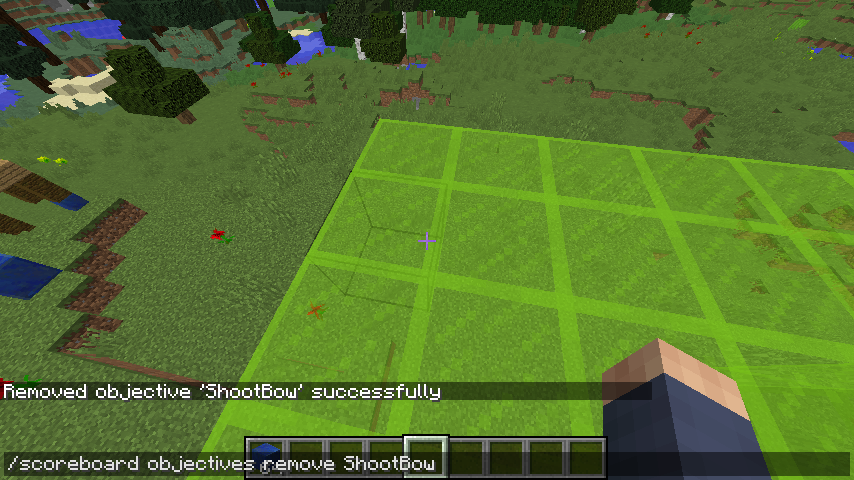
/scoreboard objectives listThis will send you a list of all your objectives and what criteria type they are.If you ever want to remove a scoreboard objective you can also do
/scoreboard objectives remove <name>There is also a command called '/scoreboard objectives setdisplay' where you can make it show on your screen somewhere.
/scoreboard objectives setdisplay <slot> [objective]
Slot is the place you want it to show, here is a complete list of the options.
| SLOT | Description |
| list | Displays a yellow number without a heading on the tab menu, where online players are shown. Visible even in singleplayer. |
| sidebar | Shows on the right hand side of the screen. Shows entities in a high score list with a heading labeled the objective's display name. Note that players will be shown even if offline, and untracked players will not be shown. In addition, fake players with names starting with a # will not show up in the sidebar under any circumstances. |
| sidebar.team.<color> | There are 16 team-specific sidebar display slots. These operate the same as the standard sidebar slot, but only display to players who are on teams which use the specified color (for example, "sidebar.team.green" displays to players on "green" teams). Valid colors are: "black", "dark_blue", "dark_green", "dark_aqua", "dark_red", "dark_purple", "gold", "gray", "dark_gray", "blue", "green", "aqua", "red", "light_purple", "yellow", and "white". |
| belowName | Shows the score followed by the objective's display name below the player's nameplate above their head. Is hidden beyond ~10 blocks and when the player is sneaking. Not visible in singleplayer. |
/scoreboard objectives setdisplay sidebar ShootBowHere is what they all look like:
belowName
list
Sidebar (Same for sidebar.team)
Note if the objective name is shown (for example the sidebar) it will show the display name if there is one. (The screenshots 2/3 are the outdated 1.12 screenshots but you get the idea)
/scoreboard players
This part of the command is used to edit peoples scores in the scoreboard we created in the last part of the command.
Firstly we have the add command:
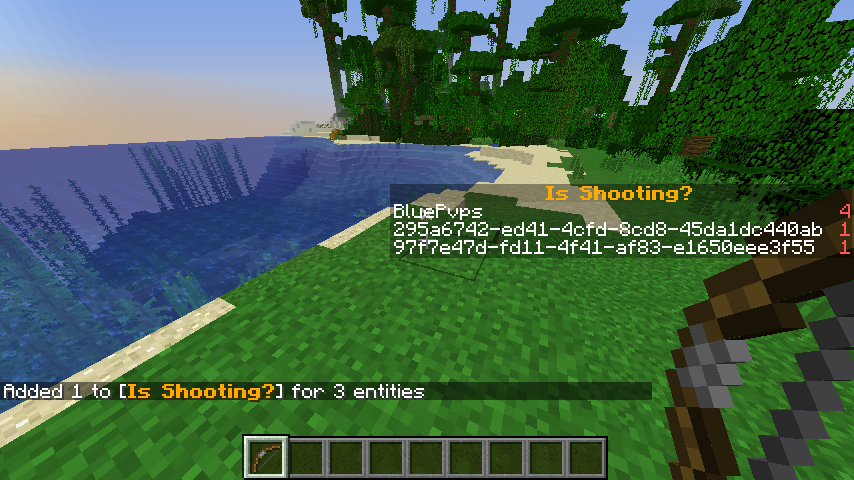
/scoreboard players add <player> <objective> <count>
This command is used to increase any players score on any objective. The arguments are quite obvious. Here is an example:
/scoreboard players add @e[limit=3,sort=nearest] ShootBow 1
 |  |
/scoreboard players remove <player> <objective> <count>
You can also do the exact same thing but to remove a score instead.
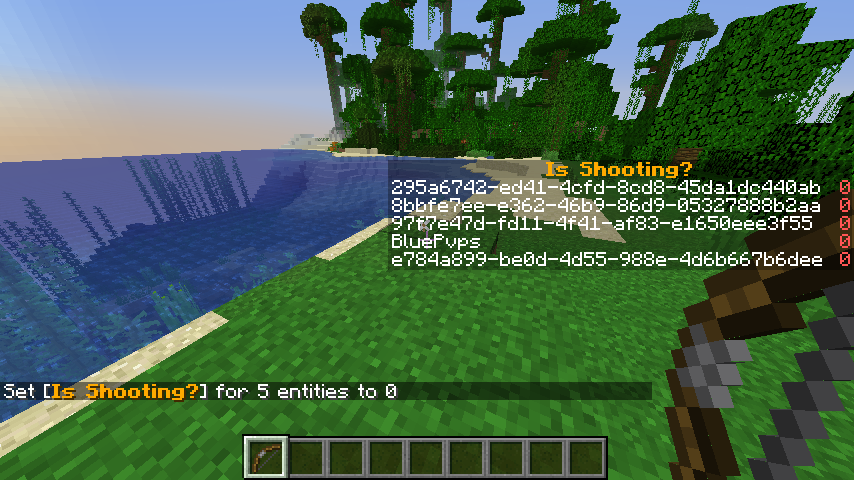
You may want to set peoples scores instead of adding to their current scores, to do this just use a 'set' instead:
/scoreboard players set <player> <objective> <count>
 |  |
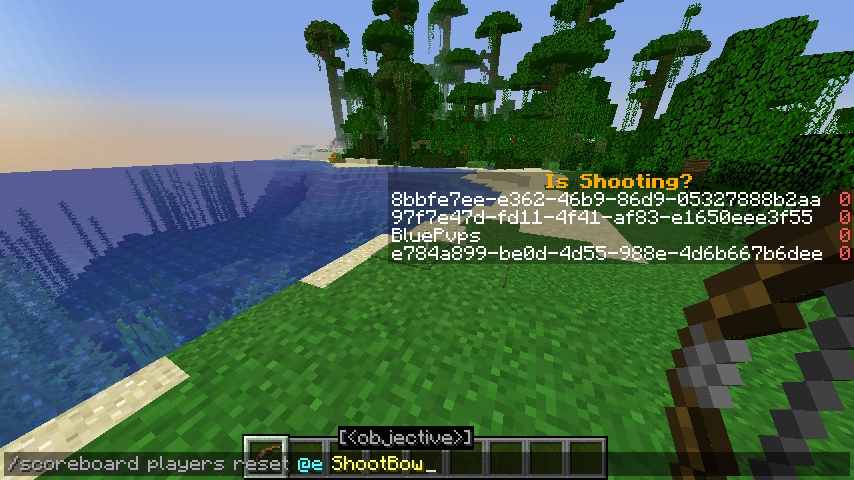
However if you are using it for the same example I used above (Reset peoples scores) then instead you can use the 'reset' command:
/scoreboard players reset <player> [objective]
 | 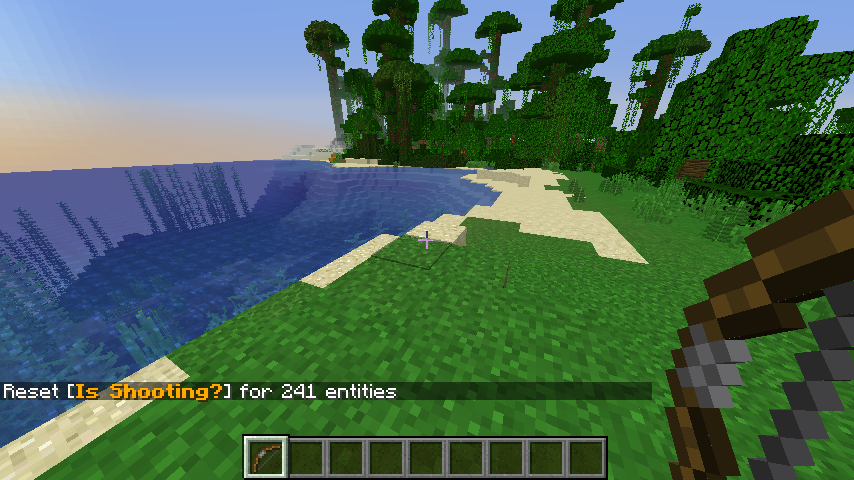 |
There are lots of other commands in scoreboard players such as 'list'
/scoreboard players list
And 'operation' which you can add, multiply etc. two scoreboards together. However you do not need to know this for now and these are rarely ever used. If you ever want to look into them just search it on the internet, send me a comment on my youtube channel or try work it out yourself using Tab Completion. Most of these commands are very self explanatory.
How do I check for a certain score?
Well if you check back on my selectors tutorial you will see a complete list of them all and what to do. However to save you the effort and summarize, you put:
To check for a minimum score on a scoreboard:
@e[scores={NAME=AMOUNT..}]
To check for a maximum score on a scoreboard:
@e[scores={NAME=..AMOUNT}]
To check if a score is between two values on a scoreboard:
@e[scores={NAME=AMOUNT1..AMOUNT2}]
And to check if a score is an exact value on a scoreboard:
@e[scores={NAME=AMOUNT}]
So for example
say @a[scores={ShootBow=5}]
Would say all players who have an exact 'ShootBow' score of 5.
Conclusion
I hope you like this tutorial, I hope you learned something new!
I would like to thank my very best friend Alex for some of the pictures.
Please subscribe!
I would like to thank my very best friend Alex for some of the pictures.
Please subscribe!
| Credit | My friend Alex for some help |
| Tags |
5003756
6


 Yuzukodo
 Papa Enny
 Escapazition
 SculkwolfContent
 VoidCorrupts
 WishQuest
 MaximusPrime23
 voktorka
 IKadekDwi
 pingy
pingy TwoManBuilds
Create an account or sign in to comment.