


8
Hello there.
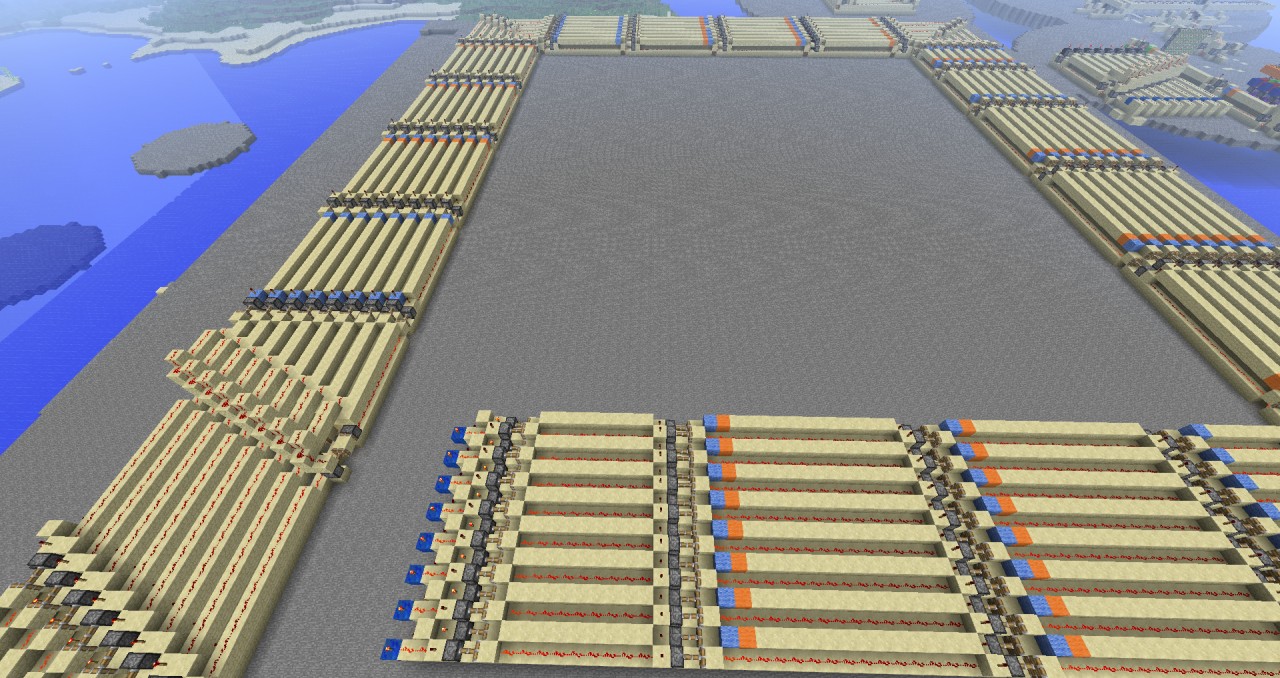
Recently I've started a new revolutionary CPU project, and I've needed to revamp instant-wire made by shrogg, so it would be more useful.Let me present you one tick stackable wiring!
Pros:
+bus width is only 2 blocks -> stackable
+0 tick on falling edge, 1 tick on rising
+2 stable states = when input is off, output is off. when input is on, output is on.
In order to use these awesome advantages, you need to:
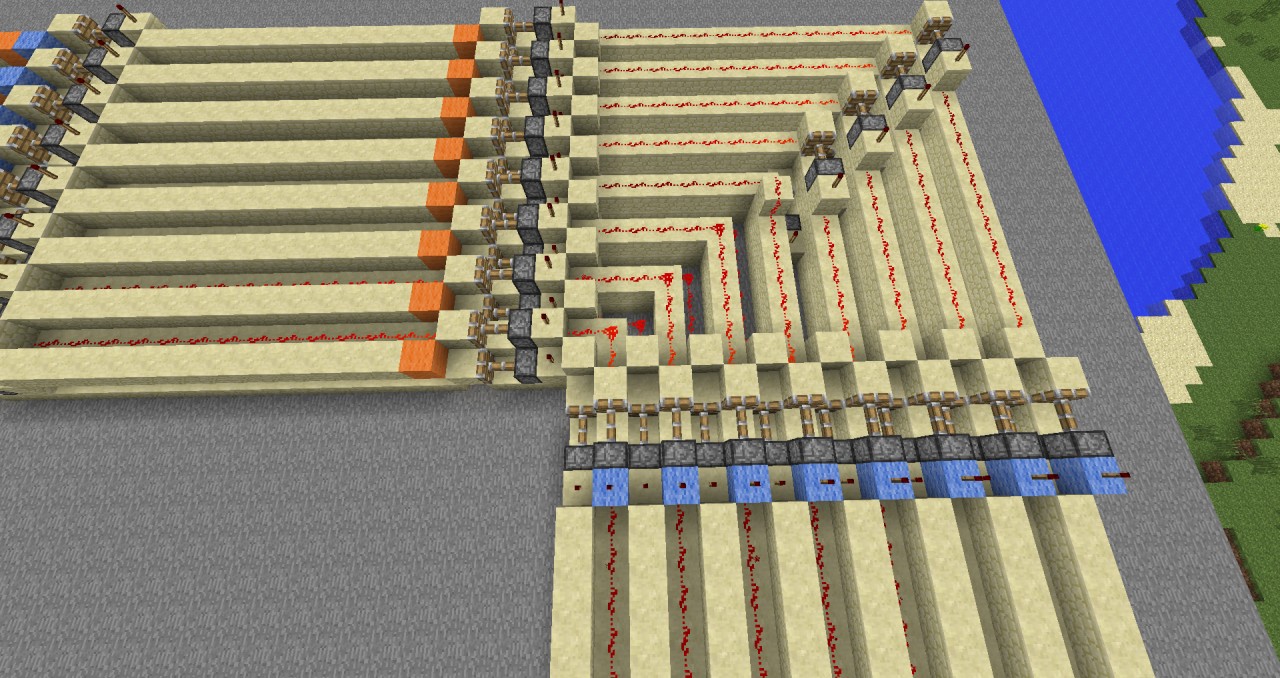
1.use special signal "entry points" or "junctions"
2.when you ever need output - use special "output points"
All elements:
1.entry point
2.output
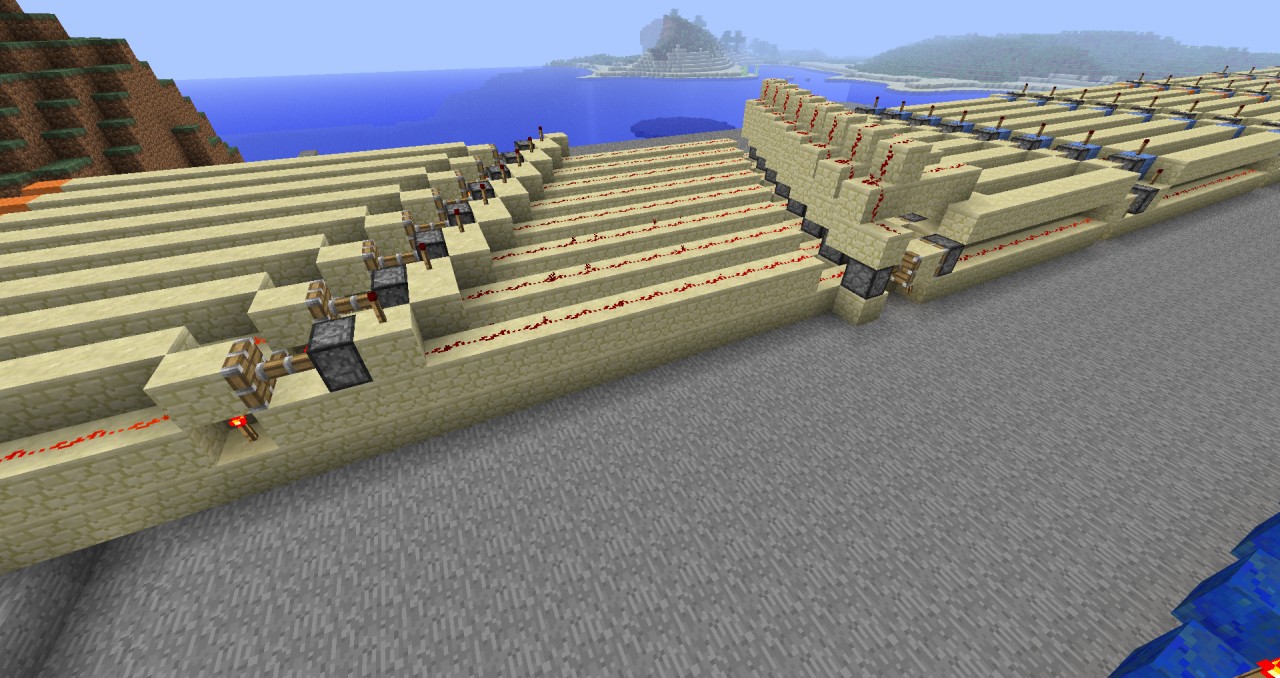
3.wiring
4.junction(as an combination of entry+output points)
will be available as schematics, so wiring up your circuit will be easier than building something out of lego :)
Things to keep in mind:
1. every junction you will use, will add +1 tick to your bus.
2. Wiring is mono-directional!
Thank you for your attention. All schematic files will be available soon.
If you are wondering how it works:
On input station Input is branched to 2 signals: on direct and one inverted (here comes 1 tick). This feeds 2 instant wire transmitters, which are capable of instant transmission of falling edge. On the "output station" these 2 signals are fed to a system with 2 battling (powered) pistons. When one of them receives an falling edge from one of the buses, it will change the state. So you can transmit a proper signal almost instantly. If you want to do a junction, you will need to transform signal twice (which is adding another 1 tick). That's all!
Recently I've started a new revolutionary CPU project, and I've needed to revamp instant-wire made by shrogg, so it would be more useful.Let me present you one tick stackable wiring!
Pros:
+bus width is only 2 blocks -> stackable
+0 tick on falling edge, 1 tick on rising
+2 stable states = when input is off, output is off. when input is on, output is on.
In order to use these awesome advantages, you need to:
1.use special signal "entry points" or "junctions"
2.when you ever need output - use special "output points"
All elements:
1.entry point
2.output
3.wiring
4.junction(as an combination of entry+output points)
will be available as schematics, so wiring up your circuit will be easier than building something out of lego :)
Things to keep in mind:
1. every junction you will use, will add +1 tick to your bus.
2. Wiring is mono-directional!
Thank you for your attention. All schematic files will be available soon.
If you are wondering how it works:
On input station Input is branched to 2 signals: on direct and one inverted (here comes 1 tick). This feeds 2 instant wire transmitters, which are capable of instant transmission of falling edge. On the "output station" these 2 signals are fed to a system with 2 battling (powered) pistons. When one of them receives an falling edge from one of the buses, it will change the state. So you can transmit a proper signal almost instantly. If you want to do a junction, you will need to transform signal twice (which is adding another 1 tick). That's all!
| Progress | 90% complete |
| Tags |
tools/tracking
581516
2
1-tick-stackable-wiring-wtih-2-stable-states


 Park1423
 CrystalRuby
 Escapazition
 dreamCritting
 Arkaliasus
 ScotsMiser
 LongerBlade
 pocapka
 person_02
 Octogamer

 XXHIKKIXX
 SeaJay Plays
 Insidious_Purr
 Meat_Mallet
Create an account or sign in to comment.
Also, since it's 1 tick, you might as well just go with repeaters(you could stretch them a bit by putting a block on each end) , to save on piston lag.
I'm planning on starting an instant computer, with single-wire logic, and 4-5 tick clock. I hope we can share some instant-wire knowledge :)
Indeed this is an improvement over Shroggs design, I've seen Ravi rider use this, but he seemed to think that the I/O ports would be too big and slow to be worth while...
I don't agree with Tavirider, I think this is a brilliant idea. And I can tell you've gone about it very scientifically by building junctions and turns first.
I'm also gonna have a crack at building and instant computer, a new version of my X1000, but first I must finish the j400 which must be about 95% done now : )