

- 6,886 views, 2 today

52
Prerequisites
- Completion of part 1 of this tutorial: Link to part 1
- A ready mind ready to learn and listen to instructions.
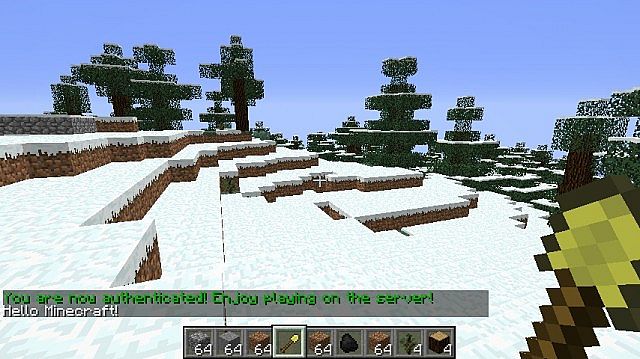
Hello World Minecraft!
The big boss server owner (BBSO) messages you on Skype; "I hear you've been learning Java," he starts off with, "I'm needing a really simple plugin made for my server."
You're skeptical about the whole thing, but reply, "What type of plugin do you have in mind?"
"I want it to say Hello Minecraft! in chat every time a user does /hi in chat. Think you can make it?"
"Sure," you reply, "piece of cake!"
"Good," he replies, "we needed it yesterday."
Knowing how impatient the BBSO can be you fire up Eclipse and get right to work.
Some Real Code
Up to now you've been building a base, but today we're actually going to write some code that actually does something in Minecraft, the fabled "Hello World," the first program that any programmer writes in any new language. The last time we left off with the skeleton code needed for the plugin, but now we are going to flesh it out. First, open up the plugin.yml that you added in the last tutorial and add the following lines:
commands:
hi:
description: Says Hello Minecraft! to the server.
usage: /hi
The plugin.yml should now look like this:

Now that you've got it added to the yml, we are going to add the actual code to the ExampleProject.java file. Under the onCommand() function add this line:
sender.sendMessage("Hello Minecraft!);
return true;
Also, delete the "return false;" line. Your ExampleProject.java file should now look like the following:

Excellent, just make sure to save it! We are now ready to package it in a jar, ready to run on your Minecraft server. Right click on the ExampleProject folder and click on Export. This should open the Export dialog box. Select the Java->Jar File option as shown.

Now click next. On the next window uncheck the .classpath and .project files, and tell it where you want to save the resulting jar file, then click on finish. The dialog box should look similar to this when you're ready:

Tah dah! You've just successfully created your first plugin. Let's load it up in Minecraft and make sure there's no errors.

If you run into any errors, make sure to look over the tutorial again and make sure everything is done correctly. Also, make sure that you have the correct indentation in the plugin.yml file, as that can throw everything off.
So, What Does it all Do?
With all of this copying, pasting, and running, you probably don't know what much of anything really does inside the plugin. Well, let's take a look at it:package tux2.exampleproject; - this is the first line in the file and identifies the package that the file belongs in.
import org.bukkit.plugin.java.JavaPlugin; - The import lines tell your plugin which files to look in for the stuff that they need and the classes that they want.
public class ExampleProject extends JavaPlugin - This can actually be broken down into several parts, and declares the class file. Every single file in java stands for a separate class file. When you compile the files they actually go into .class files.
- public - This declaration means that any other java class can reference this class.
- class - It's a class declaration
- ExampleProject - The class name
- extends JavaPlugin - If this class extends the functionality of another class file, which class file is it? In this case we are extending the JavaPlugin class from bukkit.
{} - These denote a code block. Anything between them belongs to what is right before them. So for a class file, everything inside of these belongs to that class file, for a for loop, anything inside them would be for the for loop, etc.
; - No, that's not an incomplete smiley face, the semi-colon ";" ends a statement, as statements can span multiple lines in java for readability purposes.
@Override - This is optional and tells the compiler that we are overriding a function in the parent class (JavaPlugin), and it is an easy way to spot code changes if they ever change that function in Bukkit.
public boolean onCommand(CommandSender sender, Command command, String label, String[] args) - This is a function declaration and is another one that we need to take apart and examine part by part, as there is quite a bit here.
- public - Yup, we covered it above, this means that any class that uses this class can access this function. There's also the private and protected statuses that you can apply to classes, functions, or variables, but we aren't going to cover those until a later tutorial.
- boolean - Oh, what's that? That's the return type for this function. This lets the other class that runs it know what it's going to return it. In this case it's a boolean, which returns either true or false, (yes or no). There's other return types that we will cover, like String, int, float, void, etc.
- onCommand - this is the name of the function and what other classes/functions will use to use it.
- (CommandSender sender, Command command, String label, String[] args) - These are all of the variables, with what they are going to be named in the function that the calling function needs to supply. So for this one we get who sent the command, the command itself, the command label, and a list of arguments after the command. We'll cover these more in depth in a later tutorial.
sender.sendMessage("Hello Minecraft!"); - this uses the sender instance of the CommandSender class, and calls the sendMessage function in it, with the string "Hello Minecraft!", which sends the message to the user.
return true; - this returns the success or failure to the function that called it.
public void onDisable() - This is the function that gets called when the server is shut down, or when the /reload command is done. We put any cleanup we need to do in this function. It doesn't return anything, so the return type is void.
public void onEnable() - This function gets called when the server is starting and when the /reload command is done in game. Anything that needs to be done when enabling your plugin should be done here. Since it doesn't return anything the return type is void.
Summary
In this lesson you learned how to add a command, some basics about plugins and the java programming syntax, as well as packaging your plugin into a jar file and actually running it on a server!
Coming Up
Next we will be taking an in depth look at classes, functions, and variables, as well as all the different return types for functions, and how they all work together.
<< Part 1 - Intro | Part 3 - FUNCTIONal Java >>
| Tags |
1 Update Logs
Update #1 : by Tux2 04/25/2013 9:15:34 pmApr 25th, 2013
Added link to part 3
tools/tracking
2072553
6
learning-java-bukkit-style---part-2-hello-world


 CrystalRuby
 PixelCraft__YT
 Vunder - Lucas
 PrincessLuna16
 GalaxyCat24
 Hut
Hut justaminecraft-creator
 Arkaliasus
 BlockyMan2000


 illystray
 pathisgamer
Create an account or sign in to comment.