

- 707 views, 2 today

23
Warning: There is alot of reading below. If you know how to setup a server and want to skip to plugin tutotials, Skip all the steps and look for the line. If you want to see a tutorial for a plugin please comment it below.
So you want to make a bukkit server? You're in luck! I am a proffesional server manager. I have been making bukkit servers for 2 years now and I am here to help you! I have made a blog on what to add in your server (Click here for the blog) and now I am here to tell you how to set it up, with a list in order of what to do.
My Server- mc.skyblockrealms.com
My Website- skyblockrealms.com
1. Getting a server
When you make a server you are going to need a hosting provider because if you run it from your computer you are exposing your network to hackers and you don't want that. I have made a list of the best hosting providers below:
The amount of ram you get should be dependent on how much you want in your server. If it's a small server then you should get about 1-2 GB of ram. If it's a big server then about 5-8 GB. If it's a HUGE server then get about 16-32 GB. When/If you purchase your server then you will be given an e-mail that has your login information. You need to click the link that gives the link to your multicraft account. Then you will be prompted with a login screen. Enter the username and password that was sent to you in your email. If you logged in successfully click profile and in the password field enter the password you want then login again.
2. Setting up Multicraft
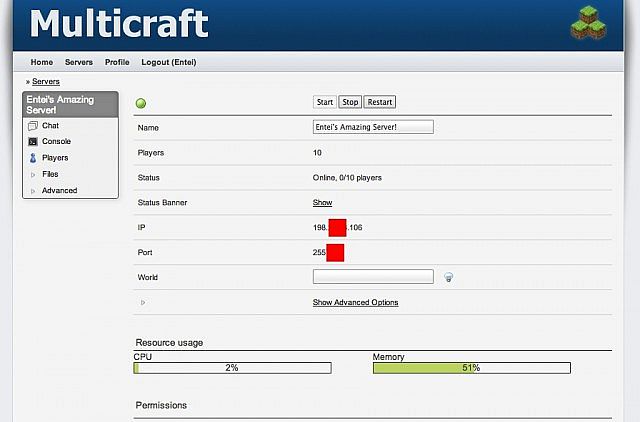
Once you find the home page to your server (Servers > My Servers > [your server]) it should look SIMILAR to this:
Now is where the fun begins. You will want to change the name to something that you can remember, It's not essential, just helpful. Next you want to click Show Advanced Options and click "Announce World Save" so it's unchecked. This looks ALOT more professional. Lastly, you want to change your SERVER JAR option so it says bukkit (Then your version, If a new version of minecraft has recently come out click Bukkit: Beta or Bukkit Dev, If no new version has come out then click Bukkit: Reccomended). Next make sure you click Save at the bottom or else it will be reset. Once you're done with all that you will want to go to Files > Config Files and edit it to your liking. Once you're done click Save then move on to the next step.
3. Adding plugins
Now you want to restart the server so it generates your files. Now you want to go to bukkit.org and click "Get plugins" and find your plugins and then download them. For a tutorial on which plugins to download, refer to the blog post link in the begining of this blog post. Now you want to go back to multicraft and click Files > FTP File Access then enter the password that you made when you changes it in step 1. If you did not change it in step 1 then enter the password you were given in your initial email. Now you want to click the plugins folder. If there is no plugins folder then refer to step 2 again and if you still can't figure it out then request help from someone in the Forums or the PMC chat. Once you are inside the folder click "Upload" on the side. All the .jar files will go to the left and all the .zip files will go to the right (This includes Essentials). Once you are done with that you can restart the server so that you get all the folders for the plugins. The amount of plugins per 1 GB (1000 MB) of ram you have should be equal to 10 plugins (e.g. 4 GB of memory = 40 plugins). After that you can go back to your plugins folder then look for the plugin you want to edit then open the folder. DO NOT CLICK THE CONFIG.YML, CLICK THE EDIT BUTTON TO THE RIGHT. Once everything is setup, restart your server again then continue to the next step.
4. Connecting to your server
To connect to your server use the IP then type a : then enter the port (e.g. 127.0.0.1:25678) in your minecraft game.
5. Adding a domain
This is a little more advanced, if you don't care about a domain then I reccomend that you skip to the next step, as domains cost money. Note- This is a godaddy tutorial, If you use another domain provider then you will have to skip to the next step or you can try but I do not garuntee it will work)
6. MySql
If your hosting provider offers free MySQL then you want to click Advanced > MySQL database. Next you want to click "Create Database". All of your information nessecary is there except your port which is 3306. You should just write that down and use it if you need to input it into a plugin. It is not very nessecary though to click the administration link.
7. Console
This is basically the OP that is on your server but never on at the same time. You can basically just OP yourself then check the logs for problems and such.
---------------------------------------------------------------------------------------------------------------------------
Plugin Tutorials
So you need help with your plugins? No Problem I'm here to help! Don't see your plugin here? Comment below the plugin you need help with!
Thanks for reading guys! I'm taking plugin tutorial requests so remember to comment below!
So you want to make a bukkit server? You're in luck! I am a proffesional server manager. I have been making bukkit servers for 2 years now and I am here to help you! I have made a blog on what to add in your server (Click here for the blog) and now I am here to tell you how to set it up, with a list in order of what to do.
My Server- mc.skyblockrealms.com
My Website- skyblockrealms.com
1. Getting a server
When you make a server you are going to need a hosting provider because if you run it from your computer you are exposing your network to hackers and you don't want that. I have made a list of the best hosting providers below:
Hosting Providers
NOTICE: I AM NOT AFFILIATED WITH THESE GROUPS. THIS IS LIKE ME SAYING GO TO McDONALDS BECAUSE I LIKE IT. THESE ARE RECCOMENDATIONS, NOT ME TRYING TO SELL THEIR GOODS. If you are a moderator trying to strike me for commercial advertising please PM me so then I don't have to redo the blog post, I'll just take down the Hosting Providers spoiler.
My top providers in a list:
1) Vlhosting
2) Pytohost
3) MCProHosting
4) Gizmo Servers
Who NOT to use:
1) BeastNode
2) GGservers
3) MCpowerhosting
These are from previous experiences, I do know what I am saying. I cannot tell you the prices or why to use/not use them because then I will get banned for commercial advertising
The amount of ram you get should be dependent on how much you want in your server. If it's a small server then you should get about 1-2 GB of ram. If it's a big server then about 5-8 GB. If it's a HUGE server then get about 16-32 GB. When/If you purchase your server then you will be given an e-mail that has your login information. You need to click the link that gives the link to your multicraft account. Then you will be prompted with a login screen. Enter the username and password that was sent to you in your email. If you logged in successfully click profile and in the password field enter the password you want then login again.
2. Setting up Multicraft
Once you find the home page to your server (Servers > My Servers > [your server]) it should look SIMILAR to this:
What your multicraft should look like
Note- You may be missing things or have extra things, it's okay don't panic

Now is where the fun begins. You will want to change the name to something that you can remember, It's not essential, just helpful. Next you want to click Show Advanced Options and click "Announce World Save" so it's unchecked. This looks ALOT more professional. Lastly, you want to change your SERVER JAR option so it says bukkit (Then your version, If a new version of minecraft has recently come out click Bukkit: Beta or Bukkit Dev, If no new version has come out then click Bukkit: Reccomended). Next make sure you click Save at the bottom or else it will be reset. Once you're done with all that you will want to go to Files > Config Files and edit it to your liking. Once you're done click Save then move on to the next step.
3. Adding plugins
Now you want to restart the server so it generates your files. Now you want to go to bukkit.org and click "Get plugins" and find your plugins and then download them. For a tutorial on which plugins to download, refer to the blog post link in the begining of this blog post. Now you want to go back to multicraft and click Files > FTP File Access then enter the password that you made when you changes it in step 1. If you did not change it in step 1 then enter the password you were given in your initial email. Now you want to click the plugins folder. If there is no plugins folder then refer to step 2 again and if you still can't figure it out then request help from someone in the Forums or the PMC chat. Once you are inside the folder click "Upload" on the side. All the .jar files will go to the left and all the .zip files will go to the right (This includes Essentials). Once you are done with that you can restart the server so that you get all the folders for the plugins. The amount of plugins per 1 GB (1000 MB) of ram you have should be equal to 10 plugins (e.g. 4 GB of memory = 40 plugins). After that you can go back to your plugins folder then look for the plugin you want to edit then open the folder. DO NOT CLICK THE CONFIG.YML, CLICK THE EDIT BUTTON TO THE RIGHT. Once everything is setup, restart your server again then continue to the next step.
4. Connecting to your server
To connect to your server use the IP then type a : then enter the port (e.g. 127.0.0.1:25678) in your minecraft game.
5. Adding a domain
This is a little more advanced, if you don't care about a domain then I reccomend that you skip to the next step, as domains cost money. Note- This is a godaddy tutorial, If you use another domain provider then you will have to skip to the next step or you can try but I do not garuntee it will work)
How To add a Domain (Steps)
1. Go to Godaddy and click My Account and click Manage your domains. Once done with that click the blue link to your DNS Panel (It should be your domain highlighted and underlined in blue)
2. Click DNS Zone File then click "Add Record"
3. Now select A (Host) in the dropdown menu
4. Type mc or play in the host (this will be your new IP e.g. mc.skyblockrealms.com)
5. In the Points to box type the IP of your server (Do not type the : then the port or else it will not work)
6. Click "Save" then click "Save" again in the red box that pops up.
7. Wait about an hour then test the IP. When you test the Ip you must include the port.
6. MySql
If your hosting provider offers free MySQL then you want to click Advanced > MySQL database. Next you want to click "Create Database". All of your information nessecary is there except your port which is 3306. You should just write that down and use it if you need to input it into a plugin. It is not very nessecary though to click the administration link.
7. Console
This is basically the OP that is on your server but never on at the same time. You can basically just OP yourself then check the logs for problems and such.
---------------------------------------------------------------------------------------------------------------------------
Plugin Tutorials
So you need help with your plugins? No Problem I'm here to help! Don't see your plugin here? Comment below the plugin you need help with!
Thanks for reading guys! I'm taking plugin tutorial requests so remember to comment below!
| Tags |
1 Update Logs
Update #1 : by goto5048 09/17/2015 7:51:30 pmSep 17th, 2015
Updated
tools/tracking
2865318
6
how-to-make-a-bukkit-server-with-plugin-tutorials


 Khangbo84
 TheMountaineer
 Zelvind
 MindOfSocial
 AloComet
 ScotsMiser
 Team UNNAMED
 MistFaller
 star_weaver

 WYHA-Storm
Create an account or sign in to comment.