


- 5,913 views, 3 today

490
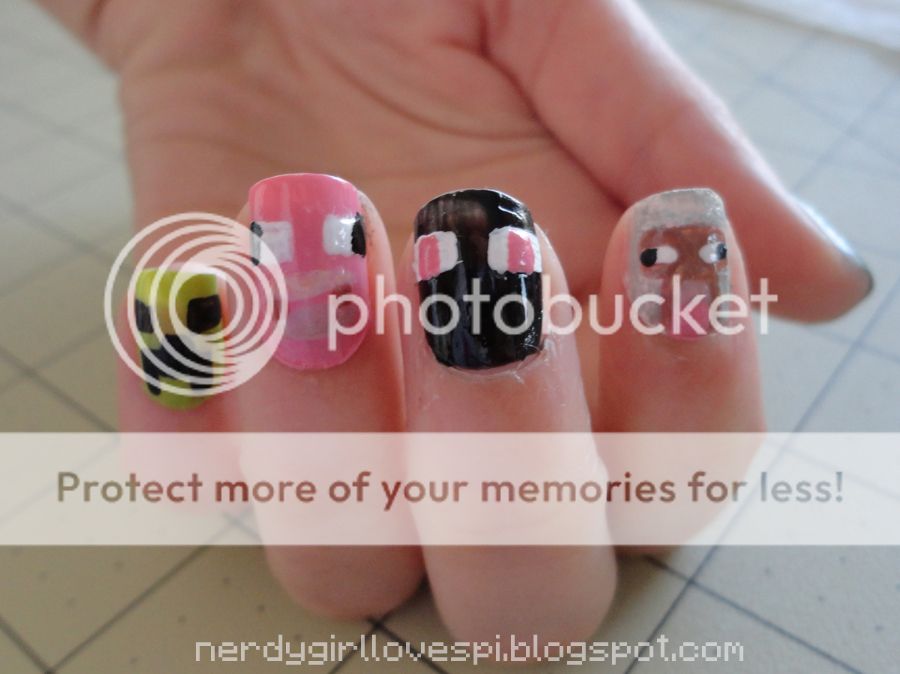
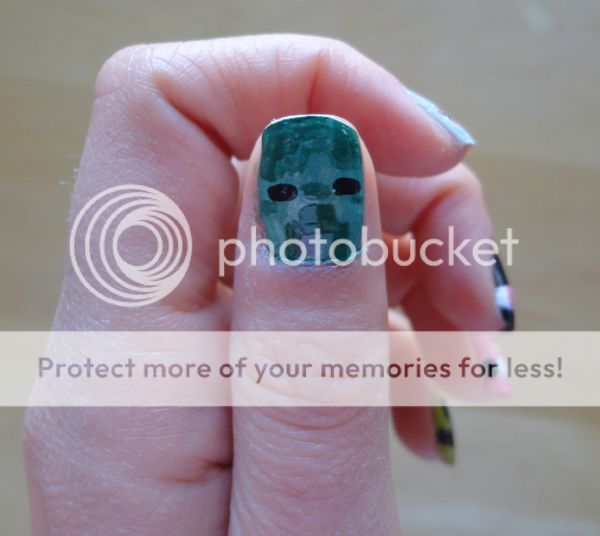
Minecraft-inspired Nail Art
(Tutorials below photos!)
- - - - - - - - - - - - - - - - - - - - - - - - - - - -

- - - - - - - - - - - - - - - - - - - - - - - - - - - - - - - - - - - - - - - - - - - - - - - - - - -
- - - - - - - - - - - - - - - - - - - - - - - - - - - -
v Important Tips! v
- - - - - - - - - - - - - - - - - - - - - - - - - - - -
v Onto the tutorials! v
(Tutorials below photos!)
- - - - - - - - - - - - - - - - - - - - - - - - - - - -
- - - - - - - - - - - - - - - - - - - - - - - - - - - - - - - - - - - - - - - - - - - - - - - - - - -
- - - - - - - - - - - - - - - - - - - - - - - - - - - -
v Important Tips! v
Important Tips
Important Tips!
Now, I'm by no means a nail art expert but here are some tips I've come up with that may help you out!
1. Nail polish can be difficult to work with when doing nail art; It gets expensive, the formula can be too thick, and it can ruin your brushes. If you don't have a variety of polishes at your disposal, acrylic craft paint works just as well. I wouldn't recommend it for your base coats but for small details, it works great. On all of the nails picture above, I used black and white paint for the eyes and mouths. If you do put it directly onto your nail, make sure you apply a coat of clear polish onto your nail first; I wouldn't recommend painting it directly onto your nails. I'm not sure of the effects of it but it just doesn't seem like a good idea.
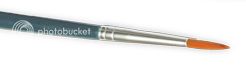
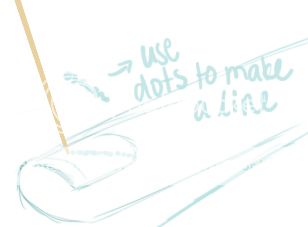
2. A good brush is the key to clean, successful nail art. You want a small, tapered brush that ends in a fine point for little details like faces and eyes. Stray brush hairs can also result in messiness so trim them off. You can also use toothpicks to dab on details. Applying details in little dots as opposed to long strokes can be the key to clean details. Nail art pens are great for applying strokes of color but not a good idea when it comes to small details. See below:
Now, I'm by no means a nail art expert but here are some tips I've come up with that may help you out!
1. Nail polish can be difficult to work with when doing nail art; It gets expensive, the formula can be too thick, and it can ruin your brushes. If you don't have a variety of polishes at your disposal, acrylic craft paint works just as well. I wouldn't recommend it for your base coats but for small details, it works great. On all of the nails picture above, I used black and white paint for the eyes and mouths. If you do put it directly onto your nail, make sure you apply a coat of clear polish onto your nail first; I wouldn't recommend painting it directly onto your nails. I'm not sure of the effects of it but it just doesn't seem like a good idea.
2. A good brush is the key to clean, successful nail art. You want a small, tapered brush that ends in a fine point for little details like faces and eyes. Stray brush hairs can also result in messiness so trim them off. You can also use toothpicks to dab on details. Applying details in little dots as opposed to long strokes can be the key to clean details. Nail art pens are great for applying strokes of color but not a good idea when it comes to small details. See below:
3. Dipping brushes in nail polish makes them difficult to clean. Use nail polish remover to remove most of the nail polish, and don't wait until it dries to do it. Clean your brushes immediately after you are done using them. Soak them in the nail polish remover for a little while if the polish is especially tough to remove. Wipe it off on a paper towel or rag. Be warned, though: This ruins brushes fairly quickly so I wouldn't recommend doing this to expensive brushes. You can find cheap brush sets at stores like Michael's or Hobby Lobby; Buy a set and pick out the smallest brushes. Designate these as your nail art brushes. As long as you clean your brushes quickly after use, they'll serve you well.
4. Always use a clear top coat to seal your nail art! Suggested top coats are Seche Vite Dry Fast Top Coat (great) or Sally Hansen Hard as Nails Strengthening Top Coat (good). Both can be found at drug stores or beauty supply stores.
5. If you'd like to know exactly what nail polishes I used, comment or PM me.
- - - - - - - - - - - - - - - - - - - - - - - - - - - -
v Onto the tutorials! v
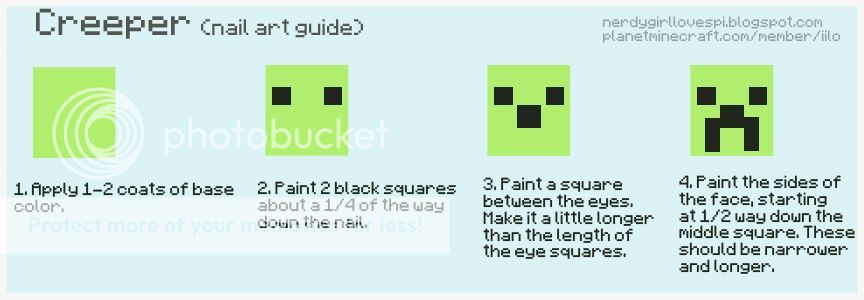
Creeper
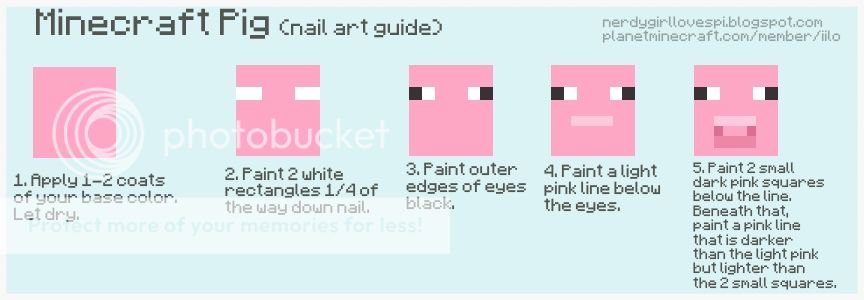
Pig
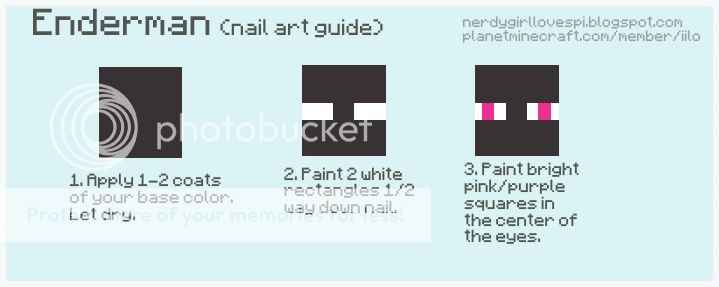
Enderman
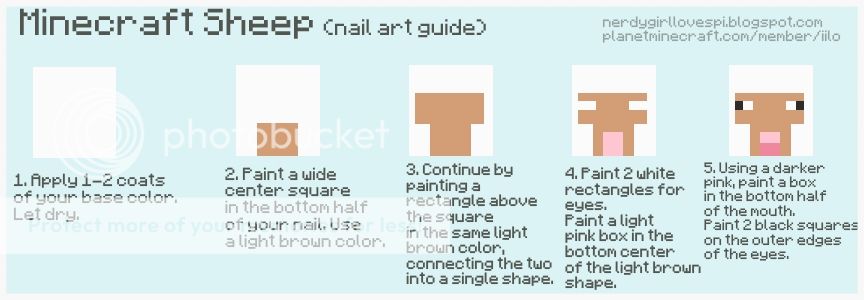
Sheep
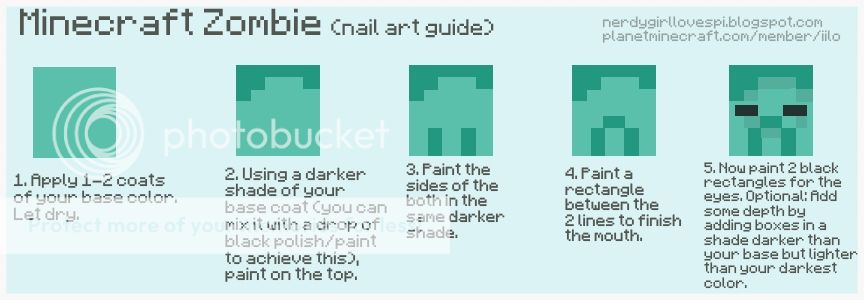
Zombie
| Tags |
2 Update Logs
Update #2 : by iilo 02/19/2013 6:10:57 pmFeb 19th, 2013
Added the rest of the tutorials. Added tips section.
LOAD MORE LOGS
tools/tracking
1921023
6
minecraft-nail-art-tutorials-coming-soon


 Arkaliasus
 Superrio321
 sjen_2001
 TheMountaineer
 Panda Gocarts3
 hotsuop
 rouzman

 pathisgamer


Create an account or sign in to comment.