


- 3,441 views, 1 today

142
Recording Minecraft With Little to No Lag [Tutorial]
Author Note : Updated links at the bottom of the page
INTRO
For those people who have been on Youtube and watched famous Youtubers like CaptainSparklez, BebopVox, MinecraftChick etc., they might see that they are recording Minecraft. Some of those people then followed up by attempting to record there own Minecraft games. People who have tried it might have seen a major change for the worse in the performance of not only there game but the computer itself while recording.
In a MinecraftForum post they stated that the recommended computer specifications while recording your game was a 3.0GHz Quad Core computer. The average cost of that is about $500 to $600 computer. For some people this is out of the question.
When I tried to record with my computer, it lagged extremely hard on my computer. Even if I used Fraps, Quicktime, Camtasia, and even the lesser known program BlueBerry. No matter what I tried it was still a horrible experience.
There where three different paths to go, either
1. Buy a new computer
2. Build a new computer
3. Upgrade to one with higher performance
I use a laptop so upgrading is out of the question. Building a computer would require time which I didn't have and buying one was not in the budget. So I decided to look little bit harder on the internet. I was able to come across a new start-up company that offered there free easy to use, no past experience screen recording program. They promised a better, less laggy recording to make your experience in-game better. So I decided to test it out. Bellow are the following steps that I took to make sure that I could record. If you want any proof about this program, there are some links to my Youtube videos bellow the step-by-step tutorial.
First, I began the download for EZ-Vid. It went quite quick but when I started it up, it downloaded the needed files that it needed to install. This may be a little thing but if you are worried about it taking up room on your computer, this is good.
If you are using a Mac computer download the latest update for Quicktime, Quicktime Player, and if you want, instead of regular Quicktime, you can buy Quicktime X which I wouldn't recommend. Instead if you want to purchase a recording software for your Mac computer Quicktime Pro works just fine. If you have a new Mac, recording can be done easy with Quicktime and it really shouldn't be that hard on your computer considering you have a new Mac.
Next, while I waited for this to be installed, I made sure to make the performance of Minecraft even better. Now for those of you who don't know about modding, mods add content to the game. If you have been playing Minecraft since PreAlpha, you will know how fast it was back then. This is because the game didn't need to load so much as it does now. Now there are plenty of constant things going on in the background of Minecraft like, Hunger Bar, Food Saturation Level, etc. Back in the earlier days, it only needed to load different chunks, mobs, clouds, and loading the world. So pretty much what it means is that the more mods that you have installed on your Minecraft, the more time it is going to take to load and play and the more lag your client will have. To stop this try to uninstall all mods except ModLoader because you will need this later.
Unfortunately, just uninstalling mods is not enough. You will still need to lower some quality to boost the performance. This step will be lowering the quality of your actual Minecraft. So, make sure that you have yourself a ModLoader minecraft.jar. This will be important. Now most people who don't have a top notch gaming computer or even a quad core should know to lower the quality of the game. This can be done by going to your o��Escapeo�� menu. Then navigate your way to the following and change the settings as needed
Non-Modded Minecraft
1. Go to the options menu
2. Turn music ALL the way down. This may boost performance by a little bit.
3. I choose to turn sensitivity down just because it looks visually less laggy but this doesn't quite effect the gameplay
4. Go under o��Video Settingso��.
5. Next, change o��Graphicso�� to Fast. This will make the game less visually inviting but make the gameplay faster
6. Turn render distance to EITHER short or tiny
7. Turn smooth lighting to OFF
8. Turn Performance to Max FPS
9. Turn bobbing to OFF
10. Turn GUI scale to Normal
11. Turn Advanced OpenGL to Fast.
12. Turn Brightness to whatever you want
13. Turn clouds to OFF
14. Finally turn particles to MINIMAL
After to have finished configuring these options your minecraft should run pretty fast if not faster than before. That part was the standard procedure when quickening up the performance. If you want, you should also install a Minecraft mod called OptiFine. What it does is create a faster better performance when you are playing Minecraft by lowering the quality of most everything. You will want to set everything to the lowest possible setting. Since OptiFine, tells you in detail what each option does, I will not go into very much detail. Instead, hover you mouse over each option for ¾ seconds.
1. Turn Fog to OFF
2. Turn Fog Start to whatever you need
3. Now go under details.
4. Turn Clouds to OFF
5. Turn Cloud Height all the way to the left until it is on OFF
6. Turn Trees to FAST
7. Turn Grass to FAST
8. Turn Water to FAST
9. Turn Rain & Snow to OFF
10. Turn Sky to OFF
11. Turn stars to OFF
12. Turn Sun & Moon to OFF
13. Turn show capes to OFF
14. Turn Depth Fog OFF
15. Next click Done
16. Then go under the Quality option
17. Turn MipMap Level to OFF
18. Turn MipMap Type to Nearest
19. Turn Anisotropic Filtering to OFF
20. Turn Antialiasing to OFF
21. Turn Clear Water to either OFF or ON
22. Turn Random Mobs to OFF
23. Turn Better Grass to OFF
24. Turn Better Snow to OFF
25. Turn Custom Fonts to ON
26. Turn Custom Colors to OFF
27. Turn Swamps Colors to ON
28. Turn Smooth Biomes to ON
29. Turn Connected Textures to OFF
30. Next click done
31. Now go under Animations
32. Under this, turn EVERYTHING to OFF other than Particles
33. Turn Particles to Minimal
34. Now click done
35. Now go under performance
36. Turn Smooth FPS to OFF or ON
37. Turn Smooth Input to ON
38. Turn Load Far to OFF
39. Turn Preloaded Chunks to OFF
40. Turn Chunk Updates to 1
41. Turn Dynamic Updates to ON
42. Now click done
43. Now go under Other...
44. Turn Fast Debug Info to OFF
45. Turn Debug Profiler to OFF
46. Turn Weather to OFF
47. Turn Time to Default
48. Turn Fullscreen to Default
49. Turn Autosave to 3 Minutes if you have a chance of crashing but turn to 30 Minutes if you are sure that you won't crash. (Click ESC to save the game without exiting it)
After you finish configuring them, you should be done with lowing the quality IN-GAME. You are still going to have to lower the quality of other things on the computer (Windows Only). Remember to also turn off TooManyItems while in-game because that causes some major lag when you are crafting something.
WINDOWS
Before continuing, remember that this part is for Windows only. The Mac section will be under this if you want to read about lowering the settings. The first thing you are going to want is the program GameBoost or you can manually end most processes in TaskManager. What GameBooster does is close unused processes. Then, after you are done with the program, it reopens them. The creators link will be at the bottom of the page. So you are going to want to start the download for this and the installation. Then follow the steps bellow to close some other processes that GameBooster will NOT close for you.
Go to the hidden icons arrow on the task bar.
You are going to want to close all the processes that you KNOW that you downloaded and installed. If you need extra help, I made a youtube video showing me ending processes. Also, when you are speeding you compute up, remember to CLOSE ALL windows before starting the recording. Also, if you are going to record yourself play, try to load your world up before hand because loading a new world, and spawning can cause a major lag spike when you are trying to make a video. This isn't necessary but I would recommend it. If you want your viewers to know that you aren't placing certain things so you know where they are or not searching for materials.
So after you have installed GameBooster, launch it. Next, you click the button o��Boosto��. And after it is done loading, wait a few seconds and it will shrink down to your dock and you are done. Move past the Mac section and then you can learn how to begin recording.
MACS
Macs are actually much simpler than Windows when recording. Most Apple computers can close most programs automatically and end all processes. But sometimes they won't all the way. There are two ways to go about this. Either go to the Force Quit menu and close all programs or you can restart your computer. One thing to remember though is the fact that Google Chrome, FireFox, Safari, and (I hope not but) Netscape 3, do not close some addons (plugins in NetScape 3.0 and Extentions in Google Chrome) and because Mac's run many processes in the background they may not be closed so you must do it yourself. You will need to close these because believe it or not, they still run when your browser is closed. Safari and NetScape you really don't need to worry about but Google Chrome (GC) and FireFox (FF) you should really look out for. Since the only Mac I have with me right now is my old laptop, I can't be sure as to know if the Shorcut Commands are the same as they are on a PC but I'm pretty sure that they are the same.
DISABLING PLUGINS
There are two different types of extensions/addons for GC and FF which are as follows
Menu Bar Plugins o�� They run on you menu bar
Background Plugins o�� They run in the background of you browser/computer (GC Only)
We have to disable them. To disable a Menu Bar plugin right click it and then click DISABLE. To disable Background plugins, either, go to Tools then Extensions under the Wrench looking icon in the top right hand corner under the X/Red close tab. You can also go to this URL: chrome://chrome/extensions/
Remember, when a URL starts with, o��chromeo�� that means its accessing the Google Chrome settings webpage. You DO NOT have to be online for you to be able to do this. If you want to go to the main page of the Google Chrome Browser settings go to this URL
chrome://chrome/
So, after you have gotten to this page, you will have a list of your installed Extensions. This is where you can disable and enable your installed plugins you will most likely be coming back to this page after you have finished recording what you need too. Google Chrome makes it really easy to enable and disable different extensions. Next to each plugin, there is a check box. Just click it and you will disable it.
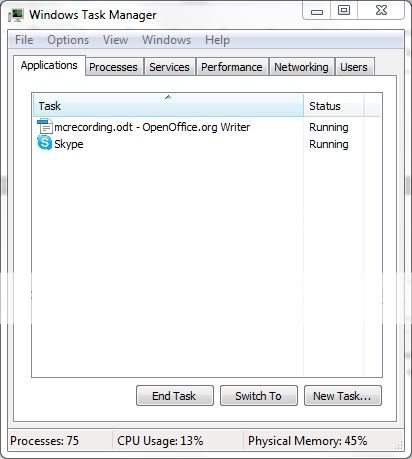
After you have disable it, you still need to make sure that Google Chrome doesn't slow down your computer. This part you don't need to do if you own a Mac. Go to the start menu which is the blue circle in the bottom left hand corner of the computer screen. Next you are going to type in o��Task Managero�� without the quotes. You can also use CTRL ALT DELETE to open another Windows page and then click Task Manager which is labeled as o��Start Task Managero��. On Windows 7, you should see it as o��View running processes with Task Managero��. Open that one. You should see a window that looks like this.
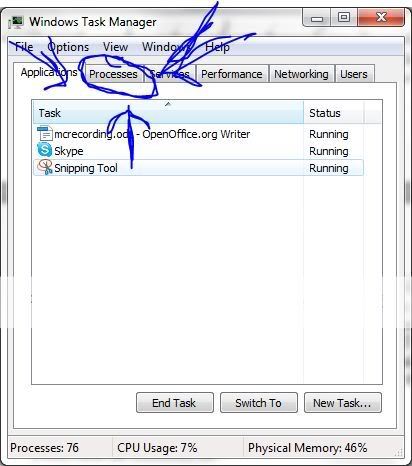
Next, click the Processes tab.
You should see a list of processes. If you have a long list of Processes, that means that you haven't used GameBooster yet. Do that before continuing. If you have run GameBooster, you should see a short list of programs. My list of programs isn't as short as yours should be because I have quite a few open programs that I am using. But it may look like this
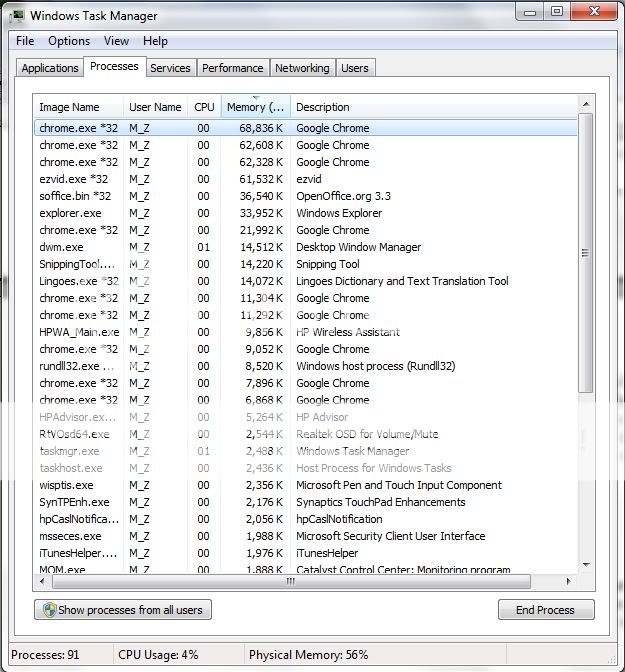
Now, if you don't have the options called chrome.exe (*32 or *64) that means the GameBooster actually recognized that it needs to close Google Chrome. If it hasn't, just right click them (one at a time) and then select the option o��End Process Treeo��. You might see the option o��End Processo�� but that only closes the one process. Using o��End Process Treeo��, it will close all Google Chrome related processes. This includes all those Extensions. Also, if you see any other processes that you ARE familiar with, you should end those process trees as well. This includes Skype, Microsoft Office, Microsoft Office Update, and whatever else. Even though they may appear as a light weight process on the computer, once you have a few, they can really slow down your computer. Remember, if you don't recognize the process, DO NOT CLOSE IT. It can really mess up your computer causing you to have to restart your computer and have to do all this over again.
This is all you can really do to speed up your computer if you don't overclock it. But now to the part that you came here for, how to use EZ-Vid to record. So first you need to start up EZ-Vid. After it has been opened, you should see a window that looks like this. You will get a pop-up window called ffdshow compatibility manager. Just click on of the o��Don't show ffdshowo�� then click the box in the bottom left hand corner that says o��Don't show this message againo�� if you don't want this window to pop-up anymore. Then click o��Okayo��.
I will go through the options and the different features
The o��Titleo�� is where you put the title of the project. Duh

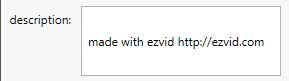
The o��Descriptiono�� is the description that shows up under your video on youtube.
The o��Keywordso�� is what words you search for when you are looking for your video on Youtube. You can put multiple words in there.

The o��Categoryo�� drop down menu is what the category of the video will be in.

The o��Musico�� drop down menu is for selecting the music that EZ-Vid created. This music is Liberty Free (Free/Shared Content) and you can use it in your projects. Do this after you have finished recording your screen. Unfortunately, you can't put your own music files into EZ-Vid just yet. You can post onto there forums though and ask for support for the files type but currently, there isn't really anything you can do about it.

The triangle button is the play button and when clicked turns into a pair of two perpendicular lines which signifies the stop button like most play/pause system.

The picture of the piece of paper with the plus sign to the bottom left means the new project button. Clicking this will erase your current recordings so use with caution and only when you really want to start over again.

The open folder icon means loading a project that you have saved. This too will erase your current work if you click without saving and open a recent document.

You will then see two arrows each facing opposite directions. The one pointing to the left means Undo while the one pointing to the right is the latter, Redo. To use these you will need to have something in your Time-line. The time-line is what you edit your video in.

Next, you will see two magnifying glasses one with a plus the other with a minus symbol. The first magnifying glass is so you can zoom into you time-line and the other magnifying glass is for zooming out on the time-line.

Across the magnifying glasses, you will see some other symbol. The first one looks like a gaming controller. This opens the help file for recording. Since you have to record your game in o��Windowedo�� mode (Which is the default mode for Minecraft) opening this will tell you how to do so. Well, it more realistically tells you that you need to have your game in Windowed mode. Then you type you game name in and it searches it on your default search engine in browser. You don't really need to do this though. Just remember not to play Minecraft in fullscreen (F12).

The next symbol looks like a computer monitor and as Windows Vista/7/8 Users may recognize as a symbol that looks a bit like the wired internet button. Clicking that will start recording for your screen. This will not be the one that we are going to be working with for making a video.

After that, you will see another symbol that looks exactly like the one before except this one has a nice professional recording microphone next to it. This is just like the one before but this one lets you record your voice while recording your screen. This is the one that we will be using to record.

Next up, there is just our little microphone. This is for just regular recording of audio You will probably not be using this unless you have forgotten to record audio while you were recording your screen before. This is not really that useful if you were recording a play-through.

The next symbol which looks like someones face that has speech lines streaming from the mouth (That sounded weird) is for Synthesizing Speech. What that means is that it makes an artificial voice speak the words that you have created with a text slide, which I will get to next. So, to sum it up for those iPhone 4S users, it makes a voice that sounds like Siri speak your words. This effect is very VERY random and I have no idea why it was added in. But I really like it, it's definitely more for fun than youtube standard videos (Now that I think... youtube standard is VERY low).

The next button looks like the letter T. This stands for Text which means that when clicked you can make a text slide. You can then use this text slide to make your little o��Sirio�� voice then speak it. This is definitely a really good and useful tool that you can use to put in the beginning or end of your clip. You can put it in the center of other clips but you will have to split the clip which I will explain at the end of the Tutorial.

The final button is one that you should definitely remember. This one looks like a piece of a movie strip. This lets you add media (Pictures and Movies) to your project. This is unquestionably something to use in the future because it will be frequently serviceable to you.

Now we will move down to the different features of EZ-Vid.
Player: Where you movie is played. Can be played with the SPACE button

Time-Line: Where you can edit together your clips
Make sure to investigate more with the time-line by right clicking around to find out some really cool features that come with EZ-Vid. There are actually some really cool effects. Just right click and you will get some cool info. If you need any extra help, you can click the "?" icon which is next to the EZ-Vid logo.

So now the second part of EZ-Vid. So without further ado, how to record. So, we have stopped a bunch of processes, downloaded two programs, mabye even installed some plugins. But now we ready to record. Hopefully your computer should be running at its top speeds right now. So first, let's start up Minecraft. Either load up or generate a world. Now go into you ESCAPE menu. Now, remember this next part because you will have to close you browser. But before you do so, make sure to Favorite, Diamond, and post a comment onto this post ;D. But anyway, just click the record button on EZ-Vid and bam! Your recording has started. It shouldn't be laggy depending on if you have set everything up correctly. The only bad thing about EZ-Vid is that you will be able to see a little tab in the bottom left hand corner of the screen that says your recording. Now this is a very small sacrifice for recording at the speeds you are. But if you are crazy like I am, I suggest you crop the video after you are done recording.
That is all you really need to do! I will include a shortcut list for editing in EZ-Vid bellow. If you enjoyed this post then please Diamond it and leave a comment because it makes me feel good about myself. I will also include all the needed downloads for everything. So please visit the creators page for each, or one, or any amount and leave a nice comment there and download from there ADFLY link because they make a bit of money when you download.
Video I Recorded (Dual-Core Processor)
DOWNLOADS (1/2/14)
Razor Game Booster
EZVid
| Tags |
1 Update Logs
Update #1 : by 9ReMiX9 01/02/2014 5:19:10 pmJan 2nd, 2014
Updated links
tools/tracking
1180356
6
recording-minecraft-with-a-dual-core


 SteampunkWolf
 Cirxett
 katenshw
 Ww2guru73
 MyZia
MyZia Bubblez705
 Hebgbs


 illystray

 pathisgamer
Create an account or sign in to comment.
It did also recently crash my graphic design computer which is very unpleasent
I don't think that it has a V9 on it. I have experienced it with my old computer and fixed it by reinstalling the browser and resetting the home page. As you said in your comment, you ran it and it crashed your graphic design computer which I'm guessing you disconnect from the internet to keep it safe. So I led to the assumption that you might not have the newest Windows Updates on it. I myself have uninstalled Firefox and Explorer on my computer out of shear hate for both. But please, check your computer for the newest updates then scan with either Norton, WSE, or McAfee.
After futher investigation I found out that the boot disc was damaged during the flight home from Thailand. But I still wonder how I got the V9 virus.
Great work though, I used to have a dual core and it frustrated me to no end sometimes.