


- 1,628 views, 1 today

105

Welcome back! Hopfully you read part one, if not take a look here.
In #2 we will look at the simple commands you can add to a plugin. Some essential code needed for this plugin was at the bottom of the last tutorial. Use the link above to take a look and complete that last step before you continue.

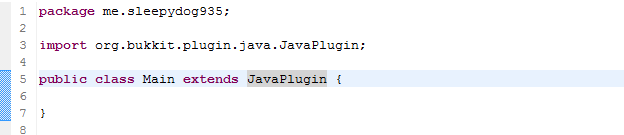
The first step is to look at the code we left of with.
We need to add some simple code. There will not be any gifs for the starting part as the code is longer then then i can record with them.
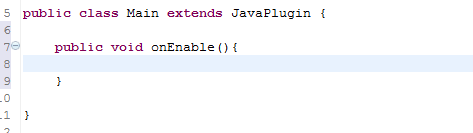
We need to add the code:
public void onEnable() {
}
Within the Main Class. The final will look like this.
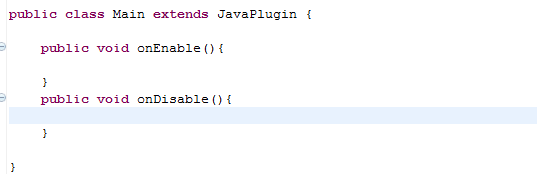
We then want to do the same below but with the words onDisable()
The final will look like this.
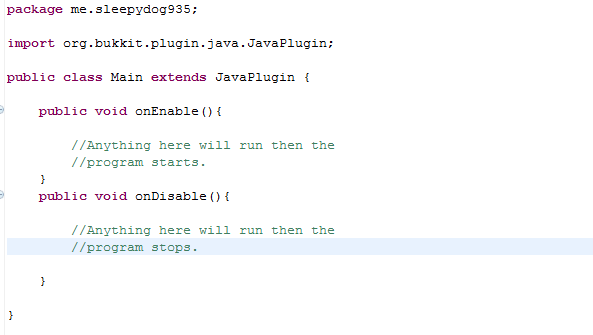
When you create code you can leave notes by putting // before a line. Anything with // before it will be ignored by the program.
Here is an example.
When all this is done we can work on the boolean onCommand(). This is what listens for the command sent in the server.
Start by typing.
public boolean onCommand(CommandSender sender, Command cmd, String label, String[] args){
}
When done this should look like.

There will be some errors, that's not a problem.
To fix the errors you need to simply import the code like we did with JavaPlugin. When importing 'Command' do not select the material, select the command.
Again an error will appear. This is not a problem we simply need to add a return statement to the code.
To do this hover over the error and select 'Add return statement'.
All the errors should be gone.
Now all your code should be along the lines of this:
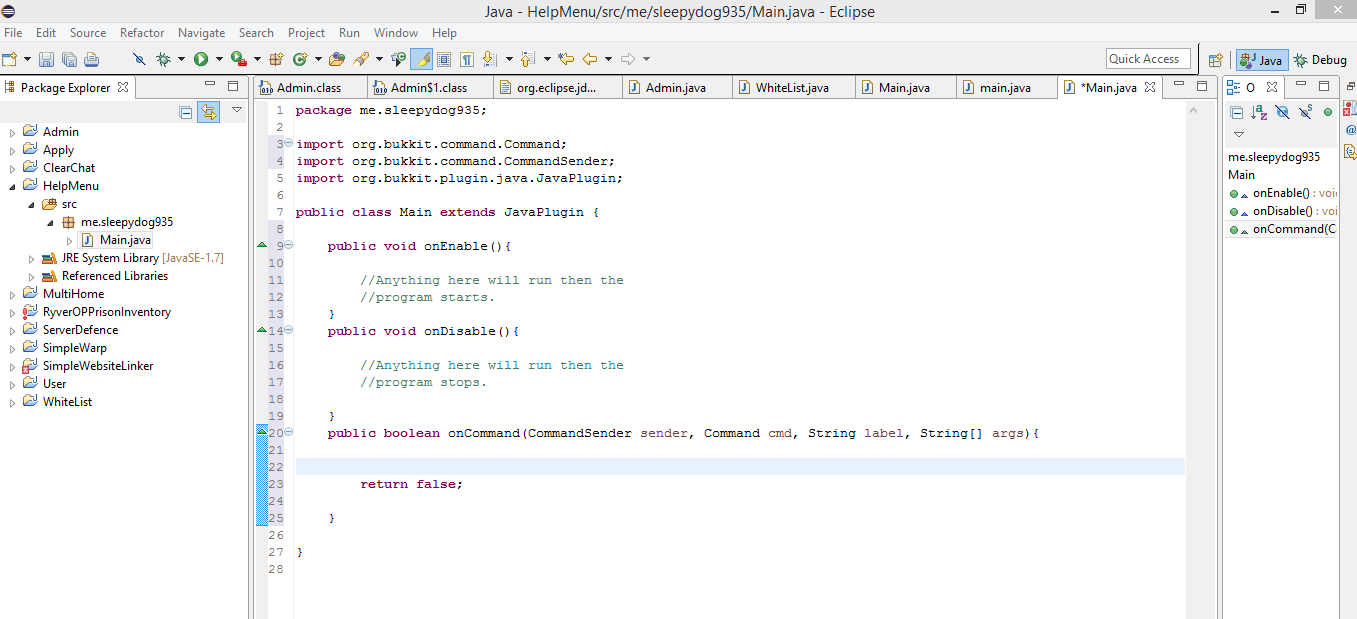
If not please follow the steps again.
This code is the base to every bukkit plugin.

Now i will show you how to listen for a command and then react according to it. To do this we listen for a command in the chat. We then check to see what that command is. When we send the server the correct information depending on what comman they entered.
The forst step is to check what command was enterd. The public boolean is always listening so we dont have to do create the listener.
Add the code:
if (cmd.equalsIgnoreCase("help"){
}
This will do what is in the brackets if the command 'help' is entered.
(Tip: This plugin will not work untill you have reached the exporting tutorial)

We then want to send the player, who enterd the command, the help message.
To do this we use: sender.sendMessage("Message goes here!");
For each line you put this code a new line in the chat will be used. You can only put one per line.
For this format we will use:
===============================
Help Menu
/command -Info
/Command -Info
/Comand - Info
===============================
(This plugin will only show commands you set it to)
(This is useful if you want to make the help message only show commands you want them to see)
The code will be:
sender.sendMessage(ChatColor.BLUE + "===============================");
sender.sendMessage(ChatColor.BLUE + " Help Menu");
sender.sendMessage(ChatColor.BLUE + "/command -Info");
sender.sendMessage(ChatColor.BLUE + "/command -Info");
sender.sendMessage(ChatColor.BLUE + "/command -Info");
sender.sendMessage(ChatColor.BLUE + "/command -Info");
sender.sendMessage(ChatColor.BLUE + "===============================");
Remember to import any errors.
The code at this time should be along the lines of:
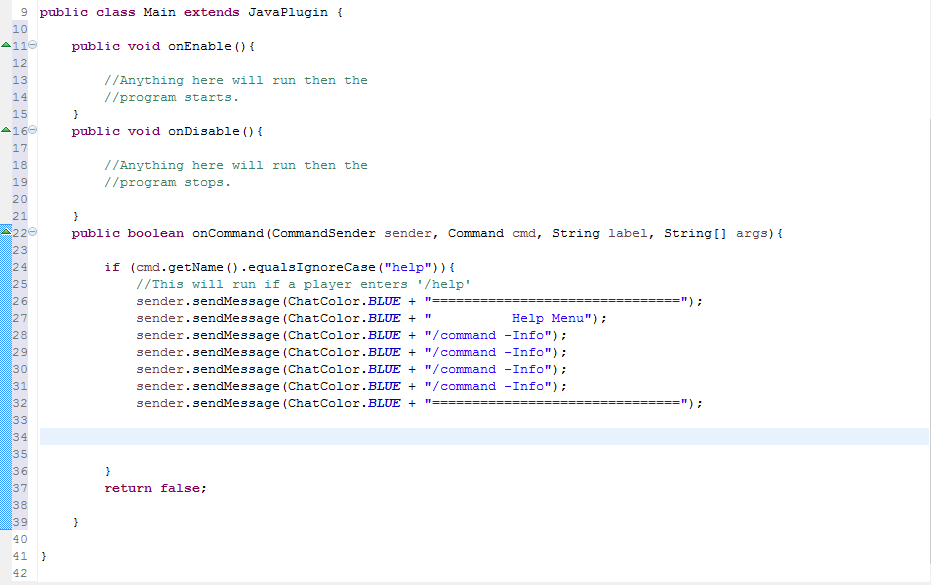
(Just realised a typing error in onEnable and onDisable. This is not a problem. I just put 'then' instead of 'when' in the green text. As i said the program does not read this so don't wory about it.)
And that's it. You now know how to add a basic command to your code! In the next tutoral we will create the plugin.yml and learn how to export your plugin ready for use!
Get your test server ready for next time.
Again you can message me if you want private lessons or if you feel the tutorials.
Please leave a comment of your opinion, ideas and suggestions.

PART 3 <<== Click here for part 3.
| Tags |
1 Update Logs
Part #3 is out! : by SleepyDog 11/13/2014 1:14:47 pmNov 13th, 2014
Finaly you can export and use your plugin: Follow part three here:
www.planetminecraft.com/blog/learn-to-code-bukkit-plugins-plugin-ymal-and-exporting-3/
www.planetminecraft.com/blog/learn-to-code-bukkit-plugins-plugin-ymal-and-exporting-3/
tools/tracking
3141279
6
learn-to-code-bukkit-plugins-the-code-2


 winston___
 Ishancnl
 Gracelyn
 HudSolo2009
 MrSwedishGamer
 Dandalf
 ENVY Llama
 star_weaver

 MegaMinerDL
 ItsAlexHimself_
Create an account or sign in to comment.
I can add a final code for each part. However this will not help you learn.