


94
Hi Guys! Bob here in which I will be teaching you guys on how to build a dynamic interior.
So first off, what is an Interior?
Dictionary.Com's Definition: the inside part of a building, considered as a whole fromthe point of view of artistic design or general effect,convenience, etc.
Now that I have that covered, are there are basic guidelines/concepts to interiors?
Course there are! (Not in any specific hierarchy)
Rule #1) ALWAYS, I mean ALWAYS make your walls double thick. Have you ever seen a house in which the same material for the exterior is the walls for the interior?
Rule #2) Try to fill in as much space as possible, but don't clutter the inside. Simply put, keep your rooms/furniture neat and organized, and have a logical amount of walking space depending on your build.
Rule #3) Use colors to your advantage. I HIGHLY recommend you check out McKupo's channel (http://www.youtube.com/user/mcKupo) and her video's on color theory and using them to express feelings and emotions. Also check out all her other videos, she's one heck of a builder, and I learnt a-lot just from watching her videos.
Alright, I can't think of anymore for now, so let's move on to the actual tutorial.
Actual Tutorial
(Please open this link: bobsbuilds.imgur.com,alongside this page (go to the album saying: Bob's Tutorial on Dynamic Interiors, as that is where the examples are.)
Step 1: The Walls.
Walls are one of the most crucial parts in making a dynamic interior. Let's look at an example of a bad wall.
(Fig #1) The lonely, single wall. Boring and unrealistic. DON'T Make these.
(Fig #2) The ok-ish, double wall. Slightly interesting and realistic. These are OK.
(Fig #3) The nice, double wall. Appealing to the eye and realistic. These are GREAT.
Now, what's the difference between these 3 walls? (Look at Fig #4) Well, the first one is already explained, boring and unrealistic. Now, you might see the difference between Wall #1 and Wall #2, but you still might not get why Wall #3 is the best out of the 3 walls. Wall #3 has correct use of COLORS (read the 2nd part above to learn more about colors), in which this case is a creamy border, into a slightly darker color, then back.
Alright, I like wall #3, so I'm going to insert it into my big box using world edit.(Fig #5)
Step 2: The Floor
The floor is also an important part in the interior, as that is what you are walking on of-course! So, now let's look at a small variety of different floors (Fig. 6)
So, for the first floor, we have a nice, simple maple wood. For the second floor, we have a simple yellow rug. For the 3rd one, we have a plank floor, not so appealing. I like the fourth one, a tile floor style. The 5th and 6th one are both rugs of different colors.
So, for the first floor, we have a nice, simple maple wood. For the second floor, we have a simple yellow rug. For the 3rd one, we have a plank floor, not so appealing. I like the fourth one, a tile floor style. The 5th and 6th one are both rugs of different colors.
Now out of all of these, I will have to go with... the first one! You might be wondering: why the first one? It is only 1 material, and didn't you say you like the 4th one? Yes, it is only 1 material, but if you look at the next picture (Fig. 7) you can see the correct use of COLORS again! It has a nice contrast, not too much, but not too little.
Step 2.5 (Really 1.5): Explaining the benefits of the double walls
1. It looks realistic and nice.
2. Details/Furniture can be implemented without taking up space! That is my favorite thing about the double walls! Look at Fig. 8 and Fig. 9, both showing a pantry, taking up less than a half of a block of space for the doors! Pretty cool right?
Step 3: The floor-plan.
Layouts are really crucial to a dynamic interior, as it allows neat, organised rooms, adding realism to the build (Fig. 10) It doesn't really matter what block you use to make the floor plan, as you will probably be changing it later. Also, use signs for the floor-plan so you can remember where everything is and what is going into that room. Also, think logically about spacing, placement and the hallway. The bathroom shouldn't be far away from a bedroom! It should be relatively close to the room. Also, you won't have windows in the bathroom too! Privacy people! I see so many mistakes like that all the time in builds.
Step 3.5: Tiers/Layers
Sort of related to floor-plans, but this is a slightly small part, so I decided to add it to the floor plan section. If you have a large empty space in the building, you can add a few layers to that area, which will break up the room without the feeling of being squished (Fig. 11) Also, it's great for the architect/builder because the area of space will be smaller, thus easier to fill in.
The Finale.
There. If you followed these steps and guidelines, you can be well on your way to making some excellent interiors.
Credits.
Credits to:
1.KupoKupo, an admin of The Voxel Box, for introducing me to basic color theory in minecraft. Check out her videos explaining color here:http://www.youtube.com/user/mcKupo
2. Giltwist, another admin of The Voxel Box, for creating the Modern Pack, the texture pack this tutorial was made in. Since he does not have a youtube channel, I shall link it to The Voxel Box's channel, as that is where he makes his videos: http://www.youtube.com/user/VoxelBoxVideos. Also download the texture pack here: http://www.voxelwiki.com/minecraft/Texture_Pack#The_Modern_Pack
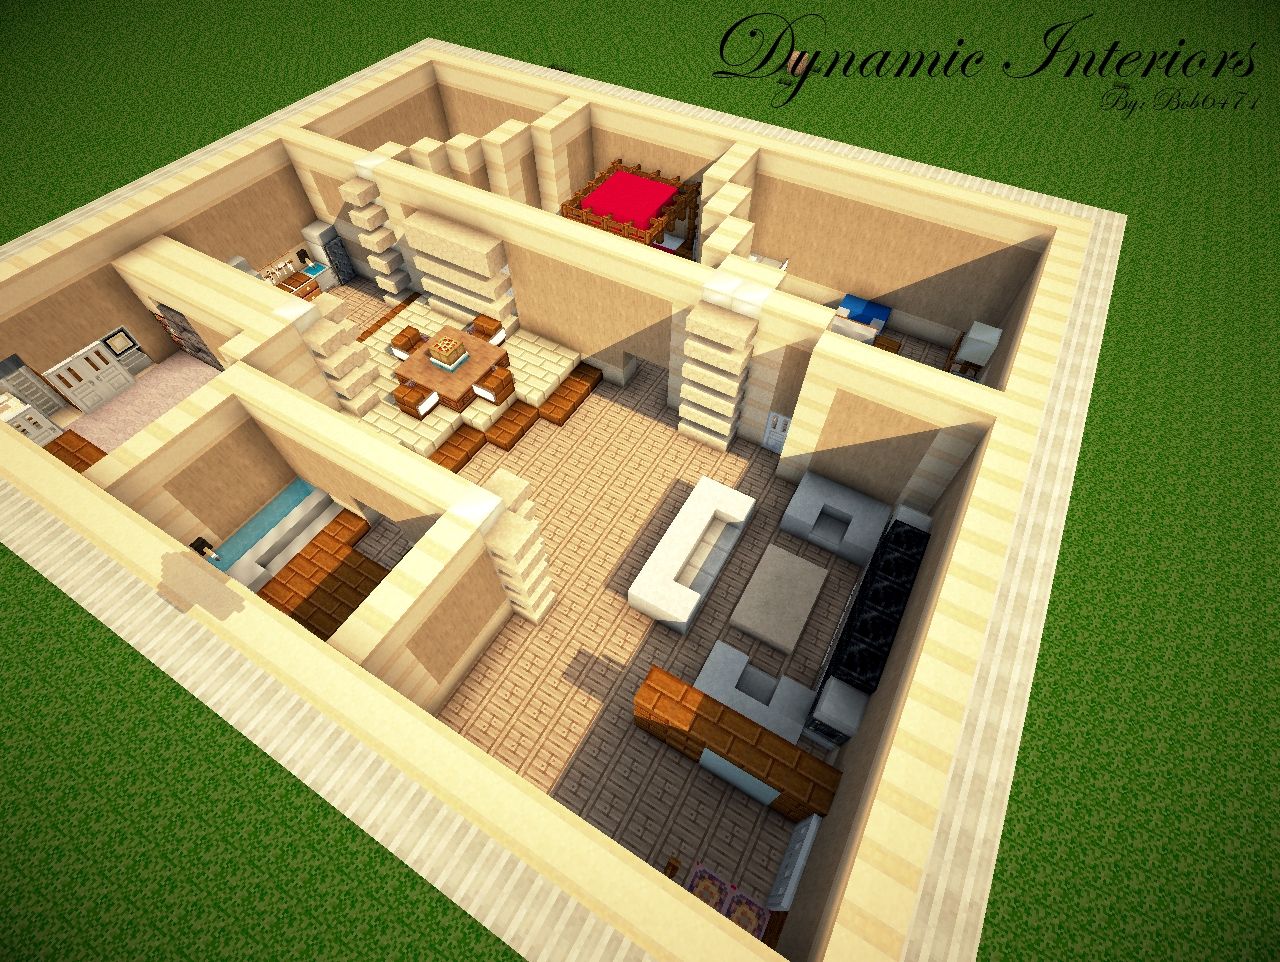
After the picture of the examples, there is a picture of my finished interior and several furniture ideas. Please give a diamond, comment or subscribe if you enjoyed the tutorial and want more. Thank you! -Bob
EDIT: Going to make this into a 3 part series, Interior (Done), Exterior:http://www.planetminecraft.com/blog/how-to-make-a-modern-exterior/, and putting it all together:http://www.planetminecraft.com/blog/how-to-make-a-modern-structure-part-3-of-3/
| Tags |
tools/tracking
793641
6
how-to-make-a-modern-interior


 theprophetjade
 WhisperOfTheWild
 Dim the Enderman
 Frwf
Frwf sniffercraft34
 shackfu
 ScotsMiser
 Khangbo84
 MindOfSocial
 Zelvind

 WYHA-Storm
Create an account or sign in to comment.
check out the next part of the series here: How to Make a Modern Exterior/Walls