




- 5
- 0
- 4

9
Alright guys! It's Damnation and I'm here to show YOU how to make a fully functional *basic* TnT Cannon! It's quite simple, you could even make it by just looking at the pictures on here! I'll explain it thoroughly down below though, in case the pictures don't help much. (Read the picture captions to find which picture goes to which step.)
*I am not the original creator of this device. Credits of the cannon go to it's rightful owner (whoever that is.) *
Step one:
Make the base. (Picture shows what it is like) It's 7 units long *Make sure you make it out of OBSIDIAN! Otherwise you'll blow not only your target to oblivion, but also your cannon.*
Step two:
Add a block of obsidian and a stone slab where the picture shows (On the opened end of the cannon base.)
Step three:
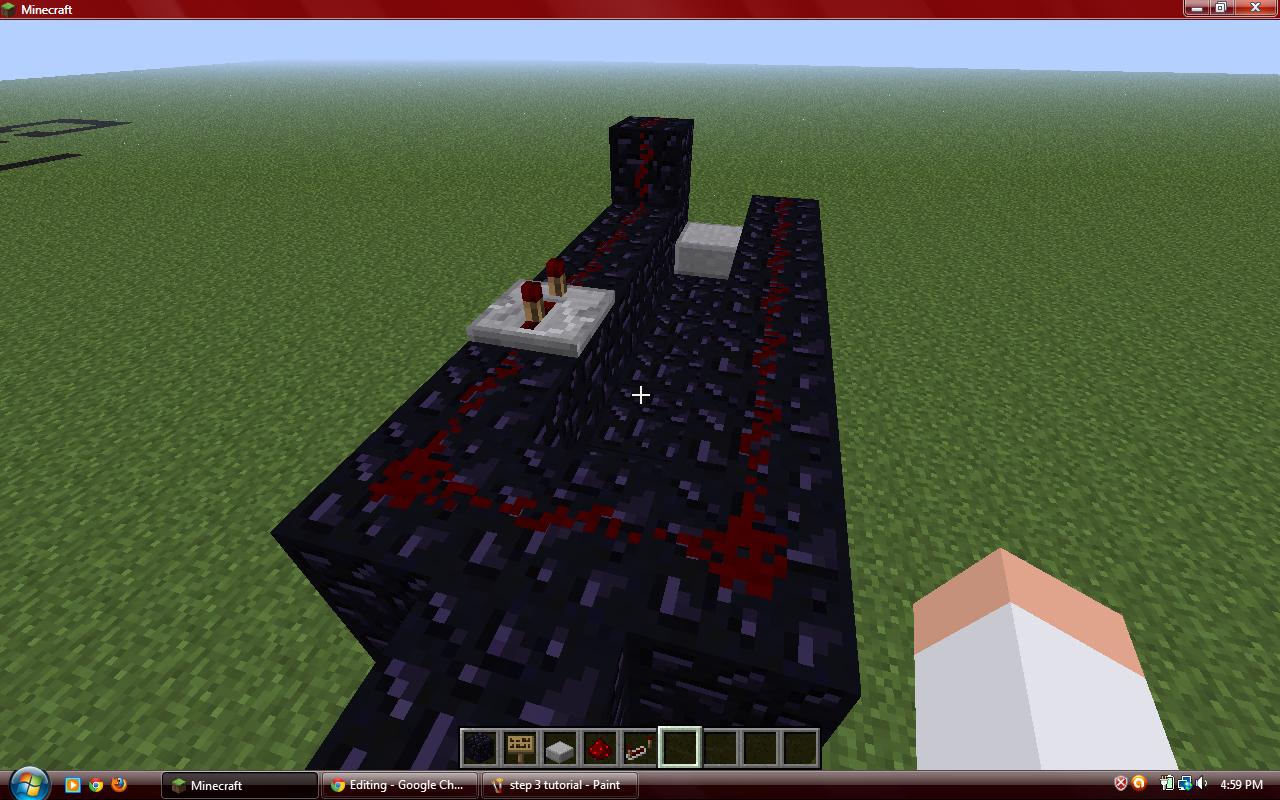
Add a backwards "L" to the back of the cannon. This is where the button to activate the cannon will be placed.
Step four:
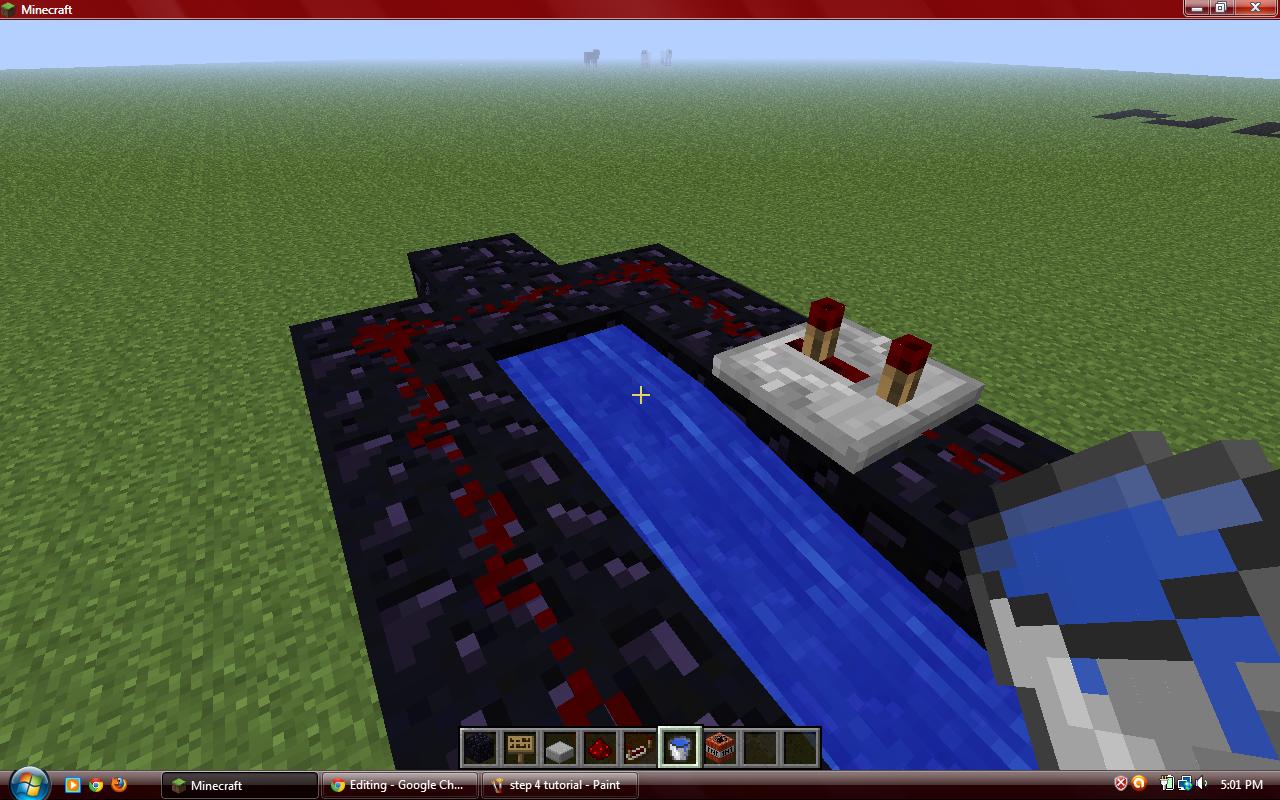
Add the redstone wiring. Add arepeater where the picture shows.
*RIGHT CLICK THE REDSTONE REPEATER 2 TIMES TO MAKE IT DELAY THE TNT THAT FIRES!!!!!!!*
*^^^ THAT IS CRUCIAL!
Step five:
Add water where the picture shows.
Step six:
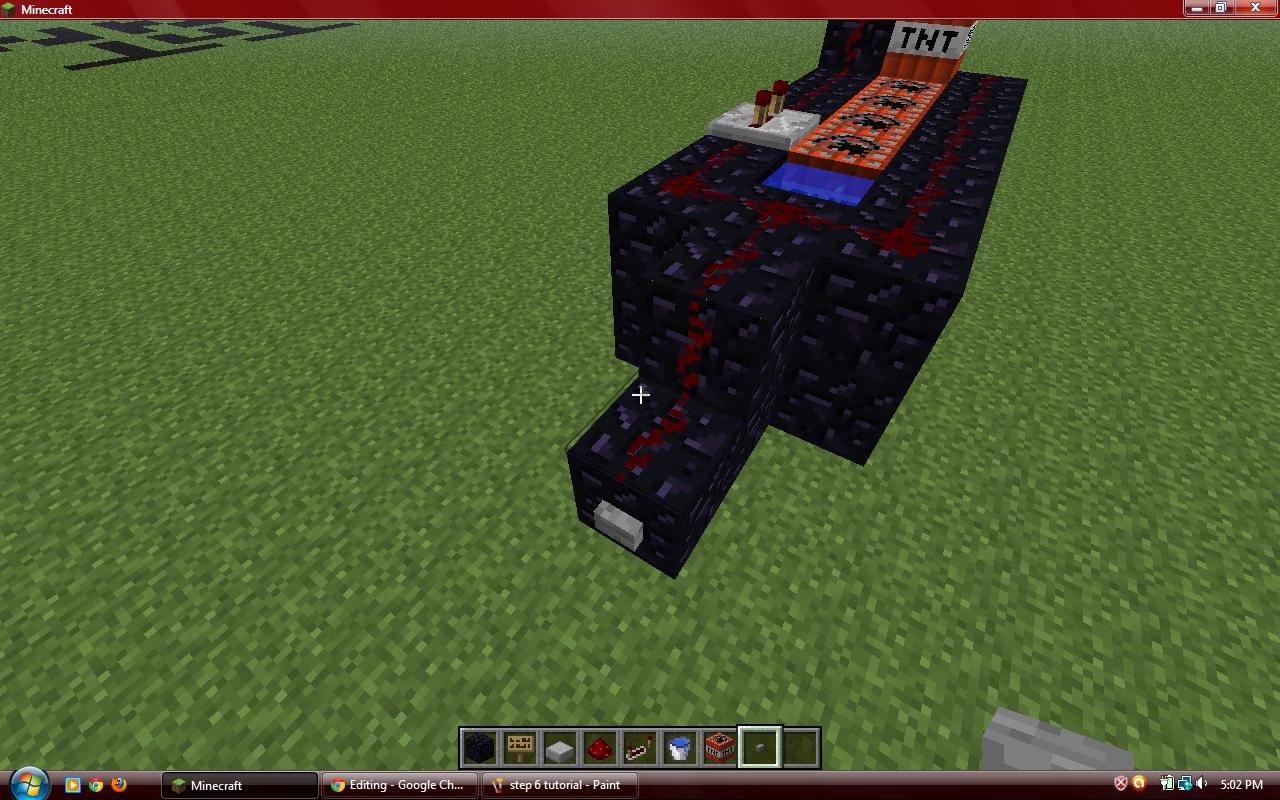
Line up the TnT where the picture shows. *Don't place over the area where you placed the water!*
Step seven:
Place the button and the last of the redstone where the picture shows.
Step eight:
LAUNCH!
*I am not the original creator of this device. Credits of the cannon go to it's rightful owner (whoever that is.) *
Step one:
Make the base. (Picture shows what it is like) It's 7 units long *Make sure you make it out of OBSIDIAN! Otherwise you'll blow not only your target to oblivion, but also your cannon.*
Step two:
Add a block of obsidian and a stone slab where the picture shows (On the opened end of the cannon base.)
Step three:
Add a backwards "L" to the back of the cannon. This is where the button to activate the cannon will be placed.
Step four:
Add the redstone wiring. Add arepeater where the picture shows.
*RIGHT CLICK THE REDSTONE REPEATER 2 TIMES TO MAKE IT DELAY THE TNT THAT FIRES!!!!!!!*
*^^^ THAT IS CRUCIAL!
Step five:
Add water where the picture shows.
Step six:
Line up the TnT where the picture shows. *Don't place over the area where you placed the water!*
Step seven:
Place the button and the last of the redstone where the picture shows.
Step eight:
LAUNCH!
6 Update Logs
Update #6 : by Damnation 03/05/2013 6:57:19 pmMarch 5, 2013 @ 11:57 pm UTC
Bump. :D
LOAD MORE LOGS
More like this

 NuclearBolton
 Oh_My_GHandi
 emanresu11
 hunter101sup
 xXBlueBooXx
1910720
2









 MrNoobC00l

 SOBERANO



Have something to say?
SHOULD BE IN BLOG POSTS
Don't spam my comments with useless crud please. Ask why someone posted a tutorial here instead of the blogs before pointing out the obvious.
~Damnation