


- check_circle GUI
- 19,526 views, 17 today
- 2,504 downloads, 1 today

68
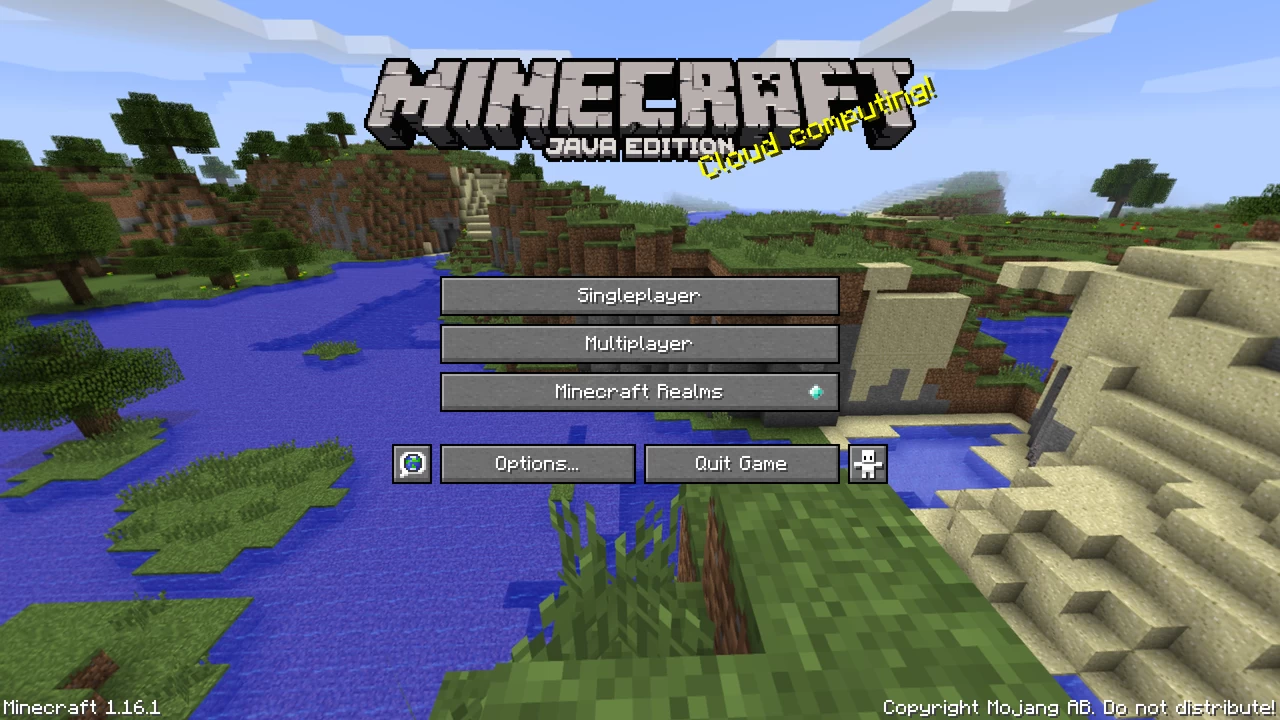
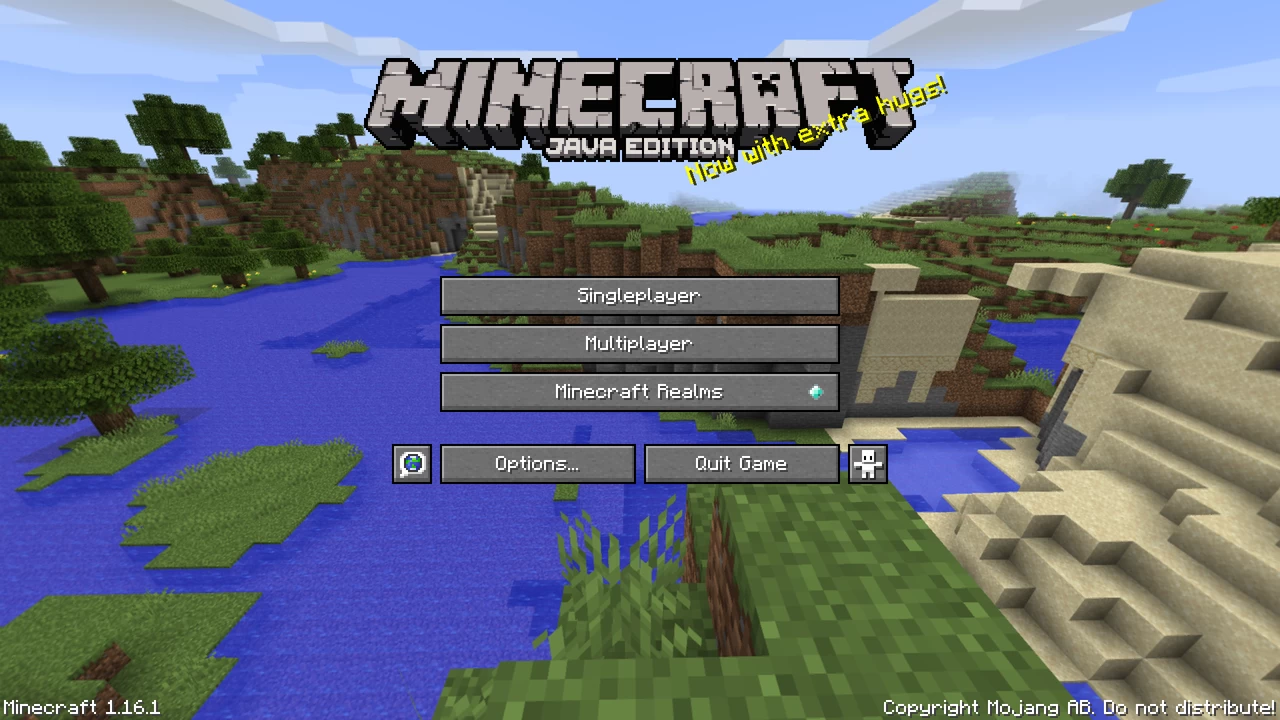
If you want the most authentic, accurate recreation of the original, classic menu background panorama, this pack is for you! This resource pack will replace your menu background with the original one from before 1.13, as a full 360° 4K panorama.
This pack comes in 6 different variations:
Head over to the Versions tab, and download your preferred version!
My intention with this pack was to recreate the old panorama textures as faithfully as possible. This meant getting the correct camera position and angle, the correct cloud and sun locations, the correct render distance, and many other smaller details. No other recreation pack took these into account.
I tried various methods, but what I ended up doing was downloading an old version of MCEdit that can open pre-anvil worlds (max Y level is 128), and I made a schematic of the terrain. I then made a superflat world in 1.12.2 with the same seed, and pasted the schematic into the exact same coordinates. Then I used the Replay Mod to create a cube projection screenshot, which ensures that I can capture the entire 360° view of the area all at once. This is an absolute necessity, because the clouds are constantly moving, so there is no way to screenshot them without them being misaligned on the different sides on the panorama cube.
Another hurdle I had to overcome, is that the east/west and north/south orientations have changed since beta 1.7.3, so I ended up having to rotate the terrain by 90° to get the correct sun position. This also meant the water texture had to be rotated by -90° to maintain the correct orientation.
Another issue cropped up with the the clouds again. In beta 1.7.3 they were 20 blocks lower compared to newer versions. This meant the clouds couldn't be aligned properly with the original reference. This meant I had to raise the terrain by 20 blocks, since the cloud layer could not be lowered in any way.
These were the major steps to ensure the recreation is as faithful to the original as possible.
This pack comes in 6 different variations:
- using Minecraft's beta textures, in clear and blurred
- using pre-1.14 textures, in clear and blurred
- using post-1.14 textures, in clear and blurred
Head over to the Versions tab, and download your preferred version!
Pack labels
- B - Beta (referring to using old beta textures in the panorama)
- C - Classic (referring to using pre-1.14 textures in the panorama)
- J - Jappa (referring to using post-1.14 textures - made by Jasper Boerstra (Jappa) - in the panorama)
- B - blurred
- C - clear
How I made the pack
My intention with this pack was to recreate the old panorama textures as faithfully as possible. This meant getting the correct camera position and angle, the correct cloud and sun locations, the correct render distance, and many other smaller details. No other recreation pack took these into account.
I tried various methods, but what I ended up doing was downloading an old version of MCEdit that can open pre-anvil worlds (max Y level is 128), and I made a schematic of the terrain. I then made a superflat world in 1.12.2 with the same seed, and pasted the schematic into the exact same coordinates. Then I used the Replay Mod to create a cube projection screenshot, which ensures that I can capture the entire 360° view of the area all at once. This is an absolute necessity, because the clouds are constantly moving, so there is no way to screenshot them without them being misaligned on the different sides on the panorama cube.
Another hurdle I had to overcome, is that the east/west and north/south orientations have changed since beta 1.7.3, so I ended up having to rotate the terrain by 90° to get the correct sun position. This also meant the water texture had to be rotated by -90° to maintain the correct orientation.
Another issue cropped up with the the clouds again. In beta 1.7.3 they were 20 blocks lower compared to newer versions. This meant the clouds couldn't be aligned properly with the original reference. This meant I had to raise the terrain by 20 blocks, since the cloud layer could not be lowered in any way.
These were the major steps to ensure the recreation is as faithful to the original as possible.
| Credit | Earthcomputer, cortex, DutChen18, Neil, Tomlacko, PseudoGravity and the Minecraft@Home project contributors for finding the seed |
| Progress | 100% complete |
| Game Version | Minecraft 1.19 |
| Resolution | 16x |
| Tags |
4 Update Logs
Update #4 : by UsernameGeri 12/04/2023 1:11:54 pmDec 4th, 2023
- Updated to 1.20.2
- Updated mcmeta
- Updated pack icon
- Reduced pack size
- Moved pack to Modrinth
LOAD MORE LOGS
tools/tracking
4702922
4
classic-menu-panorama-accurate


 balibajar3
 ScotsMiser
 WhisperOfTheWild
 Davocinc
 ZRV01
ZRV01

 NinjaFrito
![Twitch Heart Cape [MS Addon] Minecraft Texture Pack](https://static.planetminecraft.com/files/image/minecraft/texture-pack/2024/087/17777102-image_s.jpg)
![Mojang Twitch Cape [MS Addon] Minecraft Texture Pack](https://static.planetminecraft.com/files/image/minecraft/texture-pack/2024/128/17777110-image_s.jpg)
 Team UNNAMED
Create an account or sign in to comment.