- 8
- 3
- 5

103
Hey Folks, BenDragonsword Here! I thought I'd make a tutorial on how I shade using Skincraft. This is an updated tutorial, which hopefully will be more understandable than the original because this method is rather effective, though I use Adobe Photoshop for my skins now due to the gradients, this is probably the next best thing.
Note: You can also use MCSkinEdit with this technique. Just go to the RGB tab and paste in the color code.
First off, Skincraft is not normally allowed on this site because it does have premade parts. If you use those, you are subject to being banned or reported. So, if you wish to use Skincraft for your skins, please make your parts from scratch.
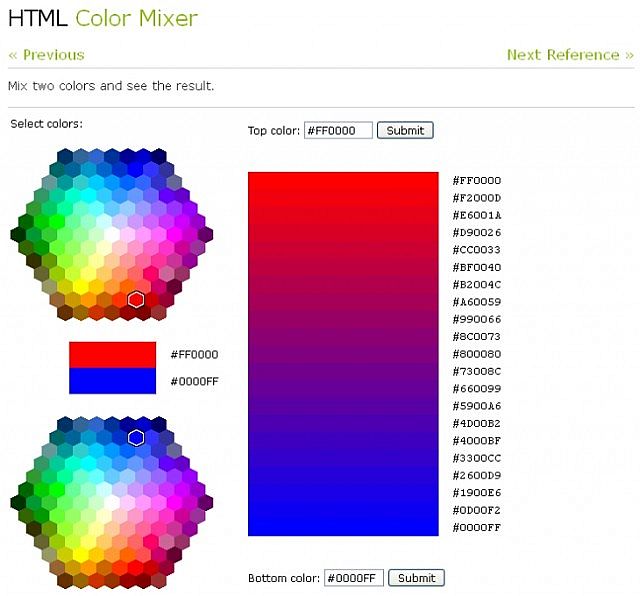
In order to get the colors you want for skincraft, you're going to need to use an html color mixer. You can find that Here. Every color on the internet has a specific color code. For example, red is #FF0000. One color that isn't on the color mixer by default is black, but its code is #000000. Plug in the color on the top and bottom that you wish to mix. Remember, to get lighter versions of a color, mix it with white. To get darker versions, mix it with black.
Once you get the correct base color, start coloring in the skin. Then, for the lighter and darker areas, mix it with white and black, respectively. Then, simply use lighter and darker shades for the fading of the shadows and highlights. Remember, the insides of the legs and arms are darker, along with the bottoms. The Tops of the legs are also darker, because they're shadowed by the body. The tops of the head and arms are going to be your lightest areas.
I hope this helps everyone in their skinning adventures. Please leave your feedback and a diamond if this was helpful. If you like this tutorial, take a look at my skins. Thanks for your continued support!
Note: You can also use MCSkinEdit with this technique. Just go to the RGB tab and paste in the color code.
First off, Skincraft is not normally allowed on this site because it does have premade parts. If you use those, you are subject to being banned or reported. So, if you wish to use Skincraft for your skins, please make your parts from scratch.
In order to get the colors you want for skincraft, you're going to need to use an html color mixer. You can find that Here. Every color on the internet has a specific color code. For example, red is #FF0000. One color that isn't on the color mixer by default is black, but its code is #000000. Plug in the color on the top and bottom that you wish to mix. Remember, to get lighter versions of a color, mix it with white. To get darker versions, mix it with black.
Once you get the correct base color, start coloring in the skin. Then, for the lighter and darker areas, mix it with white and black, respectively. Then, simply use lighter and darker shades for the fading of the shadows and highlights. Remember, the insides of the legs and arms are darker, along with the bottoms. The Tops of the legs are also darker, because they're shadowed by the body. The tops of the head and arms are going to be your lightest areas.
I hope this helps everyone in their skinning adventures. Please leave your feedback and a diamond if this was helpful. If you like this tutorial, take a look at my skins. Thanks for your continued support!
1 Update Logs
Update #1 : by BenDragonsword 04/12/2013 10:28:55 amApril 12, 2013 @ 2:28 pm UTC
Rewritten to be more user-friendly! Includes picture of the HTML Color Mixer Interface.
More like this

 Mr_Eraser
 doctordiamondz
 yumenightfire27
 KeyBoy18
 Themonix
1585503
6


 User5600593G


 uzvarua
 Fantino2011
 Papa Enny
Have something to say?