
Published , 3/7/21 12:49 pm
- 3,126 views • 4 today
Added CreditMy friend Alex for some help.
- 11
- 10
- 1

62
| The creations in this course are explained in a good amount of detail, showing the thought processes of how they were worked out, the tricks I used, and how you could adapt and learn from each example in your own creation. |  |
Without further ado, let's get right into it! ~Panda
Arrow Particles
In this tutorial, I will be making arrow's have trails and arrows to disappear once they hit the ground. If you are here for the commands rather than learning they are all at the bottom of the page.
The commands I will be using to achieve this are:
• Particle
• Tag
• Execute
• Kill
• Playsound
Method / Explanation:
Firstly, We need to create particle trail to follow the arrow, for this we will use /particle. If you don't know how to use this command just click on it above. To choose your particle from the complete list click here. Or just use Tab Completion on it.
Example - /execute at @e[type=arrow] run particle smoke ~ ~ ~ 0.1 0.1 0.1 0.01 5 force
Then we want a system to detect when an arrow has hit the ground, the easiest way to do this is using the inGround data tag. This tag is unique to Arrows as other mobs use a tag called onGround instead however they have the same purpose.
/tag @e[type=arrow,nbt={inGround:1b}] add ArrowInGround
This is checking if an arrow is in the ground and if it is, giving them a tag.
Then all our next commands will be executing from the tag. In these command blocks we can add what we want but we need to make sure they execute at the arrow not the command block so we use
/execute at @e[tag=ArrowInGround] run COMMAND
One of these should be a arrow killing command to stop it from always looping the commands as your 'inGround' statement will always be true.
Below I have all the commands from this tutorial and I hope you learned something!
Your commands should look like this:
 | /kill @e[tag=ArrowInGround] |
 | /execute at @e[tag=ArrowInGround] run playsound minecraft:entity.blaze.hurt voice @a[distance=..25] ~ ~ ~ 1 1 1 |
 | /execute at @e[tag=ArrowInGround] run particle lava ~ ~ ~ 0.8 0.8 0.8 0.01 15 force |
 | /tag @e[type=arrow,nbt={inGround:1b}] add ArrowInGround |
 | /execute at @e[type=arrow] run particle smoke ~ ~ ~ 0.1 0.1 0.1 0.01 5 force |
Locked Chests
In this tutorial, I will be making chests have locks and you only open it if you have the correct key. If you are here for the commands rather than learning they are all at the bottom of the page.
The commands I will be using to achieve this are:
• Data
• Setblock
Method / Explanation:
Locking chests is actually a very simple concept. The mechanism to do it is already is the game, just not used in survival minecraft. You can do this two different ways, /setblock or /data. We are doing the same thing with both of these options but /data edits an existing chest whereas setblock creates a new one.
We have a -1 on the y axis in our command so your command block should be directly above the chest unless you edit this value.
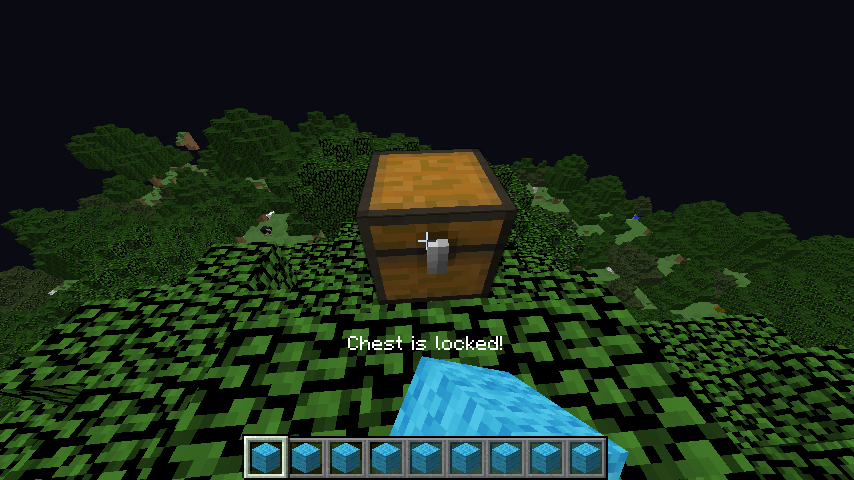
The 'Lock' data tag, once you activate your command block, will make it so you can not open the chest unless the item you are holding has the same name that you put in, for me I called it 'Key' so my item needs to be called this to access the chest. If not, in your actionbar it just says 'This chest is locked'.
Once this has been done, you need to create your key. To do this only you will know the key name so you could just use an anvil to name it whatever you want or you could use the /give command.
I wanted to try go in more depth with this but that really is all there is to it.
I hope you found this tutorial helpful!
The commands I will be using to achieve this are:
• Data
• Setblock
Method / Explanation:
Locking chests is actually a very simple concept. The mechanism to do it is already is the game, just not used in survival minecraft. You can do this two different ways, /setblock or /data. We are doing the same thing with both of these options but /data edits an existing chest whereas setblock creates a new one.
/data merge block ~ ~-1 ~ {Lock:"Key"}We have a -1 on the y axis in our command so your command block should be directly above the chest unless you edit this value.
The 'Lock' data tag, once you activate your command block, will make it so you can not open the chest unless the item you are holding has the same name that you put in, for me I called it 'Key' so my item needs to be called this to access the chest. If not, in your actionbar it just says 'This chest is locked'.
Once this has been done, you need to create your key. To do this only you will know the key name so you could just use an anvil to name it whatever you want or you could use the /give command.
/give @p minecraft:tripwire_hook{display:{Name:"{\"text\":\"Key\"}"}} 1As I said the item could be anything as long as the name matches.I wanted to try go in more depth with this but that really is all there is to it.
I hope you found this tutorial helpful!
Grappling Hook
In this tutorial, I will be making a grappling hook using fishing rods and the fishing bobber entity. If you are here for the commands rather than learning they are all at the bottom of the page.
The commands I will be using to achieve this are:
• Tag
• Tp
• Execute
• Kill
• Playsound
Method / Explanation:
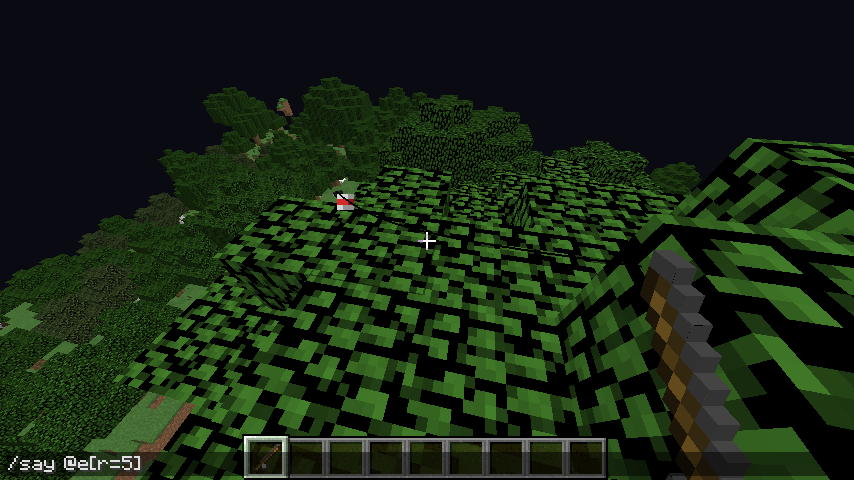
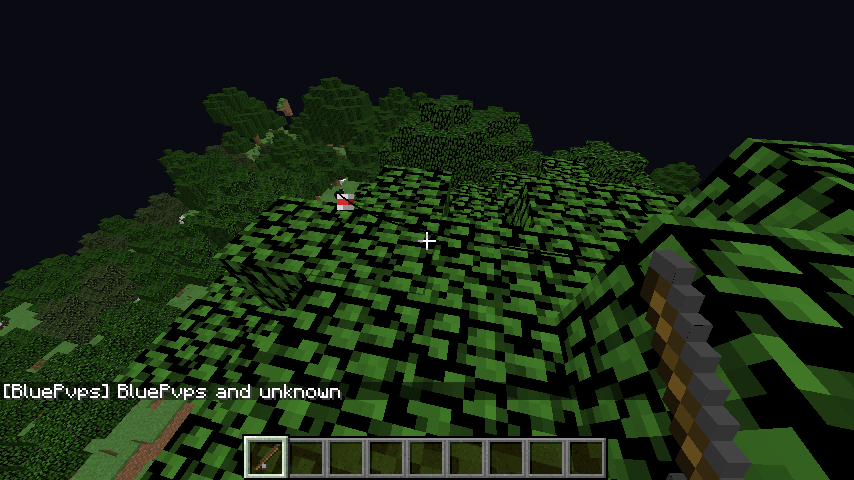
The hook with fishing rods can not be summoned with /summon and has had an interesting past. This is because in 1.12 and below the only way to detect it was to use 'name=unknown' as it didn't have it's own entity type.
Above is for 1.12 ^
However in 1.13 you can now test for it using 'type=fishing_bobber'. Our first command to use the fishing bobber will be /tag. Instead of doing
/tag @e[type=arrow,nbt={inGround:1b}] add ArrowInGround
like we did for the arrow effects we will be doing:
/tag @e[type=fishing_bobber,nbt={OnGround:1b}] add BobberInGround
As I said in my arrow particles tutorial, if it is not an arrow we use the 'OnGround' tag instead of 'inGround' and we use this tag to make sure it just teleports them or executes our next commands once it lands instead of all the time. Then we can add what we want! Make sure all the things you want to happen are executing for the tag.
If you also want a grappling hook then you can add a tp or teleport command. If you do not know the difference between these two I recommend checking out their usages page as they have different functionalities.
/execute at @e[tag=BobberInGround] run tp @p ~ ~ ~ ~ ~
We can also add a playsound or particles if you want to. If you do not know how these work I recommend checking out these command usages to although they are the kind of commands you don't need to know of by heart you can just use tab completion to create them. Also make sure your last conditional command is a unknown killer as otherwise once it lands you will be continuously teleported to it until you retract it. I will let you try work out how to make the kill using what I told you in this tutorial but if you can't remember the commands are all below.
I hope you learned something!
Your commands should look like this:
The commands I will be using to achieve this are:
• Tag
• Tp
• Execute
• Kill
• Playsound
Method / Explanation:
The hook with fishing rods can not be summoned with /summon and has had an interesting past. This is because in 1.12 and below the only way to detect it was to use 'name=unknown' as it didn't have it's own entity type.
 |  |
However in 1.13 you can now test for it using 'type=fishing_bobber'. Our first command to use the fishing bobber will be /tag. Instead of doing
/tag @e[type=arrow,nbt={inGround:1b}] add ArrowInGround
like we did for the arrow effects we will be doing:
/tag @e[type=fishing_bobber,nbt={OnGround:1b}] add BobberInGround
As I said in my arrow particles tutorial, if it is not an arrow we use the 'OnGround' tag instead of 'inGround' and we use this tag to make sure it just teleports them or executes our next commands once it lands instead of all the time. Then we can add what we want! Make sure all the things you want to happen are executing for the tag.
If you also want a grappling hook then you can add a tp or teleport command. If you do not know the difference between these two I recommend checking out their usages page as they have different functionalities.
/execute at @e[tag=BobberInGround] run tp @p ~ ~ ~ ~ ~
We can also add a playsound or particles if you want to. If you do not know how these work I recommend checking out these command usages to although they are the kind of commands you don't need to know of by heart you can just use tab completion to create them. Also make sure your last conditional command is a unknown killer as otherwise once it lands you will be continuously teleported to it until you retract it. I will let you try work out how to make the kill using what I told you in this tutorial but if you can't remember the commands are all below.
I hope you learned something!
Your commands should look like this:
 | /kill @e[tag=BobberInGround] |
 | /execute at @e[tag=BobberInGround] run playsound minecraft:entity.blaze.hurt master @a[distance=..25] |
 | /execute at @e[tag=BobberInGround] run tp @p ~ ~ ~ ~ ~ |
 | /tag @e[type=fishing_bobber,nbt={OnGround:1b}] add BobberInGround |
Blocks/Items on head
In this tutorial, I will be making any block or item be put on the players helmet slot (Wearing it like a hat).
The commands I will be using to achieve this are:
• Replaceitem
Method / Explanation:
This is actually very very easy to do and only required one command that you could just type in chat. First we need to decide what block or item we want to have. When putting in items or blocks into commands it is always their block id's as the game doesn't understand english just the code it is given. The best way to find out block id's if you do not know it is just tab completion on the command. However if you don't like that method there are also plenty of websites with them all on.
Click here for a block id list
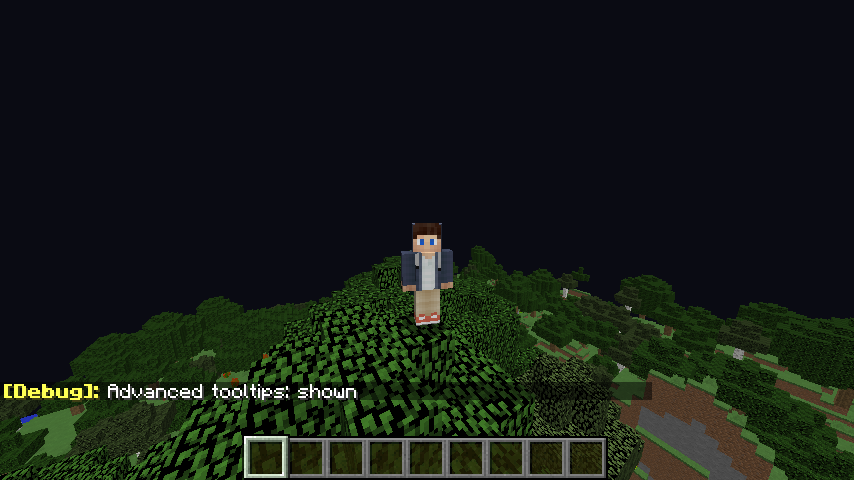
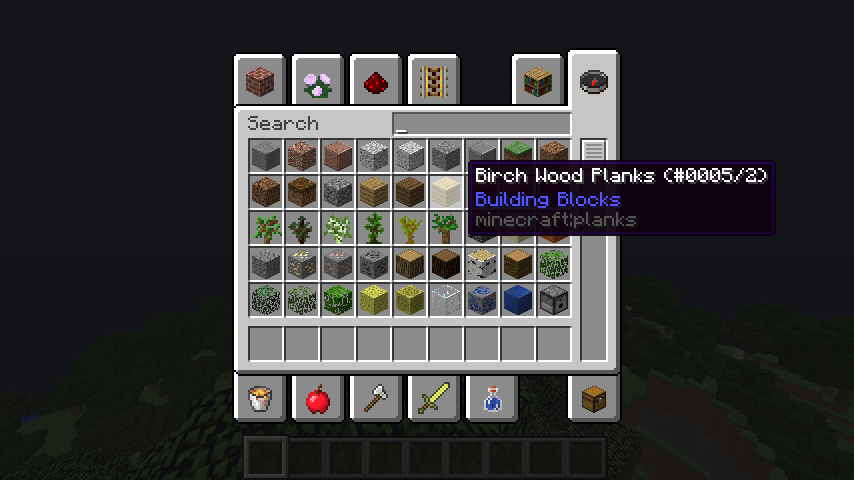
When I say block id's I mean the ones like 'minecraft:' not the numbers ones as they were stopped being used in minecraft version 1.8+ I believe. Another great way to find them is pressing F3 + H and it shows advanced tooltips so then just go in the creative inventory, hover over the item and it will tell you it.
Then we are ready to start making our command using the replaceitem command.
/replaceitem entity @a slot.armor.head minecraft:end_rod 1
To replace items in the way we want we put entity at the front as there is also one for blocks we check the usage page for more info about that. Then after your block id the number is the amount of it, this isn't useful for Block/Items on heads however for replaceitems in inventories it is very useful.
Note you can change the selector to whatever you want but I have it as @a (All players).
I hope you learned something!
The commands I will be using to achieve this are:
• Replaceitem
Method / Explanation:
This is actually very very easy to do and only required one command that you could just type in chat. First we need to decide what block or item we want to have. When putting in items or blocks into commands it is always their block id's as the game doesn't understand english just the code it is given. The best way to find out block id's if you do not know it is just tab completion on the command. However if you don't like that method there are also plenty of websites with them all on.
Click here for a block id list
When I say block id's I mean the ones like 'minecraft:' not the numbers ones as they were stopped being used in minecraft version 1.8+ I believe. Another great way to find them is pressing F3 + H and it shows advanced tooltips so then just go in the creative inventory, hover over the item and it will tell you it.
 |  |
/replaceitem entity @a slot.armor.head minecraft:end_rod 1
To replace items in the way we want we put entity at the front as there is also one for blocks we check the usage page for more info about that. Then after your block id the number is the amount of it, this isn't useful for Block/Items on heads however for replaceitems in inventories it is very useful.
Note you can change the selector to whatever you want but I have it as @a (All players).
I hope you learned something!
Custom Pets
In this tutorial, I will be custom pets using slimes and custom skulls. If you are here for the commands rather than learning they are all at the bottom of the page.
The commands I will be using to achieve this are:
• Summon
• Execute
• Teleport
• Particle
• Playsound
Method / Explanation:
To begin, we need to know how this works and what we are trying to achieve. The small slimes follow the player as they are aggressive however the smallest ones do not do any damage. We can use this to create a pet. However for it to be new we need it to look different. For this we use custom skulls as they are about the same size as the slimes so their hitboxes would make sense.
Custom skulls are player heads that look like a specific players ign, This could be yours, a friends etc. We get them with the give command.
/give @p minecraft:player_head{SkullOwner:"Subscribe"} 1
But with custom heads, mojang also have a collection is usernames you can put in for a specific look. For example a cake. We call these MHF heads as they all begin with 'MHF_'
A full list of these can we found here.
Once you have decided what head you want we can continue
/give @p minecraft:player_head{SkullOwner:"MHF_TNT"} 1
Next we need to create our slime summon command and an invisible armor stand with our custom skull on it's head. To create summon commands with lots of data tags the easiest way is not doing it by hand but instead with McStacker. On this website you put in the mob and all the data tags you want and it gives you the summon command for you!
Check out McStacker!
You should end up with two commands like these. Just paste each one into a command block and leave them for now.

These are the two elements we need to make our pet. Now we need to work on making the armor stand constantly follow the slime so they are like one mob. For this we will execute at our slime which I called Slime1 and then make the Armor Stand I named Skull1 to it.
/execute as @e[name=Slime1] at @s run teleport @e[name=Skull1] ~ ~-1.4 ~
The reason I have given them numbers is because for every different one with this system they will need different names and tp commands for each one so it doesn't confuse the system. We could fix this with scoreboards but at the moment the best way forward would to just to add a new teleport command and names for each one. So if you have a second it would be:
/execute as @e[name=Slime2] at @s run teleport @e[name=Skull2] ~ ~-1.4 ~
Or whatever you named them. For this we are not caring about head rotation so teleport or tp would work it doesn't really matter but teleport is generally a better command so I would use /teleport to get yourself into a habit of using it.
Now we have it teleporting it is essentially working! Now we can add some particles and/or playsounds. Both of these commands are commands that I recommend just using tab completion to work out what you need to put but here is my two commands.
/execute at @e[name=Slime1] run particle minecraft:witch ~ ~ ~ 0.1 0.1 0.1 0.01 10 force
/execute at @e[name=Slime1] run playsound minecraft:entity.creeper.hurt voice @a[distance=..3] ~ ~ ~
However after doing this I decided the playsound was annoying as it didn't stop so I made it when it wasn't on ground. I did this with the {OnGround:0b} data tag as 0 being false, 1 being true and also OnGround because?
Yes that's right! It isn't an arrow so it is OnGround not inGround! Glad you remembered ;)
So I added a nbt parameter in the selector
/execute at @e[name=Slime1,nbt={OnGround:0b}] run playsound minecraft:entity.creeper.hurt voice @a[distance=..3] ~ ~ ~ 1 1 1
Now we are done! I hope you learned something!
Your commands should look like this:
The commands I will be using to achieve this are:
• Summon
• Execute
• Teleport
• Particle
• Playsound
Method / Explanation:
To begin, we need to know how this works and what we are trying to achieve. The small slimes follow the player as they are aggressive however the smallest ones do not do any damage. We can use this to create a pet. However for it to be new we need it to look different. For this we use custom skulls as they are about the same size as the slimes so their hitboxes would make sense.
Custom skulls are player heads that look like a specific players ign, This could be yours, a friends etc. We get them with the give command.
/give @p minecraft:player_head{SkullOwner:"Subscribe"} 1
But with custom heads, mojang also have a collection is usernames you can put in for a specific look. For example a cake. We call these MHF heads as they all begin with 'MHF_'
A full list of these can we found here.
Once you have decided what head you want we can continue
/give @p minecraft:player_head{SkullOwner:"MHF_TNT"} 1
Next we need to create our slime summon command and an invisible armor stand with our custom skull on it's head. To create summon commands with lots of data tags the easiest way is not doing it by hand but instead with McStacker. On this website you put in the mob and all the data tags you want and it gives you the summon command for you!
Check out McStacker!
You should end up with two commands like these. Just paste each one into a command block and leave them for now.
  | /summon slime ~ ~1 ~ {Silent:1b,Size:0,CustomName:"{\"text\":\"Slime1\"}",ActiveEffects:[{Id:14b,Amplifier:1b,Duration:20000000,ShowParticles:0b}]} /summon armor_stand ~ ~1 ~ {NoGravity:1b,Marker:1b,Invisible:1b,ArmorItems:[{},{},{},{id:"minecraft:player_head",Count:1b,tag:{SkullOwner:{Name:"MHF_TNT2"}}}],CustomName:"{\"text\":\"Skull1\"}"} |
These are the two elements we need to make our pet. Now we need to work on making the armor stand constantly follow the slime so they are like one mob. For this we will execute at our slime which I called Slime1 and then make the Armor Stand I named Skull1 to it.
/execute as @e[name=Slime1] at @s run teleport @e[name=Skull1] ~ ~-1.4 ~
The reason I have given them numbers is because for every different one with this system they will need different names and tp commands for each one so it doesn't confuse the system. We could fix this with scoreboards but at the moment the best way forward would to just to add a new teleport command and names for each one. So if you have a second it would be:
/execute as @e[name=Slime2] at @s run teleport @e[name=Skull2] ~ ~-1.4 ~
Or whatever you named them. For this we are not caring about head rotation so teleport or tp would work it doesn't really matter but teleport is generally a better command so I would use /teleport to get yourself into a habit of using it.
Now we have it teleporting it is essentially working! Now we can add some particles and/or playsounds. Both of these commands are commands that I recommend just using tab completion to work out what you need to put but here is my two commands.
/execute at @e[name=Slime1] run particle minecraft:witch ~ ~ ~ 0.1 0.1 0.1 0.01 10 force
/execute at @e[name=Slime1] run playsound minecraft:entity.creeper.hurt voice @a[distance=..3] ~ ~ ~
Click here for a particle list | Click here for a playsound list |
Yes that's right! It isn't an arrow so it is OnGround not inGround! Glad you remembered ;)
So I added a nbt parameter in the selector
/execute at @e[name=Slime1,nbt={OnGround:0b}] run playsound minecraft:entity.creeper.hurt voice @a[distance=..3] ~ ~ ~ 1 1 1
Now we are done! I hope you learned something!
Your commands should look like this:
 | /execute at @e[name=Slime1,nbt={OnGround:0b}] run playsound minecraft:entity.creeper.hurt voice @a[distance=..3] ~ ~ ~ 1 1 1 |
 | /execute as @e[name=Slime1] at @s run teleport @e[name=Skull1] ~ ~-1.4 ~ |
 | /execute at @e[name=Slime1] run particle minecraft:witch ~ ~ ~ 0.1 0.1 0.1 0.01 10 force |
Custom Portals
In this tutorial, I will be making mario warp pipes in order to show off how to make custom portals and how to use freshcoal. If you are here for the commands rather than learning they are all at the bottom of the page.
The commands I will be using to achieve this are:
• Summon
• Execute
• Effect
• Tp
Method / Explanation:
Firstly, we need to decide what kind of portal you want and how they go through it. I am going to create mario warp pipes but if you want one big like a nether portal etc the same system should work but depending on what you want another system may work better. First of all if you want a warp pipe or something similar I am going to use a Custom Head on an armor stand again. However to expand on this concept more than last time, I am going to use a website called FreshCoal.
Check out FreshCoal
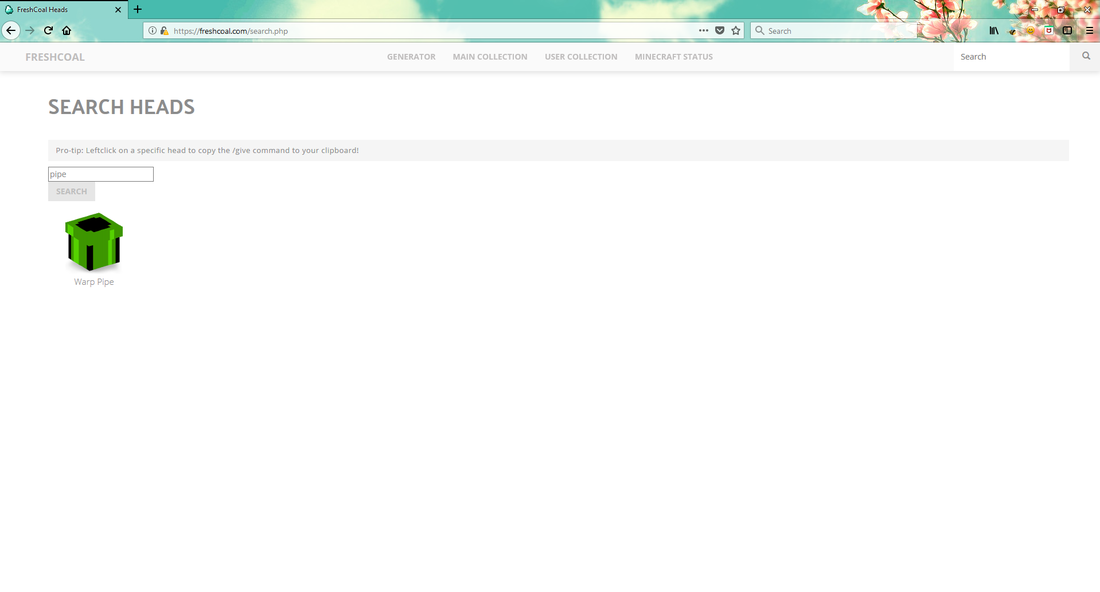
FreshCoal has a massive collection of custom heads as you can see and all you have to do to find what you want is use the search bar. When you click on a head it copies the code you need. It comes out with something like this:
/give @p player_head{display:{Name:"Warp Pipe"},SkullOwner:{Id:[I;207564088,234898911,-1529712739,42103763],Properties:{textures:[{Value:"eyJ0ZXh0dXJlcyI6eyJTS0lOIjp7InVybCI6Imh0dHA6Ly90ZXh0dXJlcy5taW5lY3JhZnQubmV0L3RleHR1cmUvNjE5NTQ0NTYxOTdmZGVjMjJmNDgwYWM1M2U3MWM2YTY4YTFhODYyN2M2MDgwZGY1N2RiODNkZmMzNDY2ZiJ9fX0="}]}}} 1
As you can see it is a lot more complicated than last time with the SkullOwner data tag and the MHF skulls but you do not need to understand this code to convert it to a head on an armor stand. We are converting it to an armor stand because we can not execute from a block but if we have an armor stand we can.
With this code copied we then need to go to McStacker, the summoning command generator, if you haven't worked it out already, I love this website!
Click out McStacker
Once on there set the mob to armor stand, and add some of the data tags you want. You will need Invisible, Marker, NoGravity, a Tag called 'Warp1' or any name but make sure you change the commands later appropriately. Once this is done go to the heat slot and select player head. Where it has the SkullOwner tag just paste your code - Although your code is not just a SkullOwner tag McStacker extracts what it needs from it. Once you have done this you should have a command something like this:
If yours is different, that is fine so long as you have looked at mine and can not see anything in yours which is needed. Also make sure to adjust you y coordinates to ~-1.95 as I have done so it fits in the ground perfectly.
Then do the same thing but the tag or name is Warp2:
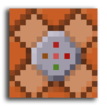
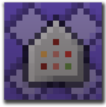
This can have a different player head if you want to but I decided to keep it the same. Then go to your game if you have not already and place the commands down and activate them. Break the command blocks and the armor stands should be underneath. Note: do not worry if the correct head isn't showing yet. This sometimes happens for no reason and it is a bug with minecraft.
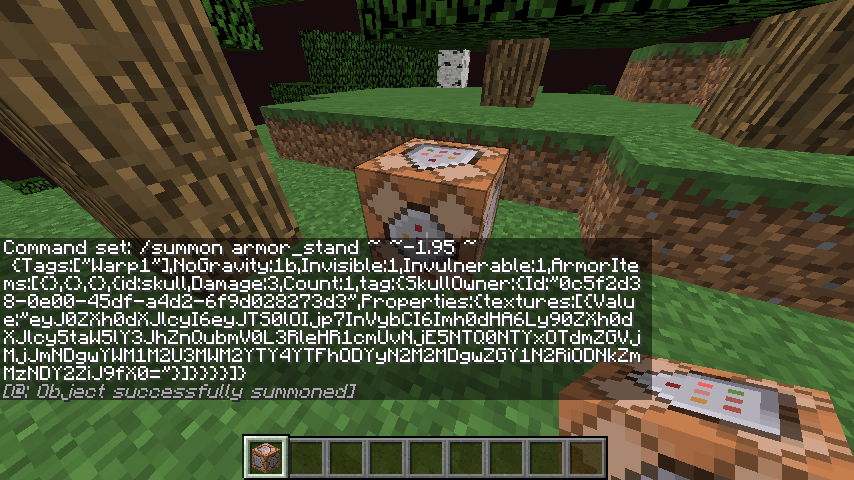
1.12 Image but you still get the idea ^
Once you have done that it is time to make it functional! To begin we want it so if they walk into the first pipe it teleports them to the second, hopefully we can all work out how to do that as it isn't to complicated but if you do not know how the execute or tp commands work just check their usages page.
/execute at @e[tag=Warp1] run tp @a[distance=..2] @e[tag=Warp2,limit=1]
Now it should teleport you but once you get their nothing happens! To fix this we can just execute from our second warp pipe (Warp2 or whatever you named it) and add our commands:
/execute at @e[tag=Warp2] at @a[distance=..2] run tp @s ~ ~0.02 ~
/execute at @e[tag=Warp2] run effect give @a[distance=..2] minecraft:levitation 1 1 true
/execute at @e[tag=Warp2] run effect give @a[distance=..2] minecraft:resistance 3 3 true
Now we have these it should all work! None of the commands will need to be conditional because we are not depending on any event to happen. I hope you found this helpful! ~Blue
Your commands should look like this:
The commands I will be using to achieve this are:
• Summon
• Execute
• Effect
• Tp
Method / Explanation:
Firstly, we need to decide what kind of portal you want and how they go through it. I am going to create mario warp pipes but if you want one big like a nether portal etc the same system should work but depending on what you want another system may work better. First of all if you want a warp pipe or something similar I am going to use a Custom Head on an armor stand again. However to expand on this concept more than last time, I am going to use a website called FreshCoal.
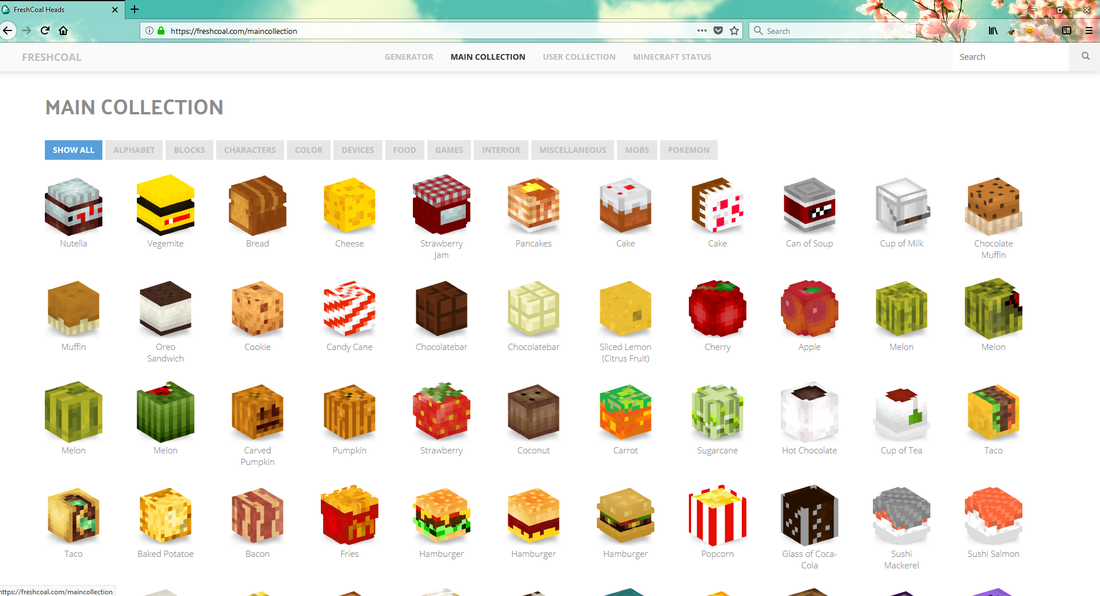 |  |
Check out FreshCoal
FreshCoal has a massive collection of custom heads as you can see and all you have to do to find what you want is use the search bar. When you click on a head it copies the code you need. It comes out with something like this:
/give @p player_head{display:{Name:"Warp Pipe"},SkullOwner:{Id:[I;207564088,234898911,-1529712739,42103763],Properties:{textures:[{Value:"eyJ0ZXh0dXJlcyI6eyJTS0lOIjp7InVybCI6Imh0dHA6Ly90ZXh0dXJlcy5taW5lY3JhZnQubmV0L3RleHR1cmUvNjE5NTQ0NTYxOTdmZGVjMjJmNDgwYWM1M2U3MWM2YTY4YTFhODYyN2M2MDgwZGY1N2RiODNkZmMzNDY2ZiJ9fX0="}]}}} 1
As you can see it is a lot more complicated than last time with the SkullOwner data tag and the MHF skulls but you do not need to understand this code to convert it to a head on an armor stand. We are converting it to an armor stand because we can not execute from a block but if we have an armor stand we can.
With this code copied we then need to go to McStacker, the summoning command generator, if you haven't worked it out already, I love this website!
Click out McStacker
Once on there set the mob to armor stand, and add some of the data tags you want. You will need Invisible, Marker, NoGravity, a Tag called 'Warp1' or any name but make sure you change the commands later appropriately. Once this is done go to the heat slot and select player head. Where it has the SkullOwner tag just paste your code - Although your code is not just a SkullOwner tag McStacker extracts what it needs from it. Once you have done this you should have a command something like this:
 | /summon armor_stand ~ ~-1.95 ~ {NoGravity:1b,Invulnerable:1b,Invisible:1b,Tags:["Warp1"],ArmorItems:[{},{},{},{id:"minecraft:player_head",Count:1b,tag:{SkullOwner:{Id:[I;207564088,234898911,-1529712739,42103763],Properties:{textures:[{Value:"eyJ0ZXh0dXJlcyI6eyJTS0lOIjp7InVybCI6Imh0dHA6Ly90ZXh0dXJlcy5taW5lY3JhZnQubmV0L3RleHR1cmUvNjE5NTQ0NTYxOTdmZGVjMjJmNDgwYWM1M2U3MWM2YTY4YTFhODYyN2M2MDgwZGY1N2RiODNkZmMzNDY2ZiJ9fX0="}]}}}}]} |
Then do the same thing but the tag or name is Warp2:
 | /summon armor_stand ~ ~-1.95 ~ {NoGravity:1b,Invulnerable:1b,Invisible:1b,Tags:["Warp2"],ArmorItems:[{},{},{},{id:"minecraft:player_head",Count:1b,tag:{SkullOwner:{Id:[I;207564088,234898911,-1529712739,42103763],Properties:{textures:[{Value:"eyJ0ZXh0dXJlcyI6eyJTS0lOIjp7InVybCI6Imh0dHA6Ly90ZXh0dXJlcy5taW5lY3JhZnQubmV0L3RleHR1cmUvNjE5NTQ0NTYxOTdmZGVjMjJmNDgwYWM1M2U3MWM2YTY4YTFhODYyN2M2MDgwZGY1N2RiODNkZmMzNDY2ZiJ9fX0="}]}}}}]} |
1.12 Image but you still get the idea ^
Once you have done that it is time to make it functional! To begin we want it so if they walk into the first pipe it teleports them to the second, hopefully we can all work out how to do that as it isn't to complicated but if you do not know how the execute or tp commands work just check their usages page.
/execute at @e[tag=Warp1] run tp @a[distance=..2] @e[tag=Warp2,limit=1]
Now it should teleport you but once you get their nothing happens! To fix this we can just execute from our second warp pipe (Warp2 or whatever you named it) and add our commands:
/execute at @e[tag=Warp2] at @a[distance=..2] run tp @s ~ ~0.02 ~
/execute at @e[tag=Warp2] run effect give @a[distance=..2] minecraft:levitation 1 1 true
/execute at @e[tag=Warp2] run effect give @a[distance=..2] minecraft:resistance 3 3 true
Now we have these it should all work! None of the commands will need to be conditional because we are not depending on any event to happen. I hope you found this helpful! ~Blue
Your commands should look like this:
 | /execute at @e[tag=Warp2] run effect give @a[distance=..2] minecraft:resistance 3 3 true |
 | /execute at @e[tag=Warp2] run effect give @a[distance=..2] minecraft:levitation 1 1 true |
 | /execute at @e[tag=Warp2] at @a[distance=..2] run tp @s ~ ~0.02 ~ |
 | /execute at @e[tag=Warp1] run tp @a[distance=..2] @e[tag=Warp2,limit=1] |
Lava Water
In this tutorial, I will be switching lava and waters abilities and showing off the 'execute if block'. If you are here for the commands rather than learning they are all at the bottom of the page.
The commands I will be using to achieve this are:
• Execute
• Effect
• Particle
Method / Explanation:
To switch lava and water we need to establish what each one does:
Lava causes you to burn and take damage from being inside it
Water allows you to swim without taking damage
Switching these around first means we need to make lava no longer burn you, this will be easy with 'execute if block'. This is a subcommand of /execute:
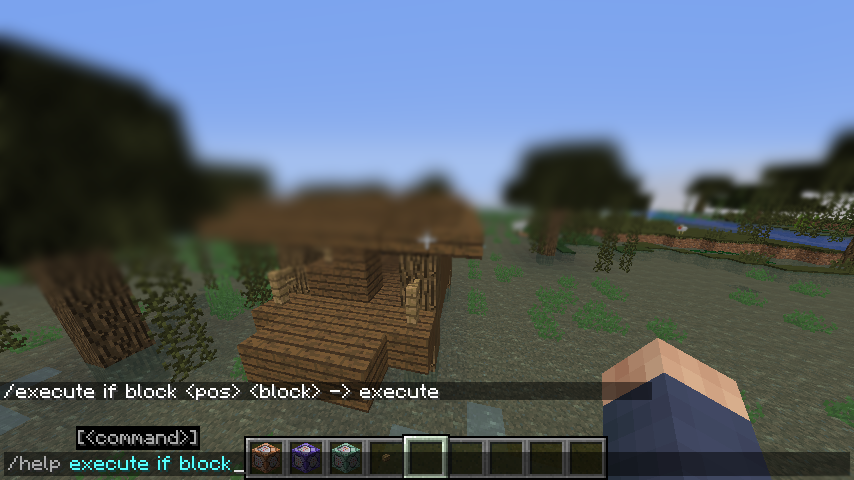
This command detects for a block in a certain position.
/execute as @a at @s if block ~ ~ ~ lava run effect give @s minecraft:fire_resistance 20 1 true
This command detects for all players that are inside lava and then effects them with fire resistance, so if they are in lava they can not burn.
That's lava fixed now we need to make water work. It IS possible to make someone or something burn while not in fire or lava however it is a complicated system so for the level we are at in these courses we will just make them wither or poison instead.
/execute as @a at @s if block ~ ~ ~ water run effect give @s minecraft:wither 5 1 true
Now we have made our lava and water swap however for the aesthetics we are going to also add some particles
Click here to see Particle List
I recommend just tab completing to see the list of particles but if you are the kind of person who likes to see a list then the website above is for you!
We need to use the same execute detect commands too so the particles are around the correct players:
/execute at @a if block ~ ~ ~ lava run particle splash ~ ~1 ~ 0.3 0.2 0.3 0.01 1 force
/execute at @a if block ~ ~ ~ water run particle lava ~ ~ ~ 0.3 0.2 0.3 0.01 1 force
I hope you learned something from this tutorial and try to remember about the execute if block as it is very useful!
Commands:
The commands I will be using to achieve this are:
• Execute
• Effect
• Particle
Method / Explanation:
To switch lava and water we need to establish what each one does:
Lava causes you to burn and take damage from being inside it
Water allows you to swim without taking damage
Switching these around first means we need to make lava no longer burn you, this will be easy with 'execute if block'. This is a subcommand of /execute:
This command detects for a block in a certain position.
/execute as @a at @s if block ~ ~ ~ lava run effect give @s minecraft:fire_resistance 20 1 true
This command detects for all players that are inside lava and then effects them with fire resistance, so if they are in lava they can not burn.
That's lava fixed now we need to make water work. It IS possible to make someone or something burn while not in fire or lava however it is a complicated system so for the level we are at in these courses we will just make them wither or poison instead.
/execute as @a at @s if block ~ ~ ~ water run effect give @s minecraft:wither 5 1 true
Now we have made our lava and water swap however for the aesthetics we are going to also add some particles
Click here to see Particle List
I recommend just tab completing to see the list of particles but if you are the kind of person who likes to see a list then the website above is for you!
We need to use the same execute detect commands too so the particles are around the correct players:
/execute at @a if block ~ ~ ~ lava run particle splash ~ ~1 ~ 0.3 0.2 0.3 0.01 1 force
/execute at @a if block ~ ~ ~ water run particle lava ~ ~ ~ 0.3 0.2 0.3 0.01 1 force
I hope you learned something from this tutorial and try to remember about the execute if block as it is very useful!
Commands:
 | /execute as @a at @s if block ~ ~ ~ lava run effect give @s minecraft:fire_resistance 20 1 true |
 | /execute at @a if block ~ ~ ~ lava run particle splash ~ ~1 ~ 0.3 0.2 0.3 0.01 1 force |
 | /execute as @a at @s if block ~ ~ ~ water run effect give @s minecraft:wither 5 1 true |
 | /execute at @a if block ~ ~ ~ water run particle lava ~ ~ ~ 0.3 0.2 0.3 0.01 1 force |
I hoped you learned something new today. Feel free to check out all of these little creations.
I would like to thank Alex for the help with the commands and photos. Please subscribe because I had to stay up till 5am to talk with alex because he lives in australia. Thank you so much for your support!
If you want to see the rest of the minecraft commands series click here!
Thank you so much and have a good one!
1 Update Logs
Update #1 | Little fizes : by 3kh0 03/07/2021 12:49:25 pmMarch 7, 2021 @ 5:49 pm UTC
I just fixed some of the links and the photo that were not loading properly. Stuff like that.
Curated in their collections


5007524
6


 Lqwsh
Lqwsh


Have something to say?