
• 11/27/13 7:44 am
- 1.1k views • 0 today
- 11
- 4
- 6
1,322
Hello, traveler. I see you've come to learn the art of texture-packeth making! Eth! Follow these instructions, and you'll have yourself a complete, fully made, ready to be shipped, explosive, colorful, radiant pack made for the 3D world of Minecraft Unrated.
Step 1: Choosing what you'll make
I view this as the most important part of the entire process; choosing what you'll be doing the texture pack on, the theme, the feel, and just the overall vibe of the artwork. Try to choose something manageable; don't attempt a huge recreation of Game of Thrones, just because you like the series.
Step 2: Choose Resolution
This is a simple step; choose how many pixels will be textured in each block. The best route to start with is an ordinary x16, or 16 pixels to a side. Your other options get doubly harder every time, not including x4 and x8. You can use x32, x64, x128, x256, or, at the maximum, x512. Depending on how much time you have and how much experience, going with the one you'll know you can finish is the best option.
Step 3: Get the Files to Edit
Okay. To get the actual textures, find a Youtube video that shows how to get them from the main bin file, or file that runs the textures. If you use 1.5.2 or below, go to Start menu, type in %appdata% then choose .minecraft -> bin -> minecraft -> and open that file with WinRAR, or another unzipping program. WinZip works fine too, but I reccomend RAR. Now, for actual programs you can use to edit the textures....
Basic Paint - Stay away. This is the worst option you can choose; resolution is low and color palette is hard to use.
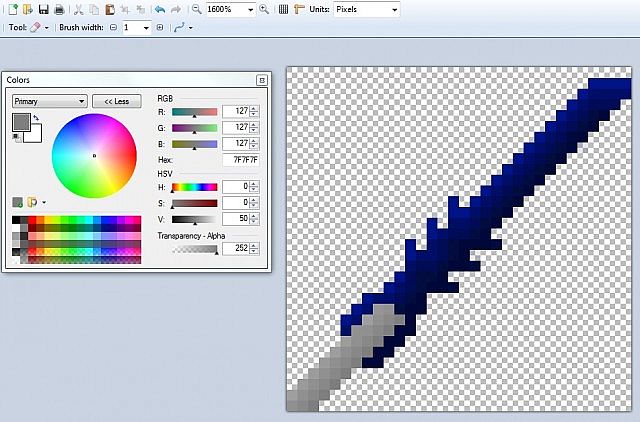
Paint.NET - The choice for most texturers, and what I use. Easy color selections and smooth handling.
GIMP - A free editing program, which is pretty much a downgraded version of Photoshop. Requires a little prior experience, but it handles well once you figure it out.
Photoshop - It can be used, but its an unnecessary amount of work, in my opinion. Hard to learn.
Step 4: Texturing your first Items
The safest option on what to texture first is the tools. These allow for a broad range of customization, and as a main object in Minecraft, represent the foundation for the actual texture pack. Start with wood, so that just in case you screw up, wood is supposed to be horrible anyways.
- Next, start with the basic blocks; Dirt, Stone, Wood Logs, and Wood Planks
- Do a few more items and blocks before moving on to heavier stuff
- This is where it starts getting challenging; attempt to make a good looking chest.
- Try working with detail on the paintings.
- Finish off the items
- Finish the blocks
- Work on armor, second hardest material to work on
- Finish paintings
- Texture mobs. Watch and make sure the textures meet correctly on every side of the animal. This is the hardest part of texturing.
- Wrap up the rest of the stuff you want, like title screens and backgrounds.
Step 5: Uploading your finished pack
Here's where you need a program to finish everything off. You can either download a texture RAR file from here, or make your own. You will need either WinRAR or WinZip to create a new zipped file(this means a collection of files that cannot normally be opened) and put all the textures you need into it. This should include assets, pack.png, and pack.mcmeta. You can now go onto PMC, go to Texture Packs, and upload your very own, finished texture pack.
BAM
Step 1: Choosing what you'll make
I view this as the most important part of the entire process; choosing what you'll be doing the texture pack on, the theme, the feel, and just the overall vibe of the artwork. Try to choose something manageable; don't attempt a huge recreation of Game of Thrones, just because you like the series.
Step 2: Choose Resolution
This is a simple step; choose how many pixels will be textured in each block. The best route to start with is an ordinary x16, or 16 pixels to a side. Your other options get doubly harder every time, not including x4 and x8. You can use x32, x64, x128, x256, or, at the maximum, x512. Depending on how much time you have and how much experience, going with the one you'll know you can finish is the best option.
Step 3: Get the Files to Edit
Okay. To get the actual textures, find a Youtube video that shows how to get them from the main bin file, or file that runs the textures. If you use 1.5.2 or below, go to Start menu, type in %appdata% then choose .minecraft -> bin -> minecraft -> and open that file with WinRAR, or another unzipping program. WinZip works fine too, but I reccomend RAR. Now, for actual programs you can use to edit the textures....
Basic Paint - Stay away. This is the worst option you can choose; resolution is low and color palette is hard to use.
Paint.NET - The choice for most texturers, and what I use. Easy color selections and smooth handling.
GIMP - A free editing program, which is pretty much a downgraded version of Photoshop. Requires a little prior experience, but it handles well once you figure it out.
Photoshop - It can be used, but its an unnecessary amount of work, in my opinion. Hard to learn.
Step 4: Texturing your first Items
The safest option on what to texture first is the tools. These allow for a broad range of customization, and as a main object in Minecraft, represent the foundation for the actual texture pack. Start with wood, so that just in case you screw up, wood is supposed to be horrible anyways.
- Next, start with the basic blocks; Dirt, Stone, Wood Logs, and Wood Planks
- Do a few more items and blocks before moving on to heavier stuff
- This is where it starts getting challenging; attempt to make a good looking chest.
- Try working with detail on the paintings.
- Finish off the items
- Finish the blocks
- Work on armor, second hardest material to work on
- Finish paintings
- Texture mobs. Watch and make sure the textures meet correctly on every side of the animal. This is the hardest part of texturing.
- Wrap up the rest of the stuff you want, like title screens and backgrounds.
Step 5: Uploading your finished pack
Here's where you need a program to finish everything off. You can either download a texture RAR file from here, or make your own. You will need either WinRAR or WinZip to create a new zipped file(this means a collection of files that cannot normally be opened) and put all the textures you need into it. This should include assets, pack.png, and pack.mcmeta. You can now go onto PMC, go to Texture Packs, and upload your very own, finished texture pack.
BAM
More like this
![How to Make a Texture Pack [Step by Step] Minecraft Blog](https://static.planetminecraft.com/files/resource_media/screenshot/1216/terrain_2019107_thumb.jpg) How to Make a Texture Pack [Step by Step]Tutorial Blog
How to Make a Texture Pack [Step by Step]Tutorial Blog Aidanator12321
•4/18/12 11:42
3.5k 9x 191
Aidanator12321
•4/18/12 11:42
3.5k 9x 191


 PiggyPorker
 RetextureKing
 Naruto_Dattebayo13
 Bradman2500
2603068
6






Have something to say?