


Published Dec 29th, 2013, 12/29/13 5:28 pm
- 2,082 views, 2 today
- 7
- 3
- 14

189
Hi, Non (Nonbuscus) here! I'll be giving you a very simple and easy tutorial!
1. You will need to go to you favorite website/program. For this tutorial, I will be using MinecraftSkins the Skindex. Here's a link: www.minecraftskins.com/skin-editor/ Make sure you use a pencil tool.
2. Now you will need to fill the left, right, and back of head the color you will be using for you hair. I will be using black. This will be for every head (left, right, and back)
3. Now, you will have to go lighter. So click this button on your page: . You will have to go diagonally across the page from right to left. Here's and example:
  . If you can't see it, you'll know what I mean in the next step.
4. In this step, you'll outline the black with a lighter color so press the lighter color button again (It's this button: ) It looks like this: 
5. You will outline the colors like you did in step 4. It's mostly the same thing. Here's a picture:
6, 7, 8, 9: You will have to keep doing the same thing over and over again like in steps 4 and 5. Once you finish, it will look like this: Looks nice doesn't it? : P
If you choose to do a lighter color than a darker color, then you will have to do something different. Instead of going lighter, you go darker, since you already made it light. You press the darker button. It looks like this: . After you finish, it may look like this:
For this next step, it will be for the front of the head.
1. Mostly you do the same thing like you did before. Go lighter each time (Or darker). (Since the eyebrows are also black, I will be using a different color for it.) BUT! You will make it lighter from up and down (Sorry I suck at explaining) It will look liker this: If you can't see it, you'll know what I mean in the next step.
2. Now, you're going to outline the "lighter" part. It will look like this:
3, 4, 5, 6, 7, 8, 9. Keep outlining the part, and it will eventually look like this:
10. In this step you can make the eyebrow black so it won't look weird XD. Here's a picture:
Now you have finished the front! Congratulations! Now, in the next step you will find how to make the bottom.
1. In this part, color the whole thing the color you're using for the hair. Here's a picture:
2. Now do the same thing you did with your left, right, and back of your head.
3. (This step is important!!!) Now you have to color the tip of the head the color of the skin, so it will look like every other skin XD.
That's the last of the step! Next you will learn how to do the top of the head.
1. For this step, click the lighter button ( ). Now, you put two pixels from top to bottom diagonally. You will have to do this at every four corners. 
2. Next outline the lighter color with a lighter color (This means to press the lighter button again) It would end up like this:
3, 4, 5, 6, 7, 8, 9. Keep doing the things you had done like in step 1 and 2. Eventually, it would look like this:
Congratulations! You have finished the top! Now, the front of head, where the hair drops.
1. Now, color the base of your hair the color of your hair (Obviously XD)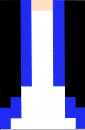
2. In this step, make your pencil brush lighter. Color the top of the hair from top to bottom diagonally again.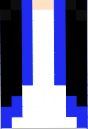 Sorry if you can't see it
3. Outline it.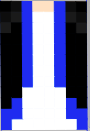
4. Here's where it gets a little complicated. Press the darker button. Now outline the lighter one.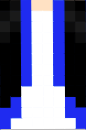
5. Make it darker again. It's already black so don't do that. Skip a line, and use the same color as 2 lines ago.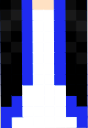
6. Now make it lighter. Do you see a pattern? Outline the color again.
7, 8, 9. Keep doing this until you reach the end of the hair.
Finally, you finished the front hair! Now, the neck.
1. Color the whole thing the color you're using.
2. Now, do the same thing you did with your left, right, and back hair. It should look like this at the end: (Sorry if the picture is slanted XD)
3. Now, color the end of the neck the same color as your skin.
You finished the neck! Now the back hair!
1. Color the whole back the color of your hair.
2. Now do the same thing like you did with your left, back, and right.
3. Color the end of your back however you want. Make it the same color as the shirt.
Lastly, the bangs!
1. For your bangs do it exactly like the front of your hair. I can remind you. You will make it lighter from up and down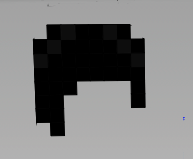
2. Now, you're going to outline the "lighter" part. It will look like this: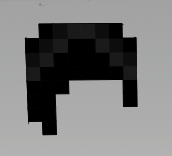
3. Keep doing that, and you'll end up with this.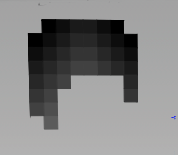
You finished the tutorial! This is what I made the skin to look like: It is available for download. The name I put for the girl is "Random Girl" , so if you want it you can download it.
That's the end!
1. You will need to go to you favorite website/program. For this tutorial, I will be using MinecraftSkins the Skindex. Here's a link: www.minecraftskins.com/skin-editor/ Make sure you use a pencil tool.
2. Now you will need to fill the left, right, and back of head the color you will be using for you hair. I will be using black.
This will be for every head (left, right, and back)3. Now, you will have to go lighter. So click this button on your page:
. You will have to go diagonally across the page from right to left. Here's and example: . If you can't see it, you'll know what I mean in the next step.4. In this step, you'll outline the black with a lighter color so press the lighter color button again (It's this button:
) It looks like this: 5. You will outline the colors like you did in step 4. It's mostly the same thing. Here's a picture:
6, 7, 8, 9: You will have to keep doing the same thing over and over again like in steps 4 and 5. Once you finish, it will look like this:
Looks nice doesn't it? : PIf you choose to do a lighter color than a darker color, then you will have to do something different. Instead of going lighter, you go darker, since you already made it light. You press the darker button. It looks like this:
. After you finish, it may look like this: For this next step, it will be for the front of the head.
1. Mostly you do the same thing like you did before. Go lighter each time (Or darker). (Since the eyebrows are also black, I will be using a different color for it.) BUT! You will make it lighter from up and down (Sorry I suck at explaining) It will look liker this:
If you can't see it, you'll know what I mean in the next step.2. Now, you're going to outline the "lighter" part. It will look like this:
3, 4, 5, 6, 7, 8, 9. Keep outlining the part, and it will eventually look like this:
10. In this step you can make the eyebrow black so it won't look weird XD. Here's a picture:
Now you have finished the front! Congratulations! Now, in the next step you will find how to make the bottom.
1. In this part, color the whole thing the color you're using for the hair. Here's a picture:
2. Now do the same thing you did with your left, right, and back of your head.
3. (This step is important!!!) Now you have to color the tip of the head the color of the skin, so it will look like every other skin XD.
That's the last of the step! Next you will learn how to do the top of the head.
1. For this step, click the lighter button (
). Now, you put two pixels from top to bottom diagonally. You will have to do this at every four corners. 2. Next outline the lighter color with a lighter color (This means to press the lighter button again) It would end up like this:
3, 4, 5, 6, 7, 8, 9. Keep doing the things you had done like in step 1 and 2. Eventually, it would look like this:
Congratulations! You have finished the top! Now, the front of head, where the hair drops.
1. Now, color the base of your hair the color of your hair (Obviously XD)
2. In this step, make your pencil brush lighter. Color the top of the hair from top to bottom diagonally again.
Sorry if you can't see it3. Outline it.
4. Here's where it gets a little complicated. Press the darker button. Now outline the lighter one.
5. Make it darker again. It's already black so don't do that. Skip a line, and use the same color as 2 lines ago.
6. Now make it lighter. Do you see a pattern? Outline the color again.
7, 8, 9. Keep doing this until you reach the end of the hair.
Finally, you finished the front hair! Now, the neck.
1. Color the whole thing the color you're using.
2. Now, do the same thing you did with your left, right, and back hair. It should look like this at the end:
(Sorry if the picture is slanted XD)3. Now, color the end of the neck the same color as your skin.
You finished the neck! Now the back hair!
1. Color the whole back the color of your hair.
2. Now do the same thing like you did with your left, back, and right.
3. Color the end of your back however you want. Make it the same color as the shirt.
Lastly, the bangs!
1. For your bangs do it exactly like the front of your hair. I can remind you. You will make it lighter from up and down
2. Now, you're going to outline the "lighter" part. It will look like this:
3. Keep doing that, and you'll end up with this.
You finished the tutorial! This is what I made the skin to look like:
It is available for download. The name I put for the girl is "Random Girl" , so if you want it you can download it.That's the end!
| Tags |
2528374
6


 8ez404
 ScotsMiser
 MegaMinerDL
 MaximusPrime23

Create an account or sign in to comment.
And btw thanks I know how to shade now :D