


- 5,225 views, 1 today
- 111
- 57
- 47

2,947
NOTE: This tutorial is very old and outdated. For my new one, click this link!
To celebrate myself reaching level 50 (a couple of weeks ago, but whatever), and my 100th submission, I'm doing something that is well overdue: a tutorial as to how I go about making my skins (as of June 2014).
I use Paint.Net (not a website) to draw the skins, and MCSkin3D to test them.
Take note that all of these steps could be done in any order; this is just the order that I usually do them in.
Don't worry, this is probably the easiest step. Shade the sides, top and bottom of the body. These areas are usually coverred up, so put them in shadow.
Now you're finished! All that's left to do is upload it to PMC (if you want, and it follows all of the rules and stuff).
THE END
To celebrate myself reaching level 50 (a couple of weeks ago, but whatever), and my 100th submission, I'm doing something that is well overdue: a tutorial as to how I go about making my skins (as of June 2014).
I use Paint.Net (not a website) to draw the skins, and MCSkin3D to test them.
Take note that all of these steps could be done in any order; this is just the order that I usually do them in.
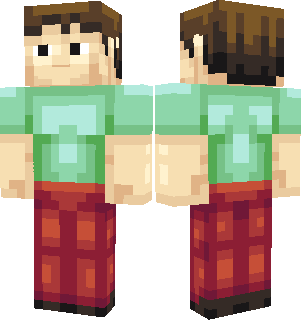
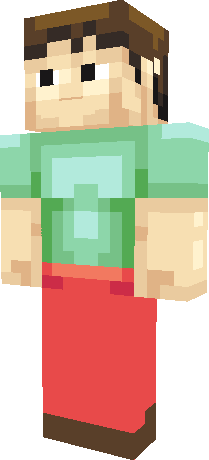
Step 1: Palette
Decide on what colours you are going to use for the skin. There are many other good tutorials that explain this in great detail, so I'll just give a quick explanation as to how I go about this. When making a colour darker, reduce the value (how light something is) and shift the hue one that is darker, and when making a colour lighter, do the opposite. You can choose whether you want to increase or decrease the saturation (how bright a colour is) as a colour gets darker, but is is usually a better idea to gain saturation. The black on my Zygarde skinis a good example of colours getting more saturated as they get lighter.
I usually create 4 shades per colour, and I always put the palette in the top left, for consistency.
I usually create 4 shades per colour, and I always put the palette in the top left, for consistency.
Step 2: Basic Design
Using the colours you just chose, draw on the basic outline of what the skin is going to look like. Some may say that it is now finished, but you've barely started.

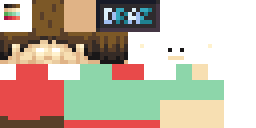
Step 3: Face
Covert the mouth and eyes into something a bit more realistic by moving the pupils and mouth onto the hat layer. Re-colour the 'jaw' on the hat layer to the skin colour, and add a pixel onto either side. Remove the pupils from the eyes on the head.
Also, I put the tips of the ears onto the hat layer, because YOLO.
Also, I put the tips of the ears onto the hat layer, because YOLO.
Step 4: Shade head
...and shade. I usually shade the head with a top-down light source. I can't really explain how I shade, I just put the colours where I feel they should go.
Step 5: Shade Arms
...and repeat. I usually shade the arms as if there is a light source towards the outside of the arms, to the left and right of the skin.
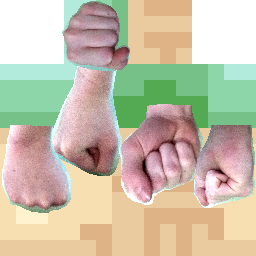
Step 6: Hands
My signature hand style that I created myself. I like it because it is shaped like a fist, that is positioned to punch things, in stead of tickle things. It also doesn't have a thumb that is as wide as the arm.
Here it is, as well as a sort of graphical explanation.
...and in 3D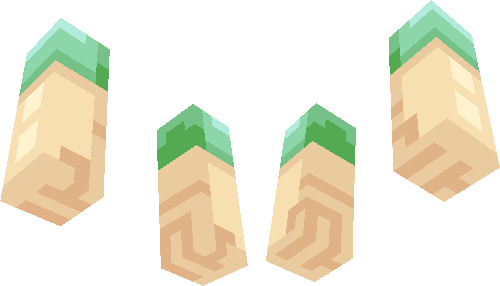
Here it is, as well as a sort of graphical explanation.
...and in 3D
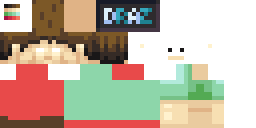
Step 7: Shade the Front and Back of the Body/spoiler
More shading. Make the clothing really tight, so that the muscles pop out, because otherwise it would look really flat.
To help make the chest and shoulder blades 'pop', don't put borders around the edge of the upper body, as the arms will make up the border.
For example:
To help make the chest and shoulder blades 'pop', don't put borders around the edge of the upper body, as the arms will make up the border.
For example:
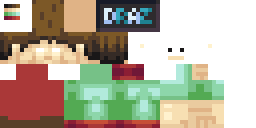
Step 8:More Body Shading
Don't worry, this is probably the easiest step. Shade the sides, top and bottom of the body. These areas are usually coverred up, so put them in shadow.
Step 9: Adjust Colours
I noticed that the red and green didn't go very well together, so I changed them.
Step 10: Shade Legs
I tend to try and make it look like the lower leg is larger on the back, and the upper leg is larger at the front. Probably not perfect anatomy, but oh well, it looks nice.
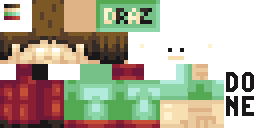
Now you're finished! All that's left to do is upload it to PMC (if you want, and it follows all of the rules and stuff).
THE END
| Tags |
1 Update Logs
Update #1 : by Drazile 06/10/2014 1:43:10 amJun 10th, 2014
Fixed multiple minor errors.
2935586
6
![Drazile's Skin Tips/Tutorial! [2000 subs, 301+ submissions!] Minecraft Blog](https://static.planetminecraft.com/files/resource_media/screenshot/1640/tutorialheader10565078_thumb.jpg)


![°αshℓєy° My Hair Shading Tutorial! [ 70 Subs Special] [ Popreel Witch Was Found After A Life Of Steves Contest Thing :P ]](https://static.planetminecraft.com/files/resource_media/screenshot/1440/small/yutrytuuuustealdisaskmehfurstbefurudownload8187369_thumb.jpg)


 8ez404
 ScotsMiser
 MegaMinerDL
 MaximusPrime23

Create an account or sign in to comment.