• 6/17/16 3:31 am
- 826 views • 0 today
- 28
- 17
- 21

113
HI <3 well yes, the title says it, ill be teaching you how to do skins ~~
Ill be teaching you how to do:
-Shading for the skin
-Hair
-Ombre
-Hair Styles
-Hue saturation
-Other accesories
Ill be teaching you how to do:
-Shading for the skin
-Hair
-Ombre
-Hair Styles
-Hue saturation
-Other accesories
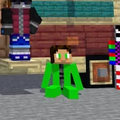
Shading for the Skin
Step 1:

ALWAYS prepair your color set for youre skin color. you can choose more than 4 color hues, if 5, that is optional as well. But today ill be doing 4 color hues.
---------------------------------------------------------------------------------------------------------------------------------------------------------------------------
Step 2:
Take youre second color hue, and do what is shown here ( Arm )

---------------------------------------------------------------------------------------------------------------------------------------------------------------------------
Step 3 :
Take youre 3rd color hue, and color the rest in.

----------------------------------------------------------------------------------------------------------------------------------------------------------------------------
Step 4:
take youre first color hue and do shown below.

----------------------------------------------------------------------------------------------------------------------------------------------------------------------------
Step 5:
Do a bit of shadings, to show some texture to the hand. ( 4th hue )

This model ive made is from Mc Skin 3D. If you wanna check it out, click here
ALWAYS prepair your color set for youre skin color. you can choose more than 4 color hues, if 5, that is optional as well. But today ill be doing 4 color hues.
---------------------------------------------------------------------------------------------------------------------------------------------------------------------------
Step 2:
Take youre second color hue, and do what is shown here ( Arm )
---------------------------------------------------------------------------------------------------------------------------------------------------------------------------
Step 3 :
Take youre 3rd color hue, and color the rest in.
----------------------------------------------------------------------------------------------------------------------------------------------------------------------------
Step 4:
take youre first color hue and do shown below.
----------------------------------------------------------------------------------------------------------------------------------------------------------------------------
Step 5:
Do a bit of shadings, to show some texture to the hand. ( 4th hue )
This model ive made is from Mc Skin 3D. If you wanna check it out, click here
Hair
Step 1:

Start with making the following pattern shown above.
---------------------------------------------------------------------------------------------------------------------------------------------------------------------------
Step 2:

Start coloring in with the LIGHTER (changing hue) color you choosed. Ill be making a brunette just to make it a bit more simpler.
----------------------------------------------------------------------------------------------------------------------------------------------------------------------------
Step 3:

Make the hure color brighter each time, and do the pattern as shown above.
----------------------------------------------------------------------------------------------------------------------------------------------------------------------------
Step 4:

do the small pixels as shown here.
(PS: anyone who has been following for a while realize i do a different type of shading for the hair, but.. well.. at least the one im doing is improvement from last times <3)
Start with making the following pattern shown above.
---------------------------------------------------------------------------------------------------------------------------------------------------------------------------
Step 2:
Start coloring in with the LIGHTER (changing hue) color you choosed. Ill be making a brunette just to make it a bit more simpler.
----------------------------------------------------------------------------------------------------------------------------------------------------------------------------
Step 3:
Make the hure color brighter each time, and do the pattern as shown above.
----------------------------------------------------------------------------------------------------------------------------------------------------------------------------
Step 4:
do the small pixels as shown here.
(PS: anyone who has been following for a while realize i do a different type of shading for the hair, but.. well.. at least the one im doing is improvement from last times <3)
Hair Styles
You can do many different hairstyles. I personally do curly, wavy, straight, etc. you can also do the bangs for the hair, or switch where you want them to be.
Examples of Styles:
Bangs-


Curly, Straight-


If you ant a simpler way to change youre hairstyles, jsut add some pixels as shown with these 2.
Examples of Styles:
Bangs-
Curly, Straight-
If you ant a simpler way to change youre hairstyles, jsut add some pixels as shown with these 2.
Ombre
Back in my days, i have really struggled to do ombres right. and i was like "how am i supposed to od this ;-;" so, ive started practicing for a while doing some ombre's. doing shades of brown, blonde, etc, and ive eventually figuree out how to do it :3 so im shoowing you my own experience of how i made my ombre
Step 1:
The MOST important thing to do is to take 7 hues for youre ombre. Do not take 4 hues or it would just end up looking like normal hair.

Step 2:
Make youre base of youre hair. im doing it staright for now, so follow up with me.

----------------------------------------------------------------------------------------------------------------------------------------------------------------------------
Step 3:

Take youre darkest hue and do what is on top.
----------------------------------------------------------------------------------------------------------------------------------------------------------------------------
Step 4:

Take youre second hue and do the pattern shown here
----------------------------------------------------------------------------------------------------------------------------------------------------------------------------
Step 5:

Take youre 3rd hue and do as shown above. you can see now that were starting to form the ombre.
----------------------------------------------------------------------------------------------------------------------------------------------------------------------------
Step 6:

Take the 4th hue, and do as shown above.
----------------------------------------------------------------------------------------------------------------------------------------------------------------------------
Step 7:

Take youre 5th hue, and start filling in all of the hair,
----------------------------------------------------------------------------------------------------------------------------------------------------------------------------
Step 8:

This one is optional, but take youre last hue, and shade in a bit on the end, to make it look a bit more ombre.
Step 1:
The MOST important thing to do is to take 7 hues for youre ombre. Do not take 4 hues or it would just end up looking like normal hair.
Step 2:
Make youre base of youre hair. im doing it staright for now, so follow up with me.
----------------------------------------------------------------------------------------------------------------------------------------------------------------------------
Step 3:
Take youre darkest hue and do what is on top.
----------------------------------------------------------------------------------------------------------------------------------------------------------------------------
Step 4:
Take youre second hue and do the pattern shown here
----------------------------------------------------------------------------------------------------------------------------------------------------------------------------
Step 5:
Take youre 3rd hue and do as shown above. you can see now that were starting to form the ombre.
----------------------------------------------------------------------------------------------------------------------------------------------------------------------------
Step 6:
Take the 4th hue, and do as shown above.
----------------------------------------------------------------------------------------------------------------------------------------------------------------------------
Step 7:
Take youre 5th hue, and start filling in all of the hair,
----------------------------------------------------------------------------------------------------------------------------------------------------------------------------
Step 8:
This one is optional, but take youre last hue, and shade in a bit on the end, to make it look a bit more ombre.
Hue Staturation
I wont be talking in these steps, because i think the diagram can explain as much.
Step 1: Step 2: Step 3:


Step 4:

For those who dont understand, i just gradually make it brighter by hue and shading.
Step 1: Step 2: Step 3:
Step 4:
For those who dont understand, i just gradually make it brighter by hue and shading.
Accesories
Ill be doing a few accsories for different parts of the body like head, feet, hands.
Head:


-I always like to out some earrings on my girl skins, it adds a little bit more to it though <3
-also, when i do my double buns, i like putting a bow on it :3
----------------------------------------------------------------------------------------------------------------------------------------------------------------------------
Arm:


-you can make some bands on the arms for youre skin. i personally love to make those, though i dont see many skinners do that, so i guess im going for originality :3
Body:


I do different types of braid styles, as shown above. It can be 2, or one, or just one in the side.
----------------------------------------------------------------------------------------------------------------------------------------------------------------------------
Legs:


A lot of people do these accesories for the legs, its really fun to do them, and i enjoy making them alot <3 You can out a bow or anything you want on it, as long as it looks pretty to you :3
----------------------------------------------------------------------------------------------------------------------------------------------------------------------------
Thanks for seeing my blog <3 I hope it helped you a little and made you improve a little bit more, Enjoy ~~
Head:
-I always like to out some earrings on my girl skins, it adds a little bit more to it though <3
-also, when i do my double buns, i like putting a bow on it :3
----------------------------------------------------------------------------------------------------------------------------------------------------------------------------
Arm:
-you can make some bands on the arms for youre skin. i personally love to make those, though i dont see many skinners do that, so i guess im going for originality :3
Body:
I do different types of braid styles, as shown above. It can be 2, or one, or just one in the side.
----------------------------------------------------------------------------------------------------------------------------------------------------------------------------
Legs:
A lot of people do these accesories for the legs, its really fun to do them, and i enjoy making them alot <3 You can out a bow or anything you want on it, as long as it looks pretty to you :3
----------------------------------------------------------------------------------------------------------------------------------------------------------------------------
Thanks for seeing my blog <3 I hope it helped you a little and made you improve a little bit more, Enjoy ~~
1 Update Logs
That Profile Pic tho : by Jadey 06/17/2016 3:41:21 amJune 17, 2016 @ 7:41 am UTC
idk what to say XD witchpaws did this for me a while ago, so i was like : "you know what, ill just put that as the image lmao" XD
More like this

 DerpyKat
 CuteMurphy

 Snowybladestorm
 jakehaker
3720839
6


 PersonWhoPlaysMinecraft
Have something to say?
I had to let it out.
Im sorry im confused xD
Nevertheless, good tutorial!
And Thanks ~~
Thank you so much!