

Published Oct 5th, 2016, 10/5/16 8:03 pm
- 15,410 views, 3 today
- 14
- 8
- 3

1
AT LAST,
I discovered a working way to customize music discs in your Minecraft world! Follow my simple steps to add any music to Minecraft without any mods or add ons!
HOW TO CUSTOMIZE MINECRAFT MUSIC DISCS
Replacing Minecraft's songs with your own does require some additional set up before you can get to jamming, so first lets set up your basics. All Minecraft songs and sounds come in OGG files, which can be converted in music editing programs, but the fastest and easiest way to convert your files are via http://audio.online-convert.com/convert-to-ogg this is a fast and friendly website to convert any file to any other type of file. Moving on, select the file you want to convert to OOG and follow the site's quick instructions (Upload, Convert, Download) once you've downloaded the file, copy it and we'll come back to that very soon. Now what you're going to do is go to your Minecraft resource packs folder and make a folder within it. Name this folder anything. Open up the folder you just created and add a new text document in the document copy and paste the following text:
{ "pack" : {
"pack_format" : 2,
"description" : "My Resource Pack"
}
}
Now select file save as, and at the dropdown under what you name it, select All Files, then name it pack.mcmeta this will save the document as a mcmeta file, which is what Minecraft's code will recognize. You can also make a custom icon (800x800 or 148x148) and save it as pack.png which will be the icon in your resource packs menu in minecraft. Now you have your pack.mcmeta file, your pack.png file, and you're ready to move on to the discs. Now it's time to make another file folder. Name this one assets which is crucial to the code. Go inside that folder make another one called minecraft (also crucial) inside the last folder you just created (minecraft) insert two more file folders, sounds and lang "lang" is the language for your what will soon be texture pack that contains the assets for your discs. We'll come back to the lang folder in a minute. First open your sounds folder and insert one more folder titled records this will be the folder you store your different OGG files for music. Now is tome to edit your lang folder. Open a new text document inside the lang folder, we will give that a crucial name after we have filled it in completely, but first its time to make a decision. Do you want to change all twelve of the discs? If so, I have a note for you at the end. So inside your new text document you want to insert the following text:
item.record.name=Music Disc
item.record.13.desc=13
item.record.cat.desc=cat
item.record.blocks.desc=blocks
item.record.chirp.desc=chirp
item.record.far.desc=far
item.record.mall.desc=mall
item.record.mellohi.desc=mellohi
item.record.stal.desc=stal
item.record.strad.desc=strad
item.record.ward.desc=ward
item.record.11.desc=11
item.record.wait.desc=wait
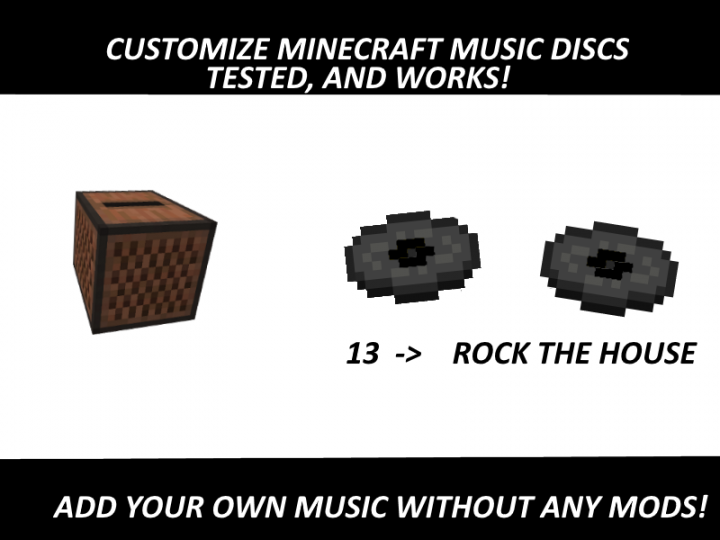
I will walk you through changing one of the music discs. Say for example, you want to change "13" to a song called "Rock the House" then change this:
item.record.13.desc=Rock the House
then go to your records file folder, and insert the Rock the House OGG file, or in your case whatever song you chose to convert as an OGG. Rename the OGG file 13, this will ensure that in game Minecraft will register the disc as still 13, but it will actually play "Rock The House" and the disc's name will say "Rock The House" now you are done changing 13, if 13 was the only disc you wanted to change you would now save the text document as en_US.lang (remember to check All Files under the name!) then all that is changed is 13, nothing else. If you wanted to change all the discs you would have to proceed to repeating the last steps multiple times until all the scripts e.g item.record.13.desc=Rock the House have been changed to names of your songs, and all OGGs matching those names named after Minecraft songs, and ensure you didn't name change this
item.record.13.desc=Rock the House but not change the OGG file, or name the OGG file wait when it's supposed to be 13. Once you've changed the discs to your liking, you have essentially created your own texture pack but only changing discs. now (if you put it in resource packs to begin with) you should be set, and close out all your folders and start Minecraft. Once you are at the Minecraft title page, go to Options and then Resource Packs, look for your icon and the name you chose. You should then select done, and open a world. Place a jukebox, search for the music disc(s) you renamed and enjoy!
Thanks for reading, if you have any questions or comments feel free to message me!
~Yeshua
I discovered a working way to customize music discs in your Minecraft world! Follow my simple steps to add any music to Minecraft without any mods or add ons!
HOW TO CUSTOMIZE MINECRAFT MUSIC DISCS
Replacing Minecraft's songs with your own does require some additional set up before you can get to jamming, so first lets set up your basics. All Minecraft songs and sounds come in OGG files, which can be converted in music editing programs, but the fastest and easiest way to convert your files are via http://audio.online-convert.com/convert-to-ogg this is a fast and friendly website to convert any file to any other type of file. Moving on, select the file you want to convert to OOG and follow the site's quick instructions (Upload, Convert, Download) once you've downloaded the file, copy it and we'll come back to that very soon. Now what you're going to do is go to your Minecraft resource packs folder and make a folder within it. Name this folder anything. Open up the folder you just created and add a new text document in the document copy and paste the following text:
{ "pack" : {
"pack_format" : 2,
"description" : "My Resource Pack"
}
}
Now select file save as, and at the dropdown under what you name it, select All Files, then name it pack.mcmeta this will save the document as a mcmeta file, which is what Minecraft's code will recognize. You can also make a custom icon (800x800 or 148x148) and save it as pack.png which will be the icon in your resource packs menu in minecraft. Now you have your pack.mcmeta file, your pack.png file, and you're ready to move on to the discs. Now it's time to make another file folder. Name this one assets which is crucial to the code. Go inside that folder make another one called minecraft (also crucial) inside the last folder you just created (minecraft) insert two more file folders, sounds and lang "lang" is the language for your what will soon be texture pack that contains the assets for your discs. We'll come back to the lang folder in a minute. First open your sounds folder and insert one more folder titled records this will be the folder you store your different OGG files for music. Now is tome to edit your lang folder. Open a new text document inside the lang folder, we will give that a crucial name after we have filled it in completely, but first its time to make a decision. Do you want to change all twelve of the discs? If so, I have a note for you at the end. So inside your new text document you want to insert the following text:
item.record.name=Music Disc
item.record.13.desc=13
item.record.cat.desc=cat
item.record.blocks.desc=blocks
item.record.chirp.desc=chirp
item.record.far.desc=far
item.record.mall.desc=mall
item.record.mellohi.desc=mellohi
item.record.stal.desc=stal
item.record.strad.desc=strad
item.record.ward.desc=ward
item.record.11.desc=11
item.record.wait.desc=wait
I will walk you through changing one of the music discs. Say for example, you want to change "13" to a song called "Rock the House" then change this:
item.record.13.desc=Rock the House
then go to your records file folder, and insert the Rock the House OGG file, or in your case whatever song you chose to convert as an OGG. Rename the OGG file 13, this will ensure that in game Minecraft will register the disc as still 13, but it will actually play "Rock The House" and the disc's name will say "Rock The House" now you are done changing 13, if 13 was the only disc you wanted to change you would now save the text document as en_US.lang (remember to check All Files under the name!) then all that is changed is 13, nothing else. If you wanted to change all the discs you would have to proceed to repeating the last steps multiple times until all the scripts e.g item.record.13.desc=Rock the House have been changed to names of your songs, and all OGGs matching those names named after Minecraft songs, and ensure you didn't name change this
item.record.13.desc=Rock the House but not change the OGG file, or name the OGG file wait when it's supposed to be 13. Once you've changed the discs to your liking, you have essentially created your own texture pack but only changing discs. now (if you put it in resource packs to begin with) you should be set, and close out all your folders and start Minecraft. Once you are at the Minecraft title page, go to Options and then Resource Packs, look for your icon and the name you chose. You should then select done, and open a world. Place a jukebox, search for the music disc(s) you renamed and enjoy!
Thanks for reading, if you have any questions or comments feel free to message me!
~Yeshua
| Tags |
3697868
6

 Princess Rumi
 TsengGames
 ScotsMiser
 Fates
Fates PowderM3
 OrderWithoutBorders

 MaximusPrime23
Create an account or sign in to comment.